Loading ...
Loading ...
Loading ...
8 | PSH Plus www.stiebel-eltron-usa.com
INSTALLATION
Preparations
Note
Ensure that the temperature knob will be accessible from
the front when the appliance is secured in place.
The appliance is designed to be permanently wall-mounted to a
solid surface. Ensure the wall offers adequate load bearing ca-
pacity. Consult the specifi cation table for the fi lled weight of your
appliance.
There should be a suitable drain near the appliance to drain off
water in the case of activation of the T&P relief valve.
Always install the appliance vertically in a room free from the risk
of freezing and as close as possible to the draw-off points.
The appliance may not be fi tted in a corner since the screws for
fi xing the appliance to the wall must remain accessible.
10.2 Securing the plywood backing sheet
This procedure calls for mounting a ¾˝ plywood sheet to the wall
attaching to at least 3 wooden studs, or another wall surface using
comparable means. Mount the appliance to the plywood sheet
using ½˝ diameter fasteners.
Transfer the dimensions for the holes to be drilled on the ply-
wood sheet (see chapter 16.1, “Dimensions and connections”,
pg. 11).
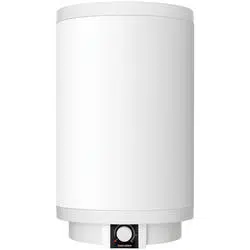
Drill a hole in the plywood to fi t the ½˝ tee nuts into the back
side of the sheet. Thread the ½˝ bolt and washer into the tee
nut, leaving a gap for the tank to mount on.
To mounting
surface
To interior
space
3
2
1
4
1 ½˝ x 1¼˝ bolt
2 Washer
3 ½˝ tee nut
4 ¾˝ plywood
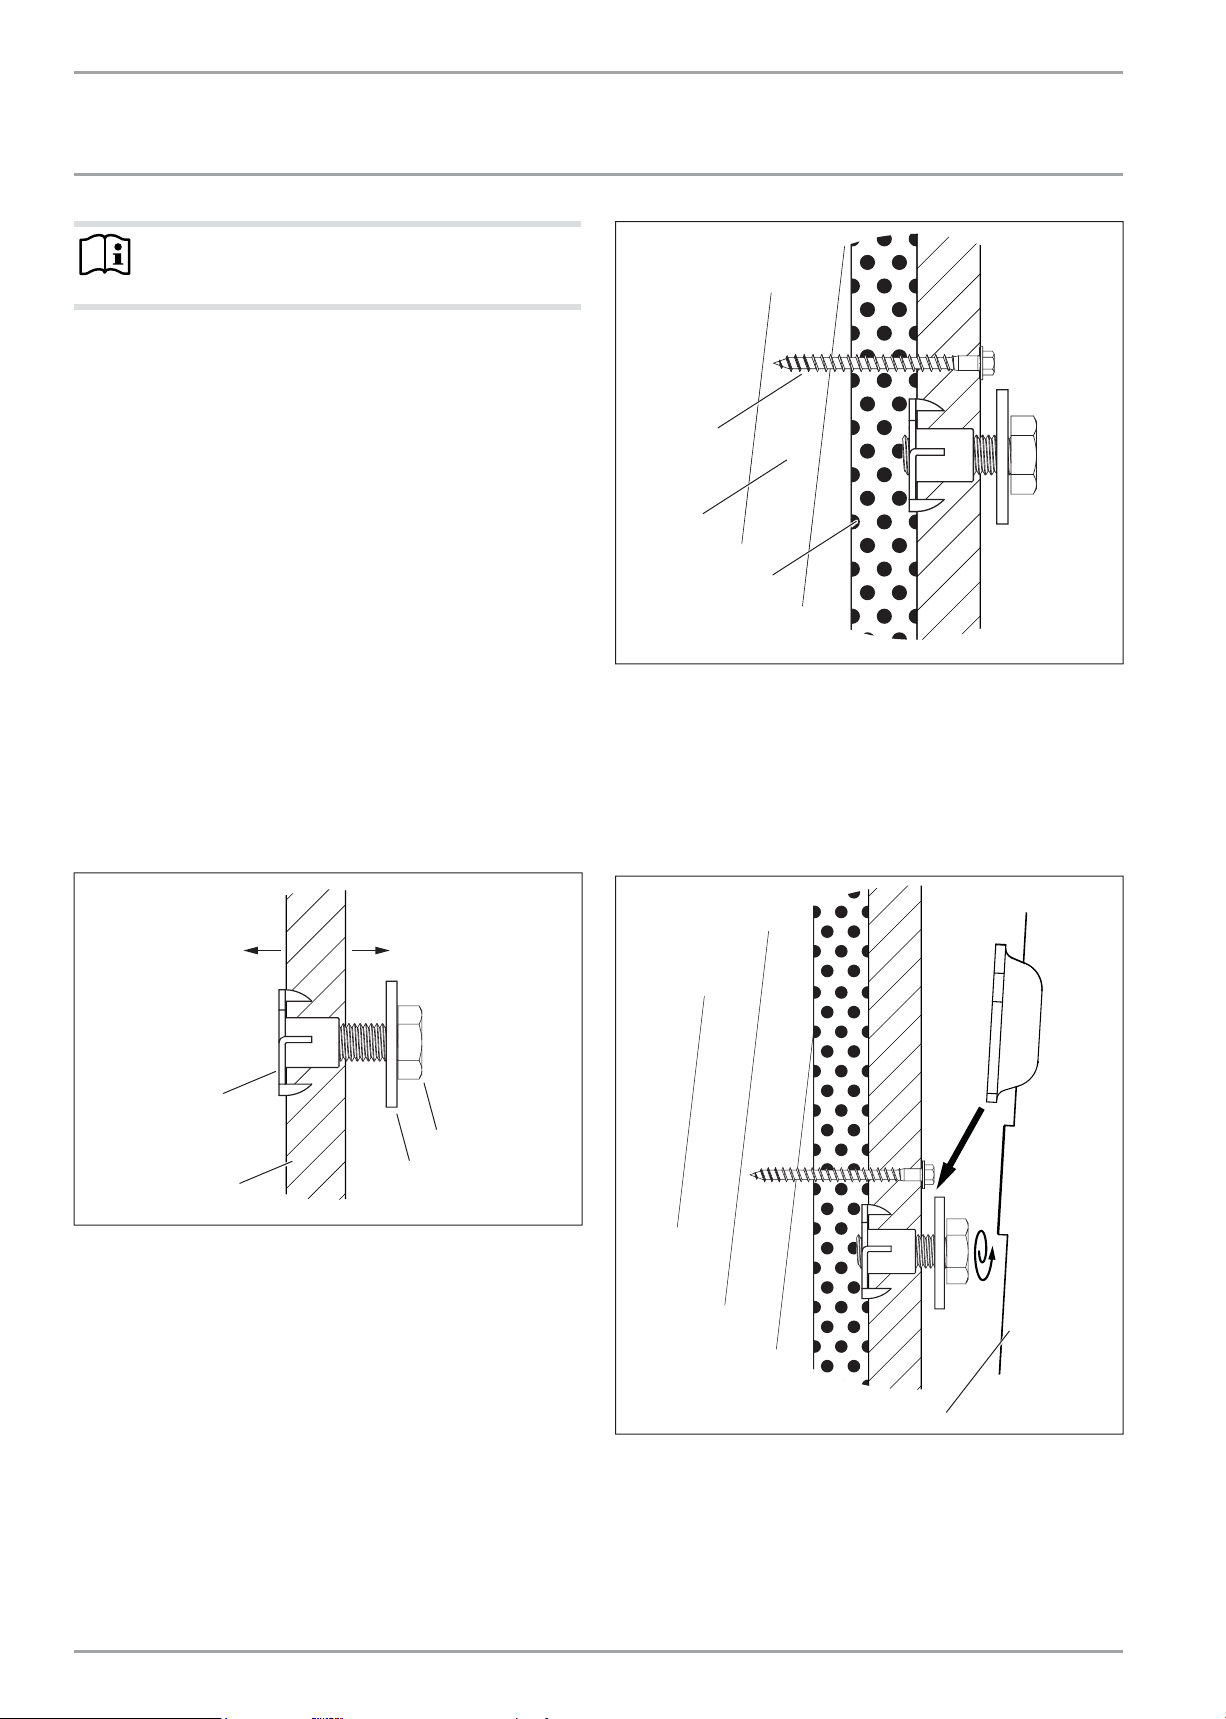
Find the wall studs and mark their location. This is the most
secure means of mounting the sheet on the wall.
Secure the plywood sheet to the studs with screws at least
size #10 x 2½˝ long. Space the screws every 6˝ above the
location of the tee nuts, and every 12˝ below. Use a level to
align the sheet horizontally.
It is recommended to mount the plywood onto 2x6 studs, but
an installation on 2x4 studs is acceptable if mounted to at
least 3 studs. If studs are spaced farther apart than 16˝, use
a wider plywood sheet and make sure to mount to at least 3
studs.
7
6
5
5 ¾˝ drywall
6 2˝x6˝ stud
7 #10 x 2½˝ wood screw
10.3 Mounting onto the plywood backing sheet
The mounting bracket attached to the appliance has hook-in slots.
Lift the appliance and mount it onto the ½˝ bolts. Make sure
the washers are on the outside of the mounting bracket.
1
1 PSH Plus
Tighten the bolts onto the washer and the bracket.
Loading ...
Loading ...
Loading ...