
Loading ...
Loading ...
Loading ...
8
OPERATION
8
OPERATION
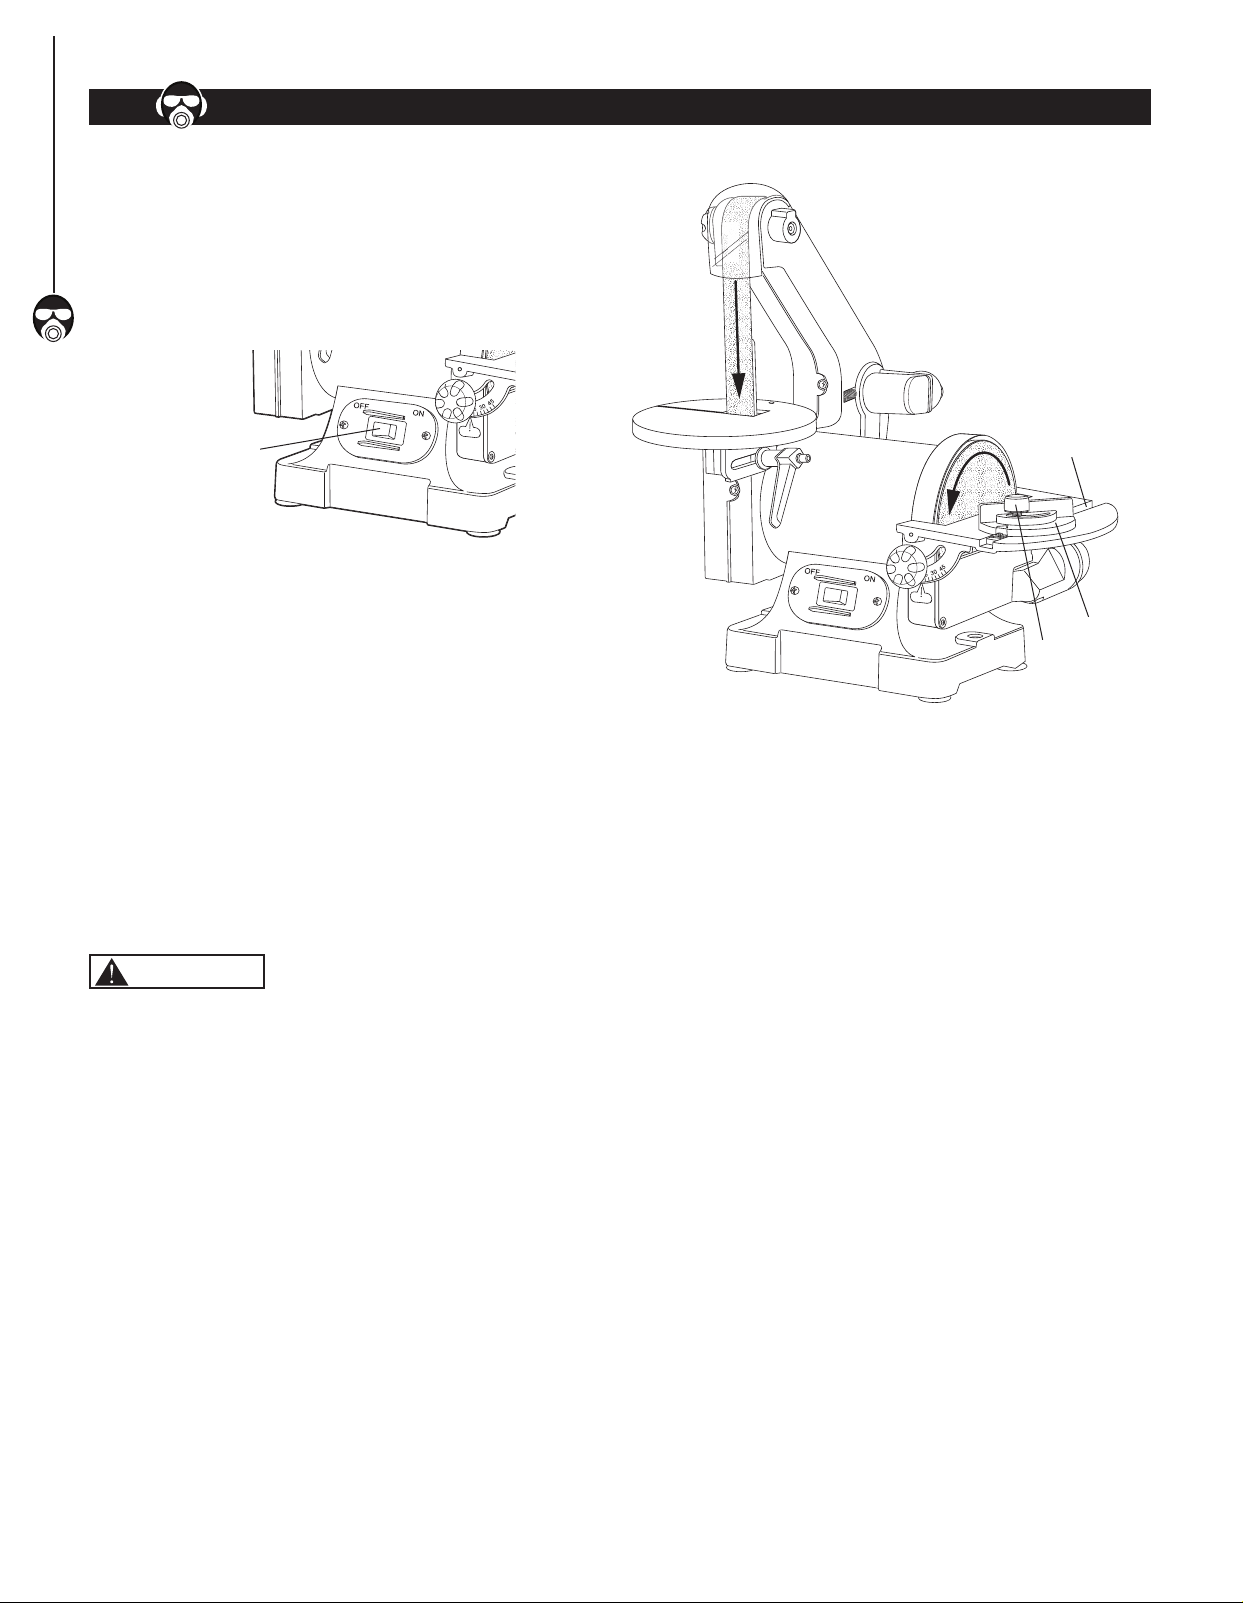
ON/OFF SWITCH
Refer to Figure 18
• To turn sander ON place the ON/OFF switch in the
ON position.
• To turn the sander OFF, place the ON/OFF switch in the
OFF position.
Figure 18
ON/OFF
Switch
SURFACE SANDING ON SANDING BELT
Hold the workpiece firmly with both hands. Keep fingers
away from sanding belt. Keep the workpiece end against
the backstop and move it slowly across the sanding belt.
Apply enough pressure to remove material; excessive
pressure will reduce sanding efficiency.
END SANDING - DISC/BELT
Refer to Figure 19
Use end sanding when sanding the ends of small, narrow
workpieces and outside curved edges.
Always work on the left side of the disc (downward rotation
side), holding the workpiece firmly with light pressure
against the sanding disc.
CAUTION
To avoid personal injury and/or damage to the workpiece,
become familiar with the rotation of the sanding belt and
disc surfaces.
The sanding belt rotates counterclockwise or downward
toward the table or backstop. The sanding disc rotates
counterclockwise, downward toward the work table on the
left side of the sanding disc and upward from the work
table on the right side of the sanding disc. Always use the
left side of the sanding disc; using the right side of the
sanding disc will cause the workpiece to fly up or kickback
and could result in injury.
Figure 19
Slot On Work Table
Lock Knob
Miter Gauge
MITER GAUGE - DISC SANDER
Refer to Figure 19
A miter-gauge is supplied with your sander, and can be
used on the sanding disc table.
• Place the miter gauge slide pole into the slot on the
work table.
• Loosen the miter gauge lock knob and move the miter
gauge head to the left or right to the desired position.
Tighten the miter gauge lock knob. NOTE: The miter
gauge head can be moved right or left 0 to 60º.
NOTE: Use of the miter gauge is recommended for
sanding small end surfaces on the sanding disc.
NOTE: Always move the workpiece across the sanding
disc from the left side towards the right side, and be sure
to hold the workpiece firmly onto the table surface.
CONTOUR SANDING WITH THE BELT
With the backstop removed the sanding belt conforms to a
curved edge for sanding and polishing.
• Remove the backstop. See Backstop under Assembly.
• Turn the sander ON and slowly feed it into the
sanding belt.
8
Loading ...
Loading ...
Loading ...