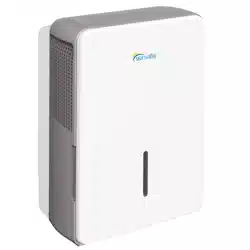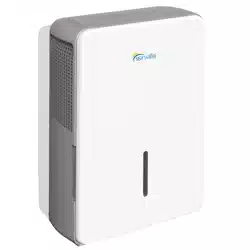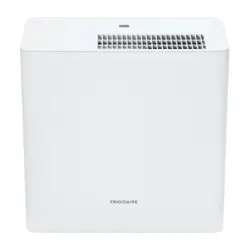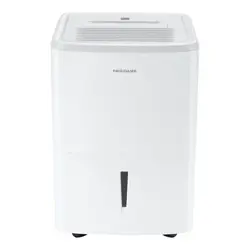
DEHUMIDIFIER
Owner’s Manual &
Installation Manual
IMPORTANT NOTE:
Read this manual carefully before installing or
operating your new machine.
Make sure to save this manual for future reference.

Safety Precautions
..............................................................................................................................................................03
Safety Precautions
Preparation
Operating Instructions
Care and Maintenance
Table of Contents
Control Panel Features......................................................................................................................................................08
Removing the collected water........................................................................................................................................10
Other features...................................................................................................................................................................... 09
Clean the grille and case..................................................................................................................................................12
Clean the bucket ................................................................................................................................................................12
Troubleshooting Tips ........................................................................................................................................................13
Clean the air filter ...............................................................................................................................................................12
When not using the unit for long time periods ......................................................................................................12
Identification of parts........................................................................................................................................................06
Design Notice.......................................................................................................................................................................06
Positioning the unit............................................................................................................................................................07
When using the unit...........................................................................................................................................................07
Accessories............................................................................................................................................................................07
Troubleshooting Tips
Safety
Precautions
Safety
Read Safety Precautions Before Operation and Installation
To prevent death or injury to the user or other people and property damage, the
following instructions must be followed. Incorrect operation due to ignoring of
instructions may cause death, harm or damage.
WARNING
•
•
•
•
•
•
•
•
•
•
•
•
•
•
•
•
•
•
•
•
•
•
•
•
•
•
Safety Precautions
Page 3
WARNING CAUTION
This symbol indicates the possibility of
property damage or serious consequences.
Do not exceed the rating of the power outlet or connection device.
Do not operate or stop the unit by switching on or off the power.
Do not damage or use an unspecified power cord.
Do not modify power cord length or share the outlet with other appliances.
Do not insert or pull out plug with wet hands.
Do not install the appliance in a location that may be exposed to combustible gas.
Do not place the unit near a heat source.
Disconnect the power if strange sounds, smell, or smoke comes from it.
You should never try to take apart or repair the unit by yourself.
Before cleaning, turn off the power and unplug the unit.
Do not use the machine near flammable gas or combustibles, such as gasoline, benzene,
thinner, etc.
Do not drink or use the water drained from the unit.
Do not take the water bucket out during operation.
Do not use the unit in small spaces.
Do not put in places where water may splash onto the unit.
Place the unit on a level, sturdy section of the floor.
Do not cover the intake or exhaust openings with cloths or towels.
Care should be taken when using the unit in a room with the following persons: infants,
children, elderly people,and people not senstive to humidity.
Do not use in areas where chemicals are handled.
Never insert your finger or other foreign objects into grills or openings. Take special care to
warn children of these dangers.
Do not place heavy object on the power cord and take care so that the cord is not compressed.
Do not climb up on or sit on the unit.
Always insert the filters securely. Clean filter once every two weeks.
If water enters the unit, turn the unit off and disconnect the power , contact a qualified service
technician.
Do not place flower vases or other water container on top of the unit.
Do not use extension cords.
This symbol indicates the possibility of
personnel injury or loss of life.

Safety
Precautions
Page 4
•
•
•
•
•
•
•
•
•
•
•
•
•
CAUTION
•
•
•
•
•
This appliance can be used by children aged from 8 years and above and person with reduced
physical, sensory or mental capabilities or lack of experience and knowledge if they have been
given supervision or instruction concerning use of the appliance in a safe way and understand
the hazards involved. Children shall not play with the appliance. Cleaning and user maintenance
shall not be made by children without supervision. (be applicable for the European Countries)
This appliance is not intended for use by persons (including childern) with reduced physical,
sensory or mental capabilities or lack of experience and knowledge, unless they have been
given supervision or instruction concerning use of the appliance by a person responsible for
their safety. Children should be supervised to ensure that they do not play with the appliance.
(be applicable for other countries except the European Countries )
If the supply cord is damaged, it must be replaced by the manufacturer,its service agent or
similarly qualified persons in order to avoid a hazard.
Prior to cleaning or other maintenance, the appliance must be disconnected from the supply
mains.
Do not install the appliance in a location that may be exposed to combustible gas. If
combustible gas accumulates around the unit, it may cause fire.
If the appliance is knocked over during use, turn off the unit and unplug it from the main power
supply immediately. Visually inspect the unit to ensure there is no damage. If you suspect the
unit has been damaged, contact a technician or customer service for assistance.
In a thunderstorm, the power must be cut off to avoid damage to the machine due to lightning.
Do not run cord under carpeting. Do not cover cord with throw rugs, runners, or similar
coverings. Do not route cord under furniture or appliances. Arrange cord away from traffic area
and where it will not be tripped over.
Do not operate unit with a damaged cord or plug. Discard unit or return to an authorized
service facility for examination and/or repair.
To reduce the risk of fire or electric shock, do not use this fan with any solid-state speed control
device.
The appliance shall be installed in accordance with national wiring regulations.
Contact the authorised service technician for repair or maintenance of this unit.
Turn off the product when not in use.
The manufactures nameplate is located on the rear panel of the unit and contains electrical and other
technical data specific to this unit.
Be sure the unit is properly grounded. To minimize shock and fire hazards, proper grounding is
important. The power cord is equipped with a three-prong grounding plug for protection against
shock hazards.
Your unit must be used in a properly grounded wall receptacle. If the wall receptacle you intend to
use is not adequately grounded or protected by a time delay fuse or circuit breaker(please refer to the
nameplate for the electrical data), have a qualified electrician install the proper receptacle.
Do not operate your air conditioner in a wet room such as a bathroom or laundry room.
The unit s circuit board(PCB) is designed with a fuse to provide overcurrent protection. The
specifications of the fuse are printed on the circuit board, such as: T 3.15A/250V (or 350V), etc.
Safety
Precautions
Page 5
Note about Fluorinated Gasses(Not applicable to the unit using R290 Refrigerant)
1.
Fluorinated greenhouse gases are contained in hermetically sealed equipment. For specific
information on the type, the amount and the CO2 equivalent in tonnes of the fluorinated
greenhouse gas(on some models), please refer to the relevant label on the unit itself.
2.
Installation, service, maintenance and repair of this unit must be performed by a certified
technician.
3.
Product uninstallation and recycling must be performed by a certified technician.
Sociable Remark
DISPOSAL: Do not dispose this product as unsorted municipal waste. Collection of such waste
separately for special treatment is necessary.
It is prohibited to dispose of this appliance in domestic household waste.
For disposal, there are several possibilities:
When using this dehumidifier in the European countries, the following information
must be followed:
· The municipality has established collection systems, where electronic waste can be disposed
of at least free of charge to the user.
· When buying a new product, the retailer will take back the old product at least free of charge.
· The manufacture will take back the old appliance for disposal at least free of charge to the user.
· As old products contain valuable resources, they can be sold to scrap metal dealers. Wild
disposal of waste in forests and landscapes endangers your health when hazardous
substances leak into the ground-water and find their way into the food chain.
Page 6
Preparation
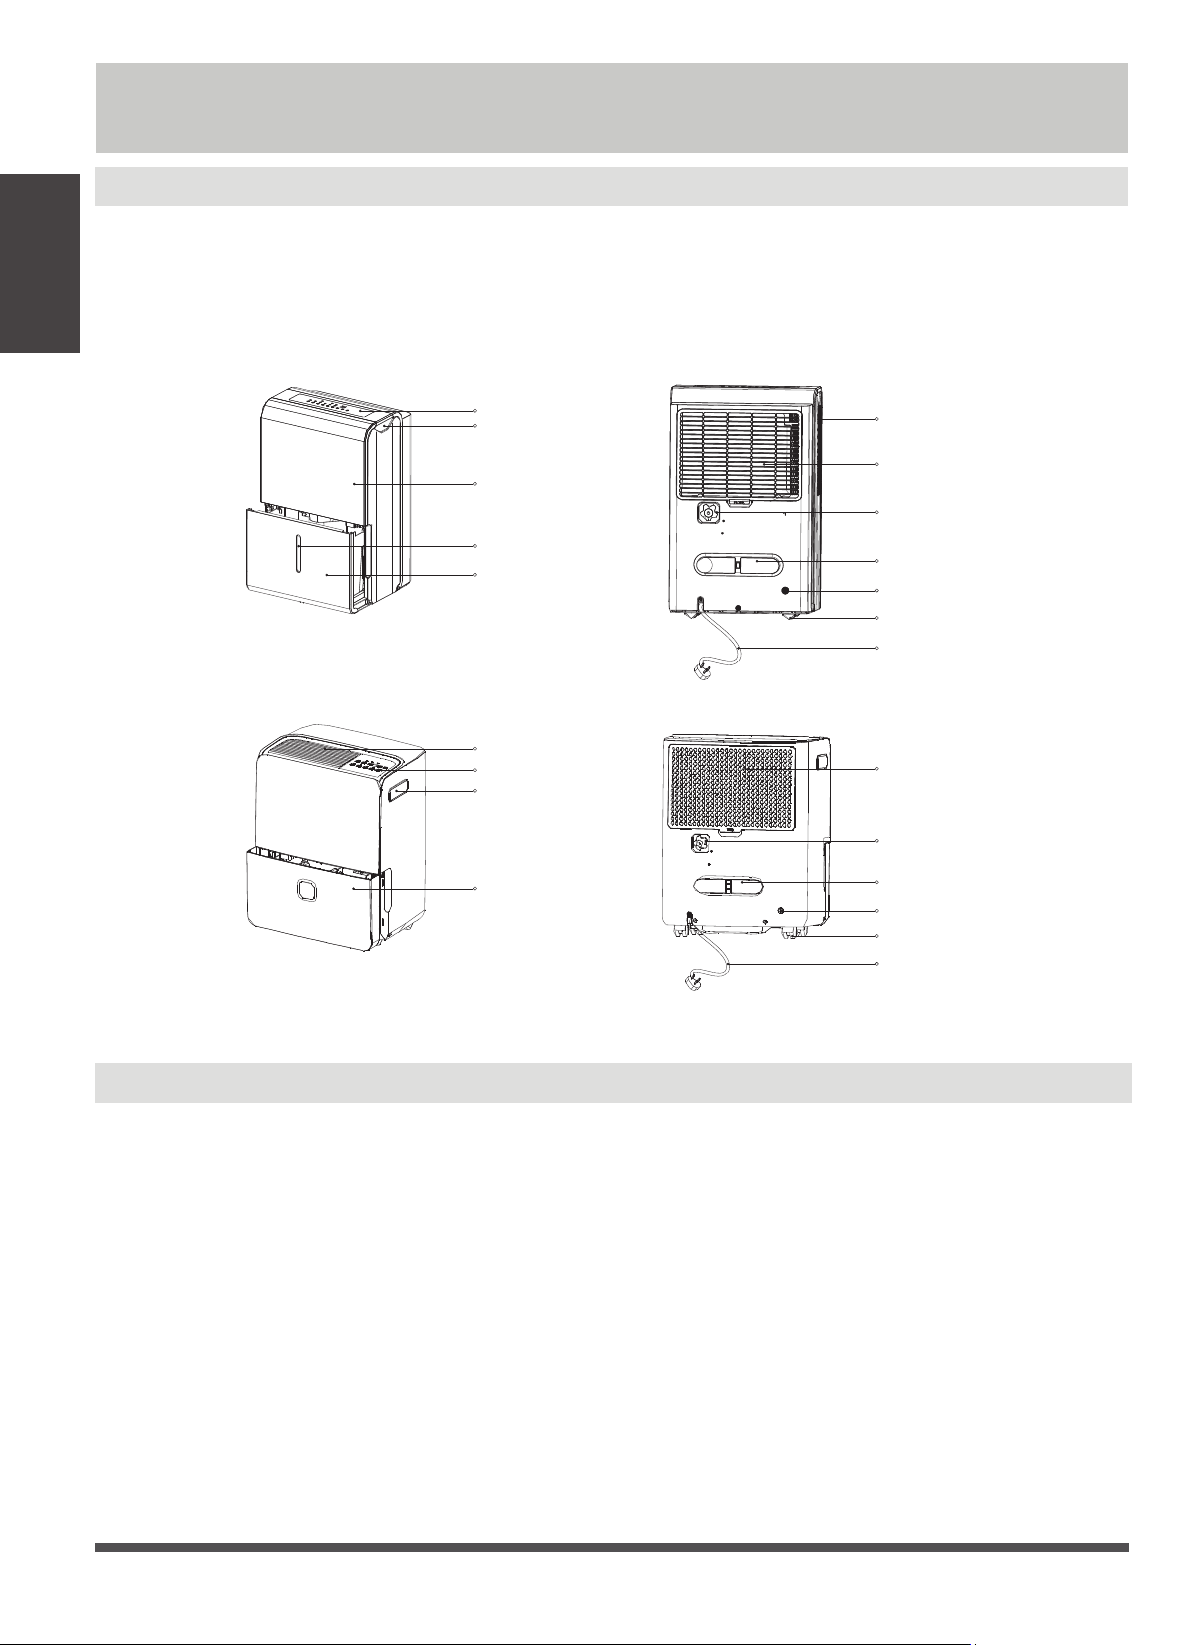
Identification of parts
NOTE:
All the illustrations in the manual are for explanation purpose only. Your machine may be slightly different.
The actual shape shall prevail. The unit can be controlled by the unit control panel alone or with the remote
controller. This manual does not include Remote Controller Operations, see the <<Remote Controller
Instruction>> packed with the unit for details.
Design Notice
In order to ensure the optimal performance of our products, the design specifications of the unit are
subject to change without prior notice.
Control panel
Panel
Water level window
Water bucket
Water bucket
Handle(both sides)
Handle(both sides)
Air outlet grille
Air outlet grille
Air filter
Caster
Pump drain hose outlet(some models
without)
Power cord buckle(placed in the water
bucket,used only when storing the unit)
Continuous drain hose outlet
Power cord and plug
Air filter
Caster
Pump drain hose outlet(some models
without)
Power cord buckle(placed in the water
bucket,used only when storing the unit)
Continuous drain hose outlet
Power cord and plug
Control panel
Preparation
Preparation
Page 7
When first using the dehumidifier, operate the unit
continuously 24 hours. Make sure the plastic cover on
the continuous drain hose outlet install stightly
properly so there are no leaks.
This unit is designed to operate with a working
environment between tween 5 C/41 F and 32 C/90 F,
and between 30%(RH) and 80%(RH).
If the unit has been switched off and needs to be
switched on again quickly , allow approximately three
minutes for the correct operation to resume.
Do not connect the dehumidifier to a multiple socket
applications only. This dehumidifer should not be used
for commercial or industrial applications.
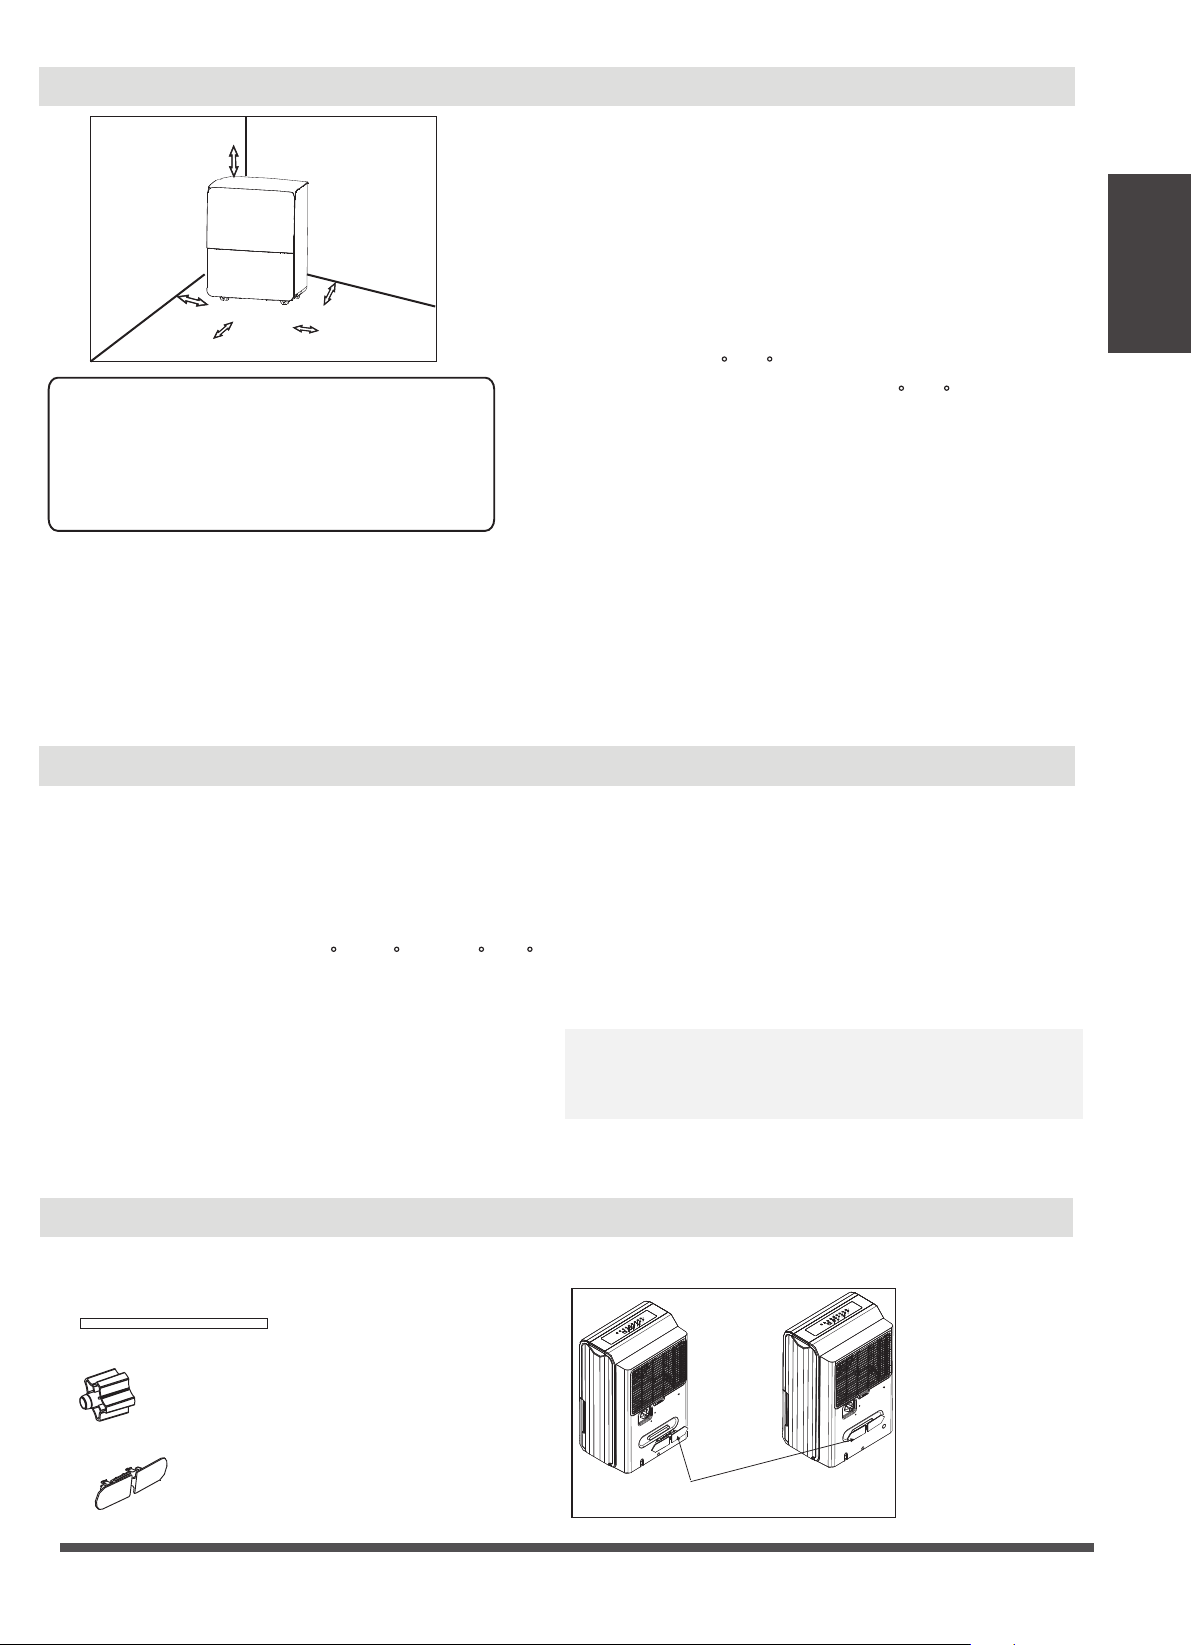
Place the dehumidifier on a smooth, level floor strong
enough to support the unit with a full bucket of water.
Allow at least 20cm of air space on all sides of the unit
for good air circulation (at least 40cm of air space on
air outlet).
Place the unit in an area where the temperature will
not fall below 5 C(41 F). The coils can become covered
with frost at temperatures below 5 C(41 F), which may
reduce performance.
Place the unit away from the clothes dryer, heater or
radiator.
Use the unit to prevent moisture damage anywhere
books or valuables are stored.
Use the dehumidifier in a basement to help prevent
moisture damage.
The dehumidifier must be operated in an enclosed
area to be most effective.
Close all doors, windows and other outside openings
to the room.
A dehumidifier operating in a basement will have little
or no effect in drying an adjacent enclosed storage
area, such as a closet, unless there is adequate
circulation of air in and out of the area.
Do not use outdoors.
This dehumidifer is intended for indoor residential
Casters(At four points on the bottom of unit)
Casters can move freely.
Do not force casters to move over carpet, nor
move the unit with water in the bucket.
(The unit may tip over and spill water.)
Positioning the unit
When using the unit
•
•
•
•
•
•
•
•
•
•
•
•
•
•
•
•
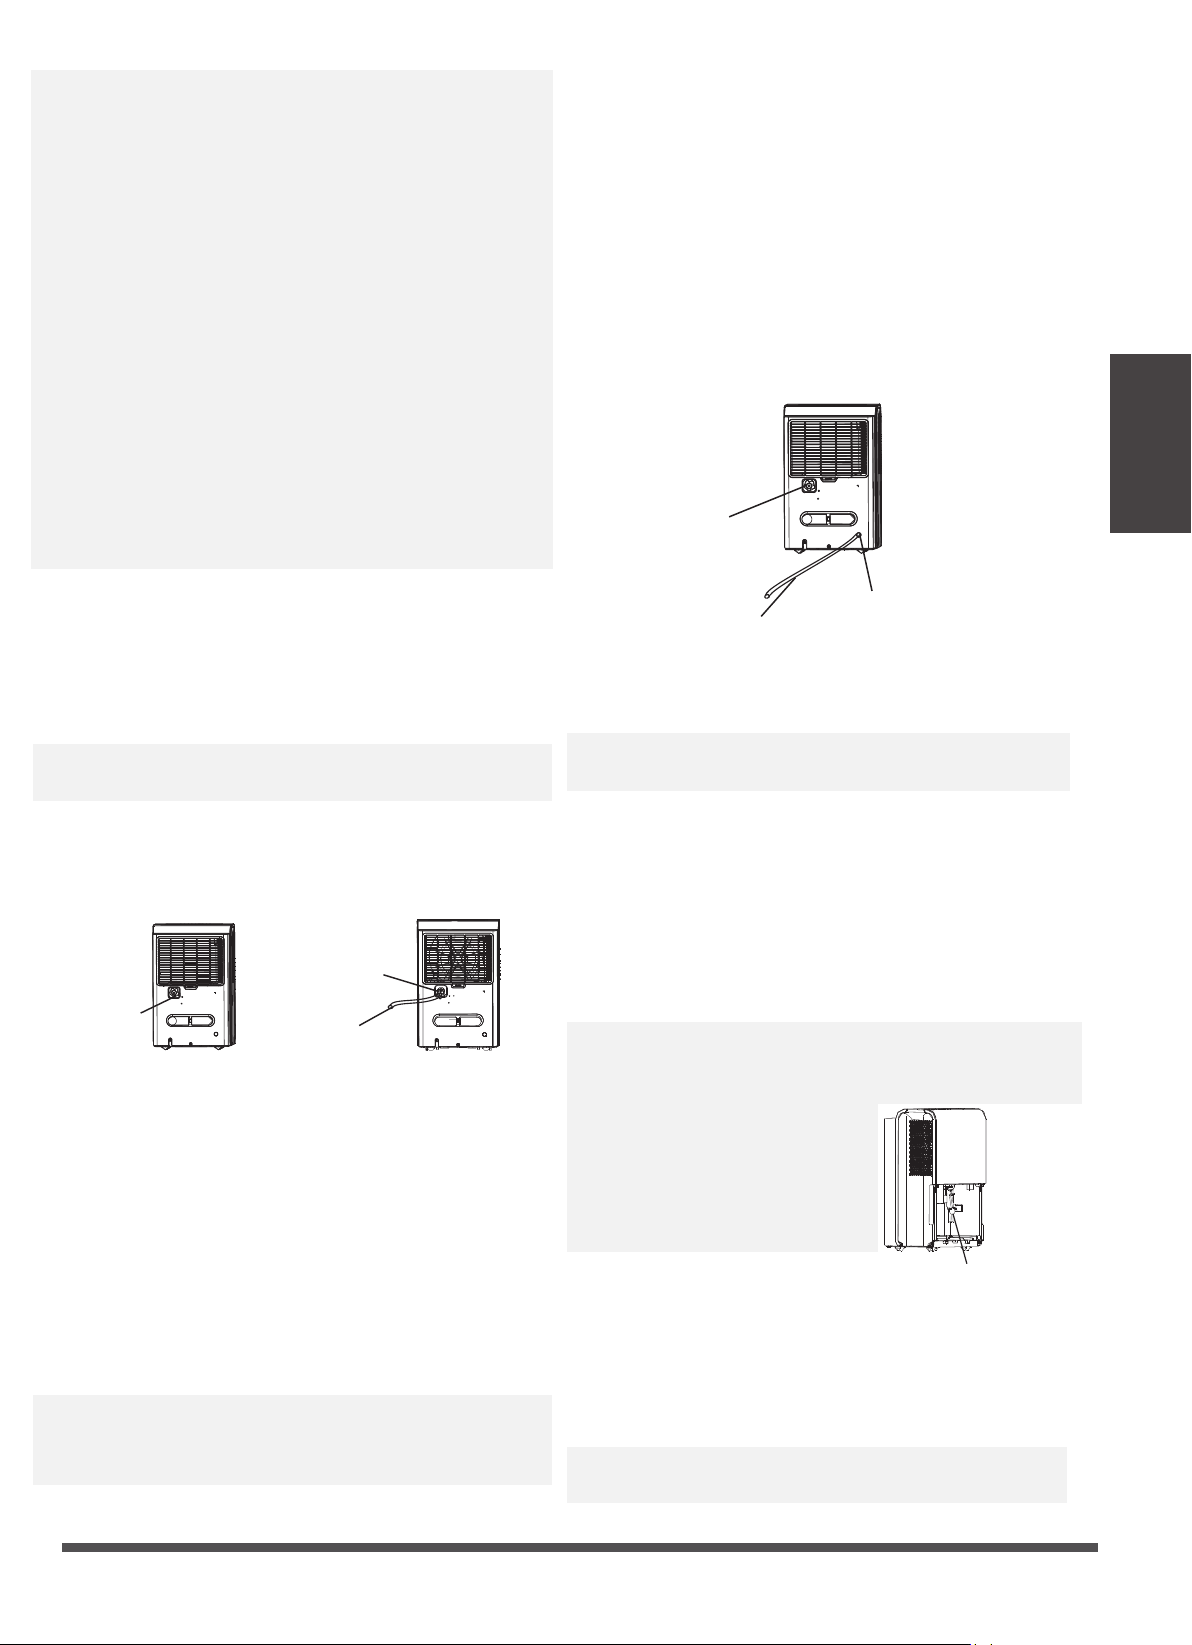
Accessories(placed in the bucket of the unit)
outlet, which is also being used for other electrical
appliances.
Select a suitable location, making sure you have easy
access to an electrical outlet.
Plug the unit into a electrical socket-outlet with earth
connection.
Make sure the Water bucket is correctly fitted
otherwise the unit will not operate properly.
•
•
•
Note:When the water in the bucket reaches to a certain
level,please be careful to move the machine to avoid it
falling down.
pump drain hose(1 pc)(only for the unit with pump
feature)
installation of the power cord bucket
power cord bucket(1 pc)
female threaded end(1 pc)(on some models)
Insert the power cord buckle
into the unit.
20cm or more
40cm or more
20cm or more
20cm or more
40cm or more
Preparation
Page 8
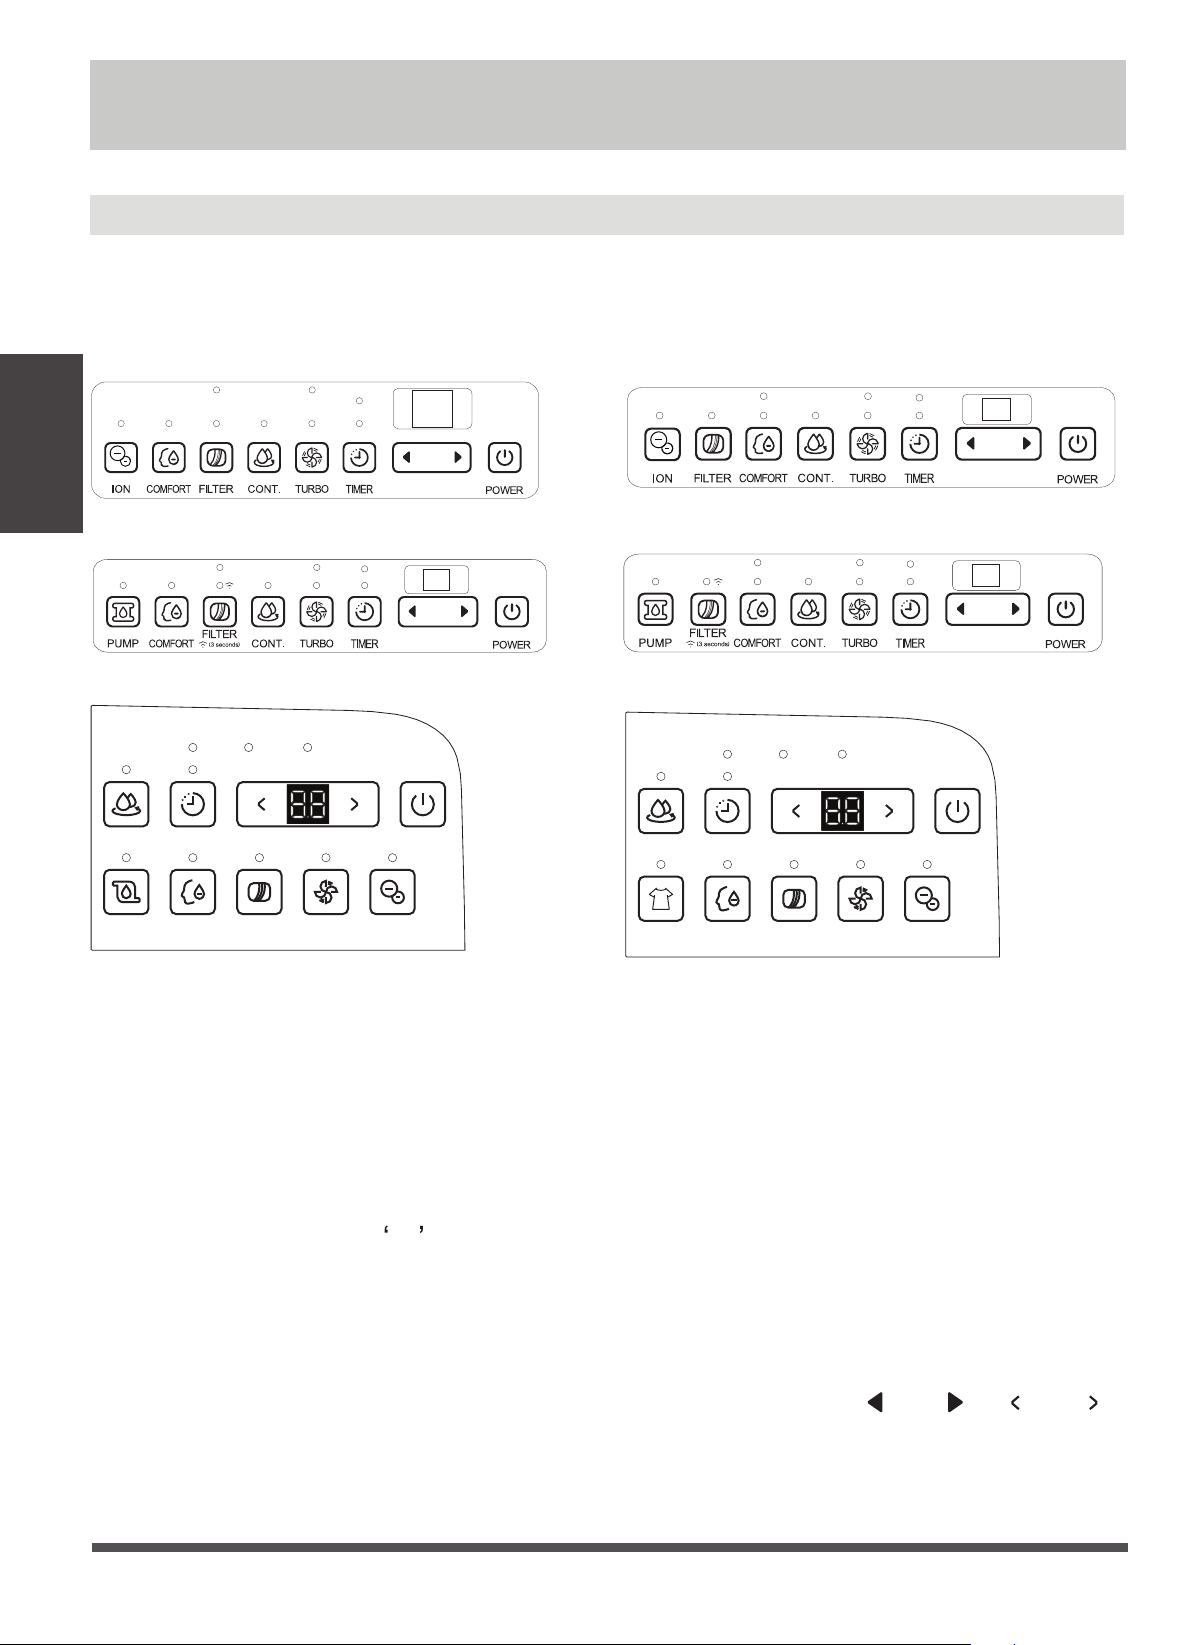
On
Off
Full
Auto defrost
On
Off
Full
Defrost
On
Off
Full
Auto defrost
On
Off
Full
Defrost
TIMER
On
Off
Defrost
Full
CONT.
POWER
PUMP
COMFORT FILTER TURBO ION
TIMER
On
Off
Defrost
Full
CONT.
POWER
DRYER
COMFORT FILTER TURBO ION
Operating Instructions
Control Panel Features
Note: The following control panels
are for explanation purpose only. The control panel of the unit you
purchased may be slightly different according to the models. Your machine may not contain some indicators or
buttons. The actual shape shall prevail.
FILTER /WIRELESS(on some models) button
The check filter feature is a reminder to clean the Air Filter
for more efficient operation. The Filter light(Clean filter
light) will illuminate after 250 hours of operation. To reset
after cleaning the filter , press the Filter button and the
light will go off. Press the filter button for 3 seconds when
the unit is on or off to initiate the Wireless connection
mode. The LED DISPLAY shows AP to indicate you can
set Wireless connection and the compressor is forced off.
If connection (router) is successful within 8 minutes, the
unit will exit Wireless connection mode automatically and
the Wireless indicator illuminates and the compressor
reverts previous state. If connection is failure within 8
minutes, the unit exits the Wireless connection mode
automatically.
CONTINUE button
Press to activate the continuous dehumidifying
operation.
TURBO Pad
Control the fan speed. Press to select either High
or Normal fan speed. Set the fan control to High
for maximum moisture removal. When the humidity
has been reduced and quiet operation is preferred,
set the fan control to Normal.
Timer button
Press to initiate the Auto start and Auto stop feature,
in conjuction with the and (or and )
buttons.
Operating
Instructions

Page 9
Operating
Operating
Instructions
COMFORT button(on some models)
Press to starts/stops the comfort dehumidifying
operation.
Note: On this operation,the unit can not be set
humidity level. For some models, under comfort
dehumidifying operation, press Up/Down button will
cancel this feature.
Other features
· Humidity Set Control buttons
UP/DOWN buttons
· TIMER Set Control buttons
Use the Up/Down buttons to set the Auto start and
Auto stop time from 0.0 to 24.
The humidity level can be set within a range of 35%
RH(Relative Humidity) to 85%RH(Relative Humidity)
in 5% increments. For drier air , press the (or )
button and set to a lower percent value(%). For
damper air, press the (or ) button and set a
higher percent value(%).
POWER button
Press to turn the dehumidifier on and of
f.
PUMP button(on some models)
Press to activate the pump operation.
Note: Make sure the pump drain hose is installed into
the unit and the continuous drain hose is removed
from the unit before the pump operation is activated.
When the bucket is full,the pump starts to work.Refer
to the next pages for removing the collected water. Do
not use this operation when the outdoor temperature
is equel to or less than 0 C (32 F).
Bucket Full Light
Glows when the bucket is ready to be emptied.
Auto Defrost
When forst builds up on the evaporator coils, the
compressor will cycle off and the fan will continue to
run until the frost disappears.
proper position.
For some models, the fan motor will continue to run
for 30 seconds.
Auto Shut Off
The dehumidifier shuts off when the bucket is full, or
when the bucket is removed or not replaced in the
Wait 3 minutes before resuming operation
After the unit has stopped, it can not be restart
operation in the first 3 minutes.This is to protect the
unit. Operation will automatically start after 3 minutes.
O O
ION button(on some models)
DRYER button(on some models)
Press to activate the ionizer. Anions are automatically
generated by ionization. The anions deactive the
Press to activate the dryer operation. Press it again to
stop the function.
Display
Shows the set % humidity level from 35% to 85% or
auto start/stop time (0~24) while setting, then shows
the actual(±5% accuracy) room % humidity level in a
range of 30% RH(Relative Humidity) to 90%RH(Relative
Humidity).
Error Codes and Protection Code:
AS-Humidity sensor error--Unplug the unit and plug it
back in. If error repeats, call for service.
ES-Tube Temperature sensor of the evaporator error--
Unplug the unit and plug it back in. If error repeats,
call for service.
P2-Bucket is full or bucket is not in right position--
Empty the bucket and replace it in the right
position.(only available for the unit with no pump
feature.)
P2-Bucket is full -- Empty the bucket.(only available for
the unit with pump feature.)
Eb-Bucket is removed or not in right position-- Replace
the bucket in the right position.(only available for
the unit with pump feature.)
Note: When one of the above malfunctions occurs,
turn off the unit, and check for any obstructions.
Restart the unit, if the malfunction is still present, turn
off the unit and unplug the power cord. Contact the
manufacturer or its service agents or a similar qualified
person for service.
airborne chemical vapors and dust particles. Press it
again to stop the function.
Page 10
Removing the collected water
Check filter feature
The system starts to count the time once the fan motor
operates. The check filter feature can be only activated
when the accumulated operation time achieves 250
hours or more. The Reset light(Clean filter indicator
light) flashes at one time per second, after finishing
clean the air filter, press the Filter button and the Reset
light(Clean filter indicator light) goes off.
Auto-Restart
If the unit breaks off unexpectedly due to the power
cut, it will restart with the previous function setting
automatically when the power resumes.
Setting the Timer
· When the unit is on, first press the Timer button, the
Timer Off indicator light illuminates. It indicates the
Auto Stop program is initiated. Press it again the
Timer On indicator light illuminates. It indicates the
Auto Start is initiated.
· When the unit is off, first press the Timer button, the
Timer On indicator light illuminates. It indicates the
Auto Start program is initiated. Press it again the
Timer Off indicator light illuminates. It indicates the
Auto Stop is initiated.
· Press or hold the UP or DOWN button to change the
Auto time by 0.5hour increments, up to 10 hours,
then at 1 hour increments up to 24 hours. The
control will count down the time remaining until
start.
· The selected time will register in 5 seconds and the
system will automatically revert back to display the
previous humidity setting.
· When the Auto Start & Auto Stop times are set,
within the same program sequence, Timer On Off
indicator lights illuminate identifying both On and
Off times are now programmed.
· Turning the unit On or Off at any time or adjusting
the timer setting to 0.0 will cancel the Auto Start/
Stop function.
· When LED display window displays the code of P2,
the Auto Start/Stop function will also be cancelled.
There are three ways to remove collected water.
1. Use the bucket
· When the unit is off, if the bucket is full, the Full
indicator light will light.
· When the unit is on,if the bucket is full, the
compressor and the fan turn off, and the Full
indicator light will light, the digital display shows P2.
· Slowly pull out the bucket. Grip the left and right
handles securely, and carefully pull out straight so
water does not spill. Do not put the bucket on the
floor because the bottom of the bucket is uneven.
Otherwise the bucket will fall and cause the water to
spill.
· Throw away the water and replace the bucket. The
bucket must be in right place and securely seated
for the dehumidifier to operate.
· The machine will re-start when the bucket is restored
in its correct position.
1. Pull out the bucket a little.
2. Hold both sides of the bucket with even strength,
and pull it out from the unit.
3. Pour the water out.
Pump hose drops
Reinstall pump hose properly
Operating
Instructions
Operating
Instructions
Page 11
Notes:
· When you remove the bucket, do not touch any parts
inside of the unit. Doing so may damage the product.
· Be sure to push the bucket gently all the way into the
unit. Banging the bucket against anything or failing
to push it in securely may cause the unit not to
operate.
· If the pump hose drops when you remove the
bucket, you must reinstall the pump hose properly to
the unit before replace the bucket into the unit.
· When you remove the bucket,if there is some water
in the unit you must dry it.
· When the unit is on, if the bucket is removed, the
compressor and the fan turn off, then the unit will
beep 8 times and the digital display shows Eb.
· When the unit is off, if the bucket is removed, the unit
will beep 8 times and the digital display shows Eb.
· Water can be automatically emptied into a floor drain
by attaching the unit with a water hose(ld≥Φ5/16
′′,
not included) with a female threaded end(ID:M=1
′′,
not included)
Note: On some models, the female threaded end is
include.
· Remove the plastic cover from the back drain outlet
of the unit and set aside, then insert the drain hose
through the drain outlet of the unit and lead the
drain hose to the floor drain or a suitable drainage
facility.
· Water can be automatically emptied into a floor drain
or a suitable drainage facility by attaching the pump
drain outlet with a pump drain hose(Φod=1
/
4
′′,
supplied).
· Remove the continuous drain hose from the unit and
install the plastic cover to the continuous drain hose
outlet of the unit by clockwise rotation.
· Resert the pump drain hose into the pump drain hose
outlet for depth of 15mm at least, then lead the water
hose to the floor drain or a suitable drainage facility.
2. Continuous draining
Remove the plastic
cover by couter-
clockwise rotation.
Drain hose
Female threaded end
· When you remove the plastic cover, if there is some
water in the back drain outlet of the unit you must
dry it. Make sure the hose is secure so there are no
leaks and the end of the hose is level or down to let
the water flow smoothely.
· Direct the hose toward the drain, making sure that
there are no kinks that will stop the water flowing.
Make sure the water hose is lower than the drain hose
outlet of the unit.
· Select the desired humidity setting and fan speed on
the unit for continuous draining to start.
Note: When the continuous draining feature is not
being used, remove the drain hose from the outlet, and
dry the water in the continuous drain hose outlet.
3. Pump draining (on some models)
· Press the pump pad of the unit to activated the pump
operation. When the bucket is full the pump starts to
work.
Note: The pump may cause big noise when it starts to
work for 3~5 minutes. It is a normal phenomenon.
· Make sure the hose is secure so there are no leaks.
· Direct the hose toward the drain, making sure that
there are no kinks that will stop the water flowing.
· Place the end of the hose into the drain and make
sure the end of the hose is level or down to let the
water flow smoothly. Do never let it up.
· select the desired humidity setting and fan speed on
the unit for pump draining to start.
Note: The pump operation on light blinks at 1Hz when
the pump is operational failure. Please turn off the unit
and plug the power cord out. Check the following
things:
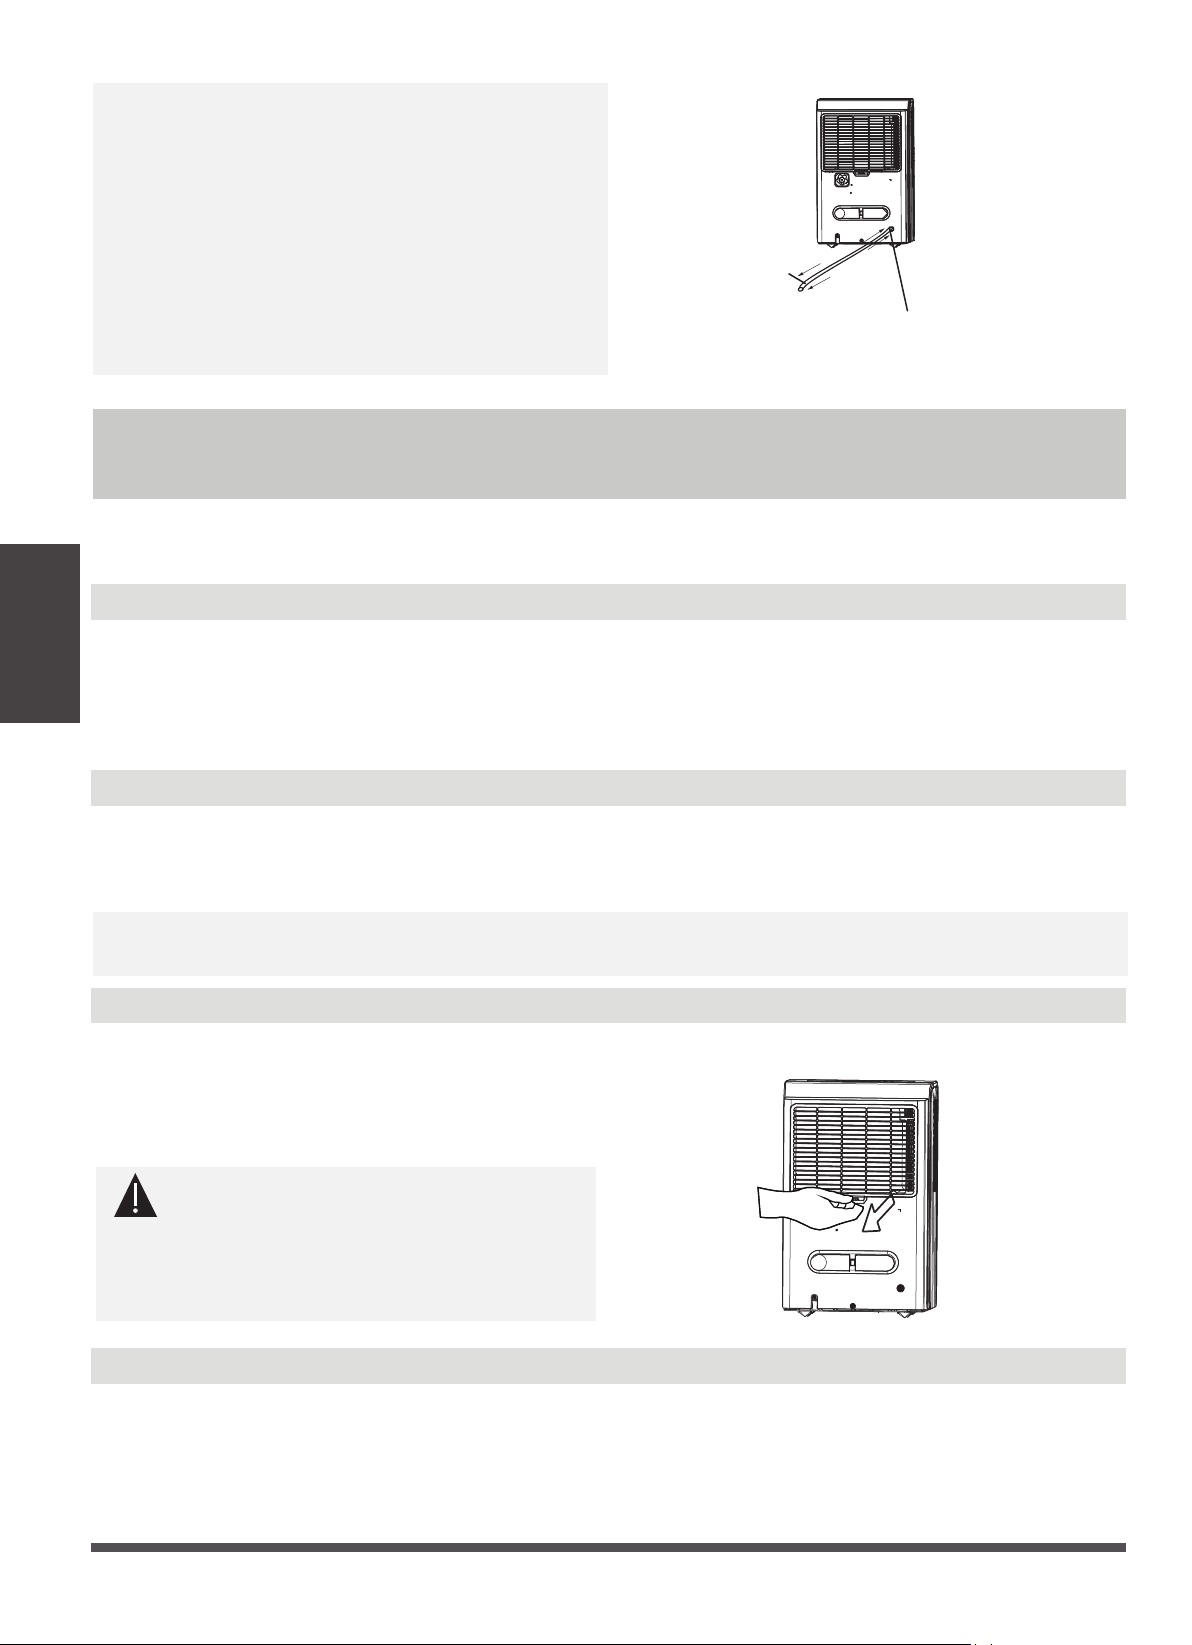
· Cleaning the filter of the pump.
-Remove the bucket from the
unit, take down the pump and
clean the filter of the pump.
Pump drain hose
Pump drain
hose outlet
Reinstall the
plastic cover
Filter of the pump
· Check that the pump drain hose does not link or back.
· Empty the water of the bucket.
· Reinstall the pump hose if it drops and reinstall the
bucket properly. Turn on the unit. If the error repeats,
call for service.
Note: Do not use this operation when the outdoor
temperature is equal to or less than 0 C (32 F),
o o
Operating
Instructions
Page 12
Clean the bucket
Clean the air filter
When not using the unit for long time periods
Clean the Grille and Case
Care and Maintenance
· Use water and a mild detergent. Do not use bleach or abrasives.
· Do not splash water directly onto the main unit. Doing so may cause an electrical shock, cause
the insulation to deteriorate, or cause the unit to rust.
· The air intake and outlet grilles get soiled easily, so use a vacuum attachment or brush to clean.
· Remove the filter every two weeks based on normal operating conditions.
· To remove the filter, pull filter outwards.
· Wash the filter with clean water then dry.
· Re-install the filter, replace Bucket.
Care and cleaning of the dehumidifier
Turn the dehumidifier off and remove the plug from the wall outlet before cleaning.
Every few weeks, clean the bucket to prevent growth of mold, mildew and bacteria. Partially fill the
bucket with clean water and add a little mild detergent. Swish it around in the bucket, empty and
rinse.
Note: Do not use a dishwasher to clean the bucket. After clean, the bucket must be in place and
securely seated for the dehumidifier to operate.
· After turning off the unit, wait one day before emptying the bucket.
· Clean the main unit, water bucket and air filter.
· Wrap the cord with the power cord buckle.
· Cover the unit with a plastic bag.
· Store the unit upright in a dry, well-ventilated place.
otherwise water is become ice that will cause the
water hose blocked up and the unit failure. Make sure
to empty the bucket once a week when using the
pump draining feature. When the pump draining
feature is not being used, remove the pump drain
hose from the outlet.
· Press the pump drain hose outlet in and take the
pump drain hose out from it (See Fig.13). Make sure
do not let the water in the pump hose drip to the
floor.
2,Take the pump
drain hose out
1,Press the pump drain hose outlet in
CAUTION
DO NOT operate the dehumidifier without a
filter because dirt and lint will clog it and
reduce performance.
Care and
Maintenance

Page 13
Troubleshooting Tips
Problem What to check
o o
Before calling for service, review the chart below first yourself.
Unit does not start
· Make sure the dehumidifier s plug is pushed completely into the outlet.
· Check the house fuse/circuit breaker box.
· Dehumidifier has reached its preset level or bucket is full.
· Water bucket is not in the proper position.
· The air filter is clogged.
· The unit is tilted instead of upright as it should be.
· The floor surface is not level.
· Clean the filter of the pump.
· Check the pump hose does not link or block.
· Empty the water of the bucket.
· Hose to connector or hose connection may be loose.
· Intend to use the bucket to collect water, but the back drain plug is
removed.
· This is normal. The dehumidifier has Auto defrost feature.
· These are error codes and protection codes. See the CONTROL PANEL
FEATURES section.
· Did not allow enough time to remove the moisture.
· Make sure there are no curtains, blinds or furniture blocking the front or
back of the dehumidifier.
· The humidity control may not be set low enough.
· Check that all doors, windows and other openings are securely closed.
· Room temperature is too low , below 5 C(41 F).
· There is a kerosene heater or something giving off water vapor in the
room.
Dehumidifier does not
dry the air as it should
The unit makes a loud
noise when operating
Frost appears on the coils
Water on floor
ES, AS,P2,Eb appear in
the display
The pump operation on
light blinks at 1Hz
Troubleshooting
Tips

The design and specifications are subject to change without prior notice for
product improvement. Consult with the sales agency or manufacturer for details.
Any updates to the manual will be uploaded to the service website, please check
for the latest version.
CD001UI-DP/DL