Loading ...
Loading ...
Loading ...
BLADE SPEED
• The amount of force with which the blade cuts is
determined by speed.
• High cutting speeds are used on soft materials
where less force is needed and a high rate of materi-
al removal is desired.
• Low cutting speeds are used on hard materials
when more force is required.
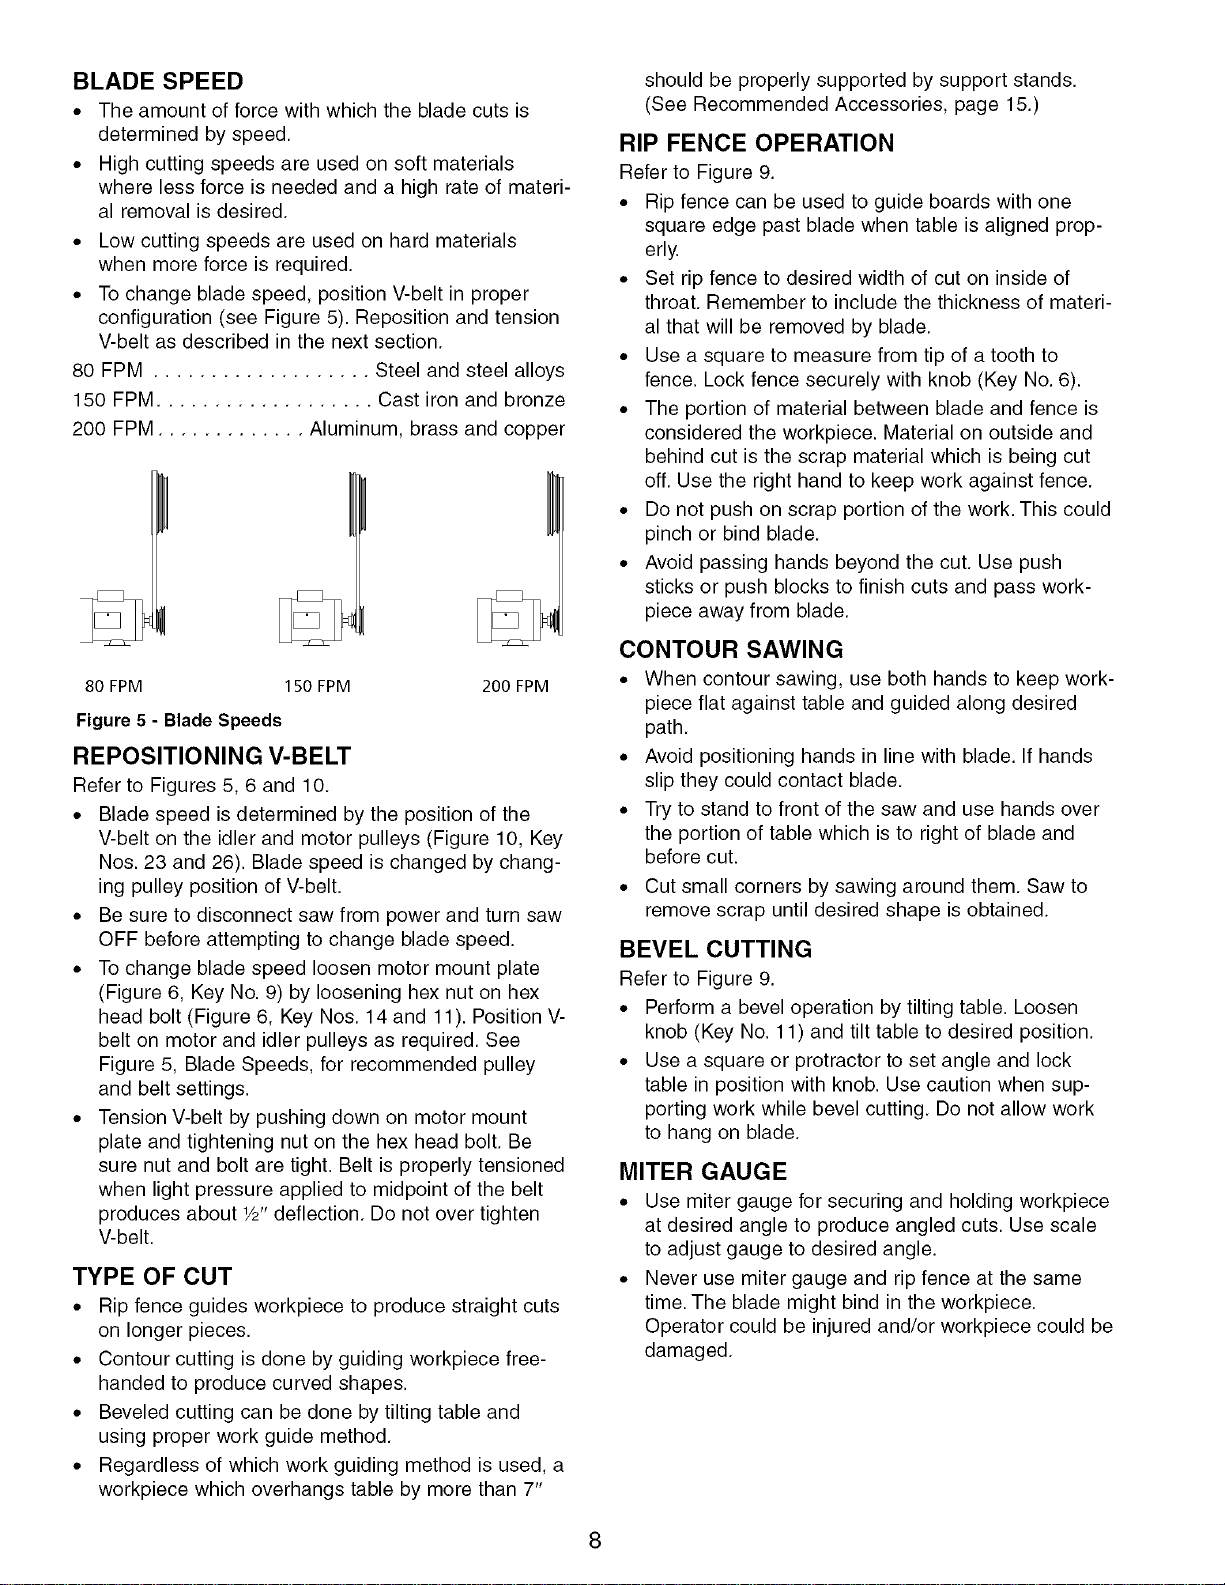
• To change blade speed, position V-belt in proper
configuration (see Figure 5). Reposition and tension
V-belt as described in the next section.
80 FPM ................... Steel and steel alloys
150 FPM ................... Cast iron and bronze
200 FPM ............. Aluminum, brass and copper
80 FPM 150 FPM 200 FPM
Figure 5 - Blade Speeds
REPOSITIONING V-BELT
Refer to Figures 5, 6 and 10.
• Blade speed is determined by the position of the
V-belt on the idler and motor pulleys (Figure 10, Key
Nos. 23 and 26). Blade speed is changed by chang-
ing pulley position of V-belt.
• Be sure to disconnect saw from power and turn saw
OFF before attempting to change blade speed.
• To change blade speed loosen motor mount plate
(Figure 6, Key No. 9) by loosening hex nut on hex
head bolt (Figure 6, Key Nos. 14 and 11). Position V-
belt on motor and idler pulleys as required. See
Figure 5, Blade Speeds, for recommended pulley
and belt settings.
• Tension V-belt by pushing down on motor mount
plate and tightening nut on the hex head bolt. Be
sure nut and bolt are tight. Belt is properly tensioned
when light pressure applied to midpoint of the belt
produces about 1/2"deflection. Do not over tighten
V-belt.
TYPE OF CUT
• Rip fence guides workpiece to produce straight cuts
on longer pieces.
• Contour cutting is done by guiding workpiece free-
handed to produce curved shapes.
• Beveled cutting can be done by tilting table and
using proper work guide method.
• Regardless of which work guiding method is used, a
workpiece which overhangs table by more than 7"
should be properly supported by support stands.
(See Recommended Accessories, page 15.)
RIP FENCE OPERATION
Refer to Figure 9.
• Rip fence can be used to guide boards with one
square edge past blade when table is aligned prop-
erly.
• Set rip fence to desired width of cut on inside of
throat. Remember to include the thickness of materi-
al that will be removed by blade.
• Use a square to measure from tip of a tooth to
fence. Lock fence securely with knob (Key No. 6).
• The portion of material between blade and fence is
considered the workpiece. Material on outside and
behind cut is the scrap material which is being cut
off. Use the right hand to keep work against fence.
• Do not push on scrap portion of the work. This could
pinch or bind blade.
• Avoid passing hands beyond the cut. Use push
sticks or push blocks to finish cuts and pass work-
piece away from blade.
CONTOUR SAWING
• When contour sawing, use both hands to keep work-
piece flat against table and guided along desired
path.
• Avoid positioning hands in line with blade. If hands
slip they could contact blade.
• Try to stand to front of the saw and use hands over
the portion of table which is to right of blade and
before cut.
• Cut small corners by sawing around them. Saw to
remove scrap until desired shape is obtained.
BEVEL CUTTING
Refer to Figure 9.
• Perform a bevel operation by tilting table. Loosen
knob (Key No. 11) and tilt table to desired position.
• Use a square or protractor to set angle and lock
table in position with knob. Use caution when sup-
porting work while bevel cutting. Do not allow work
to hang on blade.
MITER GAUGE
• Use miter gauge for securing and holding workpiece
at desired angle to produce angled cuts. Use scale
to adjust gauge to desired angle.
• Never use miter gauge and rip fence at the same
time. The blade might bind in the workpiece.
Operator could be injured and/or workpiece could be
damaged.
8
Loading ...
Loading ...
Loading ...