Loading ...
Loading ...
Loading ...
INSTALLATION INSTRUCTIONS
7
Rear wall installation
Use the two screws provided to secure the bracket
to the rear wall. The screws must enter a wood sill
plate. If the wall contains any metal studs or similar
materials, or if the back of the appliance cannot
reach the rear wall, the fl oor installation should be
used.
Floor installation
Wood fl oor: Use the two screws provided to secure
the bracket to the fl oor.
Concrete fl oor:
1. Mark the location where the screws need to be
installed.
2. Use a power drill and a concrete bit to drill a
5/32” pilot hole 2” deep into the concrete at the
center of each of the marked locations.
3. Use the two screws provided to secure the
bracket to the fl oor.
Double check the installation
After installing the bracket, slide the appliance into
its fi nal location. Look underneath the appliance
and ensure that the anti-tip arm attached to the side
panel of the appliance is engaging the bracket.
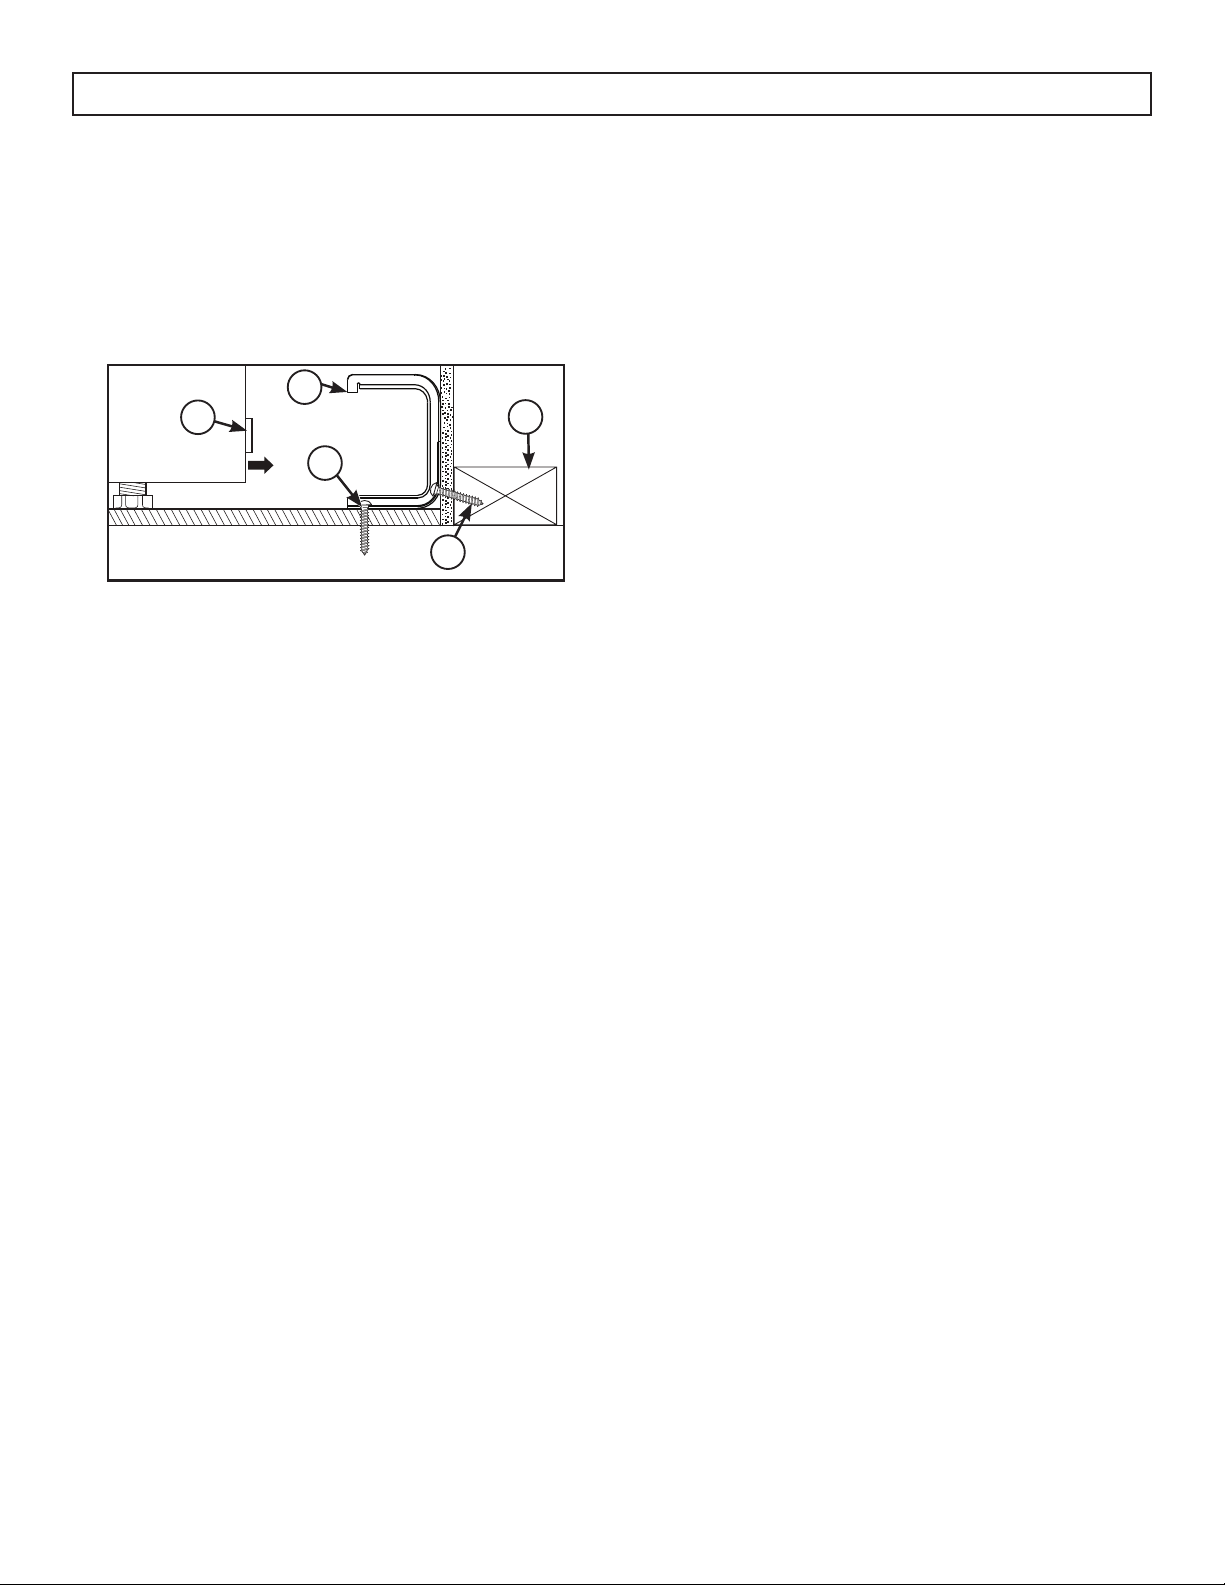
ANTI-TIP BRACKET INSTALLATION
1. Anti-tip arm on the back of the appliance
2. Anti-tip bracket
3. Screw must enter wood or concrete
4. Wall sill plate
5. Screw must enter wood
1
2
3
4
5
To reduce the risk of the appliance tipping, the anti-
tip bracket must be installed before operation.
Note: The installation of the anti-tip bracket must
meet all local codes for securing the appliance.
The anti-tip bracket must be secured to either the
rear wall or the fl oor and must be positioned in such
a way that it will overhang the anti-tip arm on the
rear of the appliance.
Loading ...
Loading ...
Loading ...