
Loading ...
Loading ...
Loading ...
40 41
GB GB
LED
After connecting the “F” and "B" connectors to the docking station, the docking station
can be xed down with the boundary pegs.
Before xing the docking station, please check again that the above mentioned conditions
are met:
- Even surface within range of power supply
- 2 m straight boundary in front,
- Inclination less than 5 %
- Surplus boundary wire tucked under the docking station for protection, outside the
boundary.
Once the docking station is xed, connect the charger extension cable (14) to charging base.
Now, connect the power supply to the mains outlet. After a brief self-test, one blue LED on the
docking station should light up. If all LEDs stay dark, double-check the mains outlet and the
power supply. If anything other than a single blue LED lights up, please refer to the chapter on
trouble-shooting.
Turn on and test the installation
Once the blue LED conrms all is OK, test the Robotic Mower's function. Check the LED
regularly to ensure xing the boundary wire has not affected the connection. Then place
the Robotic Mower in the working area, a few metres beside the docking station.
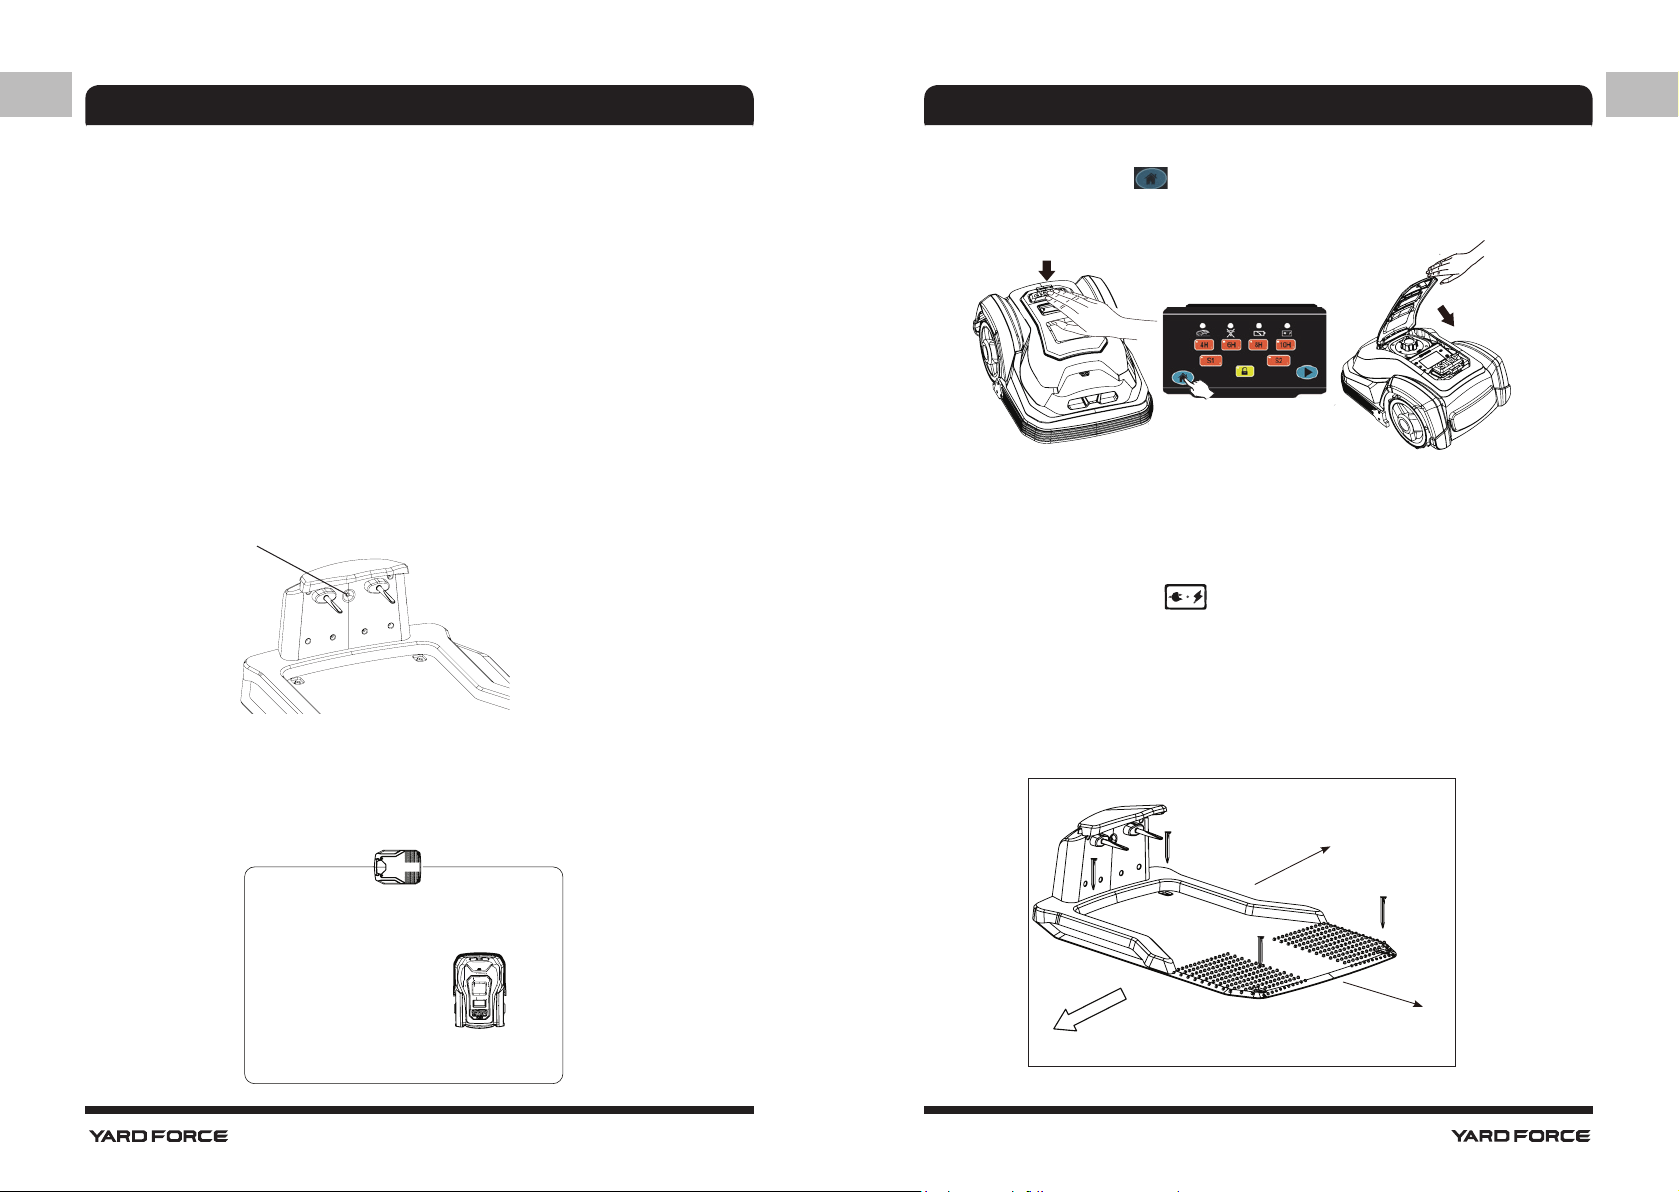
Set the main power switch (11) to "ON". The Robotic Mower will power-up and start a
self-test, but will not start working at this time.
Press down on the large STOP button (2) to open the top cover and access the controls.
Activate the button marked "
" (situated on the left part of the display) and press
down the top cover to close it.
Once closed, the Robotic Mower will automatically return to the docking station by locating
and following the boundary wire in anti-clockwise direction. If the Robotic Mower fails to dock
correctly, move the docking station to a more suitable position.
Once the device has docked, the
symbol will start ashing. This indicates that the
battery is charging correctly.
After initial installation, the Robotic Mower will remain in the docking station until the battery
is fully charged.
Successful docking and charging indicates that you have found a suitable position for the
docking station. It is now time to x it in position by fully driving the pegs into the ground.
Take care not to damage or kink the surplus wire stored under the docking station.
1 m at lawn
Area to be cut
ASSEMBLY INSTRUCTIONS ASSEMBLY INSTRUCTIONS
2 m
Start
Home
Set
Loading ...
Loading ...
Loading ...