Loading ...
Loading ...
Loading ...
TOINSTALL GUIDE BAR & SAW
CHAIN
These instructions are for replacing a
bar. The unit is fully assembled when
shipped.
NOTE: Always wear heavy gloves
when handling the saw chain.
1. Disconnect unit from power source.
2. Remove screw (A).
3. Place power unit on flat surface.
4. Loosen knob (C) slightly by
turning knob counter-clockwise
and then turn the chain tension
ring (D) counter-clockwise to relief
chain tension. To remove the
sprocket cover (B), turn knob (C)
counter-clockwise.
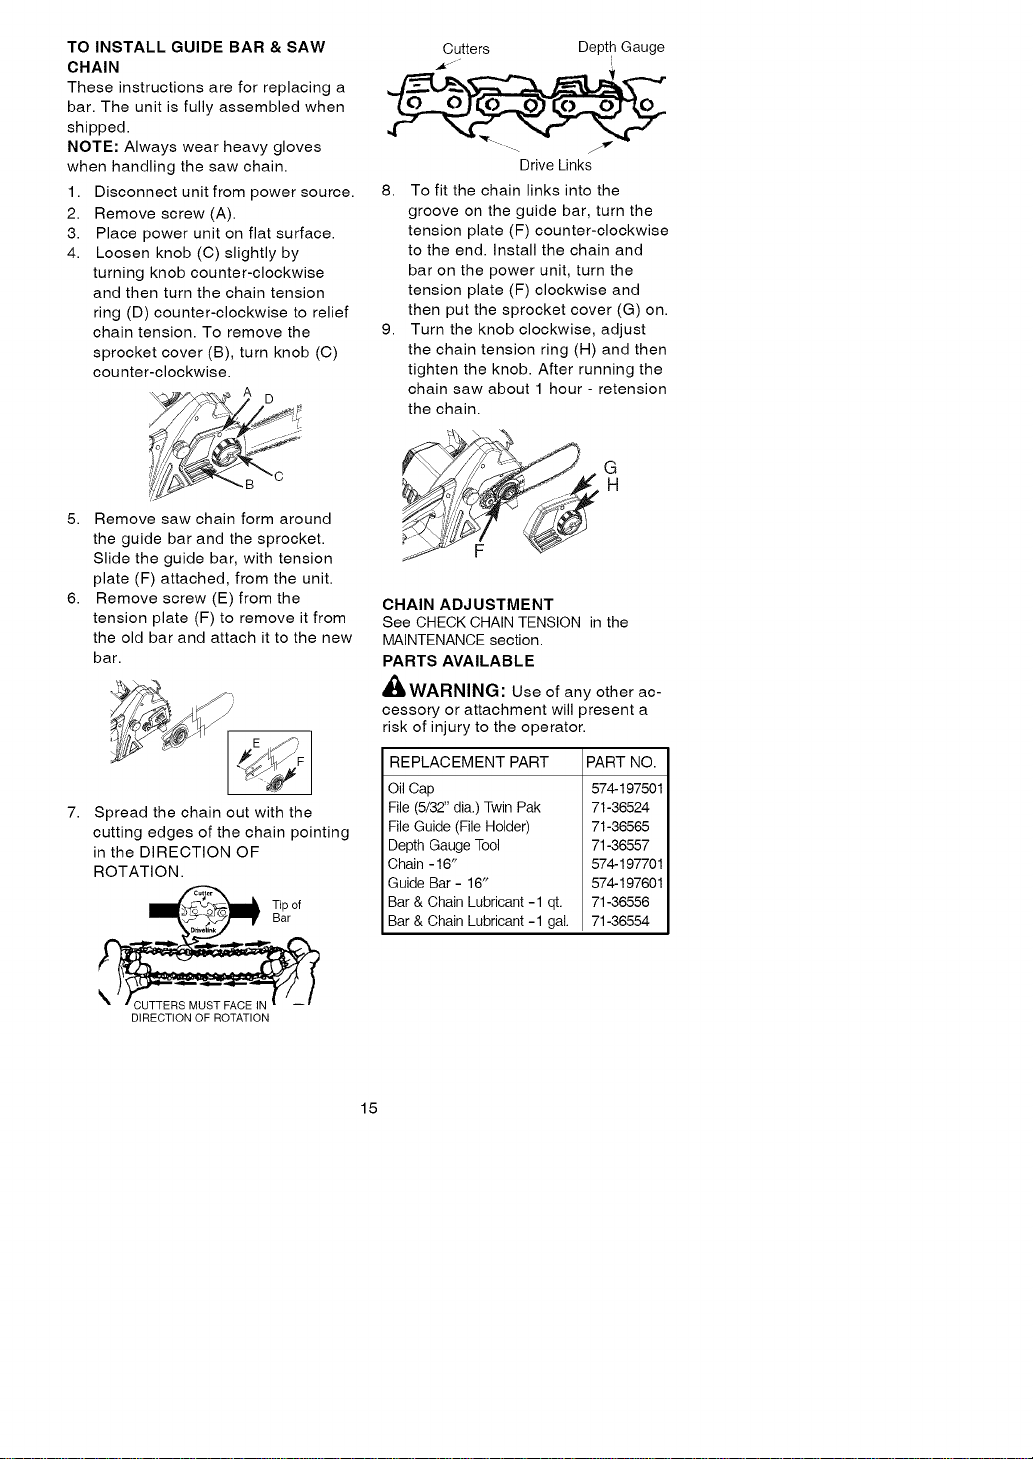
Cutters Depth Gauge
Drive Links
8. To fit the chain links into the
groove on the guide bar, turn the
tension plate (F) counter-clockwise
to the end. Install the chain and
bar on the power unit, turn the
tension plate (F) clockwise and
then put the sprocket cover (G) on.
9. Turn the knob clockwise, adjust
the chain tension ring (H) and then
tighten the knob. After running the
chain saw about 1 hour - retension
the chain.
5. Remove saw chain form around
the guide bar and the sprocket.
Slide the guide bar, with tension
plate (F) attached, from the unit.
6. Remove screw (E) from the
tension plate (F) to remove it from
the old bar and attach it to the new
bar.
7.
Spread the chain out with the
cutting edges of the chain pointing
in the DIRECTION OF
ROTATION.
Tip of
Bar
DiRECTiON OF ROTATION
G
H
CHAIN ADJUSTMENT
See CHECK CHAIN TENSION in the
MAINTENANCE section.
PARTS AVAILABLE
,_WARNING: Use of any other ac-
cessory or attachment will present a
risk of injury to the operator.
REPLACEMENT PART
Oil Cap
File (5/32" dia.) Twin Pak
File Guide (File Holder)
Depth Gauge Tool
Chain - 16"
Guide Bar - 16"
Bar & Chain Lubricant -1 qt.
Bar & Chain Lubricant -1 gal.
PART NO.
574-197501
71-36524
71-36565
71-36557
574-197701
574-197601
71-36556
71-36554
15
Loading ...
Loading ...
Loading ...