Loading ...
Loading ...
Loading ...
CHECKFOR DAMAGED OR
WORN PARTS
Contact Sears Service Center for re-
placement of worn or damaged parts.
NOTE: It is normal for a small amount
of oil to appear under the saw after
motor stops. Do not confuse this with a
leaking oil tank.
• Trigger Switch - Ensure the trigger
switch functions properly by squeez-
ing and holding the trigger switch.
Make sure motor starts and stops.
• Oil Tank - Discontinue use of chain
saw if oil tank shows signs of dam-
age or leaks.
• Power Cord - Discontinue use if
chain saw power cord shows signs
of damage or wear.
CHECK FOR LOOSE
FASTENERS AND PARTS
• Bar Knob
• Chain
• Housing Screws
CHECK CHAIN TENSION
WARNING: Wear protective
gloves when handling chain. The
chain is sharp and can cut you even
when it is not moving.
Chain tension is very important. Chain
stretches during use. This is especially
true during the first few times you use
your saw. Always check chain tension
each time you use your saw.
NOTE: Make sure the CHAIN
BRAKE is disengaged. Disengage
the CHAIN BRAKE (A) by pulling it
backward.
Disengaged
Engaged
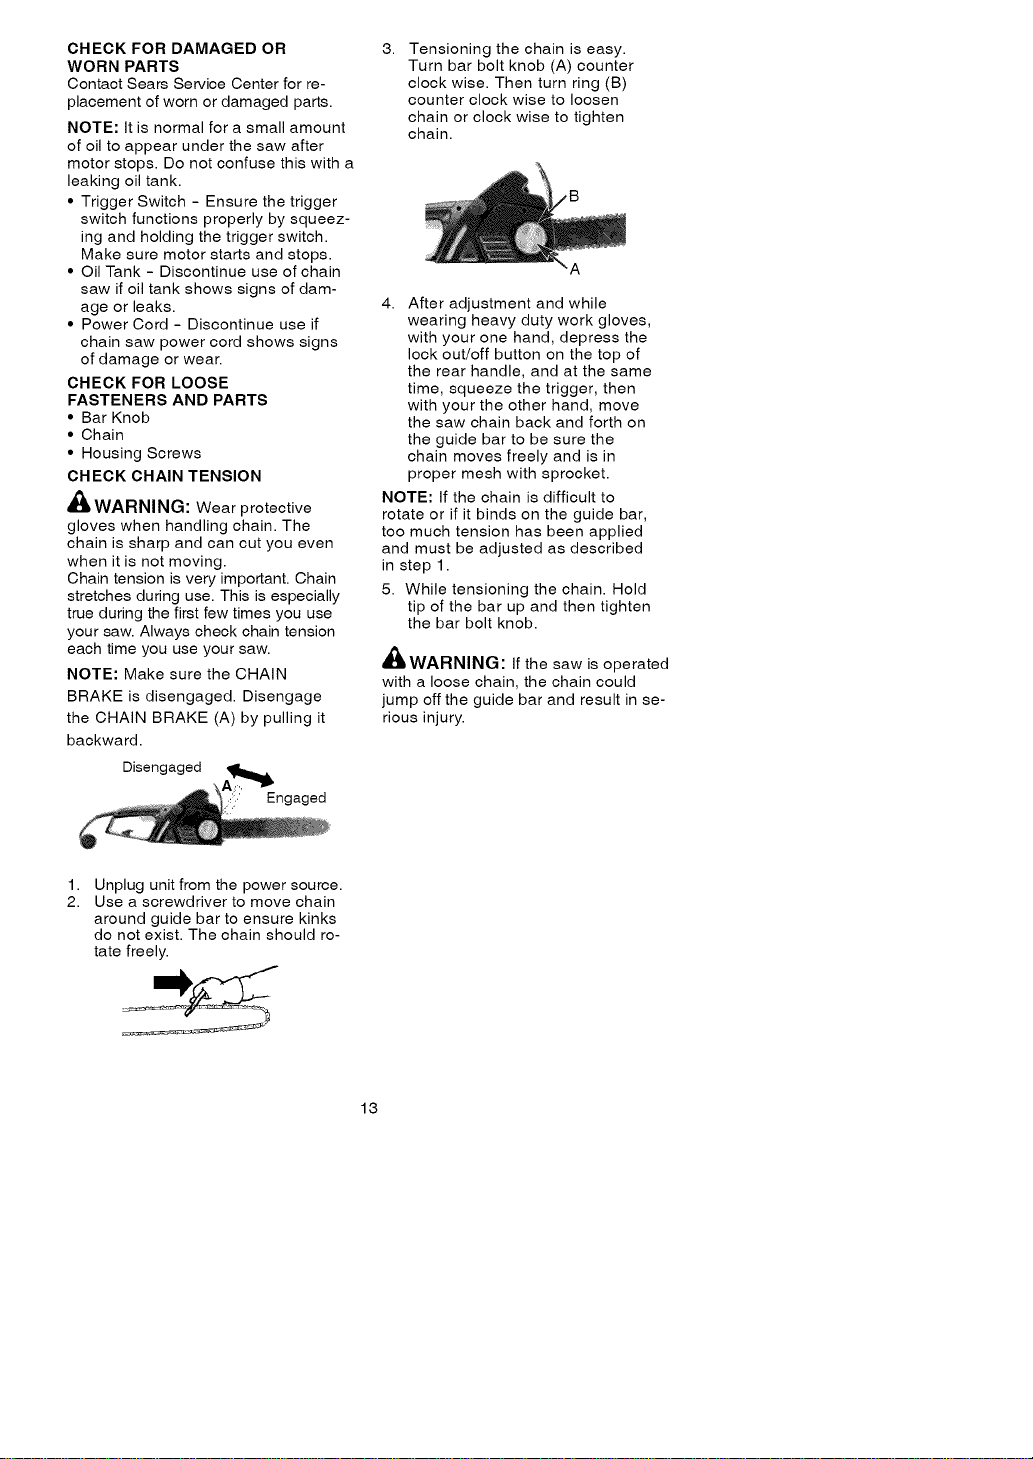
3.
Tensioning the chain is easy.
Turn bar bolt knob (A) counter
clock wise. Then turn ring (B)
counter clock wise to loosen
chain or clock wise to tighten
chain.
4. After adjustment and while
wearing heavy duty work gloves,
with your one hand, depress the
lock out/off button on the top of
the rear handle, and at the same
time, squeeze the trigger, then
with your the other hand, move
the saw chain back and forth on
the guide bar to be sure the
chain moves freely and is in
proper mesh with sprocket.
NOTE: If the chain is difficult to
rotate or if it binds on the guide bar,
too much tension has been applied
and must be adjusted as described
in step 1.
5. While tensioning the chain. Hold
tip of the bar up and then tighten
the bar bolt knob.
_WARNING: If the saw is operated
with a loose chain, the chain could
jump off the guide bar and result in se-
rious injury.
1.
2.
Unplug unit from the power source.
Use a screwdriver to move chain
around guide bar to ensure kinks
do not exist. The chain should ro-
tate freely.
13
Loading ...
Loading ...
Loading ...