Loading ...
Loading ...
Loading ...
EN
6
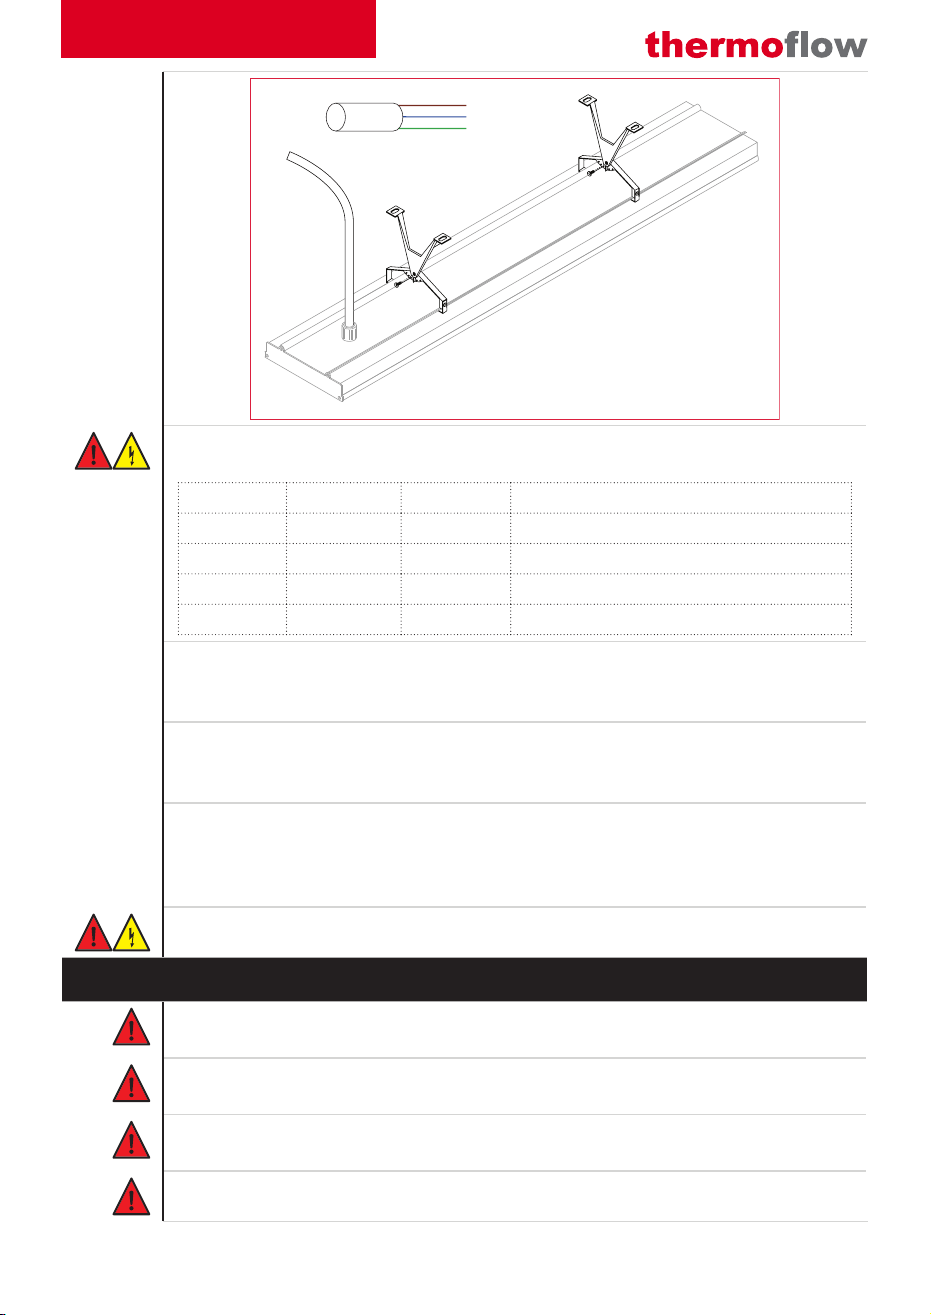
Figure 3
Power Cord
L1
L2
EARTH
The distance between two brackets and power supply (see Figure 1) are different with dif-
ferent models, please read the following list first before installation.
Model L2 L1 Power supply
HS1500NA 24”(60 cm) 10”(25 cm) 110-120V~, 60Hz, with power plug
HS1800NA 27”(70 cm) 10”(25 cm) 110-120V~, 60Hz, with power plug
HS2400NA 40”(100 cm) 10”(25 cm) 220-240V~, 60Hz, without power plug
HS3000NA 48”(120 cm) 12”(30 cm) 220-240V~, 60Hz, without power plug
Figure 1
Attach part (A) of the bracket to a wall or ceiling in such a way that it can support the appli-
ance’s weight.
Figure 2
Attach part (B) of the bracket to the device using the screws and angle brackets supplied in
the parts (C)(D).
Figure 3
Determine the desired angle for the device. Attach the two parts (A)(B) of the bracket to
each other using the screws supplied in the pack (C). Then connect power cord with power
supply.
Never route the power supply cable along the heating surface.
5 USER INSTRUCTIONS
The device’s heating surface gets extremely hot. Never touch the appliance when
it is switched on.
After use, always allow the device to cool down for at least 30 minutes before
touching it.
Do not turn on the device when objects are present underneath it within a dis-
tance of 40”(100 cm).
Remove all the packing materials before turning on the heater.
manual thermoflow far infrared heater -en & fr.indd 6 2019/11/12 17:14
Loading ...
Loading ...
Loading ...