Loading ...
2
Installation Instructions
Assemble Wall Sleeve
1. Set the bottom panel
on a clean, flat, level
surface.
/RFDWHOHIWVLGHSDQHO
Align panel in the left
bottom panel slot. Insert
the left panel into the
bottom panel until all
WDEVORFNFRPSOHWHO\
/RFDWHULJKWVLGHSDQHO
Align panel in the right
bottom panel slot.
)XOO\LQVHUWULJKWSDQHO
into bottom panel until
locking tabs engage.
/RFDWHWRSSDQHODQG
align with top of right and
OHIWVLGHSDQHOV)XOO\
insert top panel into right
and left side panels until
locking tabs engage.
,IUHTXLUHG/RFDWHZHDWKHUEDUULHUDQGDWWDFKWRWKHUHDU
of the assembled sleeve with four (4) supplied push pins.
4
3
2
1
Weather Barrier
Rear View
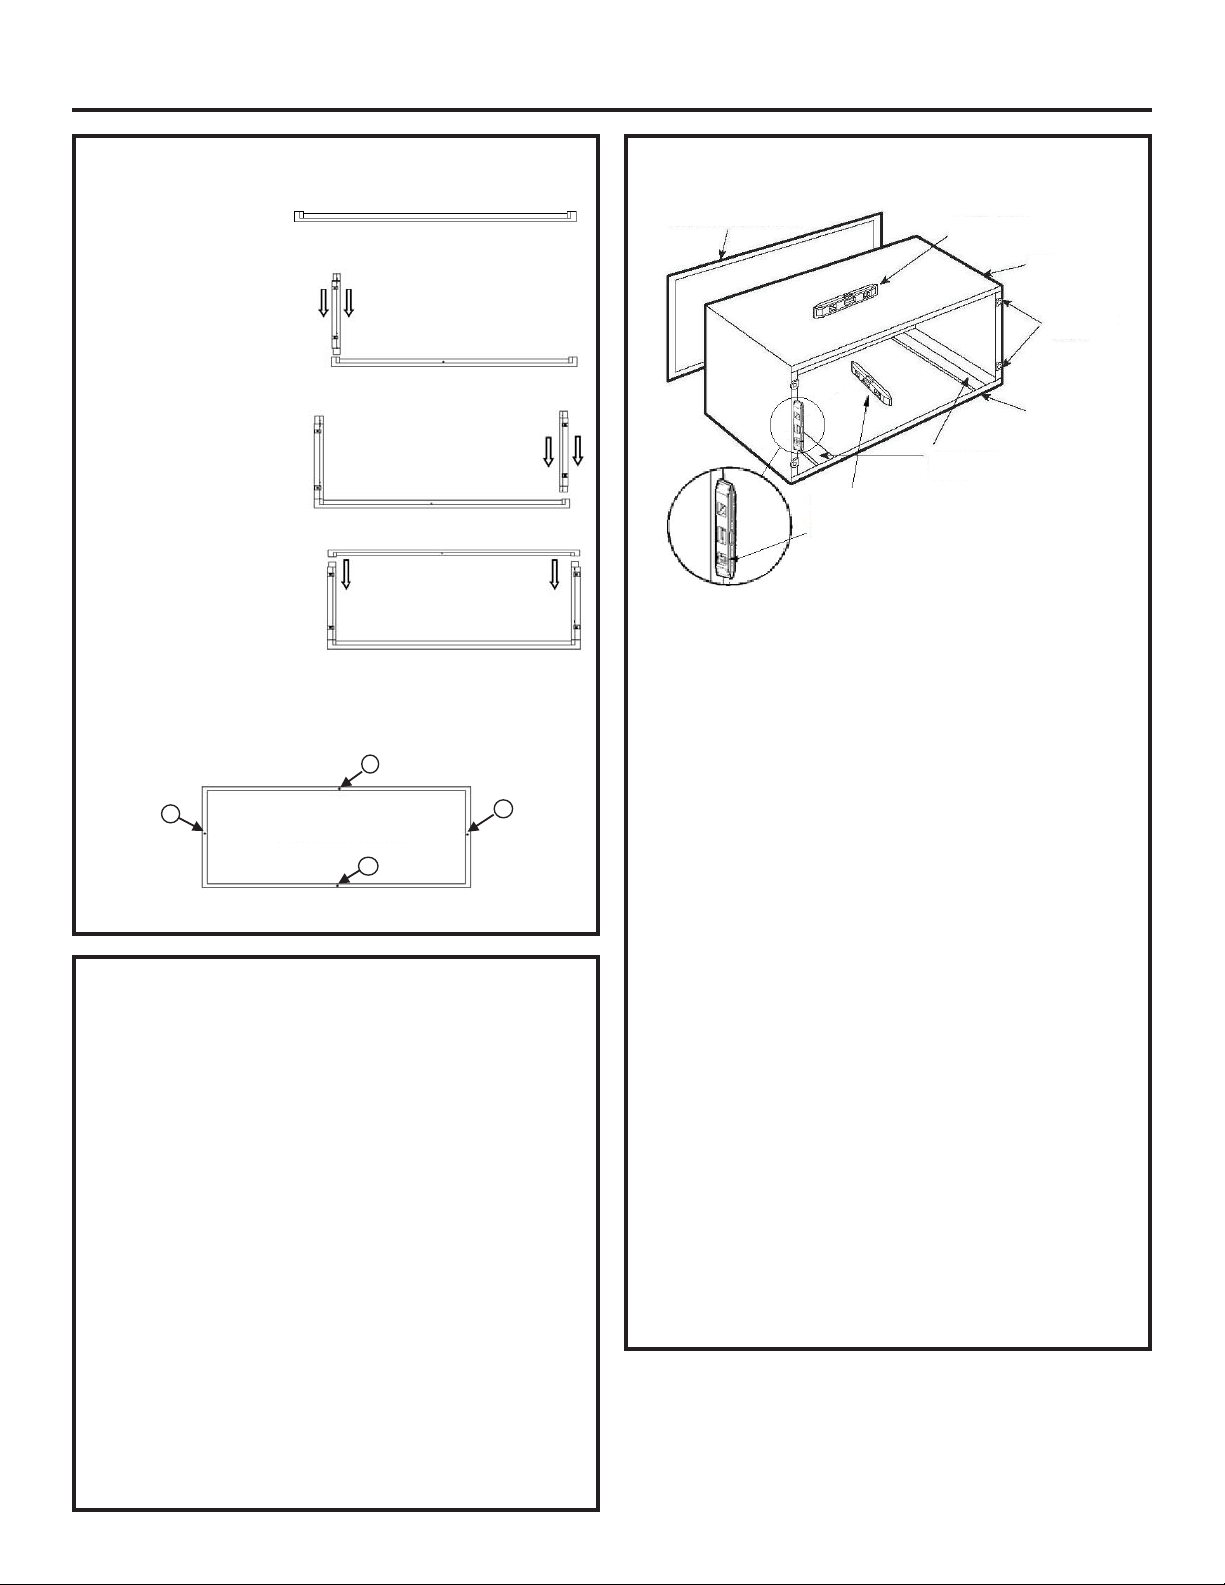
Sleeve Installation (cont.)
Cardboard
Weather Barrier
Level side
to side
Top
Bottom
Mounting
Clips
Support Rails
Pitch one quarter
(1/4) Bubble
Front to Back
4. Fasten Sleeve to Wall:/RFDWHDQGPDUNWZRKROHVRQ
HDFKVLGHDSSUR[LPDWHO\LQFKHVIURPWKHERWWRPDQG
4-inches from the top.
Drill 3/16-in. pilot holes and use #10 x 1-in. screws, or
appropriate fasteners for the wall construction, to secure
sleeve in place. It is recommended that washers are used
to prevent driving the screw head through the side wall.
IMPORTANT: Never drill or install fasteners through
the bottom of the sleeve.
Check to see if the sleeve is level from side to side and
if there is a 1/4 bubble tilt from front to back. Adjust if
QHFHVVDU\
5. Exterior Weather Proofing: 3URSHUZHDWKHUSURRILQJRI
all sides between the wall surface and sleeve is essential
to assure a trouble-free installation.
$SSO\VHDODQWFDXONLQJRUHTXLYDOHQWZHDWKHUSURRILQJ
material around the perimeter of the sleeve to eliminate
outdoor air and water leaks into the room.
6. Interior Weather Proofing:$SSO\VHDODQWFDXONLQJRU
equivalent weather proofing material to joints around the
perimeter (including bottom) of the sleeve to create a total
air seal.
NOTE:([SDQGDEOHIRDPLQVXODWLRQD\EHDGGHGWRILOO
ODUJHZDOOJDSV$SSO\SHUPDQXIDFWXUHU¶VLQVWUXFWLRQV
IMPORTANT:3URWHFWZDOOVOHHYHGXULQJLQWHULRUDQG
exterior surface cleaning from corrosive and acidic
FKHPLFDOV7KHVHW\SHVRIFKHPLFDOVZLOOFDXVHSDLQW
damage and premature rusting of the wall sleeve.
Sleeve Installation
1. Prepare Sleeve: If grille is to be installed at this time,
remove and discard weather barrier panel and install rear
grille per the manufacturer’s instructions. If condensate
drain tube is to be installed at this time, install per the
manufacturer’s instructions.
2. Setting the Sleeve:3RVLWLRQWKHIXOO\DVVHPEOHGVOHHYH
in the wall opening with the bottom down and the drain
holes toward the outdoors.
6OHHYHPXVWH[WHQGDWOHDVWLQFKHVEH\RQGEXLOGLQJ
exterior to assure proper drainage and to allow weather
tight seal. Sleeve must extend at least 1/4 inches into
room for proper weatherproofing.
IMPORTANT: DO NOT remove the thermal insulation
from sleeve.
3. Leveling the Sleeve:3ODFHOHYHOLQORFDWLRQVDVVKRZQ
Sleeve must be mounted level side to side and a 1/4
bubble tilt front to back. Use shims as required to insure
proper level. This will allow for proper condensate
drainage.
Front View
Front View
Front View
Front View
Loading ...
Loading ...
Loading ...