
Installation
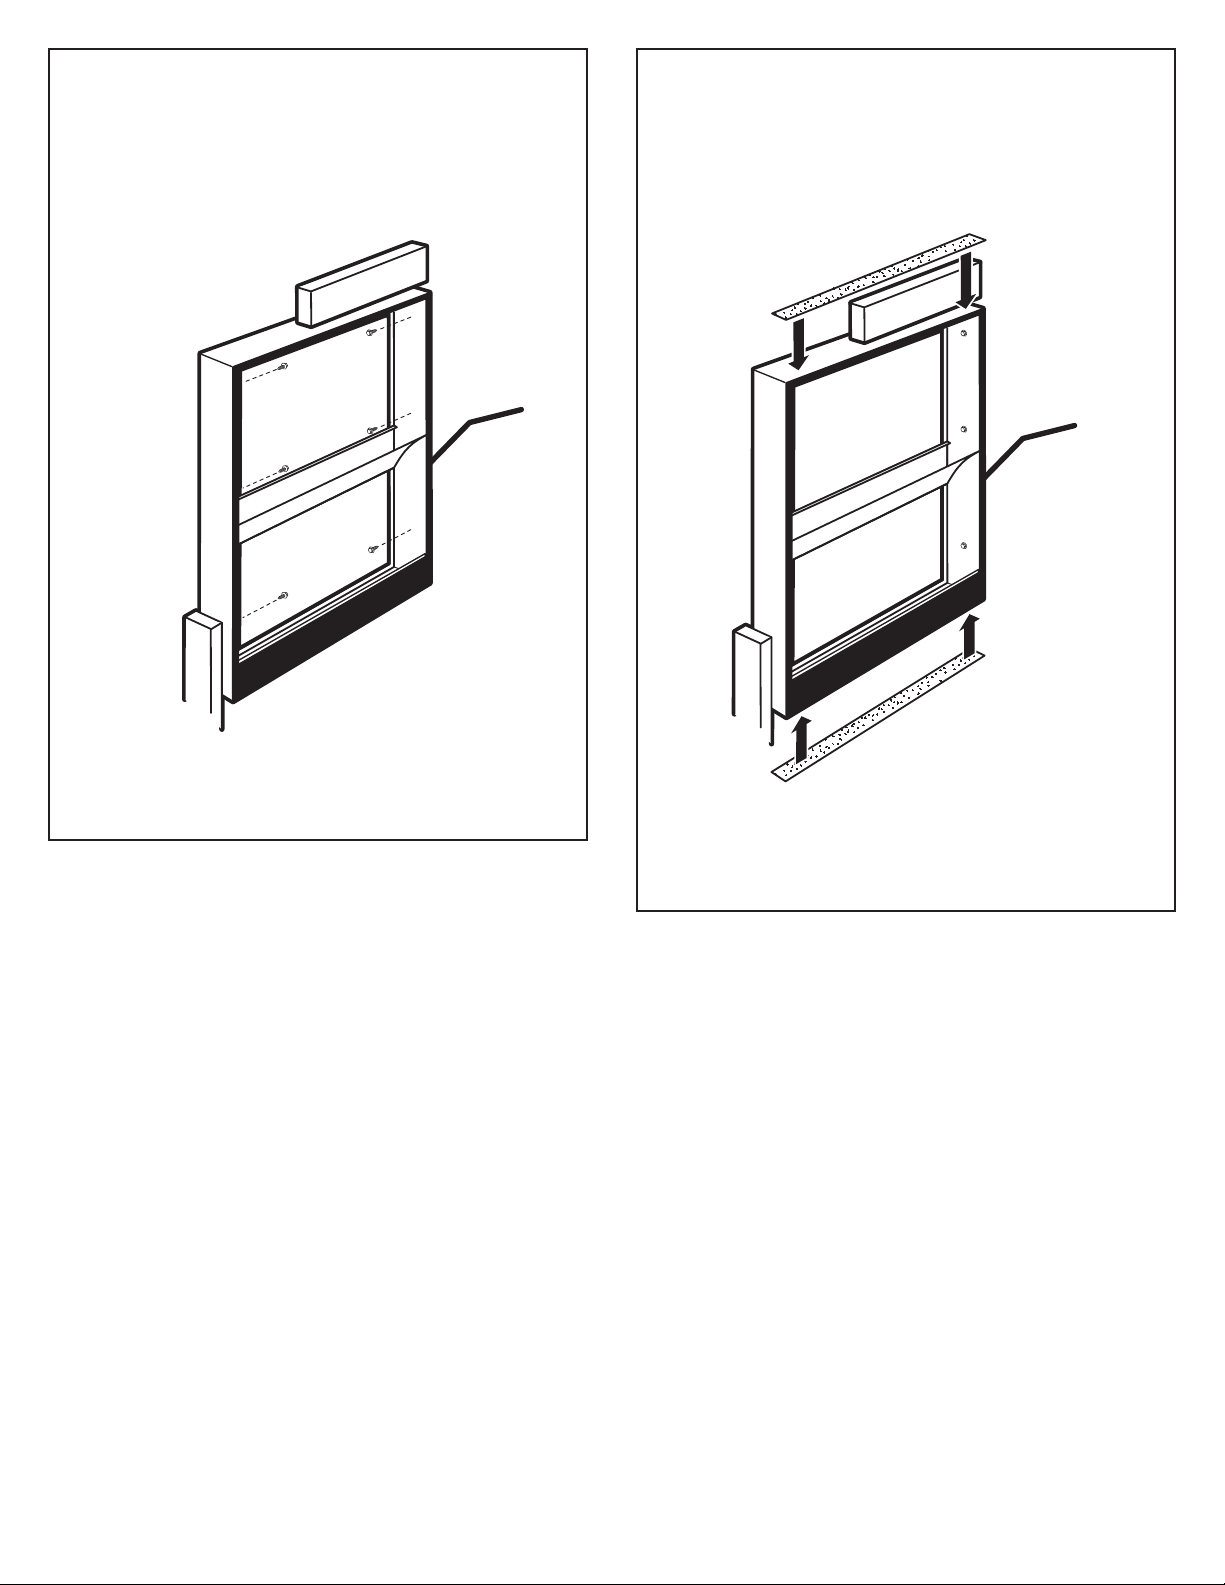
Overview
Proper header for
structural support.
Apply proper caulking
and flashing.
Properly square
and level plenum.
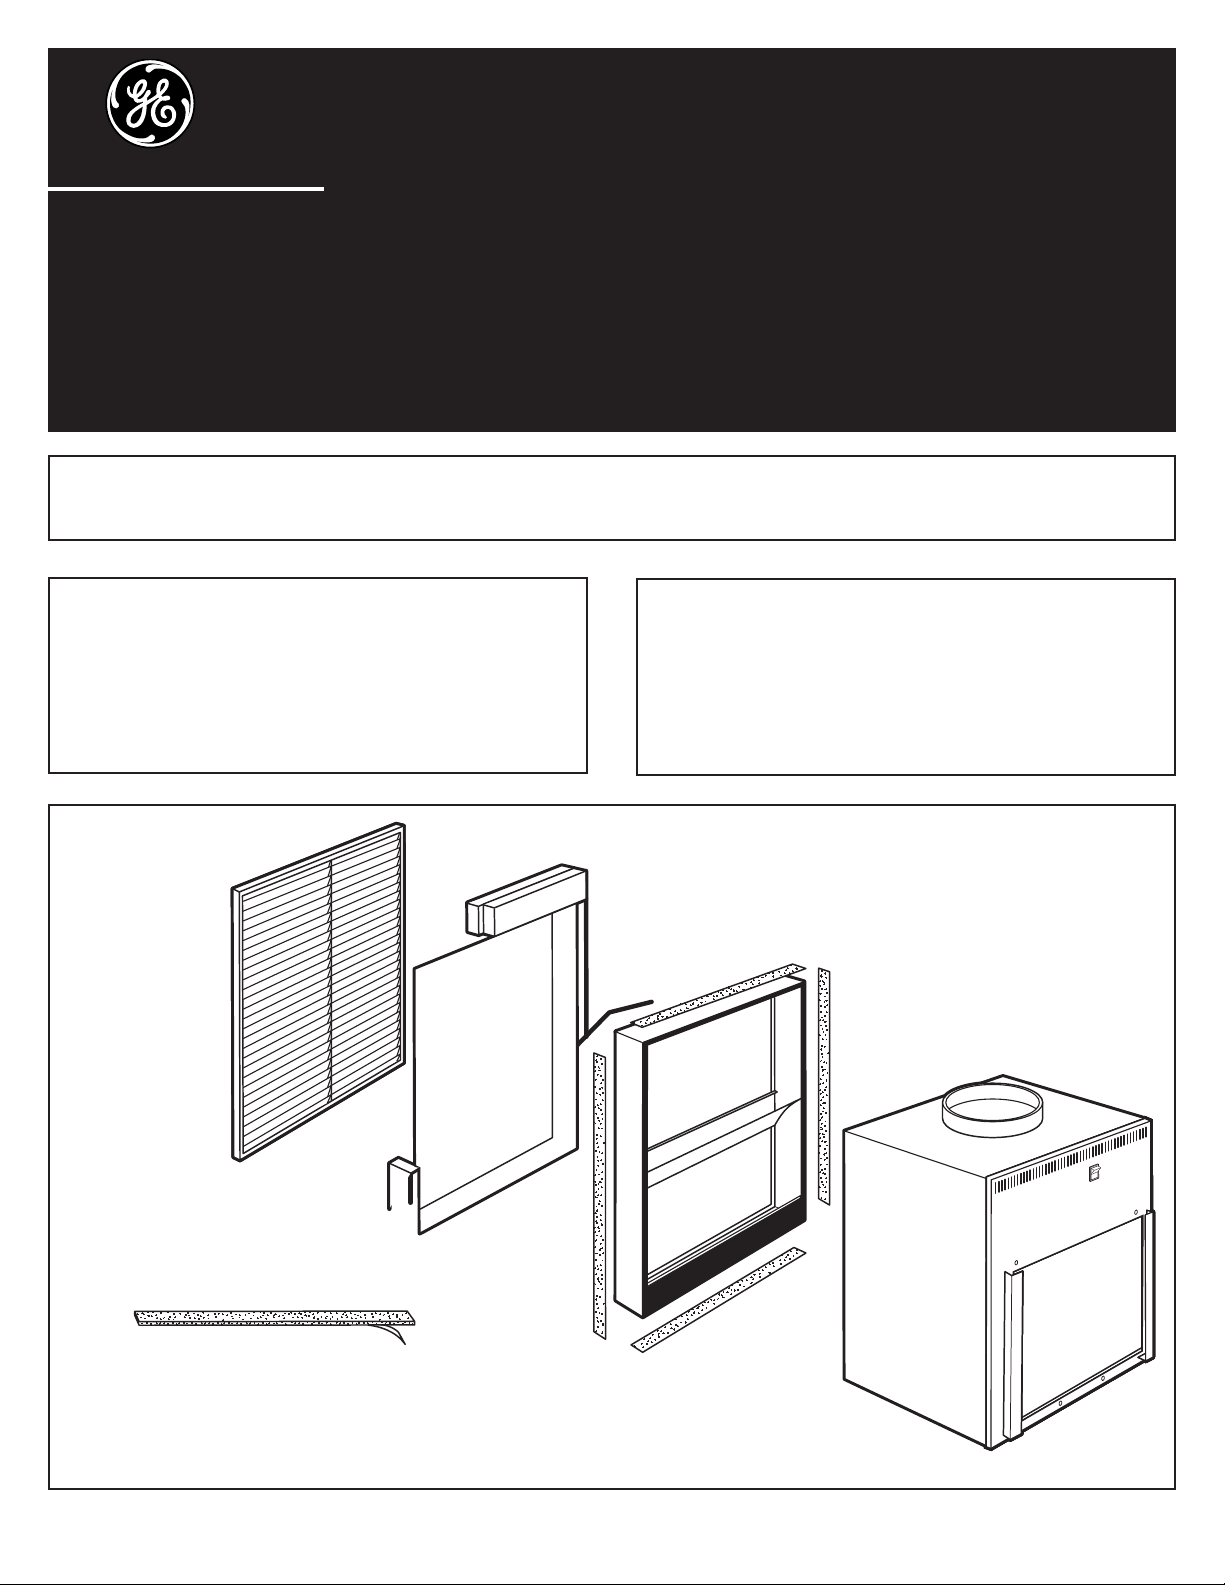
Architectural
Louver
Exterior/
Outside Wall
Wall Plenum
Insulating Foam Strips
• Top and bottom (2)
• Sides (2)
(cut to match depth of plenum
exposed in the interior closet)
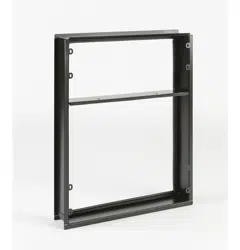
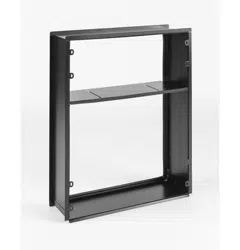
Case
RAVWP6 – 6” D x 19¾” W x 32” H
RAVWP8 – 8” D x 19¾” W x 32” H
RAVWP12 – 12” D x 19¾” W x 32” H
RAVWP15 – 15” D x 19¾” W x 32” H
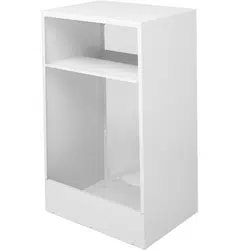
NOTE: The plenum has
a wax cardboard weather
cover. Do not remove this
cover until ready to install
the architectural louver.
1
Installation instructions RAVWP6 – 6” depth
for your new wall plenum RAVWP8 – 8” depth
RAVWP12 – 12” depth
RAVWP15 – 15” depth
Before you begin—Read these instructions completely and carefully.
IMPORTANT—OBSERVE ALL GOVERNING CODES AND ORDINANCES.
Note to Installer—Be sure to leave these instructions with the Consumer.
Note to Consumer—Keep these instructions with your Owner’s Manual for future reference.
YOUR WALL PLENUM WILL ONLY WORK IF INSTALLED CORRECTLY. MAKE SURE TO INSTALL IT
IN THE CORRECT ORIENTATION AS SHOWN IN THE ILLUSTRATIONS.
Pub No. 31-60912-1 07-10 GE
Tools Needed (depending on installation)
• Ruler or tape measure • Level
• Screwdriver • Drill
• Hammer • Saw
• Pencil
Parts Needed
• Flashing • Shims
• Caulk (silicone)
• Heading and framing materials
• Attachment screws (6) plenum to wall
2
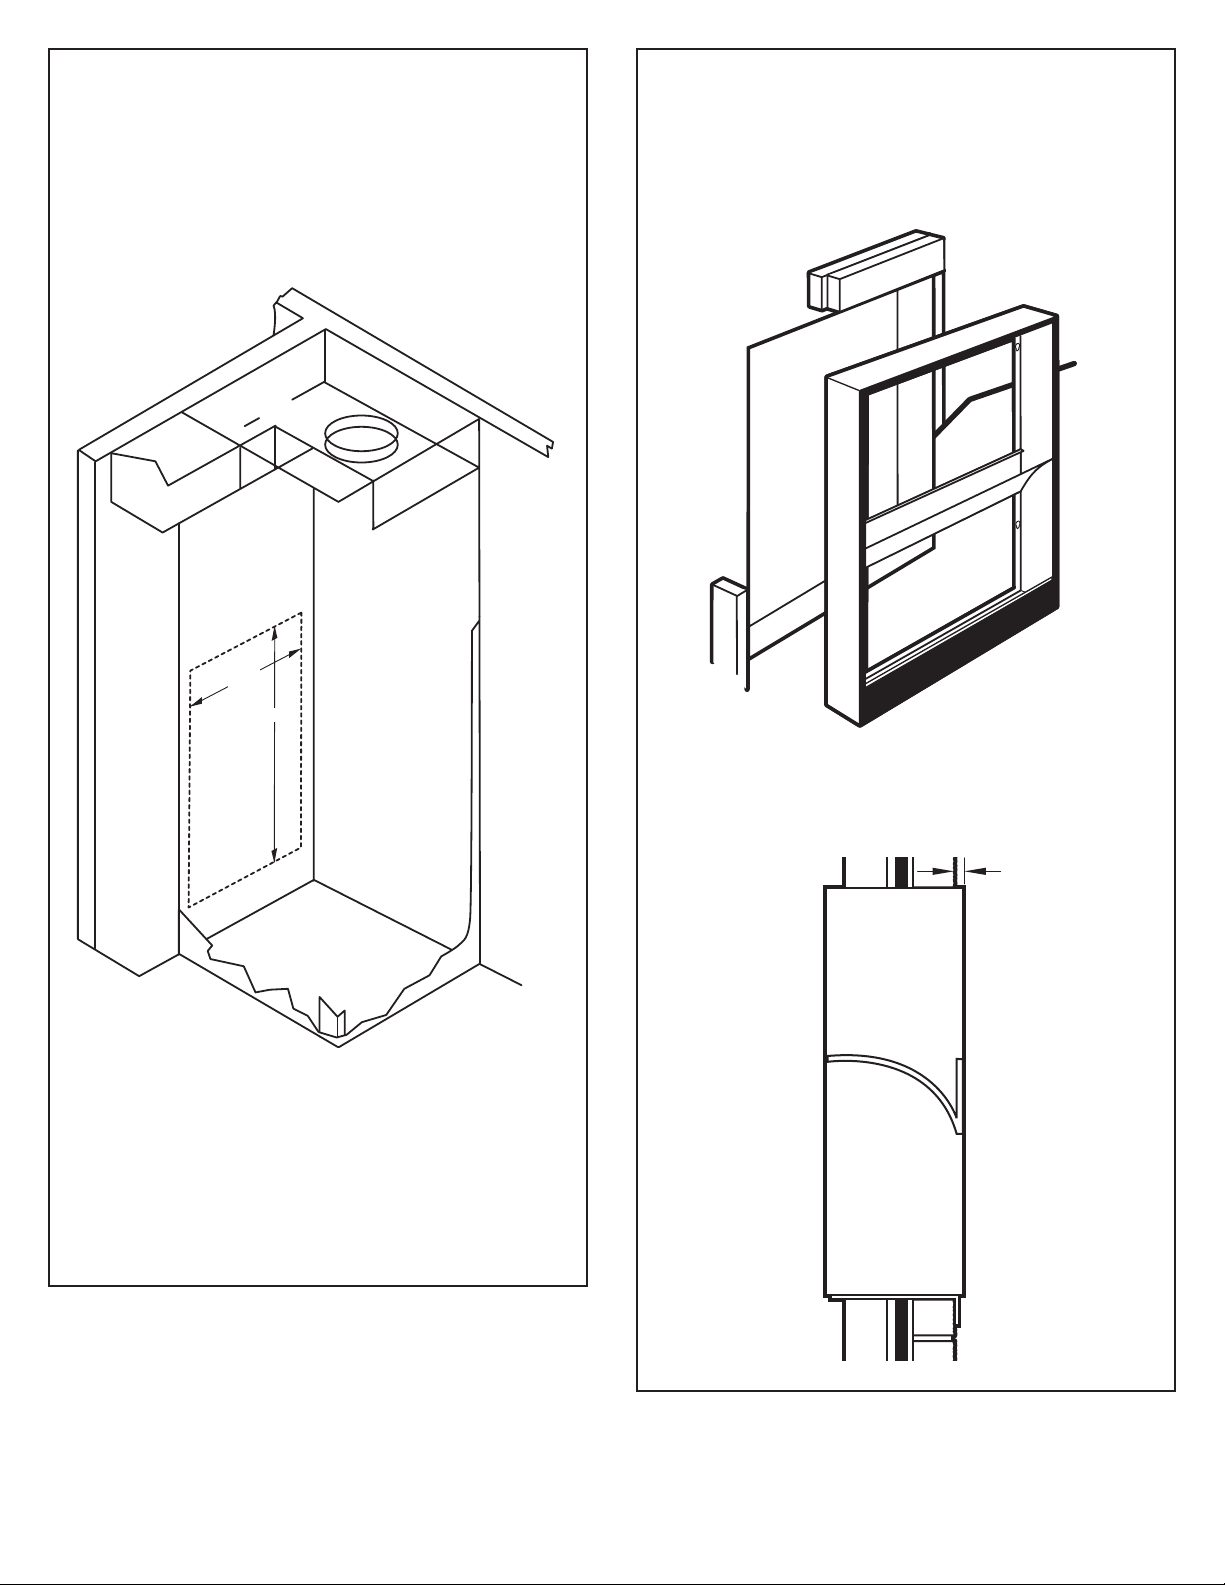
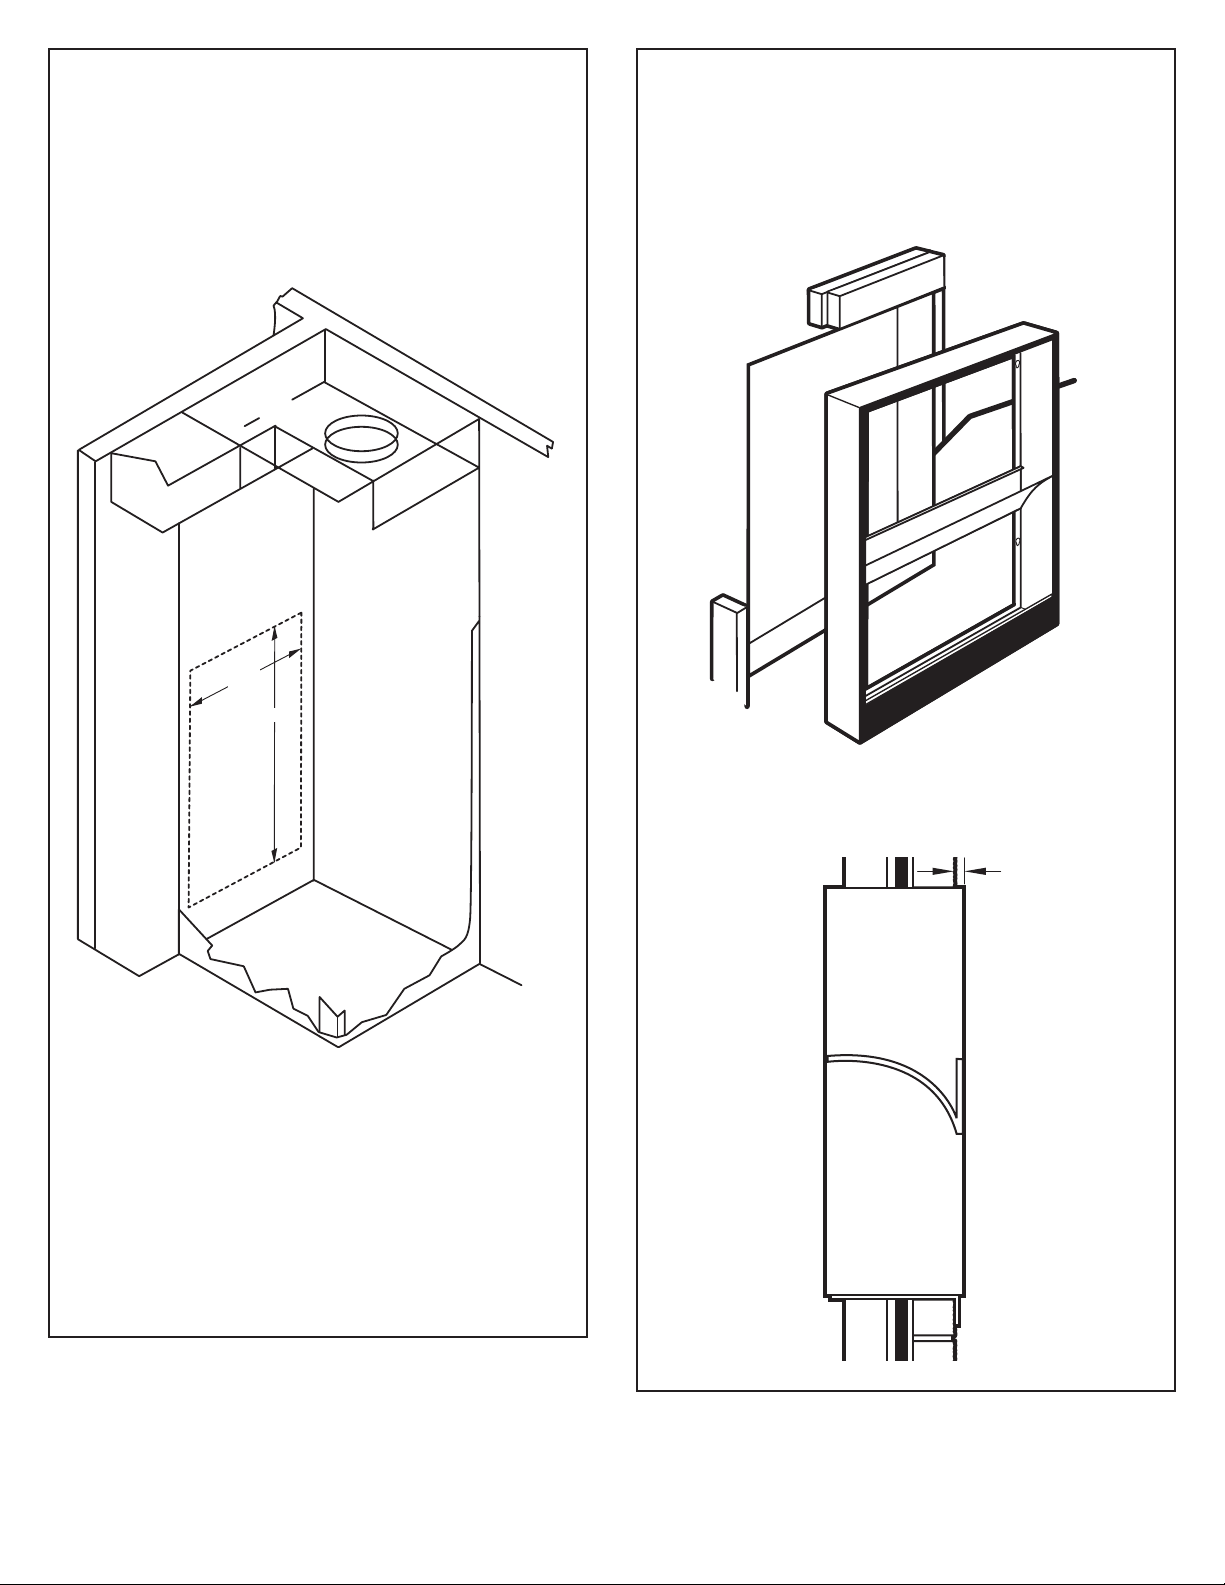
Step 1
Measure, cut and frame out the wall plenum
opening
• Measure and mark on the inside of the external
closet wall the plenum cutout dimensions as
shown below.
IMPORTANT: The wall plenum is not designed to
carry structural loads. A proper header opening
must be built into the rough opening. The plenum
requires flashing, shim and caulk for a weather-
resistant installation.
NOTE: It is the responsibility of the installer to
properly install the plenum and meet building
code requirements.
20”
32¼”
Inside closet,
looking out through
wall plenum rough cutout
External
wall
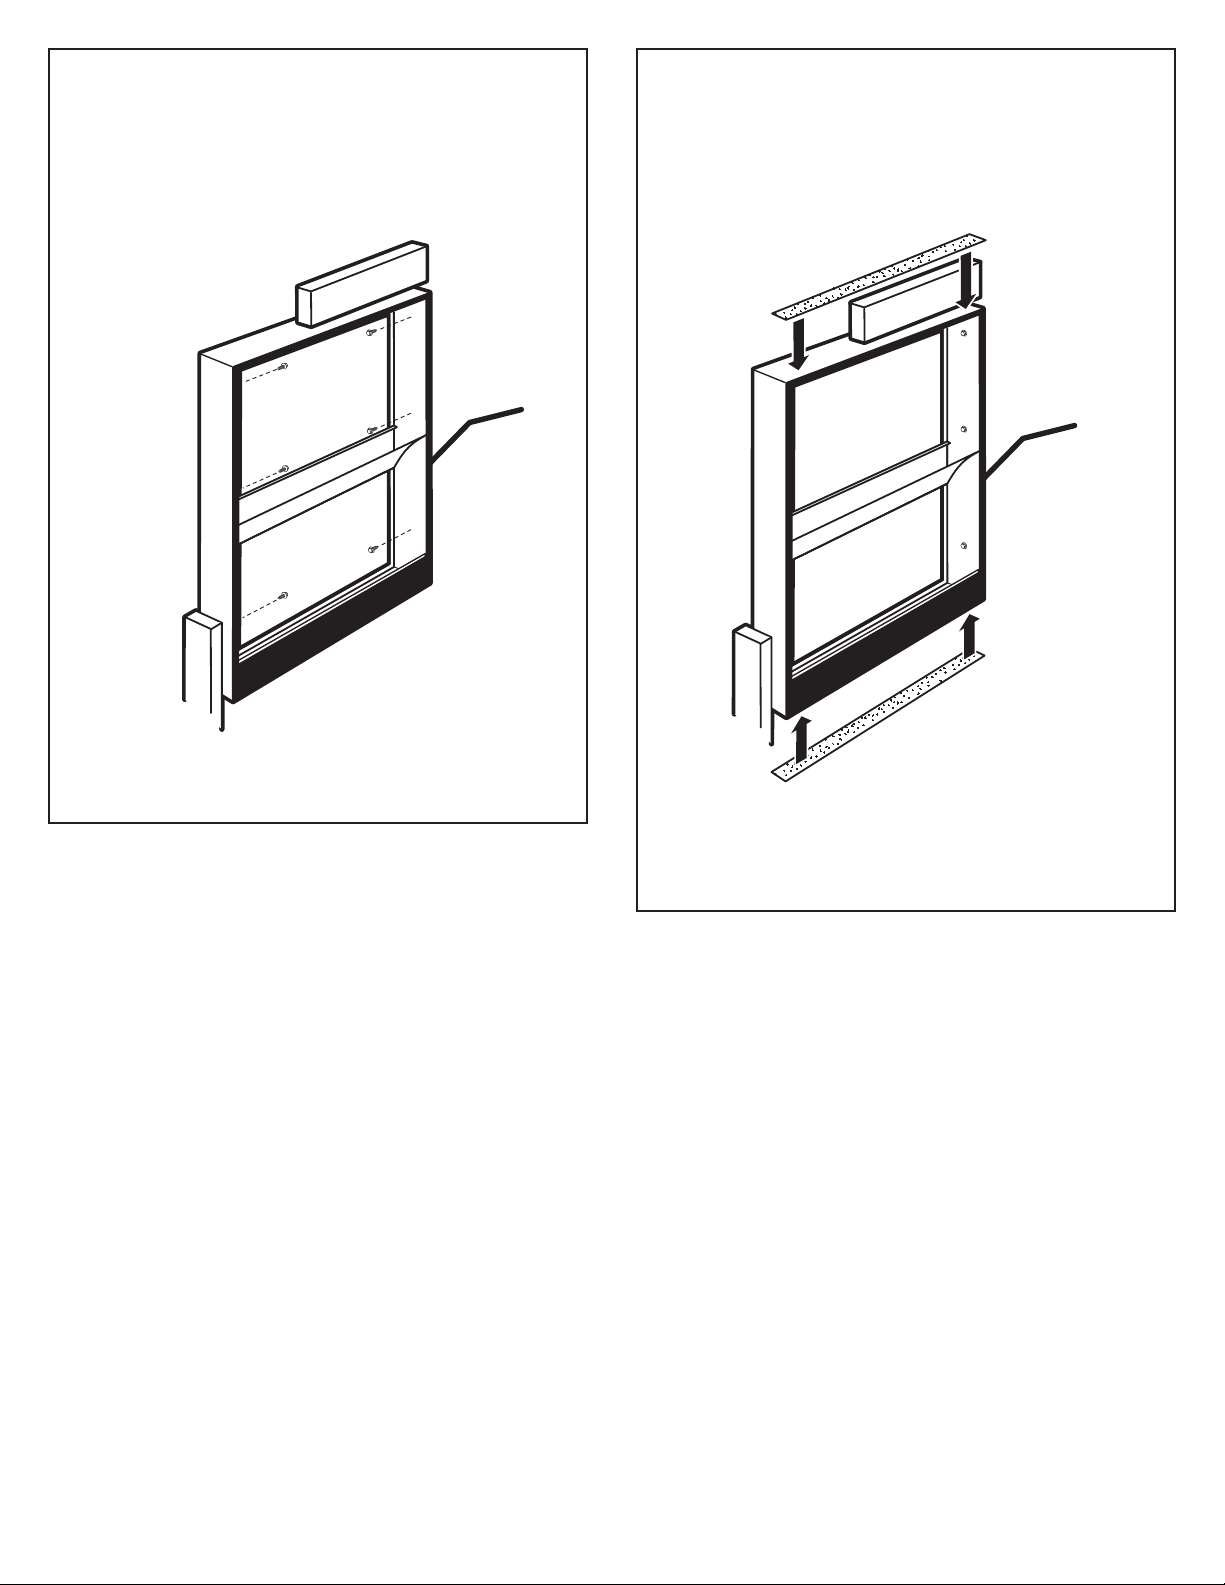
Step 2
Install the plenum
1. Before caulking and permanent attachment,
place the plenum into the cutout hole and check
for fit and level.
2. Insert the plenum into the cutout opening with
1/4” minimum protruding from the external wall.
Side view
Outside
1/4” min.
(continued on next page)
3
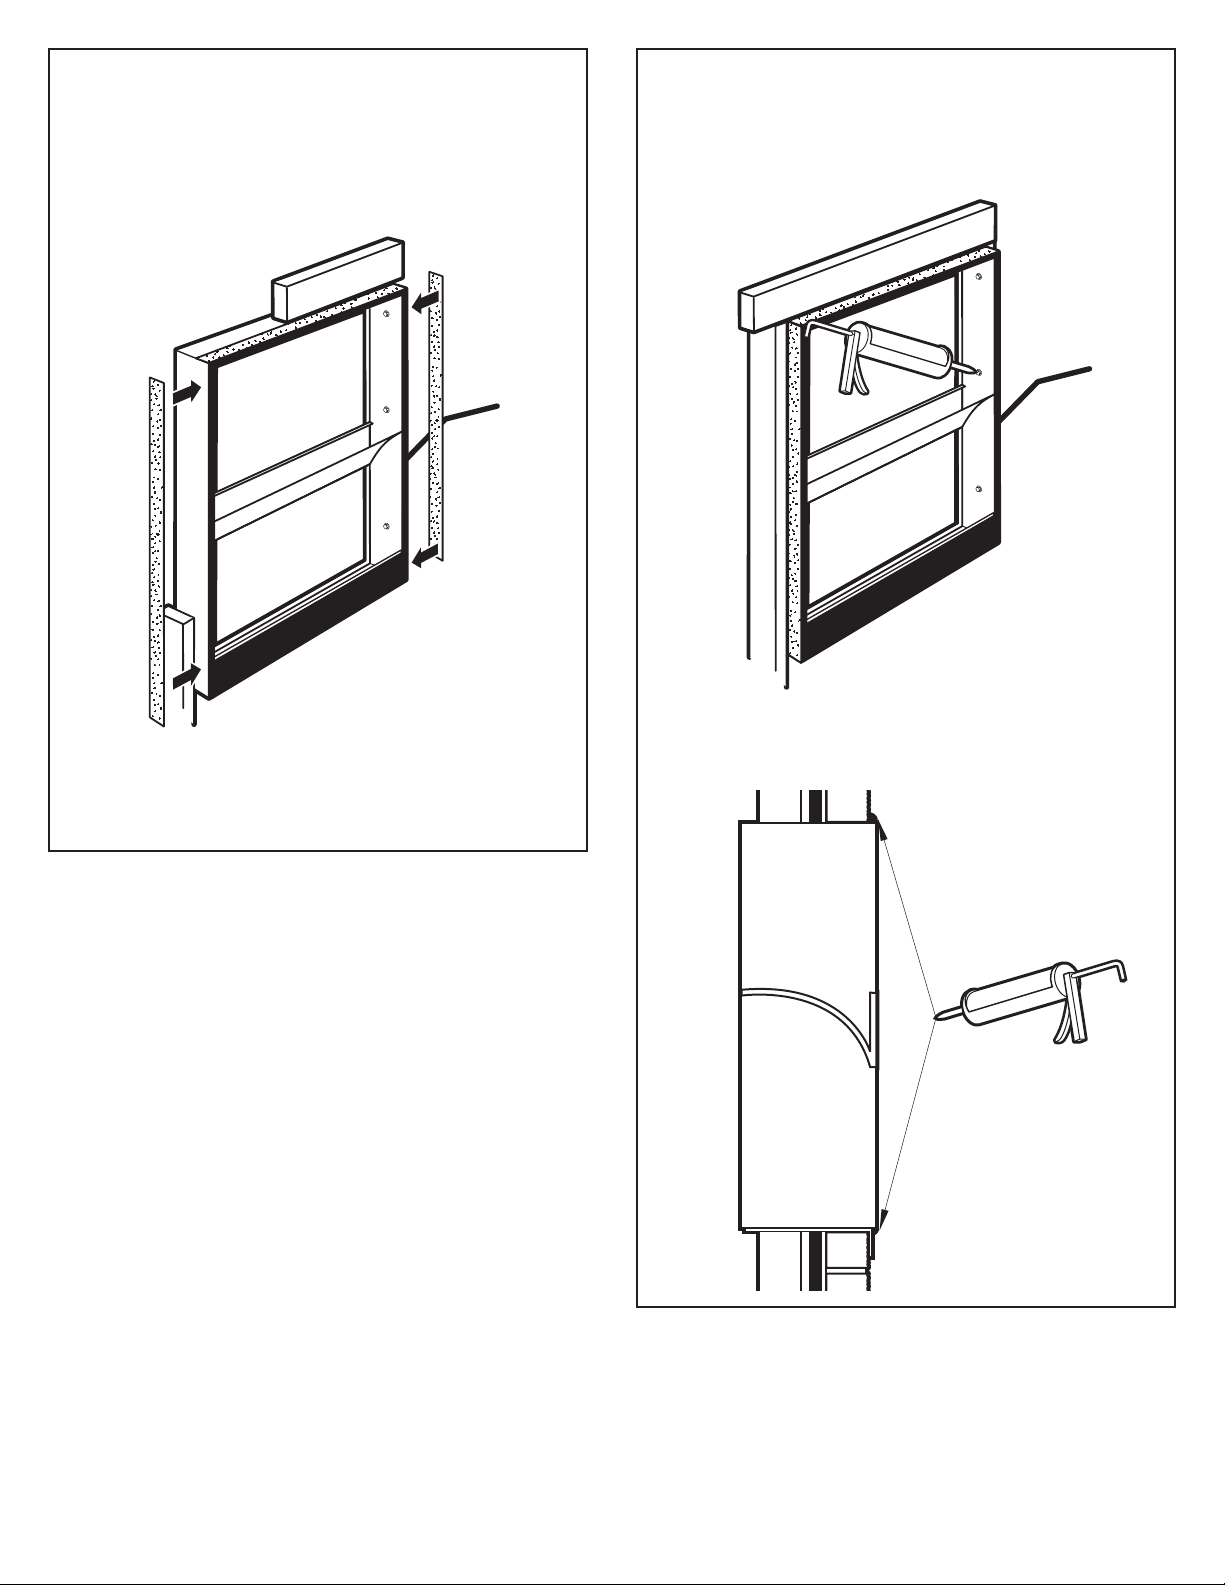
Step 2
Install the plenum (cont.)
3. Attach the sides of the plenum to the wall studs
using 6 screws. Use 3 screws on each side.
Do not use screws in the plenum top or bottom.
NOTE: Pilot holes may need to be drilled through the
plenum and into the frame.
(continued on next page)
Step 3
Install the insulating foam strips
1. Measure and cut the shorter (top and bottom)
foam strips to match the depth of the plenum
that is exposed in the interior wall.
2. Peel off the backing and apply the foam strips to
the top and bottom of the plenum along the front
edges and against the interior walls.
4
Step 4
Seal the plenum
1. Caulk the 6 screw heads and any gaps on the
inside.
2. From the outside, caulk all exterior gaps between
the plenum and the wall.
Step 3
Install the insulating foam strips (cont.)
3. Measure and cut the longer (left and right) side
foam top strips to match the depth of the plenum
that is exposed in the interior wall.
4. Peel off the backing and apply the foam strips to
each side of the plenum along the front edges
and against the interior walls.
Aperçu de
l’installation
Chevêtre approprié pour
le support structurel.
Appliquer le bon mastic et
le bon solin.
Aligner et mettre de niveau
correctement le plenum
Évent à lames
architectural
Extérieur/Mur
extérieur
Plenum mural
Bandes de mousse isolantes
• Haut et bas (2)
• Côtés (2)
(couper pour assortir la
profondeur de plénum exposé
dans le coffret intérieur)
coffret
RAVWP6 – 15 cm profondeur x 50 cm de large x 81 cm de haut
RAVWP8 – 20 cm profondeur x 50 cm de large x 81 cm de haut
RAVWP12 – 25 cm profondeur x 50 cm de large x 81 cm de haut
RAVWP15 – 32,5 cm profondeur x 50 cm de large x 81 cm de haut
REMARQUE : Le plenum présente
un couvercle de protection contre
les intempéries en carton ciré.
Ne pas retirer ce couvercle avant
d’être prêt à installer l’évent à
lames architectural.
1
Instructions d’installation RAVWP6 – 15 cm de profondeur
pour votre nouveau plénum mural RAVWP8 – 20 cm de profondeur
RAVWP12 – 30 cm de profondeur
RAVWP15 – 38 cm de profondeur
Avant de commencer – Lire attentivement ces instructions dans leur intégralité
IMPORTANT – OBSERVER TOUTES LES RÉGLEMENTATIONS ET ORDONNANCES EN VIGUEUR.
Remarque pour l’installateur – S’assurer de laisser ces instructions au client.
Remarque pour le consommateur – Garder ces instructions avec le manuel utilisateur pour
référence ultérieure.
LE PLÉNUM MURAL NE FONCTIONNE QUE S’IL EST INSTALLÉ CORRECTEMENT. S’ASSURER DE
L’INSTALLER DANS LA BONNE ORIENTATION COMME ILLUSTRÉ.
Pub No. 31-60912-1 08-10 GE
Outils nécessaires (selon l’installation)
• Règle ou mètre • Niveau
• Tournevis • Perceuse
• Marteau • Scie
• Crayon
Pièces nécessaires
• Solin • Cales
• Matériau d’étanchéité (silicone)
• Matériaux de chevêtre et de charpente
• Vis de fixation (6) du plenum au mur
2
Étape 1
Mesurer, couper et charpenter l’ouverture du
plenum mural
• Mesurer et marquer sur l’intérieur du mur
extérieur du coffret les dimensions de découpe du
plenum comme illustré ci-dessous.
IMPORTANT : Le plénum mural n’est pas conçu
pour supporter des charges structurelles. Une
ouverture appropriée pour le chevêtre doit être
intégrée à l’ouverture grossière. Le plenum
nécessite du solin, des cales et du mastic pour
assurer une installation résistant aux intempéries.
REMARQUE : Il relève de la responsabilité de
l’installateur d’installer correctement le plénum
et de respecter les spécifications du code du
bâtiment.
20”
32¼”
Intérieur du coffret, en
regardant dans la découpe
grossière de plénum mural
Mur
extérieur
Étape 2
Installation du plenum
1. Avant de mettre du mastic et de le fixer de
manière permanente, placer le plénum dans le
trou découpé et vérifier son ajustement et son
niveau.
2. Insérer le plénum dans la découpe en le faisant
dépasser au minimum de 6 mm du mur externe.
Vue de côté
Extérieur
6 mm min
(suite page suivante)
3
Étape 2
Installation du plenum (suite)
3. Fixer les côtés du plenum aux poteaux de cloison
avec 6 vis. Utiliser 3 vis de chaque côté. Ne pas
utiliser de vis dans le haut ou le bas du plenum.
REMARQUE : Des trous d’implantation peuvent
avoir à être percés dans le plenum et dans la
charpente.
(suite page suivante)
Étape 3
Installation des bandes de mousse isolante
1. Mesurer et couper les bandes de mousse plus
courtes (haut et bas) en fonction de la profondeur
du plenum qui est exposée dans le mur intérieur.
2. Détacher le support et appliquer les bandes de
mousse sur le haut et le bas du plenum le long
des bords avant et contre les murs intérieurs.

4
Step 4
Seal the plenum
1. Mettre du mastic sur les 6 têtes de vis et dans les
espaces de joint à l’intérieur.
2. De l’extérieur, mettre du mastic dans les espaces
de joint extérieurs entre le plenum et le mur.
Étape 3
Installation des bandes de mousse isolante
(suite)
3. Mesurer et couper les bandes de mousse plus
courtes (haut et bas) pour correspondre à la
profondeur du plenum qui est exposé dans le
mur intérieur.
4. Écarter le support et appliquer les bandes de
mousse sur chaque côté du plenum le long des
bords avant et contre les murs intérieurs.