Loading ...
Loading ...
Loading ...
10
Fig. 2.21
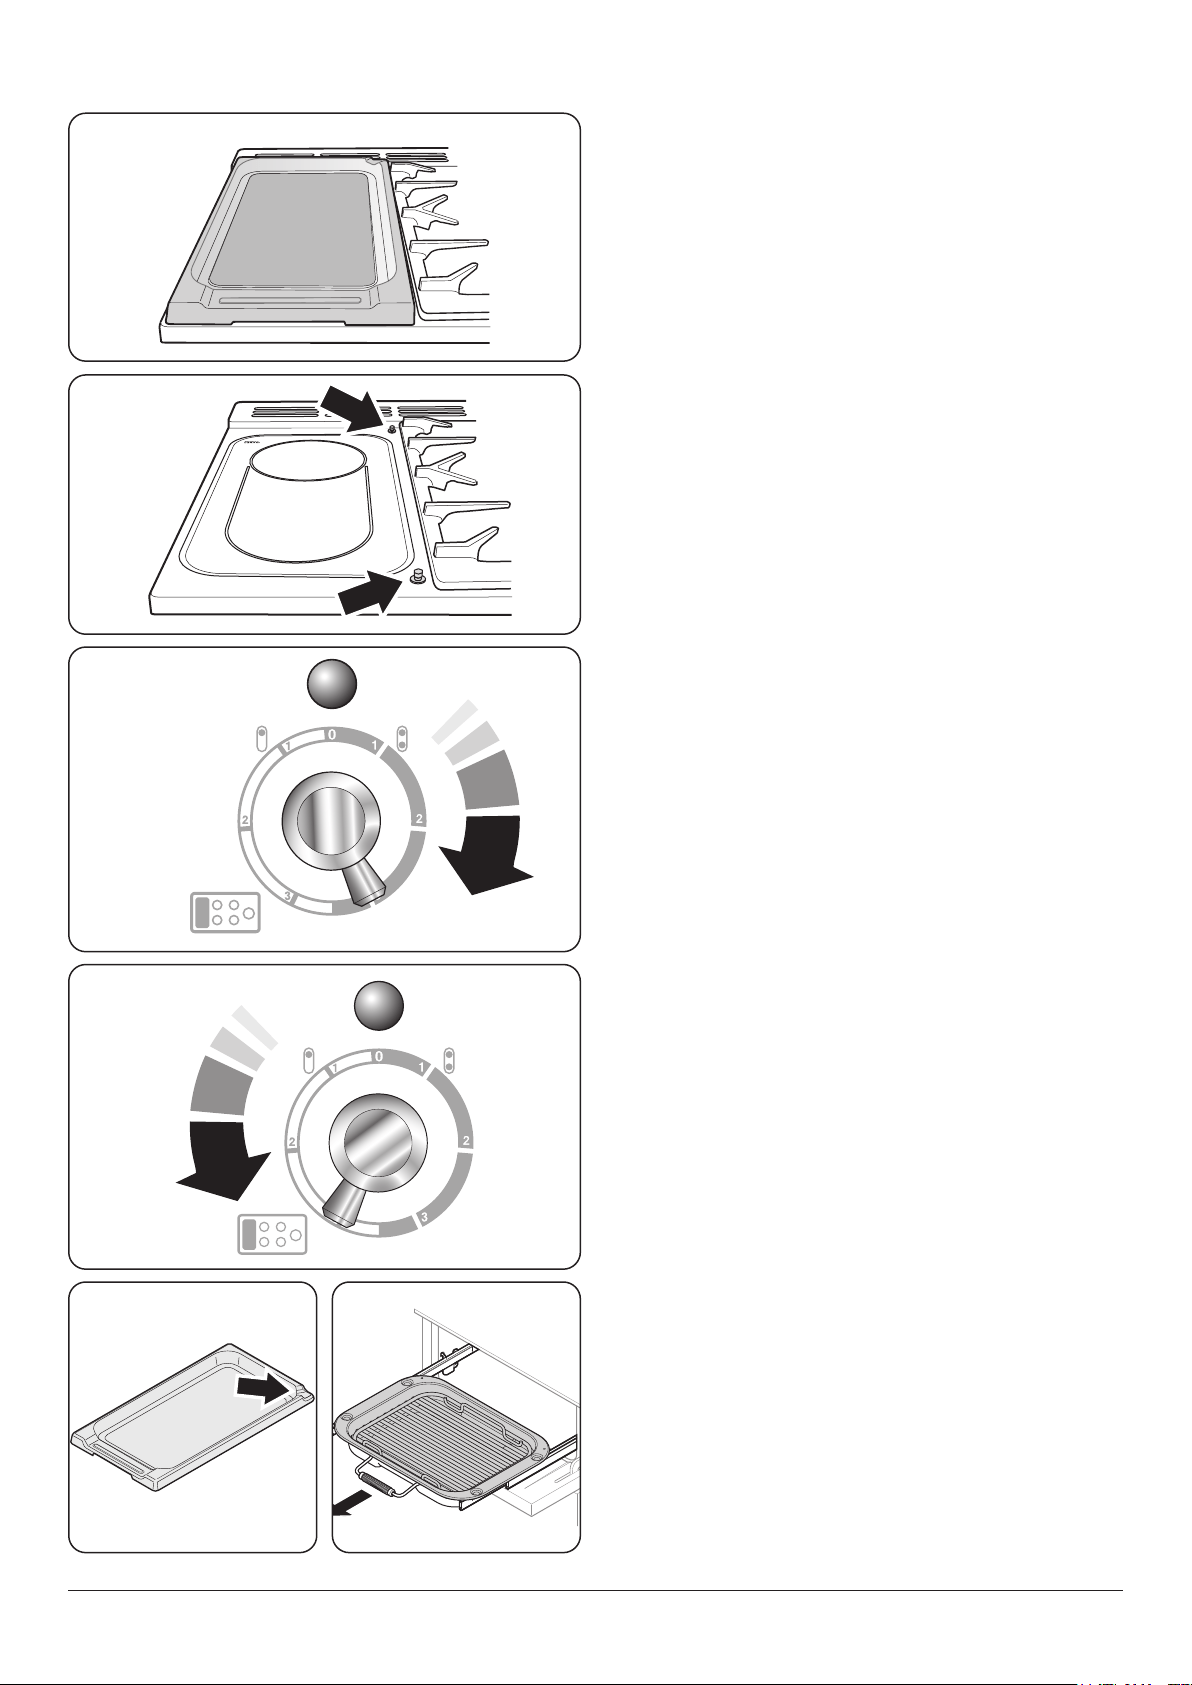
The Griddle Plate
The griddle plate (Fig. 2.16) is designed to t securely on
the locating pins over the ceramic heating area (Fig. 2.17).
Do not try to use it over one of the gas burners. It will not be
securely held and you may damage the non-stick nish.
There are two elements that allow either the whole of the
area to be heated or just the rear half.
To heat the whole area, turn the knob clockwise (Fig. 2.18).
To heat the rear ring only, turn it counter-clockwise
(Fig. 2.19).
The neon indicator light above the control knob will come on
when a hob control is turned on and stay lit while the surface
cools.
It is designed for cooking food on directly. DO NOT use pans
of any kind on it. The griddle plate surface is non-stick and
metal cooking utensils (e.g. spatulas) will damage the surface.
Use heat resistant plastic or wooden utensils.
The griddle plate can be lightly brushed with cooking oil
before use.
Preheat the griddle plate for a maximum of 5 minutes
before adding food. Leaving it longer may cause damage.
There is a gap at the right-hand rear corner of the griddle
plate (Fig. 2.20) so you can pour o excess fat after cooking.
Be careful – it may be very hot.
After cooking, allow the griddle plate to cool before cleaning.
The Glide-out Grill™ (Fig. 2.21)
n
WARNING: When the trivet has been removed from
the grill pan, please ensure that the grill pan and
cradle are fully returned into the grill chamber. The
grill pan door MUST remain open.
n
Accessible parts may be hot when the broiler is in
use. Young children should be kept away.
n
Never close the grill door when the grill is on.
1. For best results, slide the carriage back into the grill
chamber and preheat the appropriate part(s) of the grill
for two minutes. The grill trivet can be removed and the
food placed on it while you are waiting for the grill to
preheat.
2. DO NOT leave the grill on for more than a few moments
without the grill pan underneath it, otherwise the knobs
may become hot.
3. Once the grill has preheated, slide the carriage out
again. With the trivet back in place with the food on it,
slide the carriage back into the grill chamber. Make sure
that it is pushed right in.
The grill pan trivet can be turned to give four grilling heights
by a combination of turning it back to front and turning it
upside down. See chapter Using the Glide-out Grill™.
Fig. 2.16
Fig. 2.17
Fig. 2.18
Fig. 2.19
Fig. 2.20
Loading ...
Loading ...
Loading ...