Loading ...
Loading ...
Loading ...
ENGLISH INSTRUCTIONS FOR USE
6 MA10 12E - 107408647
11/2015
MAINTENANCE
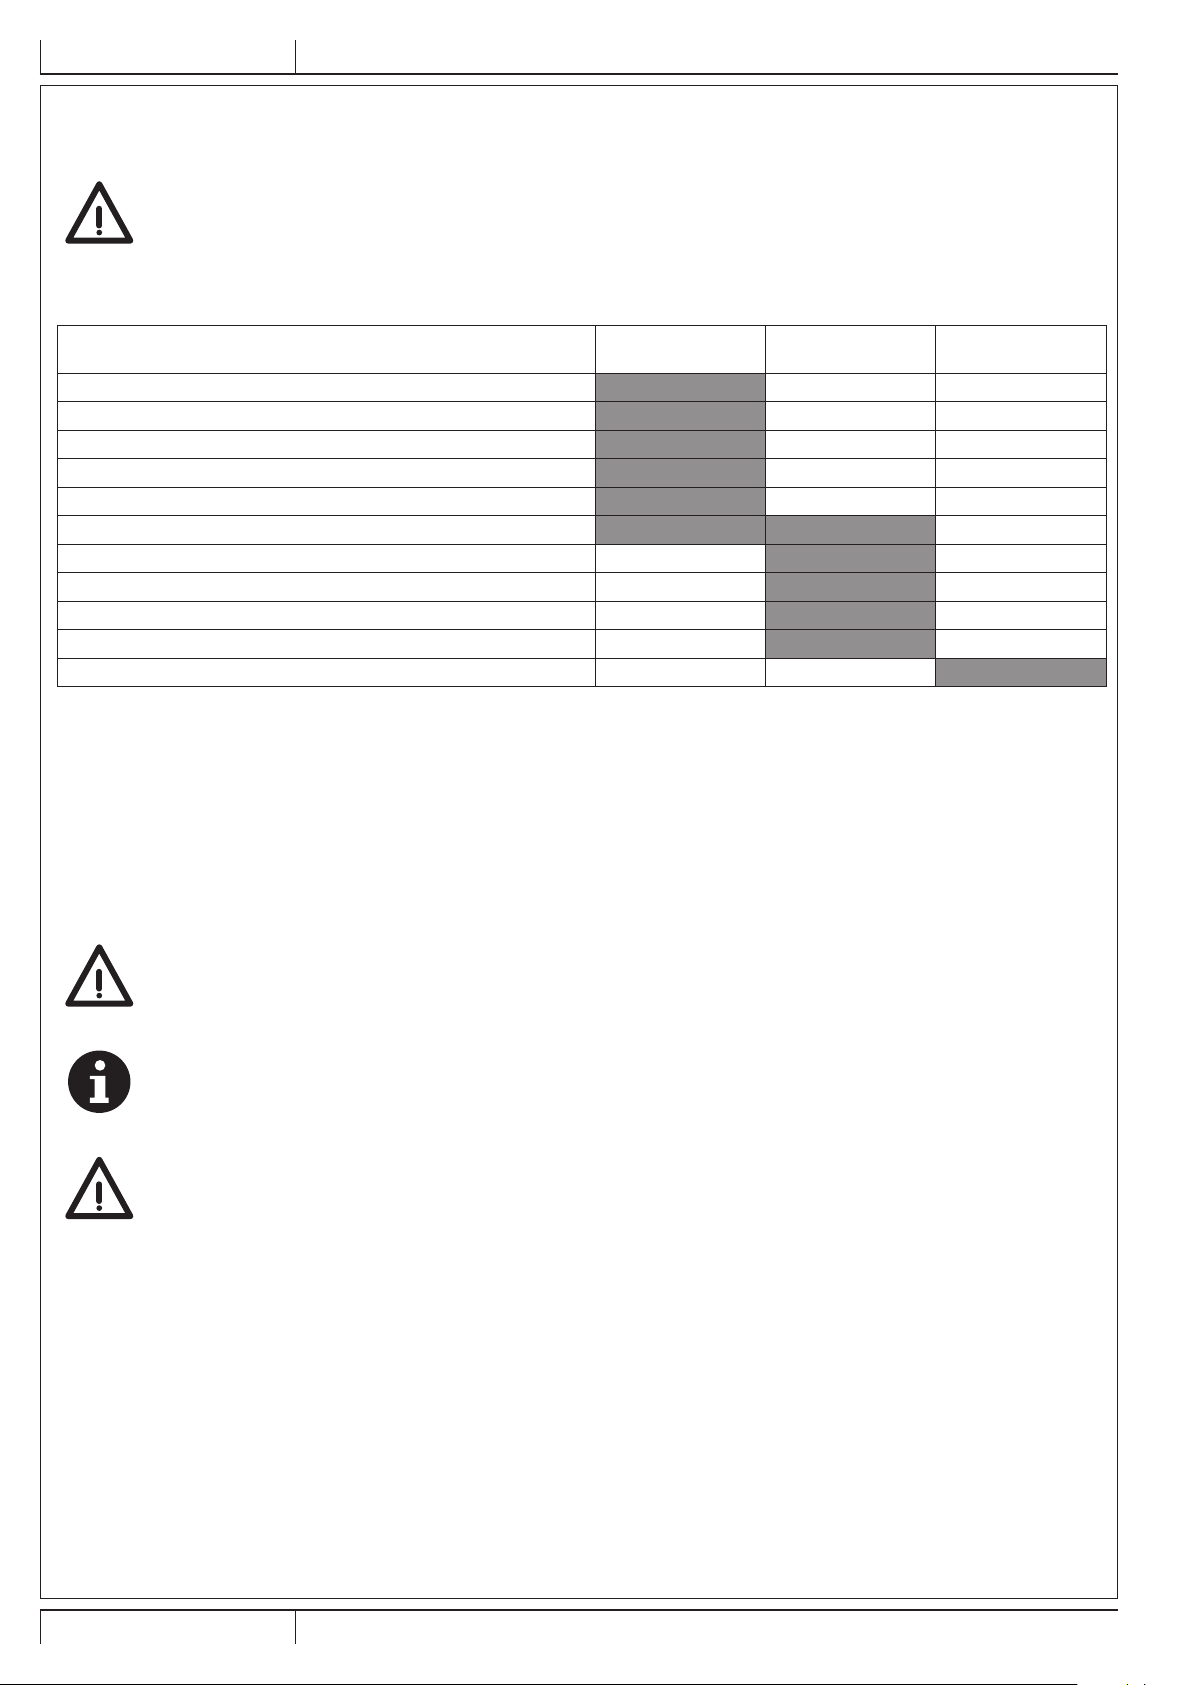
The lifespan of the machine and its maximum operating safety are ensured by correct and regular maintenance. The following chart
provides the scheduled maintenance. The intervals shown may vary according to particular working conditions.
WARNING!
Maintenance procedures must be performed with the machine switched off and the power supply cable plug
disconnected from the electrical mains.
Moreover, carefully read the instructions in the Safety chapter.
SCHEDULED MAINTENANCE TABLE
Procedure
Daily, after using the
machine
Weekly Every six months
Squeegee bar cleaning
Brush Cleaning
Recovery tank cleaning
Brush compartment and inspection compartment cleaning
Power supply cable check
Inspection compartment cleaning
Squeegee bar check
Solution lter cleaning
Air lter cleaning
Solution tank cleaning
Squeegee bar replacement
POWER SUPPLY CABLE CHECK
1. Carefully check the power supply cable (4) and the relevant
plug for wear, cuts, cracks or other damages.
If the power supply cable or the relevant plug is damaged,
contact the Clarke Service Center before using the
machine again.
SQUEEGEE BAR CLEANING
(Figure 5)
CAUTION!
It is advisable to wear protective gloves when
cleaning the squeegee bars because there can be
sharp debris.
NOTE
The squeegee bars must be clean and the blades
must be in good conditions in order to get a good
drying.
CAUTION!
The squeegee bars are fastened to the machine
with a snap system and can be easily removed.
1. Set the machine to stop position.
2. Make sure that the power supply plug is disconnected from
the electrical mains.
3. Lower the squeegee bars (16) with the pedal (7).
4. Lower the machine to reach the lower side of the cleaning
deck (13).
5. Remove the squeegee bars (16) by pulling outwards.
6. Clean and wash the squeegee bars. In particular, clean
the compartments (A) and the vacuum hole (B). Check the
blades for integrity, cuts and tears; if necessary replace the
squeegee bars.
7. Install the squeegee bars (16) and make sure they are
properly engaged.
BRUSH AND BRUSH COMPARTMENT
CLEANING
(Figure 7)
1. Lower the machine to reach the lower side of the cleaning
deck (13).
2. Turn the lever (A) counter-clockwise and remove the brush.
3. Clean and wash the brush (15) with water and detergent.
4. Check the brush bristles for integrity and wear; if
necessary, replace the brush.
5. Carefully clean the brush compartment (B).
6. Disassemble the solution dispensers (C) and clean them
with water and detergent, then rinse and reassemble in the
relevant housings.
7. Install the brush (15) on the drive hub (D) and engage it by
turning the lever (E) clockwise.
INSPECTION COMPARTMENT CLEANING
(Figure 8)
1. Turn the lever (A) and remove the inspection compartment
lid (17).
2. Check and clean carefully the inspection compartment (B).
3. Install the inspection compartment lid (17) and turn the
lever (C) to fasten it to the deck.
RECOVERY TANK CLEANING
(Figure 9)
1. Remove the tank assembly from the machine body by
using handle (8).
2. Separate the solution tank (9) from the recovery tank (12).
3. Open the recovery tank by prying on the hooks (A) and (B).
4. Clean with water and detergent the lower (C) and upper
(D) compartments of the tank, then rinse carefully.
5. Reassemble the components.
6. If necessary wash the solution tank (9) with clean water.
107408647(1)11-2015 A.indb 6 25/11/2015 09:22:07
Loading ...
Loading ...
Loading ...