Loading ...
Loading ...
Loading ...
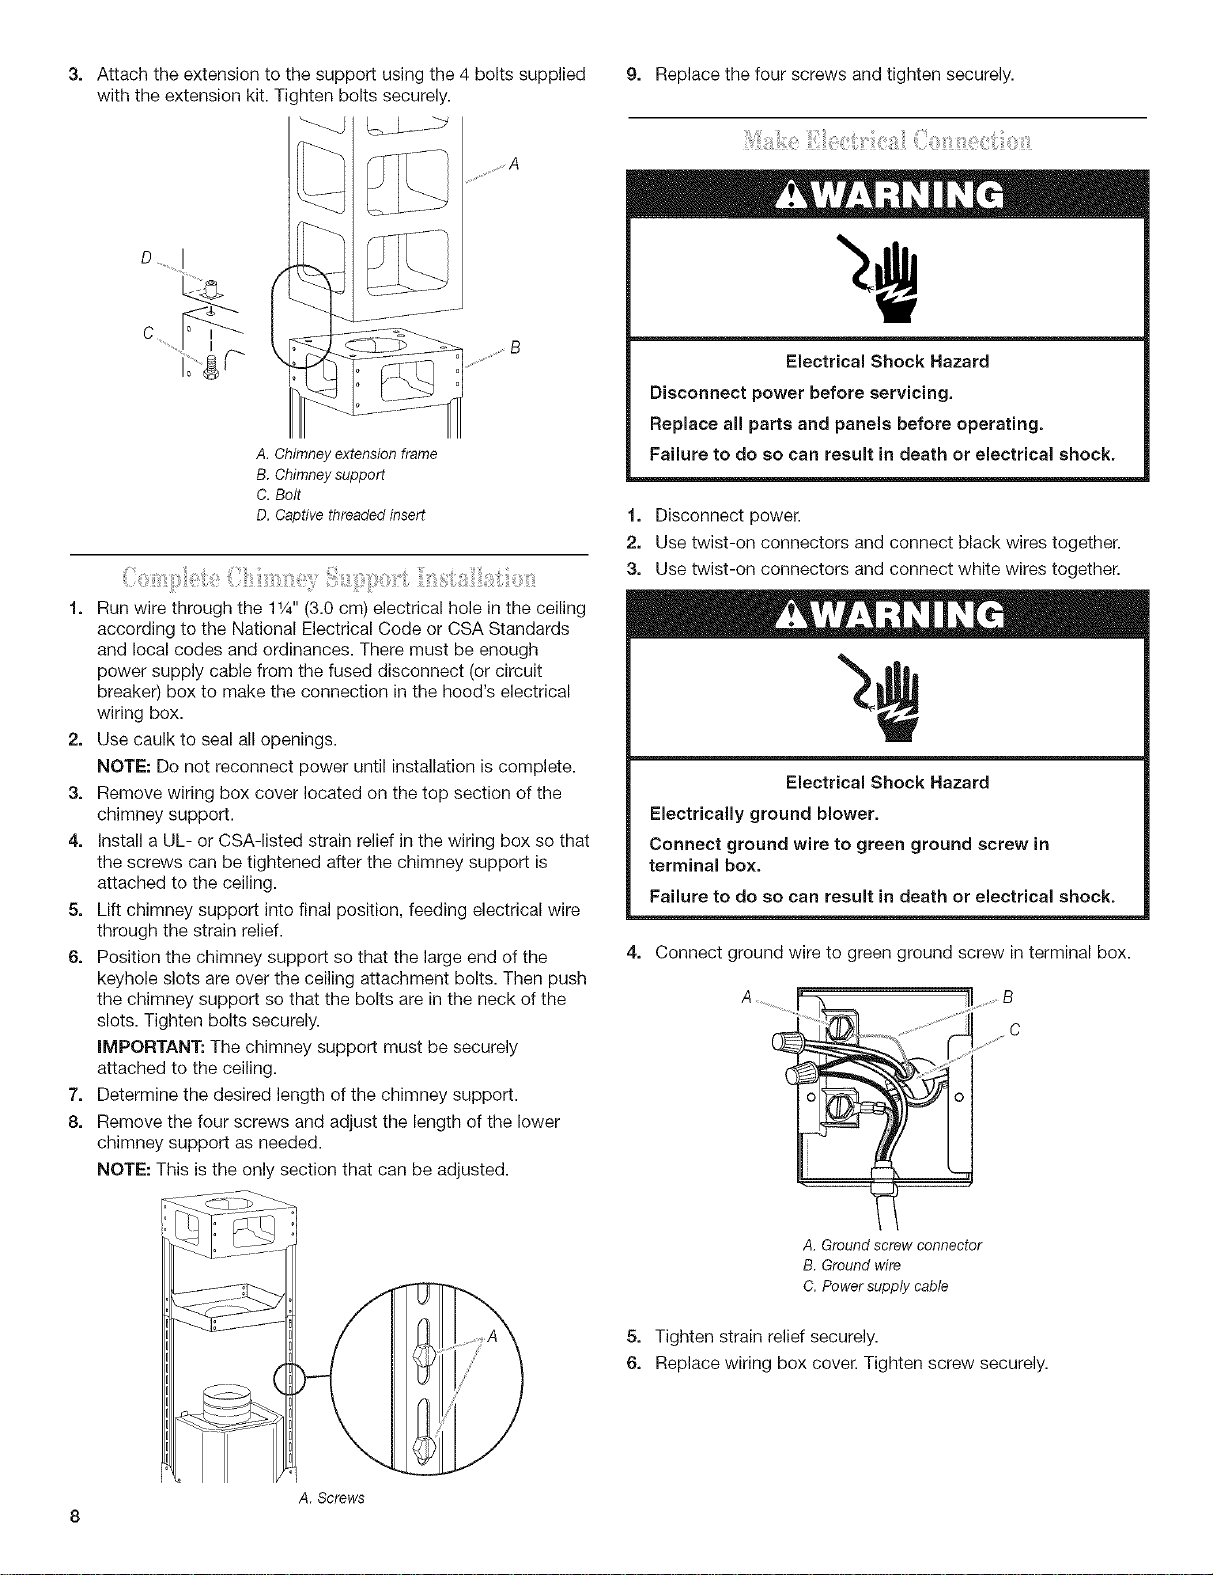
3. 9. Replacethefourscrewsandtightensecurely.Attachtheextensiontothesupportusingthe4boltssupplied
withtheextensionkit.Tightenboltssecurely.
D
C
j g
A. Chimney extension frame
B. Chimney support
C. Bolt
D. Captive threaded insert
f. Run wire through the 11/4"(3.0 cm) electrical hole in the ceiling
according to the National Electrical Code or CSA Standards
and local codes and ordinances. There must be enough
power supply cable from the fused disconnect (or circuit
breaker) box to make the connection in the hood's electrical
wiring box.
2. Use caulk to seal all openings.
NOTE: Do not reconnect power until installation is complete.
3. Remove wiring box cover located on the top section of the
chimney support.
4. Install a UL- or CSA-listed strain relief in the wiring box so that
the screws can be tightened after the chimney support is
attached to the ceiling.
5. Lift chimney support into final position, feeding electrical wire
through the strain relief.
6. Position the chimney support so that the large end of the
keyhole slots are over the ceiling attachment bolts. Then push
the chimney support so that the bolts are in the neck of the
slots. Tighten bolts securely.
IMPORTANT: The chimney support must be securely
attached to the ceiling.
7. Determine the desired length of the chimney support.
8. Remove the four screws and adjust the length of the lower
chimney support as needed.
NOTE: This is the only section that can be adjusted.
4
A.Screws
Electrical Shock Hazard
Disconnect power before servicing.
Replace all parts and panels before operating.
Failure to do so can result in death or electrical shock.
f. Disconnect power.
2. Use twist-on connectors and connect black wires together.
3. Use twist-on connectors and connect white wires together.
Electrical Shock Hazard
Electrically ground blower.
Connect ground wire to green ground screw in
terminal box.
Failure to do so can result in death or electrical shock.
4. Connect ground wire to green ground screw in terminal box.
A.Groundscrewconnector
B.Groundwire
C.Powersupplycable
5. Tighten strain relief securely.
6. Replace wiring box cover. Tighten screw securely.
Loading ...
Loading ...
Loading ...