Loading ...
Loading ...
Loading ...
TRUE RESIDENTIAL
®
TEC_TM_073 REV. B
04/15/2020Page 24 of 54
CUSTOM PANEL INSTALLATION
Required Tools:
•
Phillips Screwdriver
•
3/8" Wrench
•
1/8" Drill Bit
•
Three (3) Screws #6
SEE PAGE 16 FOR OVERLAY PANEL DIMENSIONS
BEFORE INSTALLING.
FOR EASY OVERLAY INSTALLATION, ICE MACHINE
DOOR REMOVAL IS REQUIRED.
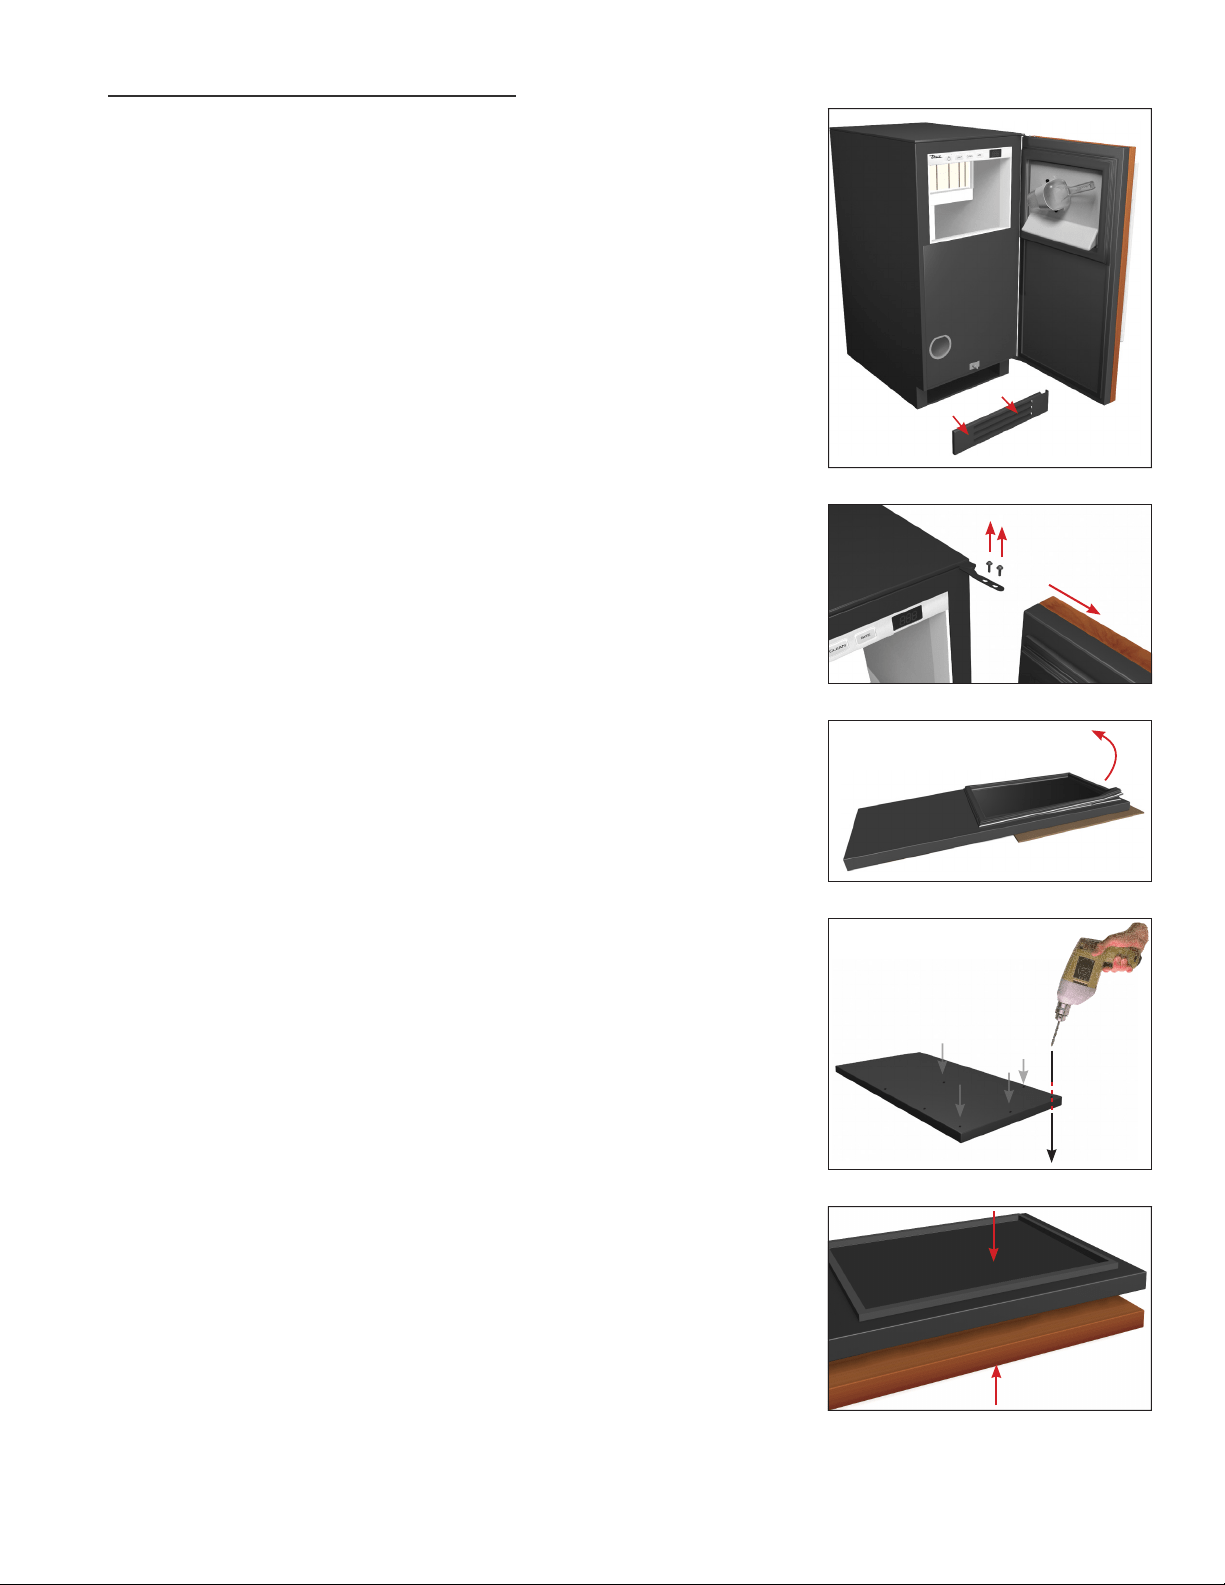
1. Open front door and pull kickplate forward
to remove.
2. To remove door, back out two bottom hinge
screws with a 3/8" wrench. Secure door while
removing screws. Remove two Phillips screws
from the top hinge. Save all these screws for later
reinstall.
3. Lay door on a safe solid surface. Lay cardboard
or other safe material down before working on
the door.
4. Remove door gasket from the inside of the door
frame. Place gasket to the side for later reinstall.
5. There are pre-marked areas on the front of the
door. Drill these pre-marked holes with 1/8" drill
bit. Make sure to drill all the way through the
door.
NOTE: IF HANDLE IS BEING USED ON OVERLAY,
INSTALL IT BEFORE STEP 8 (SEE IMAGE A ON
PAGE 22). FOR BEST INSTALLATION, SCREWS
ATTACHING HANDLE SHOULD BE RECESSED.
6. It is recommended to clamp the door front on
top of the overlay before drilling pilot holes and
installing anchor screws. The clamp ensures the
overlay panel and door stay aligned with each
other while installing. Once panel is clamped in
place, pilot holes may be drilled into the panel
from the rear side of the door. Mark to only drill
1/2" into rear side of door.
1
3 & 4
2
Remove screws
from top and
bottom hinge
6
5
Loading ...
Loading ...
Loading ...