
Loading ...
Loading ...
Loading ...
Touchscreen Tips
• Drag up or down to scroll through lists and menus.
• Swipe up or down to scroll quickly.
• Tap to select an item.
• From the watch face, swipe up or down to scroll through the glances on the watch.
• Tap a glance to view additional information, if available.
• During an activity, swipe up or down to view the next data screen.
• During an activity, swipe right to view the watch face and glances, and swipe left to return to the activity data
fields.
• When available, select or swipe up to view additional menu options.
• Perform each menu selection as a separate action.
Locking and Unlocking the Touchscreen
You can lock the touchscreen to prevent inadvertent screen touches.
1 Hold to view the controls menu.
2 Select .
The touchscreen locks and does not respond to touches until you unlock it.
3 Hold any button to unlock the touchscreen.
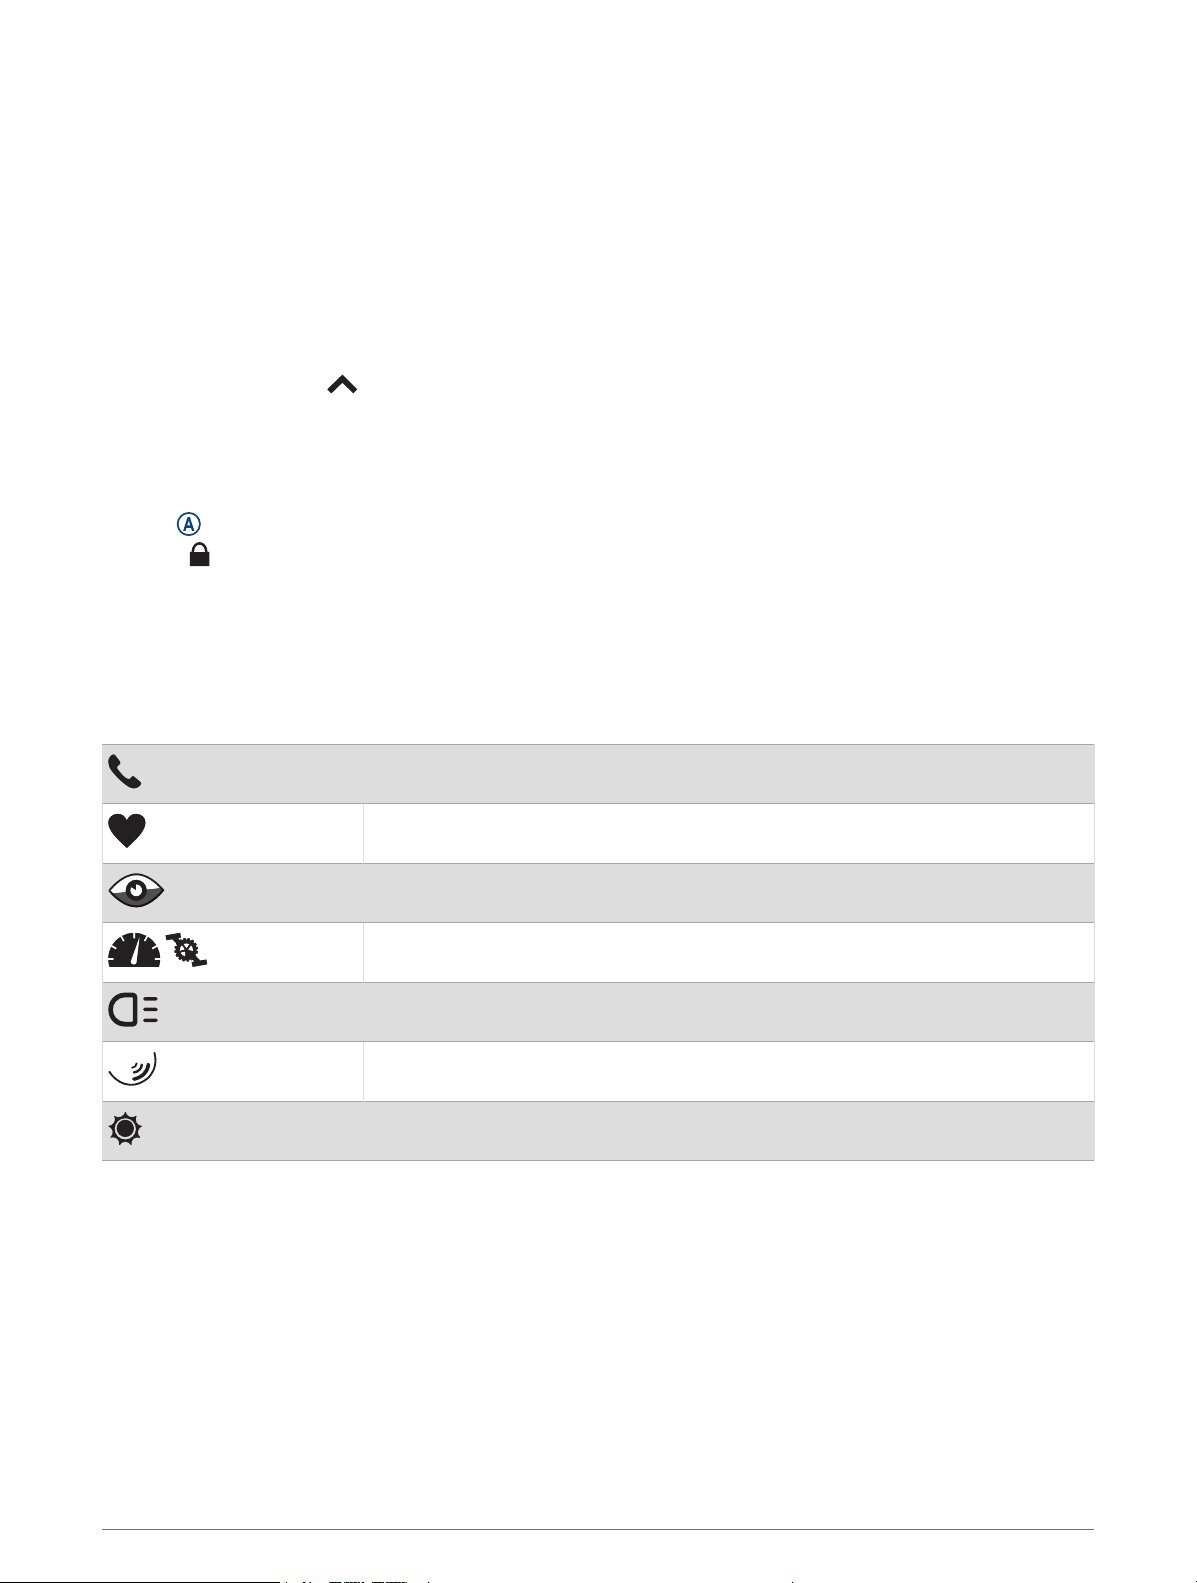
Icons
A flashing icon means the watch is searching for a signal. A solid icon means the signal was found or the
sensor is connected. A slash through an icon means the feature is turned off.
Phone connection status
Heart rate monitor status
LiveTrack status
Speed and cadence sensor status
Varia
™
bike light status
Varia bike radar status
tempe
™
sensor status
Setting Up Your Watch
To take full advantage of the Venu 2 series features, complete these tasks.
• Pair the watch with your phone using the Garmin Connect
™
app (Pairing Your Phone, page 3).
• Set up Wi‑Fi
®
networks (Connecting to a Wi‑Fi Network, page 6).
• Set up music (Music, page 8).
• Set up your Garmin Pay
™
wallet (Setting Up Your Garmin Pay Wallet, page 10).
• Set up safety features (Safety and Tracking Features, page 12).
2 Introduction
Loading ...
Loading ...
Loading ...