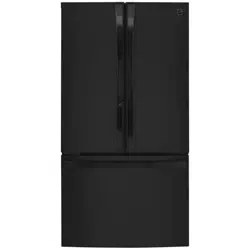
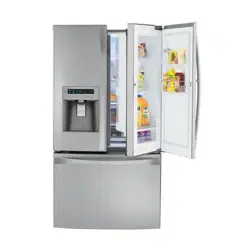
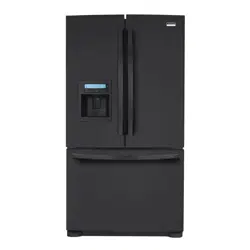
User Manual Kenmore 79579043312 Refrigerator

Kenmore 79579043312 Refrigerator - Use Manual - Use Guide PDF.
Documents: Go to download!
  • Owner's manual - (English, Spanish)

file thumbnail

User Guide Kenmore 79579043312 Refrigerator

Table of contents

  • Warranty
  • Protection Agreements
  • Important Safety Instructions
  • Electrical & Grounding Requirements
  • Parts and Features
  • Refrigerator Installation
  • Unpacking Your Refrigerator
  • Installation
  • Removing/Replacing Your Refrigerator and
  • Freezer Handles, Doors and Drawers
  • Reversing Doors and Handles
  • Drawer Model)
  • Reversing Doors and Handles
  • Swing Model)
  • Leveling and Door Alignment
  • Using Your Refrigerator
  • Setting the Controls
  • Automatic Icemaker
  • Food Storage Guide
  • Refrigerator Section
  • Adjusting Shelves
  • Humidity Controlled Crisper
  • Pantry Drawer
  • Door Bins
  • Dairy Bin
  • Freezer Section
  • Ice Bin
  • Pullout Drawer
  • Durabase
  • Durabase Divider
  • Care And Cleaning
  • General Cleaning Tips
  • Exterior
  • Inside Walls
  • Door Liner And Gaskets
  • Plastic Parts
  • Condenser Coils
  • Light Replacement
  • Power Interruptions
  • When You Go On Vacation
  • When You Move
  • Connecting the Water Line
  • Troubleshooting Guide
  • Kenmore Connect
  • Service

REFRIGERATOR WARRANTY

  • Kenmore Elite Limited Warranty
  • When this appliance is installed. operated and maintained according to all supplied instructions. the following warranty coverage applies.
  • To arrange for warranty service. call 1-800-4-MY-HOME® (1-800-469-4663).
  • One Year Limited Warranty on Appliance For one year from the date of purchase. free repair will be provided if any non-consumable part of this appliance fails due to defects in material or workmanship.
  • If the appliance is ever used for other than private family purposes. this coverage applies for only 90 days from the purchase date.
  • Five Year Limited Warranty on Sealed System For five years from the date of purchase. the sealed refrigerant system of this appliance is warranted against any defects in material or workmanship.
  • New system components will be supplied for defective ones free of charge.
  • You are responsible for the labor cost of component installation after the first year from the date of purchase.
  • If the appliance is ever used for other than private family purposes. this coverage applies for only one year from the purchase date.
  • Ten Year Limited Warranty on Linear Compressor For ten years from the date of purchase. the linear compressor of this appliance is warranted against any defects in material or workmanship.
  • A new linear compressor will be supplied free of charge. You are responsible for the labor cost of installation after the first year from the date of purchase. If the appliance is ever used for other than private household purposes. this coverage applies for only two years from the purchase date.

This warranty covers only defects in material and workmanship. and will NOT pay for:

1. Consumable parts that can wear out from normal use. including but not limited to filters. belts. light bulbs. and bags.

2. A service technician to instruct the user in correct product installation. operation or maintenance.

3. A service technician to clean or maintain this product.

4. Damage to or failure of this product if it is not installed. operated or maintained according to all instructions supplied with the product.

5. Damage to or failure of this product resulting from accident. abuse. misuse or use for other than its intended purpose.

6. Damage to or failure of this product caused by the use of detergents. cleaners. chemicals or utensils other than those recommended in all instructionssupplied with the product.

Master Protection Agreements

  • Congratulations on making a smart purchase.
  • Your new Kenmore Elite ® product is designed and manufactured for years of dependable operation.
  • But like all products. it may require preventive maintenance or repair from time to time. That's when having a Master Protection Agreement can save you money and aggravation.
  • The Master Protection Agreement also helps extend the life of your new product.
  • Here's what the Agreement* includes:
  • Parts and labor needed to hetp keep products operating properly under normal use. not just defects.
  • Our coverage goes well beyond the product warranty.
  • No deductibles. no functional failure excluded from coverage real protection.
  • Expert service by a force of more than 10. 00 authorized Sears service technicians. which means someone you can trust will be working on your product.
  • Unlimited service calls and nationwide service. as often as you want us. whenever you want us.
  • "No-lemon" guarantee replacement of your covered product if four or more product failures occur within twelve months.
  • Product replacement if your covered product can't be fixed.
  • Annual Preventive Maintenance Check at your request no extra charge.
  • Fast help by phone - we call it Rapid Resolution phone support from a Sears representative on all products.
  • Think of us as a "talking owner's manual."
  • Power surge protection against electrical damage due to power fluctuations.

BASIC SAFETY PRECAUTIONS

  1. This guide contains many important safety messages. Always read and obey all safety messages.
  2. This is the safety alert symbol.
  3. It alerts you to safety messages that inform you of hazards that can kill or hurt you or others. or cause damage to the product.
  4. All safety messages will be preceded by the safety alert symbol and the hazard signal word DANGER.

PRIOR TO USE

1. Clean your refrigerator thoroughly and wipe off all dust that accumulated during shipping.

2. install accessories such as ice cube bin. drawers. shelves. etc. in their proper places.

They are packed together to prevent possible damage during shipment.

3. Allow your refrigerator to run for at least two to three hours before putting food in it. Check the flow of cold air in the freezer compartment to ensure proper cooling.

Your refrigerator is now ready for use.

  • The refrigerator should always be plugged into its own individual properly grounded electrical outlet rated for 115 Volts. 60 Hz. AC only. and fused at 15 or 20 amperes.
  • This provides the best performance and also prevents overloading house wiring circuits which could cause a fire hazard from overheated wires.
  • It is recommended that a

Shock Hazard:

  • To reduce the risk of electric shock. do not install the refrigerator in a wet or damp area.

NOTE:

  • installing on carpeting. soft tile surfaces. a platform or weakly supported structure is not recommended.
  • Select a place where a water supply can be easily connected for the automatic Jcemaken

NOTE:

  • The water pressure must be between 20 and 120 psi on models without a water filter and between 40 and 120 psi on models with a water filter.
  • Too small of a distance from adjacent items may result in lowered freezing capability and increased electricity consumption charges.
  • Allow at least 33 3¼ inches (86 cm) in front of the refrigerator to open the doors and at least 2 inches (5.08 cm) between the back of the refrigerator and the wail.

Replacing Freezer Drawer Handle

  • Place the handle on the door by fitting the handle footprints over the mounting fasteners and tightening the set screws with a 1/8 in. Alien wrench.

NOTE:

  • If the handle mounting fasteners need to be tightened or removed. use a 1/4 in. Alien wrench.
  • When assembling or disassembling the handles:
  • Grasp the handle firmly to ensure it will not drop or cause injury.
  • Prevent the handle from swinging toward nearby people or animals.
  • Check for any gap between the door and handle after the handle is fixed in place.

HOW TO iNSTALL THE FREEZER DOOR

  • Replace the cover. Insert and tighten the cover screws (2).
  • Place the freezer door down on the bottom hinge pin.
  • Bottom Hinge Pin
  • Replace the washer and the middle hinge bracket.
  • Use a 10 mm or 13/32 in. socket wrench to insert and
  • Screw\l Middle Hinge

HOW TO INSTALL THE FREEZER DRAWER

  1. Putt out each rail to full extension.
  2. Grasp the drawer on each side and hook the drawer supports C) into the rail tabs C) located on both sides.
  3. Remove the screw C) from the rail on both sides.
  4. Lower the door into its final position and tighten the screw C) located on both sides.
  5. Grasp the drawer on each side and putt it up to separate it from the rails.
  6. With the drawer pulled out to full extension. insert the lower basket C) in the rail assembly.
  7. With both hands. slide each bar out simultaneously.

WARNING;

  • If the Durabase divider is removed. there is enough open space for children or pets to crawl inside. To prevent accidental child and pet entrapment or suffocation risk. DO NOT allow them to touch or go near the freezer drawer.

AIRFLOW

  1. Be sure not to block vents while packing your refrigerator.
  2. Doing so will restrict airflow and may cause the refrigerator temperature to become too warm or cause interior moisture buildup. (See the air flow diagram below.)
  3. For Freezer Drawer Models < For Freezer Swing Models

TEMPERATURE

  • The Refrigerator Temp Control ranges from 33°F to 46°F (O°C to 8°C).
  • Pressthe Refrigerator Temp button to cycle through the available temperature settings one increment at a time.
  • The Freezer Temp Control range is from =6°F to 8°F (=21°C to =13°C). Pressthe Freezer Tamp button to cycle through the available temperature settings one increment at a time.
  • NOTE: When changing control settings. wait 24 hours before making additional adjustments.
  • The controls are set correctly when milk or juice is as cold as you would like and when ice cream is firm.
  • If the temperature in either compartment is too cold or too warm. change the setting one increment at a time.
  • Wait 24 hours for the change to stabilize before adjusting again.

NOTE:

  • The Condiment bin is not recommended for storing items that spoil easily such as milk and mayonnaise.
  • When you press and hold the Ultra Ice button. the light will be on in the display and will continue for 24 hours.
  • The function will automatically shut off after 24 hours.
  • You can stop this function manually by pressing the button one more time.
  • This function increases both ice making and freezing capabilities.

DEMO MODE (FOR STORE USE ONLY)

  • Demo Mode disables all cooling in the refrigerator and freezer sections to conserve energy while on display in a retail store. When activated.
  • OFF will display on the control pad.

DOOR ALARM

  • When power is connected to the refrigerator. the door alarm is initially set to ON.
  • When you press the Door Alarm button. the display will change to OFF and the Door Alarm function will deactivate.
  • When either the refrigerator or the freezer door is left open for more than 60 seconds. the alarm tone will sound to let you know that the door is open.
  • When you close the door. the door alarm will stop.

To deactivate:

  • With either refrigerator door opened. press and hold the Refrigerator Temp and Ultra Ice buttons at the same time for five seconds. The control pad wilt beep and the temperature settings will display to confirm that Demo Mode is deactivated.
  • Use the same procedure to activate the Demo Mode.

TEMPERATURE MODE SWITCH FUNCTION (°F <->°C)

  • If you want to convert °F to °C or vice versa. press and hold the Freezer Temp and Refrigerator Temp buttons at the same time for approximately five seconds.

AUTOMATIC ICEMAKER

  • To turn off the automatic icemaker. set the icemaker switch to OFF (O). To turn on the automatic icemaker. set the switch to ON (I).
  • The water pressure must be between 20 and 120 psi on models without a water fitter and between 40 and 120 psi on models with a water filter to produce the normal amount and size of ice cubes.
  • Foreign substances or frost on the ice-detecting sensor can interrupt ice production.
  • Make sure the sensor area is clean at all times for proper operation.
  • Personal injury Hazard
  • DO NOT place fingers or hands on the automatic ice making mechanism while the refrigerator is plugged in.

CAUTION

  • The first ice produced may include particles or odor from the water supply line or the water tank.
  • Throw away the first few batches of ice. This is also necessary if the refrigerator has not been used for a long time.
  • If discolored ice is produced. check the water supply.
  • If the problem continues. contact a Sears or other qualified service center. Do not use the ice or water until the problem is corrected.
  • Be sure nothing interferes with the sweep of the Automatic Shut Off Arm.
  • When the bin fills to the level of the Automatic Shut
  • Off Arm. the icemaker will stop producing ice.
  • It is normal for some cubes to be stuck together.
  • If ice is not used frequently. old ice cubes will become cloudy. taste stale. and shrink.

NORMAL SOUNDS YOU MAY HEAR

  • The icemaker water valve will buzz as the icemaker fills

NOTE:

  • Keeping the power switch in the ON (I) position before the water line is connected can damage the icemaker.
  • You will hear the sound of cubes dropping into the bin and water running in the pipes as the icemaker refills.

PREPARING FOR VACATION

  • Set the icemaker power switch to OFF (O) and shut off the water supply to the refrigerator.
  • NOTE: The ice bin should be emptied anytime the icemaker ON/OFF switch is turned to the OFF (O) position.
  • If the ambient temperature will drop below freezing. have a qualified technician drain the water supply system to prevent serious property damage due to flooding caused by ruptured water lines or connections.

STORING FROZEN FOOD

  1. Check a freezer guide or a reliable cookbook for further information about preparing food for freezing or for food storage times.
  2. Freezing Your freezer will not quick-freeze a large quantity of food.
  3. Do not put more unfrozen food into the freezer than will freeze within 24 hours (no more than 2 to 3 lbs. of food per cubic foot of freezer space).
  4. Leave enough space in the freezer for air to circulate around packages.
  5. Be careful to leave enough room at the front so the door can close tightly.
  6. Storage times will vary according to the quality and type of food. the type of packaging or wrap used (how airtight and moisture-proof) and the storage temperature.
  7. Ice crystals inside a sealed package are normal.
  8. This simply means that moisture in the food and air inside the package have condensed. creating ice crystals.

NOTE:

  • Allow hot foods to cool at room temperature for 30 minutes. then package and freeze.
  • Cooling hot foods before freezing saves energy.
  • Packaging Successful freezing depends on correct packaging.
  • When you close and seal the package. it must not allow air or moisture in or out. If it does. you could have food odor and taste transfer throughout the refrigerator and could also dry out frozen food.
  • Packaging recommendations: Rigid plastic containers with tight-fitting lids Straight-sided canning/freezing jars Heavy-duty aluminum foil Plastic-coated paper Non-permeable plastic wraps Specified freezer-grade self-sealing plastic bags Follow package or container instructions for proper freezing methods.
  • Do not use Bread wrappers Non-polyethylene plastic containers Containers without tight lids Wax paper or wax-coated freezer wrap Thin. semi-permeable wrap

ADJUSTING SHELVES (SPLIT SHELF)

  • Remove shelves from the shipping position and replace shelves in the position you want.
  • To remove a shelf Tilt up the front of the shelf in the direction of C) and lift it in the direction of (_). Putt the shelf out.
  • ADJUSTING SHELVES (FULL SHELF)
  • To remove a shelf Lift up the back of the shelf slightly. then putt the shelf forward and out.
  • To relnstall a shelf Slide the shelf into the guides unti it stops.
  • To relnstall a shelf Tilt the front of the shelf up and guide the shelf hooks into the slots at a desired height.
  • Then. lower the front of the shelf so that the hooks drop into the slots.

CAUTION

  • Make sure that shelves are level from one

HUMIDITY CONTROLLED CRISPER

  • The crispers provide fresher tasting fruit and vegetables by letting you easily control humidity inside the drawer.
  • You can control the amount of humidity in the moisture sealed crispers by adjusting the control to any setting between VEGETABLE and FRUIT.
  • VEGETABLE keeps moist air in the crisper for best storage of fresh. leafy vegetables.
  • FRUIT lets moist air out of the crisper for best storage of fruit.

To remove the glass

1. Lift up the glass under the crisper cover.

2. Putt the glass up and out.

NOTE: Pantry drawer not shown for clarity.

PANTRY DRAWER

  • This drawer can be used for large party trays. den items and beverages. (This drawer should not be used for vegetables that require high humidity.)
  • REMOVING THE HUMIDITY CONTROLLED CRISPER

1. To remove. pullthe drawer outto fullextension.

2. Lift the front of the crisper up. then putt it straight out.

3. To install. slightty tilt up the front. insert the drawer into the frame and push it back into place.

FREEZER SECTION

The appearance of the actual product may differ depending on the model.

1. Putt the Freezer Drawer and the Pullout Drawer out as

2. Gently lift and putt out the ice bin.

3. To replace. pull both drawers out as far as possible. and set the bin in its correct position in the Pullout Drawer.


See other models: 79042800500 10644422601 79044119510 79579753904 66513852K602

Kenmore 79579043312 | Pages: 48 | File type: PDF | Filename: 92192727_79579043312.pdf | Size: 8.39 MB | Language: English, Spanish

Download User Manual

Product Infomation and Reviews - 79579043312 photo

79579043312 Photo

T: @manualsFile

https://manualsFile.com

Kenmore 79579043312 Questions and Answers


Kenmore

Kenmore

Owner manual PDF of Kenmore 79579043312 Refrigerator.

Use manuals file type: PDF. Kenmore - Refrigeration