Loading ...
Loading ...
Loading ...
Maintenance
Filter
WARNING: To reduce the risk of
injury from accidental starting, unplug
power cord before changing or clean-
ing filter.
NOTE: This filter is made of high quality
paper designed to stop very small
particles of dust. The filter can be used
for wet or dry pick up. Handle the filter
carefully when removing to clean or
installing it. Creases in the filter pleats
may occur from installation but creases
will not affect the performance of the
filter.
Filter Cleaning
Your filter should be cleaned often to
maintain peak Vac performance.
Be sure to dry the filter before storing or
picking up dry debris.
IMPORTANT: After cleaning, check the
filter for tears or small holes. Do not use
a filter with holes or tears in it. Even a
small hole can cause a lot of dust to
come out of your Vac. Replace it
immediately.
Filter Removal and Replacement
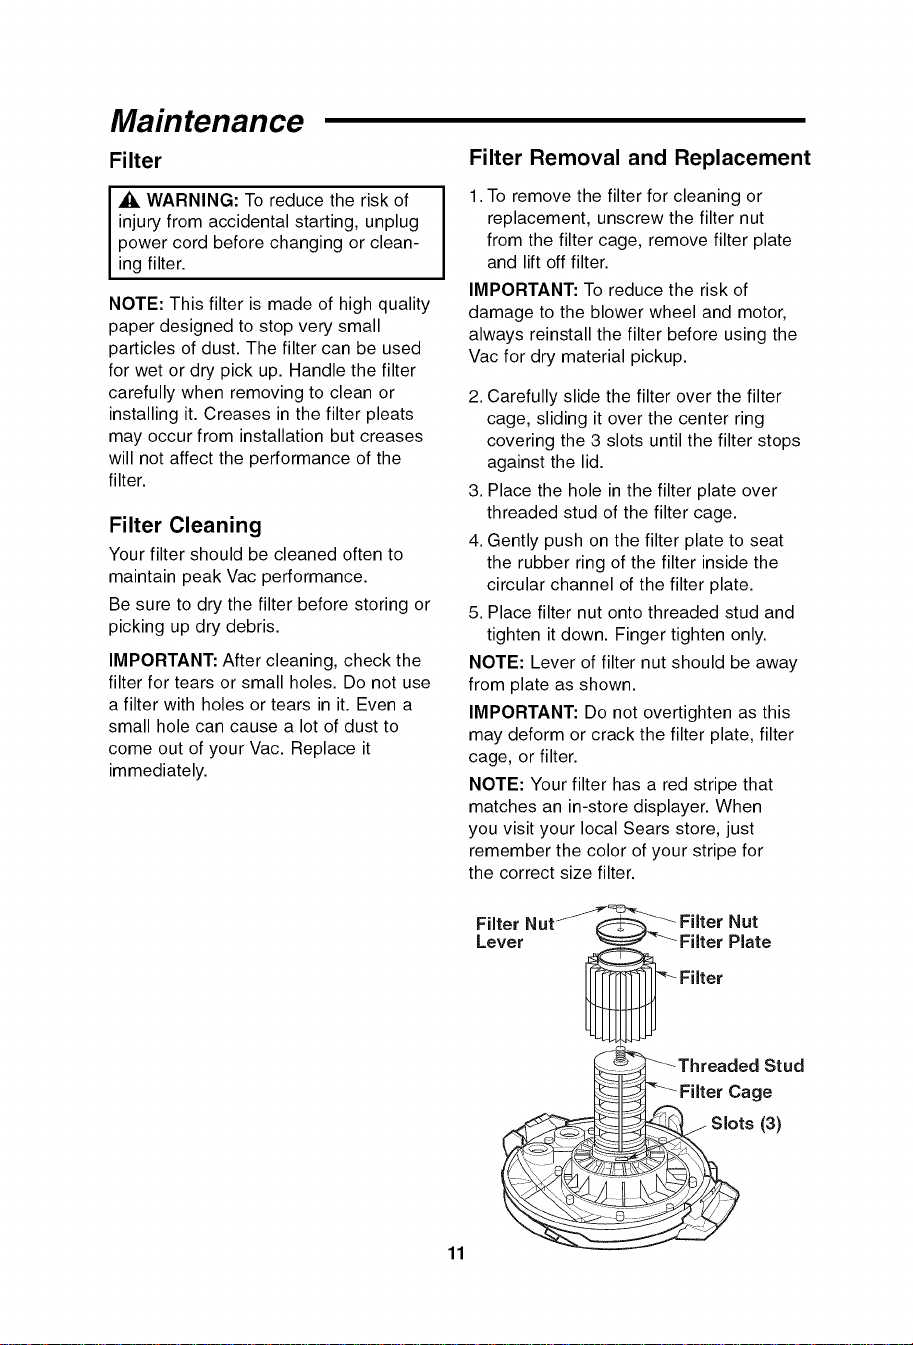
1. To remove the filter for cleaning or
replacement, unscrew the filter nut
from the filter cage, remove filter plate
and lift off filter.
IMPORTANT: To reduce the risk of
damage to the blower wheel and motor,
always reinstall the filter before using the
Vac for dry material pickup.
2. Carefully slide the filter over the filter
cage, sliding it over the center ring
covering the 3 slots until the filter stops
against the lid.
3. Place the hole in the filter plate over
threaded stud of the filter cage.
4. Gently push on the filter plate to seat
the rubber ring of the filter inside the
circular channel of the filter plate.
5. Place filter nut onto threaded stud and
tighten it down. Finger tighten only.
NOTE: Lever of filter nut should be away
from plate as shown.
IMPORTANT: Do not overtighten as this
may deform or crack the filter plate, filter
cage, or filter.
NOTE: Your filter has a red stripe that
matches an in-store displayer. When
you visit your local Sears store, just
remember the color of your stripe for
the correct size filter.
Filter Filter Nut
Lever Filter Plate
Filter
11
Stud
Filter Cage
Loading ...
Loading ...
Loading ...