Loading ...
Loading ...
Loading ...
29
2) No Water at Dispensing Faucet
- Water supply is off —> Turn on the water supply, or open Needle Valve ( turn needle handle
counter clockwise)
- Tank’s valve is closed —> Turn tank valve to an “Open” position
- Output line is crimped —> Remove crimp
- Incorrect installation —> See Fig.11 (Page 13). Verify all line connections.
- Tank defective, no pre-charge pressure —> Set tank pre-charge to 5-7 psi.
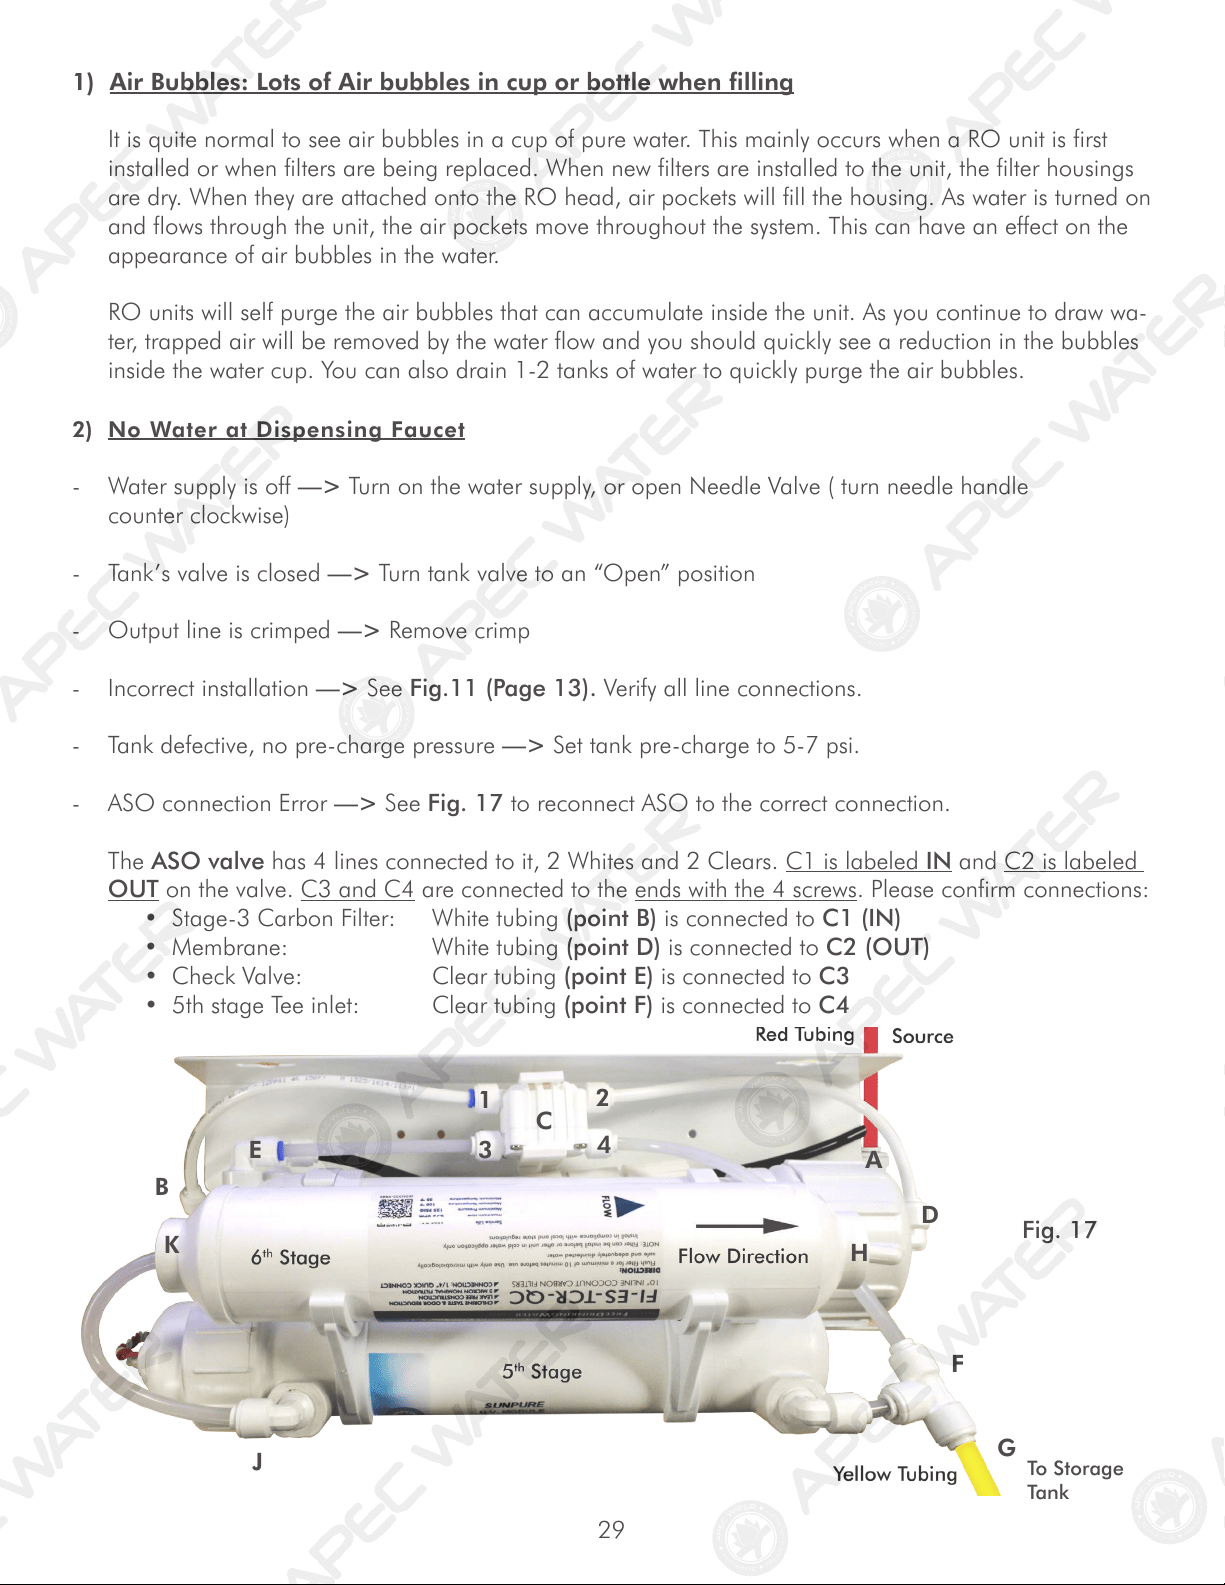
- ASO connection Error —> See Fig. 17 to reconnect ASO to the correct connection.
The ASO valve has 4 lines connected to it, 2 Whites and 2 Clears. C1 is labeled IN and C2 is labeled
OUT on the valve. C3 and C4 are connected to the ends with the 4 screws. Please confirm connections:
•Stage-3CarbonFilter: Whitetubing(point B) is connected to C1 (IN)
•Membrane: Whitetubing(point D) is connected to C2 (OUT)
•CheckValve: Cleartubing(point E) is connected to C3
•5thstageTeeinlet: Cleartubing(point F) is connected to C4
Fig. 17
A
B
C
1
2
3
4
D
E
G
To Storage
Tank
H
J
K
F
1) Air Bubbles: Lots of Air bubbles in cup or bottle when filling
It is quite normal to see air bubbles in a cup of pure water. This mainly occurs when a RO unit is first
installed or when filters are being replaced. When new filters are installed to the unit, the filter housings
are dry. When they are attached onto the RO head, air pockets will fill the housing. As water is turned on
and flows through the unit, the air pockets move throughout the system. This can have an effect on the
appearance of air bubbles in the water.
RO units will self purge the air bubbles that can accumulate inside the unit. As you continue to draw wa-
ter, trapped air will be removed by the water flow and you should quickly see a reduction in the bubbles
inside the water cup. You can also drain 1-2 tanks of water to quickly purge the air bubbles.
Loading ...
Loading ...
Loading ...