Loading ...
Loading ...
Loading ...
15
Stage
1
st
Stage
2
nd
Stage
3
rd
Stage
4
th
DRAIN
LINE
1
st
Stage - Sediment pre-filter
2
nd
Stage - Carbon block pre-filter
3
rd
Stage - Carbon block pre-filter
4
th
Stage - Membrane
5
th
Stage - UV light
6
th
Stage - Inline carbon filter
WASTE WATER
INPUT WATER
DRINKING
WATER
TO ICEMAKER OPTION
W
G
H
A
Z
Y
DRINKING WATER FAUCET
SINK
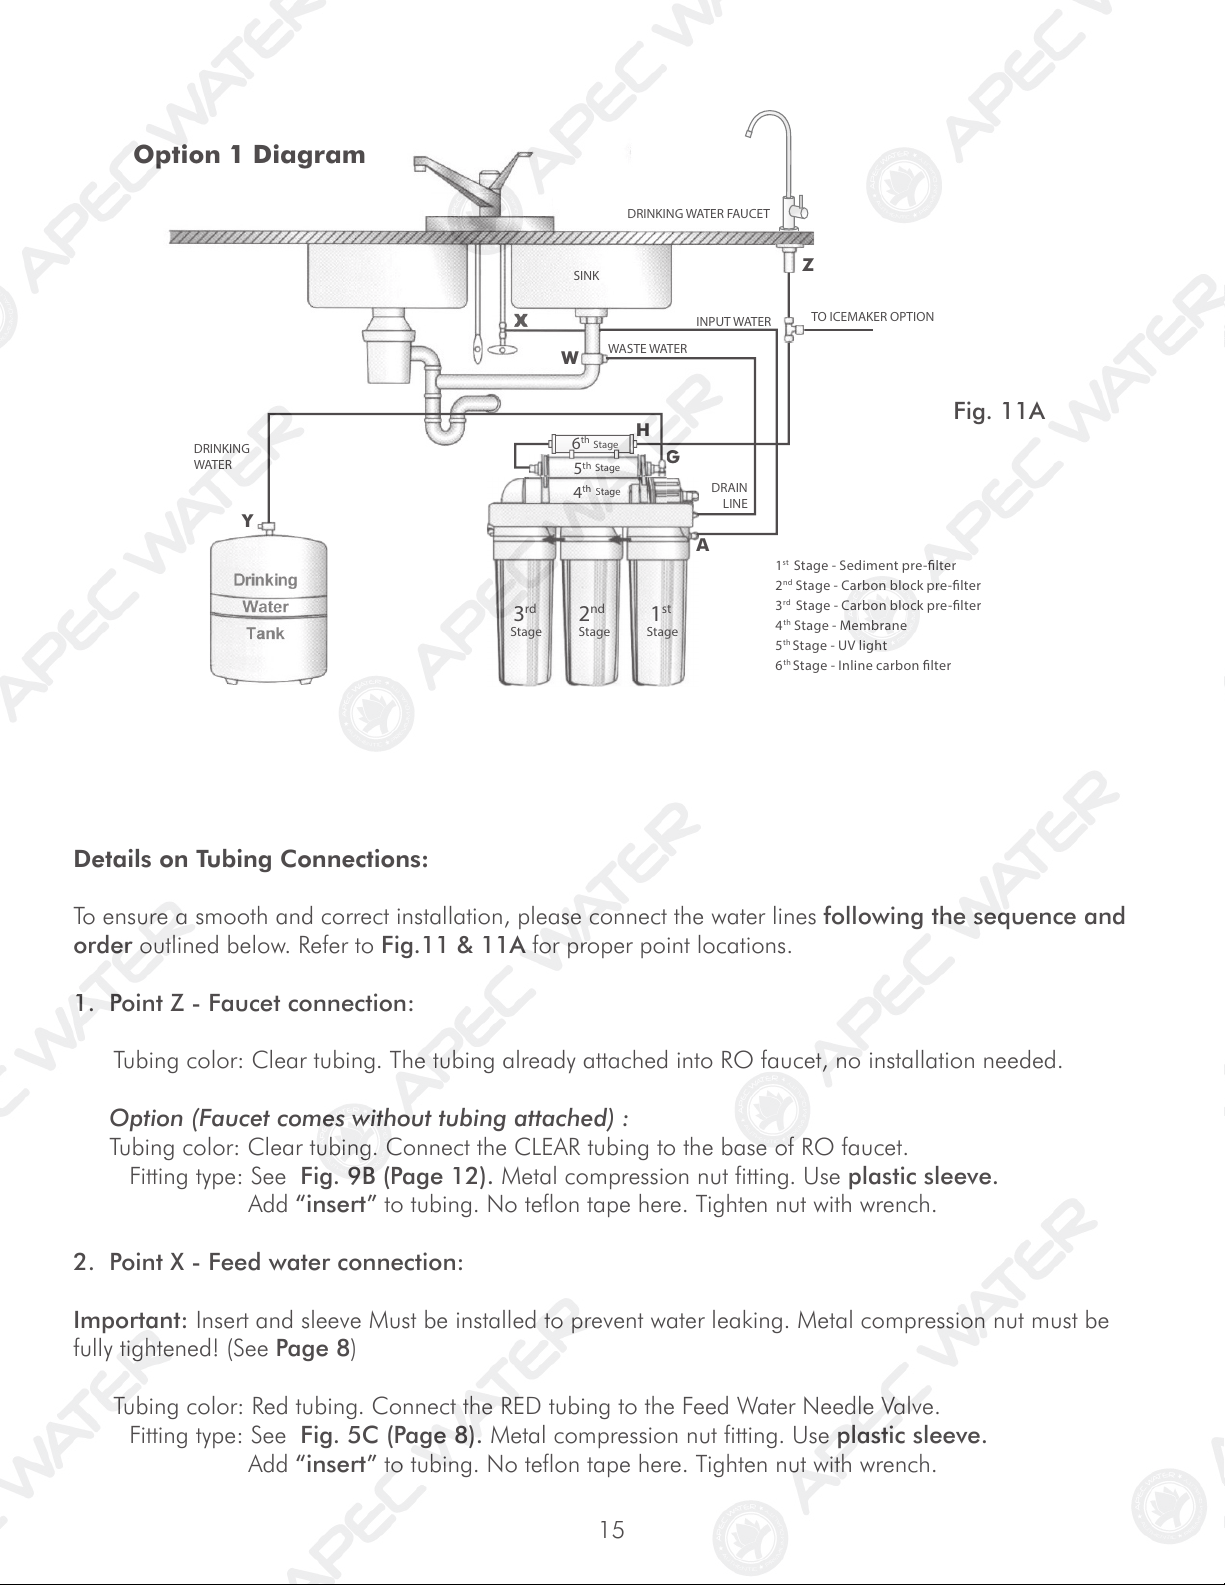
Option 1 Diagram
S
tag
e
4
th
G
Stage
5
th
Stage
6
th
Fig. 11A
Details on Tubing Connections:
To ensure a smooth and correct installation, please connect the water lines following the sequence and
order outlined below. Refer to Fig.11 & 11A for proper point locations.
1. Point Z - Faucet connection:
Tubing color: Clear tubing. The tubing already attached into RO faucet, no installation needed.
Option (Faucet comes without tubing attached) :
Tubing color: Clear tubing. Connect the CLEAR tubing to the base of RO faucet.
Fitting type: See Fig. 9B (Page 12). Metal compression nut fitting. Use plastic sleeve.
Add “insert” to tubing. No teflon tape here. Tighten nut with wrench.
2. Point X - Feed water connection:
Important: Insert and sleeve Must be installed to prevent water leaking. Metal compression nut must be
fully tightened! (See Page 8)
Tubing color: Red tubing. Connect the RED tubing to the Feed Water Needle Valve.
Fitting type: See Fig. 5C (Page 8). Metal compression nut fitting. Use plastic sleeve.
Add “insert” to tubing. No teflon tape here. Tighten nut with wrench.
Loading ...
Loading ...
Loading ...