Owner's Manual
Manual del Propietario
®
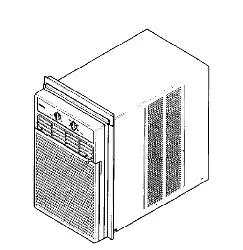
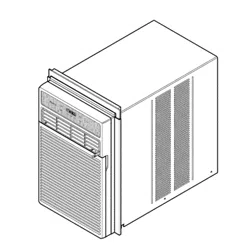
SLIDER/CASEMENTAIRCONDITIONER
HORIZONTAL/MARCOACONDICIONADORDEAIRE
Model, Modelo 580. 75063 580.75123
Distributed by Sears, Roebuck and Co., Hoffman Estates, IL 60179
www.sears.com
TABLE OF CONTENTS ........................2
WARRANTY ..............................................2
SAFETY .....................................................3
Important Safety Instructions ...................... 3
ELECTRICAL REQUIREMENTS .......4
INSTALLING THE POWER CORD ..--4
INSTALLATION ........................................5
Installation Requirements ......................... 5
Installation ................................................ 6
Horizontal Sliding Window Installation -..--6
Casement Window Installation ...................... 8
Removal From Window ............................... 8
OPERATION .............................................9
How and Why ........................................... 9
Normal Sounds ........................................ 9
Capacity and Running Time ..................... 9
Features ................................................. 10
Using the Air Conditioner ....................... 10
Display ................................................... 11
Air Direction Adjustment ......................... 1I
Remote Control ...................................... 12
HowTo insertBatteriesinto RemoteControl .. 12
MAINTENANCE ..................................... 13
Air Filter Cleaning ................................... 13
Air Conditioner Cleaning ........................ 13
How to Remove the Front Grille.................. 13
How to Replace the Front Grille .................. 13
TROUBLESHOOTING ......................... 14
Before Calling for Service ...................... 14
ESPAI_OL ................................................ 16
SERVICE NUMBERS ............ Back Cover
FULL ONE YEAR WARRANTY ON
ROOM AIR CONDITIONER
For one year from the date of purchase, when this
air conditioner is operated and maintained for
normal room cooling according to instructions in this
owner's manual, Sears wilI repair this air
conditioner, free of charge, ifdefective in material or
workmanship.
FULL FIVE-YEAR WARRANTY ON
SEALED REFRIGERATION SYSTEM
For five years from the date of purchase, when this
air conditioner is operated and maintained for
normal room cooling according to instructions in this
owner's manual, Sears wilI repair the sealed
refrigeration system (consisting of refrigerant,
connecting tubing, and compressor), free of charge,
if defective in material or workmanship.
WARRANTY SERVICE IS AVAILABLE BY
CONTACTING SEARS SERVICE AT
1-800-4-MY-HOME ®.
Warranty coverage applies only to air conditioners
used for non-commercial, private household
purposes.
This warranty applies only while this product is in
use in the United States.
This warranty gives you specific legal rights, and
you may also have other right which vary from state
to state.
Distributed by Sears, Roebuck and
Co., Hoffman Estates, IL 60179
-2-

IMPORTANT SAFETY INSTRUCTIONS
The safety instructions below will tell you how to use your room air conditioner to avoid harm to yourself or
damage to your ROOM AIR CONDITIONER.
FOR YOUR SAFETY
Do not store or use gasoline or other flammabIe
vapors and liquids in the vicinity of this or any other
appliance. Read product labels for flammability and
other warnings.
PREVENT ACCIDENTS
To reduce the risk of fire, electrical shock, or injury
to persons when using your air conditioner, follow
basic precautions, including the following:
• Be sure the electrical service is adequate for the
model you have chosen.
• if the air conditioner is to be installed in a window,
you will probably want to clean both sides of the
glass first. If the window is a triple-track type with a
screen panel included, you may want to remove
the screen completely before installation.
• Be sure the air conditioner has been securely and
correctly installed according to the separate
installation instructions provided with this manual.
Save this manual and installation instructions for
possible future use in removing or reinstalling this
unit.
• Use gloves when handling the air conditioner.
Be careful to avoid cuts from sharp metal fins on
front and rear coils.
ELECTRICAL INFORMATION
The complete electrical rating of your new room air
conditioner is stated on the seriat plate. Refer to the
rating when checking the electrical requirements.
• Be sure the air conditioner is properly grounded.
To minimize shock and fire hazards, proper
grounding is important. The power cord is
equipped with a three-prong grounding plug for
protection against shock hazards.
• Your air conditioner must be plugged into in a
properly grounded wall receptacle. If the wall
receptacle you intend to use is not adequately
grounded or protected by a time delay fuse or
circuit breaker, have a qualified electrician install
the proper receptacle.
• Do not run air conditioner with a protective
covering. This could result in mechanical damage
within the air conditioner.
• Do not use an extension cord or an adapter
plug.
_ Avoid fire hazard or electric shock.
Do not use an extension cord or an adapter plug.
Do not remove any prong from the power cord.
3-prong
grounding
plug
Test \
grounding
type wall
receptacIe
Ground
prong
tpplycord
ENERGY SAVING IDEAS
• The capacity of the room air conditioner must fit
the room size for efficient and satisfactory
operation.
• Install the room air conditioner on the shady side
of your home. A window that faces north is best
because it is shaded most of the day.
• Do not Mock air flow inside with blinds, curtains, or
furniture_ or outside with shrubs, enclosures, or
other buildings.
• Close the floor and wall registers and the fireplace
damper so coot air does not escape up the
chimney and into the duct work.
• Keep blinds and drapes in other windows closed
during the sunniest part of the day.
• Clean the air filter as recommended in the
MAINTENANCE section of this manual.
• Proper insulation and weather stripping in your
home will help keep warm air out and cool air in.
• External house shading with trees, plants or
awnings will help reduce the air conditioner's work
load.
• Operate heat producing appliances such as
ranges, washers, dryers, and dishwashers during
/
-3-

OBSERVEALL LOCALCODESANDORDINANCES.
DO NOT,UNDERANY CIRCUMSTANCES,REMOVE
THE POWERSUPPLYCORDGROUNDPRONG.
ELECTRICALGROUNDISREQUIREDONTHIS
APPLIANCE.
For230/208volt 60 Hz,AConly, 15Afusedand
properlygroundedelectricalsupply isrequired Atime
delayfuse or time delaycircuitbreakeris
recommended Usea dedicatedcircuit,serving only
this appliance.
DO NOTUSEAN EXTENSIONCORD.
115V~
F
230V~
RECOMMENDEDGROUNDINGMETHOD
Foryourpersonalsafety,thisappliancemustbegrounded.
Thisappliancehasa powersupplycordwitha 3-prong
groundingplug.Tominimizepossibleshockhazard,the
cordmustbepluggedintoa matinggroundingtypewall
receptacleandgroundedinaccordancewiththeNational
ElectricalCode(ANSI/NFPA70)latesteditionandalllocal
codesandordinances,if amatingwallreceptacleisnot
available,itisthepersonalresponsibilityandobligationof
thecustomertohavea properlygrounded3-prongwall
rece)tacteinstalIedbyaqualifiedelectrician.
Powercordmayincludea currentinterrupter
device Atestandresetbuttonisprovidedon the
plugcase.Thedeviceshouldbetestedon a
periodicbasisbyfirstpressingtheTESTbutton
andthentheRESETbuttonIftheTESTbutton
doesnottripor iftheRESETbuttonwillnotstay
engaged,discontinueuseoftheairconditionerand
contacta qualifiedservicetechnician.
NOTE: The shape may be different according to its rnodet
Use Wail Receptacle Power Supply
Standard 125V,
3-wire grounding
receptacle rated
15A. t25V AC
Standard 250V,
3-wire grounding
receptacle rated
r5A, 250V AC
Use I5 AMP. time
delay fuse or 15AMP
circuit breaker
Standard 250V,
3-wire grounding Use 20 AMP. time
receptacFe rated delay fuse or 20 AMP
20A, 250V AC circuit breaker
Electrical Shock Hazard
Plug into a grounded 3 prong outlet
Do not remove ground prong.
Do not use an adapter.
Do not use an extension cord.
Failure to follow these instructions can result in
death, fire, or electrical shock.
You can choose between the two methods below according to your preference and window sill shape.
USING SLIT "A"
Fasten the stopper using Type A screw, and lead the
power cord out through slit "A".
Screw
-4-
USING SLIT "B"
Fasten the stopper using left screw hole, and rotate
properly to lead the power cord out through slit "B".
Screw (Type ,_
,)
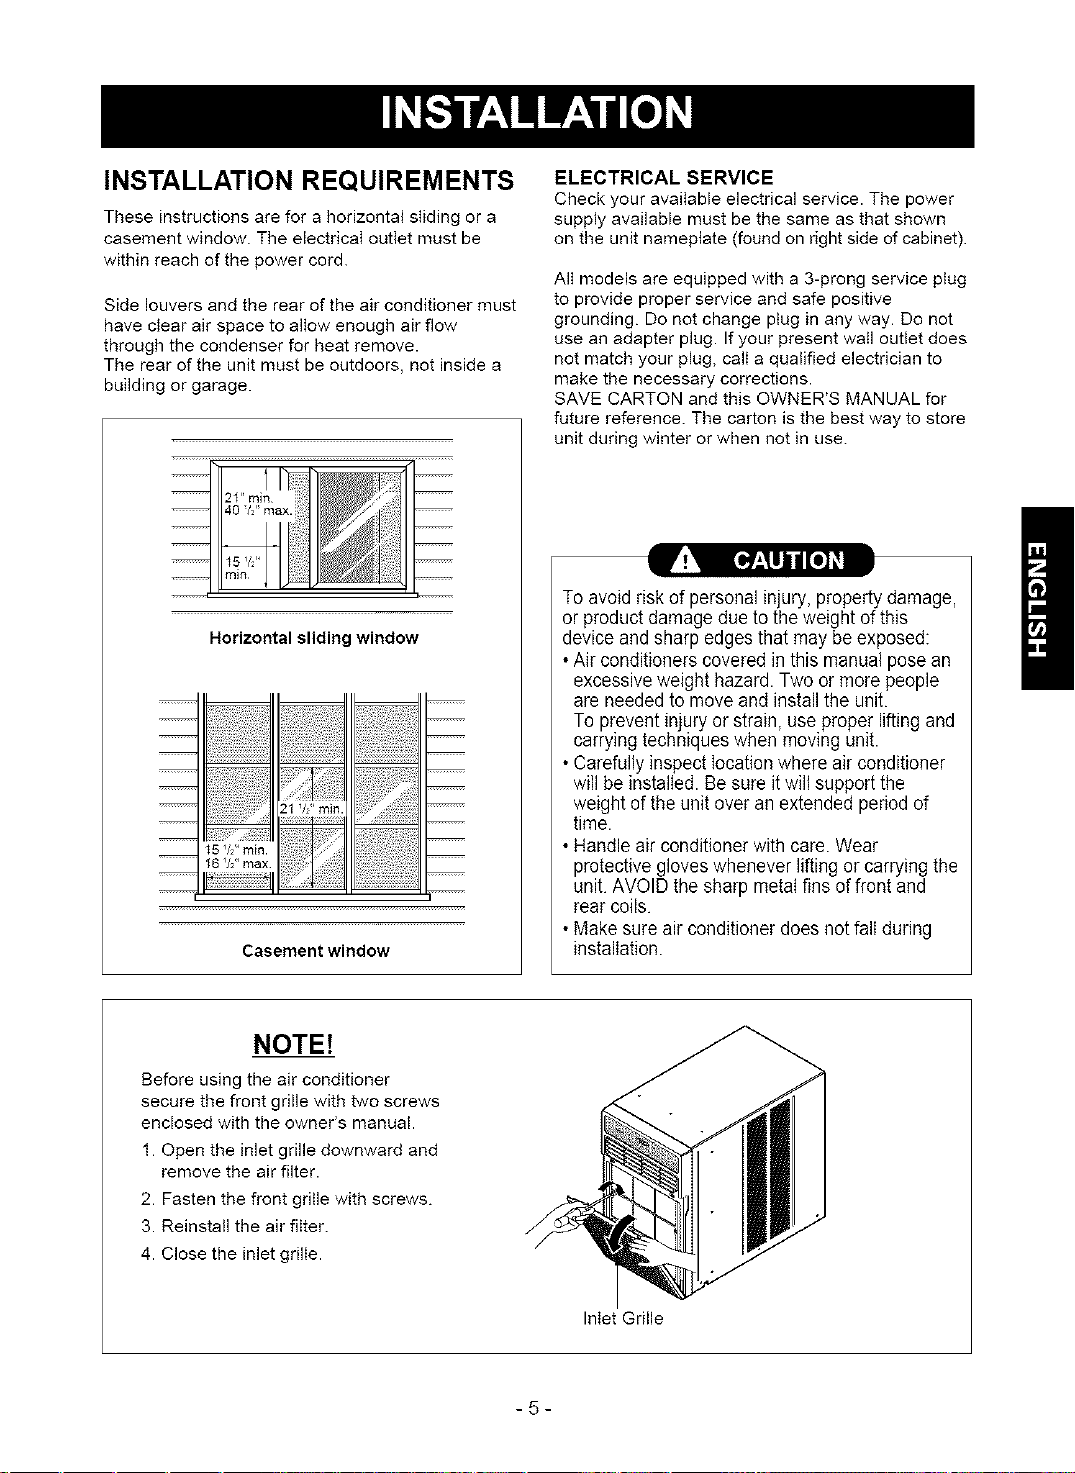
INSTALLATION REQUIREMENTS
These instructions are for a horizontal sliding or a
casement window. The electricaI outlet must be
within reach of the power cord.
Side louvers and the rear of the air conditioner must
have cIear air space to allow enough air flow
through the condenser for heat remove.
The rear of the unit must be outdoors, not inside a
building or garage.
Horizontal sliding window
i iiiili!ilili!!iiiil
16 _/" max
I I
Casement window
ELECTRICAL SERVICE
Check your available electrical service. The power
supply available must be the same as that shown
on the unit nameplate (found on right side of cabinet).
AiI models are equipped with a 3-prong service plug
to provide proper service and safe positive
grounding. Do not change plug in any way. Do not
use an adapter plug. If your present wall outlet does
not match your plug, call a qualified electrician to
make the necessary corrections.
SAVE CARTON and this OWNER'S MANUAL for
future reference. The carton is the best way to store
unit during winter or when not in use.
To avoid risk of personalinjury, property damage,
or product damage due to the weight of this
device and sharp edges that may be exposed:
• Air conditioners covered in this manual posean
excessive weight hazard. Two or more people
are needed to moveand install the unit.
To prevent injury or strain, use proper lifting and
carrying techniques when moving unit.
• Carefully inspect location where air conditioner
will be installed. Be sure itwilt support the
weight of the unit over an extended period of
time.
• Handleair conditioner with care.Wear
protective gloves whenever lifting or carrying the
unit. AVOID the sharp metal fins of front and
rear coils.
• Make sure air conditionerdoes not fall during
installation.
NOTE!
Before using the air conditioner
secure the front grille with two screws
enclosed with the owner's manual.
1. Open the inlet grille downward and
remove the air filter.
2. Fasten the front grille with screws.
3. Reinstall the air filter.
4. Close the inlet grille.
Inlet Grille
-5-

INSTALLATION HARDWARE
NO. NAME OF PARTS Q'TY
t Curtain 1
2 Curtain Frame 1
3 Upper Guide 1
4 Side Guide 2
5 Support Bracket 1
8 Bracket t
7 LeveIing bott& nut t
8 Bolt 2
9 Nut 2
I0 Washer 2
11 Side Guide seaI 1
t2 Foam Seat Strip t
t3 Window Track Seat t
t4 L Bracket t
t5 Screw (Type A) 9
t6 Screw (Type B) 3
t7 Screw (Type C) 8
REQUIRED TOOLS:
• Tight Fitting gJovee
• Standard screwdriver
• Phillips screwdriver
• Pliers
• Sharp knife
• 3/8-inch open end wrench or adjustable wrench
• 1/4-inch hex socket and ratcher
• Tape measure
• Electric drill
• 1/4-inch drill bit
INSTALLATION
Pick a location that will allow the air conditioner to
bIow the cold air into the area you want. Windows
used for installation must be strong enough to
support the weight of the air conditioner. Good
installation with speciaI attention to the proper
position of the unit will lessen the chance that
service will be needed.
When cooling more than one room, installation
location is very important. To cool your rooms, cold
air must be blown from the air conditioner in a
straight path.
HORIZONTAL SLIDING
WINDOW INSTALLATION
_1 Loosely attach the Support Bracket to the
bottom of Bracket using Bolts, Washer, and Nuts.
Attach the Leveling bolt and nat. (Fig. 1)
Bracket
Leveling Bolt & Nut
FIG. 1
_ Remove protective backing from Window Track
Seal and apply seal to window track. (Fig.2)
_m Measure and lightly mark a line 8-1/4 inches
from window jamb. Center the Support Bracket
assembly on the window track and fasten with
4 Type C screws.(Fig. 2)
-6-
FIG. 2

_lput the Support Bracket against the outside
wall and tighten the BoIts on top of the Bracket.
Adjust the Leveling Bolt so that the air conditioner
will be installed with a very slight tilt (about 1/4")
downward toward the outside for proper drainage.
Tighten the nut. (Fig. 3)
NOTE: DO NOT drill a hole in the bottom of the
base pan. The air conditioner is designed to
operate with the bottom of the base pan
approximately half-fulI of water.
About 1/4
_'_ Fasten Side Guides to the sides ef the Air
Conditioner using 3 Type A screws per Guide.
Start with first screw at middle of Guide. (Fig. 4)
r_ll Fasten upper Guide on the top of the Air
Conditioner using 3 Type A screws. (Fig. 4)
Fastening Side Guid_..,.._
Upper Guide
Side Guide
FIG. 4
H Measure height of window opening from top of
Bracket assembly as shown Fig. 5. Subtract 20-3/4
inches. Mark this measurement on Curtain and cut
the Curtain. (Fig. 5)
_ Slide Curtain into Curtain Frame. Slide Curtain
Frame assembly into side Guides of the Air
Conditioner cabinet. Make sure Curtain is firmly
enclosed on all sides by the Frame. (Fig. 6)
in Frame
Curtain_
FIG. 6
_lCut side Guide seal into 2 equal lengths.
Remove protective backing and apply it to the rear
side of cabinet Side Guides, starting just below
Curtain Frame assembly. Pinch off excess length so
seal is even with the bottom of side Guide. (Fig. 7)
weather seal
to side guides
just below edge of
Curtain Frame
FIG. 7
-7-

_1_ Place Air Conditioner in window opening. It
should sit on Bracket assembly so that Curtain
Frame and cabinet Side Guides are against top and
side window jambs. Mate front of Bracket with Base
Guide attached to the bottom of base pan.
_i] Drill 1/8 inch holes in window track through the
existing holes on Base Guide. Screw 4 Type C
screws through the holes. (Fig. 8)
i_lf this is a casement window installation,
proceed to Casement Window Installation. If not,
slide inner window sash firmly against side of the
cabinet.
_J Drill 1/8 inch hole in window jamb to align with
the existing holes in the Curtain Frame. Attach
Curtain Frame to window frame with 2 Type B
screws. (Fig. 8)
NOTE: Check all seals and plug any remaining air
gaps with a suitable weatherproof caulk.
.J
Type C screw
Typ
Windo / Track
FIG. 8
_']_lf this is casement window installation,
a
proceed to Casement Window Installation. If not,
stuff the Foam Seal Strip between the vertical sash
and the window glass. (Fig. 9)
_lJ Attach the L Bracket with a Type B screw. (Fig. 9)
FIG. 9
CASEMENT WINDOW
INSTALLATION
• Installation procedure [sthe same as that described m
steps 1 through I1 and step 13 of the Hobzenta_Sliding
Window installation
• If the window opening iswider than 15-3/4 inches you
wiltneed to install afiller panel. Make this panel from 3/4
inch thick wood and run itthe full length of the window
Attach it securely to the window frame and paint it to
protect it from the weather
• Since there is awide variety of casement window styles
and sizes, these instructionsmay not be exactly suited
to your particular situation. To ensure best results, have
the work performed by someone skilled in installing
casement window air conditioners.
REMOVAL FROM WINDOW
• Turnoff and unpDg the air conditioner.
• If horizontal slidingwindow, removethe L Bracket from
window frame andthe FoamSeat Strip from between the
windows
• Remove the Safety Bracketthat you installed inStep t2.
• Unscrew the Curtain Frame from the windowframe.
• Remove air conditioner from the window opening.
BE CAREFUL NOT TO DROP IT Once removed, set it
safely out of the way.
• Remove Curtain Frame and Curtain
• Unscrew the Side Guides and Upper Guide.
• Place unit and all assembly hardware in air conditioner
shipping carton, and store in a clean, dry place.
• Air conditioners covered inthis manual pose an
excessive weight hazard. Two or more people
are needed to move and install the unit.
To prevent injuryor strain, use proper lifting and
carrying techniques when moving unit.
• When handling the air conditioner, be careful to
avoid cuts from sharp metal fins on frontand
rear coils.
• Make sure air conditioner does notfall during
removal.
-8-

HOW AND WHY
Your room air conditioner provides the following
functions to make hot weather living more
comfortable:
•Cools and circulates room air.
• Lowers humidity by removing excess moisture.
• Filters out summertime dust, dirt, and some
airborne impurities.
The air conditioner performs these functions by
drawing room air through a filter which traps dust
and dirt particles. The air then passes over a
cooling coil which refrigerates the air and removes
excess moisture. The same air is then returned to
the room- cooler, drier, and cleaner. Moisture
removed from the room air is carried to the outside
and evaporated.
Your air conditioner is designed to be easy to
operate and to provide plenty of cooling power.
NORMAL SOUNDS FIG.10
Aside from the regular fan motor and compressor
sounds coming from your air conditioner, you will
once in a while hear a pinging sound. This is the
result of moisture being picked up from the air in the
room and thrown against the air conditioner's fan.
This is normal and should not be cause for concern.
Also, do not be alarmed if you hear a slight hissing
or gurgling sound coming from your air conditioner
after it is off. These are normal coolant noises.
....Compressor
The modern high efficiency
compressor may have a high
pitched hum or pulsating
I noise that cycles on and off.
Unit Vibration ...........................
-Fan The unit may vibrate
You may hear air and make noise
movement from because of poor walI
the fan. or window construction.
Condenser
You may hear droplets of water hitting
the condenser causing a pinging or
clicking sound.
FIG. 10
/
CAPACITY AND RUNNING TIME
Proper unit size is important in deciding the desired
comfort for the area you want to cool. An
undersized unit wilI not have the capability to cool,
leaving the area uncomfortably warm. The proper
size is determined by the number of square feet in
the area to be cooled, indoor and outdoor
temperature and humidity.
Whenever the heat or humidity load is above normal
the air conditioner must run longer and more often
to keep the desired temperature you have selected,
Under heavy heat load conditions the air conditioner
may need to run constantly to keep the temperature
you want.
At times using the MED FAN setting to circulate the
room air may make it comfortable even though the
air is not being cooled. This will decrease your cost
of use.
-9-

FEATURES
4
8
FIG. 11
1. Cabinet
2. Air Discharge
3. Vertical Air
Deflector
(Horizontal Louver)
4. Air Intake
(Inlet Grille)
5. Air Filter
6. Front Grille
7. Control Panet
8. Power Cord
9. Evaporator Coil
10. Condenser
11. Compressor
12. Base pan
13. Brace
14. Side Louver
USING THE AIR CONDITIONER
To reduce the risk of fire, electric
shock, or injury to persons, read the important
SAFETY instructions section before operating this
appliance.
To begin operating the air conditioner after
installation, follow these steps:
1. Plug in the air conditioner. (To prevent electrical
hazards, do not use an extension cord or an
adapter plug.)
2. Set the exhaust vent to the CLOSE position.
3. Set the TEMP Control to the coolest setting.
4. Set the MODE control at the highest COOL level.
5. Adjust the louvers for comfortable air flow.
6. Once the room has cooled, adjust the TEMP and
Mode ControI to the setting you find most
comfortabIe.
NOTE : Ifthe air conditioner is turned off, wait 3
minutes before restarting. This allows pressure
inside the compressor to equalize. Failure to wait 3
minutes before restarting may cause inefficient
operation.
if you move the TEMP Control to a warmer, then
immediately back to a cooler setting, the unit will
shut off. Wait 3 minutes before restarting.
VENT CONTROL
The Vent ControI alIows the air conditioner to
either recirculate inside air (CLOSE) or exhaust
air to the outside (OPEN). (FIG. 12)
• The CLOSE position is used when maximum
cooling is desired. It may atso be used for air
recirculation without cooling when the air
conditioner is set in the FAN position.
• The OPEN position removes stale air from the
room and exhausts it to the outside. Fresh air is
drawn into the room through your home's
normal air passages.
• The OPEN or CLOSE position can be used with
any fan selection.
!
CLOSE,-LVENT-LOPEN
FIG. 12
-10-

DISPLAY
POWER
• To turnthe air conditioner ON, push this button.To
turn the air conditioner OFF, push the button again,
• This button takespriority over any other buttons,
• When you first turn it on, the unit is in cool mode,
High fan speed, Temperature setting at 72°F
REMOTECONTROLS GNALRECEIVER
j- MODE
- Everytime you pushthis button, itwill shift among
COOL, ENERGY SAVER and FAN
- ENERGY SAVER
• The fan stops when the compressor stops cooling,
Approximately every 3 minutes the fan will turn on and
the unitwilt check the room air to determine if cooling is
needed,
FAN SPEED
•Everytimeyoupushthisbutton,itadvancesthe
settingasfollows:{HIGH(F3)-, LOW(F1)
MED(F2)-, HIGH(F3)}
TEMPERATURE SETTING
• Usethis button to automatically contro_the
temperature of the room. Thetemperature can be
set within a range of 6O°Fto 86"F by increments of
I°F.
-9 ¥:IIil:oJ_"Jf:!_L "I
When power is restored after an
electrical power failure, the unit will begin
to run at its last setting.
]
AIR DIRECTION ADJUSTMENT
HORIZONTAL AIR DIRECTION CONTROL
The horizontal air direction is adjusted by moving
the vertical louvers right and left with your
fingertips, (FIG. 13)
TIMER
- SHUT-OFFTIME
• You will usually use shut-off time while you sleep.
• With unit running, use Timer to set number of hours until
shut-off.
• For your sleeping comfort, once Time is set, the
Temperature setting wilt raise 2+Fafter 30 rain., and
2°F after another 30 mm.
• Every time you push Timer button, it advances the Timer
setting as follows: 1 Hour • 2 Hours • etc. * 12 Hours
maximum
- START TIME
• With unit not running, use Timer to set number of hours
before unit starts.
• Every time you push Timer button, it advances the Timer
setting as follows: 1 Hour * 2 Hours * etc. + I2 Hours
maximum
VERTICAL AIR DIRECTION CONTROL
The vertical air direction is adjusted by moving the
horizontal Iouvers up and down with your fingertips.
(FIG. 14)
FIG. 13
1 -
FIG. 14

REMOTE CONTROL
Note: The Remote Control wilI not operate properly if
strong light shines on the sensor window of the Air
Conditioner or if there are obstacles between the Remote
Control and the Air Conditioner.
Every time you push button,you will hear beep sound
from theAir Conditioner.
1 6 3
4 2 5
5
5, TIMER
- SHUT-OFF TIME
• You will usually use shut-off time while you sleep.
• With unit running, use Timer to set number of hours
untiI shut-off.
• Foryour steepingcomfort, once Time is set, the
Temperature settingwill raise 2F after 30 min, and
2°F after another 30 min.
• Everytime you push Timer button, it advances the
Timer setting as follows: 1 Hour _ 2 Hours _ etc.
12 Hoursmaximum.
- START TIME
• With unit not running, use timer to set number of
hours before unit starts.
• Everytime you push Timer button, it advances the
Timer setting as follows: 1 Hour _ 2 Hours _ etc.
12 Hoursmaximum
HOW TO INSERT BATTERIES
INTO REMOTE CONTROL
1. Removethe coverfrom the backof the remotecontroller.
2. Inserttwo batteries
• Besure that the (+) and (-) directions are correct
• Besure that both batteries are new
3. Re-attachthe cover
FIG. 15
REMOTE CONTROL OPERATIONS
1. POWER
• Toturn the air conditioner ON, push this button.
To turn the air conditioner OFF, push the button
again.
• This button takes priority over any other button
• When you first turn it on, the unit is in cool mode, High
fan speed, Temperature setting at 72T
2. TEMPERATURE SETTING
• Use this button to automatically control the
temperature of the room.
The temperature can be set within a range of 60°F to
86"F by increments of I°F.
3. MODE
- Every time you push this button, itwill shift among
COOL, ENERGY SAVER and FAN.
- ENERGY SAVER
• The fan stops when the compressor stops cooling
Approximately every 3 minutes the fan will turn on and
the unit wilt check the room air to determine if cooling
is needed
4. FAN SPEED
• Every time you pushthis button, it advances the setting
as follows: {High(F3) _ Low(F1)_ Med(F2) _ High(F3)}
-12-
'_ .16
• Donot use rechargeable batteries. Such batteries
differ from standard dry cells in shape, dimensions, and
performance.
• Remove the batteries from the remote controller if the air
conditioner is not going to be usedfor an extended
length of time.
• tnorder to prevent discharge, remove the batteries from
the remote control if the air conditioner is not going to be
used for an extended period of time. Keep the remote
control away from extremely hot or humid places. To
maintain optimal operation of the remote control, the
remote sensor should not be exposed to direct sunlight.
• The remote controI can be mounted on a wall using the
mountable holder.
,)
FIG. 17

AIR FILTER CLEANING
The Air Filter will become dirty as it removes dust
from the inside air. It should be washed at least
every 2 weeks, If the Air Filter remains full of dust,
the air flow will decrease and the cooling capacity
will be reduced, possibly damaging the unit,
•PulI the inlet grille forward, grasping both tabs,
then pull out the air filter. (FIG. 18)
• Wash the Air Filter under the faucet with warm
water, Be sure to shake off all the water before
replacing the filter, (FIG.19)
FIG. 18
FIG. 19
AIR CONDITIONER CLEANING
Clean the front grille and inlet grille by wiping with a
cloth dampened in a mild detergent solution (FtG. 20)
The cabinet may be washed with mild soap or
detergent and lukewarm water, then polished with
liquid appliance wax.
To ensure continued peak efficiency, the condenser
coils (outside of the unit) should be checked
periodically and cleaned if they become clogged
with soot or dirt from the atmosphere. Brush or
vacuum exterior coils to remove debris from fins.
FIG. 20
HOWTOREMOVETHEFRONTGRILLE
• Open the inlet grille downward.
• Remove the screw securing the Front Grille.
• Push the grille up from the bottom and pull the top
of the grille away from the case to lift the top tabs
out of their slots.
HOW TO REPLACE THE
FRONT GRILLE
Attach the front grille to the cabinet by inserting the
tabs on the grille into the slots on the front of the
cabinet. Push the grille in until it snaps into place.
IG. 22
-13-

BEFORE CALLING FOR SERVICE
Check the following list to be sure a service calI is reaIly necessary. A quick reference to this manual may
help you avoid an unneeded service call.
THE AIR CONDITIONER WILL NOT OPERATE
Check if.., Then.,.
TheCurrentinterrupterdevice istdped. Pressthe RESETbuttonlocatedon the powercordplug
Ifthe RESETbuttonwill not stayengaged,discontinueuseof the
air conditionerandcontactaquaIifiedservicetechnician.
Wallplugdisconnected. Pushplugfirmlyintowalloutlet.
Housefuseblownor circuitbreakertripped. Replacefusewithtimedetaytypeorresetcircuitbreaker.
PowerisOFF Pushthepowerbutton.
Unitwasturnedoffandthenontooquickty. Setunitoffandwait3 minutesbeforerestarting.
TEMPControlsetwarmerthanroomtemperature SetTEMPControltoa Iowernumber.
AIR FROM UNIT DOES NOT FEEL COLD ENOUGH.
Check if.., Then.,.
FANSPEEDsetatLOW. PushFANSPEEDbuttontosetatHI.
TEMPControlsettoowarm SetTEMPControltoalowertemperature.
Roomtemperaturebelow70'F (21C). Coolingmaynotoccuruntilroomtemperaturerisesabove70'F (21oC)
Temperaturesensingtubetouchingevaporatorcoil, Straightentubeawayfromevaporatorcoil
locatedbehindfrontgrille
THEAIRCONDITIONERCOOLING,BUTROOMISTOOWARM- ICEFORMINGONCOOUNGCOILBEHINDINLETGRILLE.
Check if... Then...
Outdoortemperaturebetow70"F(21C) Todefrostthe coil,settheMODEtoFAN,FANspeedtoHigh
Airfiltermaybedirty Cteanairfilter RefertoMaintenancesectionofowner'smanual
Todefrostthecoil,settheMODEtoCool,Fanspeedtohigh,andthe
TEMPControlsettoolow Tempcontroltoa highertemperature
THEAIRCONDITIONERCOOLING,BUTROOMISTOOWARM
Check if... Then...
Dirtyairfilter- airrestncted. Cleanairfilter RefertoMaintenancesectionofowner'smanual.
TEMPControlsettoowarm SetTEMPControltoatowertemperature.
Frontofunitisblockedbydrapes,blinds,furniture,etc. CIearblockageinfrontofunit.
Airdistributionisrestricted.
Doors,windows,registers,etc open Coldairescapes. Closedoors,windows,registers,etc.
Unitrecentlytumedonin hotroom. Allowadditionaltimetoremovestoredheatfromwalls,ceilingfloorandfurniture
THE AIR CONDITIONER TURNS ON AND OFF RAPIDLY,
Check if,.. Then,..
Outsidetemperatureisextremelyhot. SetFANSPEEDonHItominimizethecoolingload
Unitissettoenergysavermode Approximatelyevery3 minutesthefanwiltturnonandtheunitwillcheck
theroomairtemperaturetodetermineifcoolingisneeded.Thisisnormal
energysavermodeoperation.
NOISE WHEN UNIT IS COOLING.
Check if,.. Then,..
Soundoffanhittingwater- fromthemoistureremovalsystem Ttlisisnormalwtlenhumidityishigh.Closedoors,v,Andows,andregisters
Wndowvbra on- poor nsta ation. Refero nsta a on nsructonsorcheckwth nsa er.
WATER DRIPPING INSIDE ROOM WHEN UNIT IS COOLING.
Check if,.. Then,..
Theairconditioneris improperlyinstalled. Tiltairconditionerslightlytotheoutsideto allowwaterdrainage.Referto I
installationinstructionsorcheckwithinstalIer.
I
WATER DRIPPING OUTSIDE WHEN UNIT IS COOLING.
Check if... Then.,.
Theunitisremovinglargequantitiesofmoisture Thisisnormalduringexcessivelyhumiddays.
fromhumidroom.
-14-

-15-

INDICE DE MATERIAS ............................. 16
GARANTJA ................................................ 16
SEGURIDAD .............................................. 17
Importantes instruccionesde seguridad .....17
REQUERIMIENTOS EL_:CTRICOS ......... 18
INSTALAClON DEL CABLE ELC:CTRICA-.18
INSTALAClON ........................................... 19
Requistios de ventana .......................... 19
Installaci6n ............................................ 20
Montaje en una ventana de corredera
horizontal ............................................... 20
Instalacion de ventana con marco ......... 22
La eliminacion de Ia ventana ................. 22
OPERACION .............................................. 23
C6mo y por que ..................................... 23
Sonidos normales .................................. 23
Capacidad y tiempo de funcionamiente .--23
Caracteristicas ..................................... 24
Uso del equipo de aire acondicionado --24
Caracteristicas del equipo de aire
acondicionado ....................................... 25
MANTENIMIENTO .................................... 26
Limpieza del filtro del aire ...................... 26
Limpiezadel equipode aireacondicionado..--26
C6mo sacar Ia rejilla frontal ................... 26
C6mo a reemplaza el grille anterior ...... 26
CORRECCION DE FALLAS ...................... 27
Antesde Llamarparaservicio...................... 27
PARA PEDIR SERVICIO .......Cubierta Trasera
GARANTJA DE UN ANO POR EL
EQUlPO DE A!RE ACONDICIONADO
DE HABITACION
Durante un aSocompteto a partir de lafecha de
compra, sJeste equipo de aJreacondicionado recibe
mantenimiento y se utiliza para e_enfrJamiento
normal de habitacion segun las instrucciones
indicadas en este manual del propietario, Sears
reparara gratuitamente este equipo de aire
acondicionado, si tiene algL_ndefectoen materiales
o fabricaci6n.
GARANTJA TOTAL DE CINCO ANO$
POR E.LSISTEMA DE REFRIGERACION
HERMETICAMENTE 8ELLADO
Durante cinco aSos a partJr de la fecha de compra,
si este equJpo de aire acondicionado recibe
mantenimiento y se utiliza para el enfriamiento
normal de habitaci6n segun las instrucciones
indicadas en este manual del propietario, Sears
reparara gratuitamente el sistema de refrigeraci6n
hermeticamente seflado (que consiste en el agente
refrigerante, los tubos de conexi6n yet compresor),
si tiene algun defecto en materiales o fabricaci6n.
EL SERVICIO DE GARANTiA ESTA A SU
DISPOSICION CON SOLO PONERSE EN
CONTACTO EL CENTRO DE SEARS AL
1-800-4-MY-HOME ®
La proteccion de garantia cubre unicamente a los
equipes de aire acondicionade usados para use
domestico y no para uso comercial.
Esta garantia s6Io tiene vaIidez mientras eJproducto
se este usando en los Estados Unidos.
Esta garantia leda derechos legaIesespecificos y
usted puede tener otros derechos que varian de
estado en estado.
Distributed by Sears, Roebuck and
Co., Hoffman Estates, IL 60179
-16-

IMPORTANTES INSTRUCCIONES DE SEGURIDAD
Las siguientes instrucciones de seguridad le indicaran c6mo usar su equipo de aire acondicionado de
habitacion para evitar dafios para usted mismo y para su EQUIPO DE AIRE ACONDICIONADO.
/
POR SU SEGURIDAD
No aImacene ni use gasolina u otros vapores y
liquidos inflamables cerca de este o cualquier otro
electrodomestico. Lea Ias etiquetas de los
productos para ver si contienen advertencias sobre
el caracter inflamable de los mismos y otras
advertencias.
PARA PREVENIR ACCIDENTES
Para reducir el riesgo de incendios, descargas
electricas o lesiones personales al usar su equipo
de aire acondicionado, tome las precauciones
basicas, entre las que estan las siguientes:
• AsegL_rese de que Ia alimentaci6n electrica sea la
apropiada para et modelo que usted ha elegido.
• Si el equipo de aire acondicionado debe instalarse
en una ventana, a usted probabtemente Ie
conviene Iimpiar primero ambos Iados del vidrio.
Si la ventana es del tipo de tres panetes con un
panel incIuido de pantatla, Ie conviene sacar la
ventana comptetamente antes de la instalaci6n.
• AsegL_rese de que el equipo de aire
acondicionado ha sido instalado correctamente y
con seguridad segun se se5ala en las
instrucciones separadas de instataci6n que vienen
en este manual. Conserve este manual y Ias
instrucciones de instalaci6n para usarIos
posiblemente en eI futuro al sacar o volver a
instalar esta unidad.
• Use guantes al manejar el equipo de aire
acondicionado, tenga cuidado para evitar cortadas
con Ias afiladas aIetas metalicas que se haIlan en
los serpentines frontales y posteriores.
INFORMACION ELECTRICA
ER la placa de serie del fabricante se indica cu_ll es
la capacidad eIectrica nominal completa de su nuevo
equipo de aire acondicionado para habitacion. Consulte
esta placa cuando vaya a veriflcar los requerimientos
eI@ctricos.
• AsegOreeede que el equipo de aireacondicionado
tenga una conexion correcta atierra. Para reducir al
minimo los riesgos de descargas etectricas e incendio,
es importante conectar el equipo correctamente a tierra.
Etcord6n de aIimentaci6netectricaesta equipado con
un enchufe de tres espigas con conexi6n a tierra para
protegerle contra riesgos de descargas electricas.
• Su equipo de aire acondicionado debe enchufarse en
unatoma de corriente de pared que tenga una conexi6n
correcta atierra. Si Iatoma de corriente de pared que
usted piensausar no eeta conectada correctamente a
tierra o no esta protegida con un fusible de accion
retardada o con un interruptor de circuito, hagaque un
etectricistacalificado le instale tatoma de corriente de
pareden forma correcta.
• No ponga a funcionar et equipo de aire acondicionado
con una cubierta protectora exterior encima. Esto podria
ocasionar dafios mecanicos dentro del aire
acondicionado.
• No use un cablede extensi6n ni un enchufe
adaptador.
_ Evitelos de incendiospeIigros Y
descargaset6ctbcas.No useuncable deextensi6nni un
enchufeadaptador.No elimineningunade tasespgas
deI enchufedetcordonde alimentacioneIectrica.
Tomade corriente
de pared con
conexi6n atierra.
Prueba
\
Reponga
Cable de
--alimentaci6n
con clavija
dotada de
conexion a
tierra de 3
\ terminales
Terminal de
conexion atierra.
Bajo ninguna circunstancia
corte, quite o evite el use de
Iaconexi6n atierra de esta
elavija
IDEAS PARA AHORRAR ENERGiA
• La capacidad dei equipo de aire acondicionado
debe corresponder at tamafio de ia habitacion
para el funcionamiento eficiente y satisfactorio det
equipo.
• Instale et equipo de aire acondicionado de
habitacion en el lado sombreado de su hogar. Una
ventana orientada hacia el norte es la mejor
porque tiene sombra ia mayor parte del dia.
• No bloquee el flujo de aire hacia el interior con
persianas, cortinas o muebles; o la parte de
afuera con arbustos, paredes u otras
construcciones.
• Cierre el regulador de tiro de la chimenea, las
rejillas de calefaccion del piso y ia pared, de taI
modo que el aire frio no se escape ni por la
chimenea ni pot los conductos.
• Mantenga las persianas y las cortinas de otras
ventanas cerradas durante la parte mas soleada
del dia.
• Limpie eI filtro dei aire como se recomienda en la
secci6n "MANTENIMIENTO" de este manual.
• El aislamiento correcto y ias juntas hermeticas en
puertas y ventanas en su hogar le ayudaran a
mantener el aire caiiente afuera y el aire frio
adentro.
• At darte sombra externamente a ta casa con
&rboies, plantas o toldos ayudara a reducir Ia
carga de trabajo det equipo de aire acondicionado.
• Opere los aparatos que producen calor como, por
ejemplo, hornos, Iavadoras, secadoras y
lavaplatos durante la parte mas fria deI dia.
-17-

RESPETETODOSLOSCODIGOSYREGLAMENTOS.
BAJONINGUNACIRCUNSTANCIACORTE,QUITE0
EVITEELUSODELACONEXlONATERRADEESTA
CLAVlJA.
ESTEAPARATONECESlTASERCONECTADOATERRA.
Serequiereunaalimentaci6nelectricaCA,adecuadamente
conectadaatierraconunfusiblede15A,de60Hzyde
2301208V.Sereeomiendaunfusiblederetardooun
disyuntordecircuitoquealimentesolamenteaesteaparato
NOUSECABLEELt_CTRICODEEXTENSION.
METODORECOMENDADODECONEXIONA TIERRA
Persupropiaseguddadesteaparatodebeconectarseatiena.Este
aparatevieneequ_padosonuncabledealimentacbnyunaslavijade
tresterminales.Parareduciralmaximoelpeligrodechoqueelectece,
elcabledebeestarconectadoaunaconexbndeparedconconexi6n
atieITayestaconexi6ndebehacorsedeacuerdoconla01tima
edici6ndelC6digoEl_ctricoNacional(ANSI/NFPA70),asicomocon
losc6digosyreglameetoslocales.Sinoexisteunaconexi6nde
paredadecuada,elslientetieeelarespoesabilidadylaobiigaci6nde
mandarinstalar,sonueelectdcistacalificado,unaconexi6ndepared
adecuadadetresterminalesconconexbnafierra
115V~ 230V~
l
Elcabledealimentaci6npuedeineluirundispositivo
interruptordecorrienteLacarcasadelenchufecuenta
conunbot6ndepruebayottodereinicio.Etdispositivo
debecomprobarseperi6dicamentepresionando
primeroelbot6nTESTydespu6sRESET.
SielbotonTESTnosedesconectao sielbot6n
RESETnopermaneoeactivo,suspendaelusedelaire
acondicionadoypongaseencontactoconuntecnico
desen.4ciocualiflcado
NOTA:La forma puede ser diferente segOnsu modelo.
Utiticeelenchufedetapared Consumo de Energia
Standard 125V,
enchufe de 3
Lineas de
15A, 125V AC Utilice unfusible de
15AMP.o un
Standard 250V, Interruptor de t5AMP
enchufe de 3
Lineas de
15A, 250V AC
Standard 250V,
enchufe de 3 Utiiice unfusible de
Lineas de 20AMP o un
20A, 250V AC Interruptor de 20AMP
Petigrode cheque electfico
Conecte en una conexi6n de pared de 3 terminales
No quite la terminaI de conexi6n atierra
No use adaptadores
No use cable electrico de extensi6n
Si no se siguen estas instrucciones, puede ocasionarse
Iamuerte, un incendio o un choque el6ctrico.
Puede escoger entre los dos metodos abajo descritos de acuerdo a la forma det taburete de su ventana y su preferencia.
UTILIZANOO LA RANURA "A"
Aprete eI obturador usando hoyo de tomiIIo, y eaque
el cable electrico a trave.s de la ranura "A".
Tornillo(tipo A)
electdca
-18-
UTILIZANOO LA RANURA "B"
Aprete el obturador usandoeI hoyo izquierdo de
torniHo,y gire apropiadamente para sacar el cabIe
electrico a travee de la ranura "B".
Tornillo(tipo ,_
el6ctrica

REQUISTIOS DE VENTANA
Estas instrucciones son para una ventana de
corredera horizontal o un marco de ventana.
La salida etectrica debe quedar al alcance det cable
de conexi6n.
Para la instalaci6n en una ventana con marco, la
estructura de la ventana y el lateral det ediflcio
deben ser los adecuados para soportar et peso del
aparato de aire acondicionado.
Ventana de corredera horizontal
i!iiii!!!i_?__i_ii!,!_!!iii
t5 V2"min.
16 %" max.
_1 I
21 I/2' rain.
i!iiiiiiiiii!iiiii!ili
Ventana con marco
SERVICIO ELECTRICO
Compruebe cual esta atimentaci6n electrica que tlega a
su domicilio La alimentacion electrica disponibIe debe ser
la misma que se muestra en laplaca del fabricante de la
unidad (que se halla en et lado derecho del gabinete de
corriente alterna).
Todos los modelos estan equipados con un enchufe de
tres espigas para suministrar un servicio correcto y una
conexion atierra segura y pesitiva. No cambie el enchufe
de ninguna form& No use un enchufe adaptador. Si su
toma de corriente de pared actual no puede usarse con et
enchufe deI equipo, Hamea un electricista calificado para
que efect_]elas correcciones necesarias.
CONSERVE LA CAJA y este MANUAL DEL
PROPtETARIO para que le sirva como referencia en el
futuro. La caja es la mejor manera de conservar la unidad
durante el invierno ocuando no esta en use.
Para evitar el riesgo de tesionespersonates,danos a
su propiedad,o danos al producto debido al peso de
este equipo y los filosa que seran expuestos:
• El aire acondicionadodeI que se hablaen este
manual afirma peIigrode peso excesivo.
Dos o mas personas serequiere para movere
instalar taunidad. Para evitar heridas o agotamtento,
use tecnicasapropiadas para levntary mover Ia
unidad
• Cuidadosamenteinspeccione el tugardonde el aire
acondicionadosera puesto. Asegurese que el lugar
sostengael peso de Ia unidadsobre unperiodo de
tiempo prolongado
• Mantengasu aireacondicionado concuidado. Use
guantes protectorescuando tevanteo mueva la
unidad. EVlTE tas aletas fiIosasde metaIen el
serpentin deIanteroy de atras
• Asegurese que el aire acondicionado no secaiga
durante Iainstalacion.
NOTE!
Antes de usar el acondicionador de
aire asegure la parrilla delantera con
dos tornillos incluidos con el manual
de owner's.
1. Abra Ia parrilIa de la entrada hacia
abajo y quite el fiItro de aire.
2. Sujete ta parrilIa delantera con los
tornilIos.
3. Reinstale el filtro de aire.
4. Cierre la parrilla de la entrada.
Bandejade Entrada
-19-

INSTALACION PIEZAS DE
MONTAJE
NO. NOMBRELA PARTE CANT_DAD
1 CorLina t
2 Guis superior t
3 Guis lateral t
4 Guide laterat 2
5 Soperte de fijaci6n t
6 Soporte 1
7 Tornitlo de nivelaci6n y tuerca 1
8 Ternitlo 2
9 Tuerca 2
10 Arandeta 2
11 Junta de guis lateral 1
12 Burlete de espuma 1
13 Sello del Banda de la ventana 1
14 Soporte de fijacion de ventana t
15 TernilIo (tipe A) O
18 TernilIe (tipe B) 3
17 TemilIe (tipe C) 8
HERRAMIENTAS REQUERIDAS
• Guantes apretados
• Destornillador normal
• DestomilIador Phillips
• Pinsas
• Cuchillo filoso
• Llave inglesa o Ilave abierta de 3/8"
• Llave hexagonal de cube y trinquete de 1/4
de pulgada
• Cinta para medir
• Taladro electrico
• Broca de taladro de 1/4"
INSTALACION
Escoja un lugar que le permita Ilevar el aire frio al area
que desea. Las ventanas que se usen para la
instaiaci6n deben tener la resistencia suficiente para
soportar el peso del equipo de aire acondicionado. Una
buena instalaci6n con atenci6n especial a la correcta
posici6n de la unidad disminuir& ta probabilidad de que
sea necesario efectuar reparaciones.
Cuando se desea enfriar mas de una habitaci6n, la
instalaci6n es muy importante puesto que el aire frio no
dobla esquinas. Para enfriar sus habitaciones, el aire
frio debe desplazarse desde el equipo de aire
acondicionado en una trayectoria recta.
MONTAJE EN UNA VENTANA
DE CORREDERA HORIZONTAL
_1 Colocar sin apretar el soporte a ta parte inferior de
la fijaci6n usando los tomiltos y arandeIa y tuercas.
Cotocar el tornilIo y ta tuerca de nivelaci6n (Fig 1)
Soporte
- 20-
fijaci6n
Tornillo de
nivelaci6n y tuerca
FIG. 1
I_11 Quitan la proteccion del setlo de la banda del
ventana y aplique et sello a la banda del ventana.
I[_1 Mida y marca suavemente una linea de 8-1/4
pulgadas desde la jamba de ta ventana. Centre el
conjunto del soporte en la banda de la ventana y
ajusteto 4 tornilIos det tipo C (Fig. 2).
Jamba de
FIG. 2

_1 CoIoque Ia sujecion del soporte contra Ia pared
exterior y apriete los tornillos en Ia parte superior
deI soporte. Ajuste los torniIios de nivelaci6n de
forma que ei aire acondicionado quede instalada
con una incIinacion muy suave (unos 1/4") hacia
abajo hacia la saIida para que drene correctamente.
Apriete ia tuerca. (Fig. 3)
NOTA: NO taladrar un agujero en Ia parte inferior
de Ia bandeja de la base. El aire
acondicionado ha sido dise5ado para
funcionar con Ia bandeja de la base Ilena
con agua aproximadamente hasta Ia mitad
de su capacidad.
UnO$ //4" _.
_"_ Sujete las guias laterates a los lateraIes del aire
acondicionado con tres tornillos del tipo A para Ias
guias. Comience con el primer tornillo en la parte
media de las guias. (Fig. 4)
r_ Fijar la guis superior en ta parte superior del
aparato de aire acondicionado usando 3 torniIIos
dei tipo A.
Fijar las guias laterales
Guis Eateral
Guidelateral
FIG. 4
H Medir la akura de la abertura de la ventana
desde Ia parte superior det sopor[e, segt]n se
muestra en Ia Fig. 5. Restar 20-3/4 pulgadas.
Marcar esta medida en ia cortina y cortar la
cortina.(Fig 5)
FIG. 5
_[_ DesIizar la cor[ina en Ia cortina deI marco con
eI lade m&s suave hacia la habitacion. DesIizar la
cortina deI marco en las guias lateraIes del armario
deI aire acondicionado. Asegurarse de que ia
cortina queda firmemente sujeta en todos los lades
)or el marco. (Fig. 6)
_1 Corte dos seIIos de guia Iaterales con la misma
Iongitud. Retire la protecci6n y apliquelo en eI
lateral trasero de las guias laterates del
compar[imento comenzando per debajo deI
conjunto deI marco de la cortina.
Corte Io que sobre de forma que el sello quede
ajustado aI final de Ia guia lateral. (Fig. 7)
-21 -
Je sellante de
clima a las
guias laterales
justo en el borde
inferior de la cortina
del molde
FIG. 7

_1'_ Colocar el aparato de aire acondicionado en ta
abertura de la ventana Deberia queda asentado sebre et
soporte de medo que la oertina del marco y las guias
laterales del armario queden asentadas contra las jambas
de la parte superior y taterales de la ventana Compa_ero
frente deI Soporte del corchete con la Guia baja que
asoci6 el fondo baja de Ia bandeja.
_lTaladre huecos de 1/8 pu(gadas en Iapista de ta
banda de ventana de los huecos existents en taGuia de
la Base Atornilie 4 tornilles de tipo C atraves de los
hueoos.
_-_Si se trata de Iainstalaci6n de una ventana de
bisagras, proceda seg0n Ia Instalaoi6nde ventana de
bisagras Desiice el marco corredizo de ventana interior
contra el tateraidel compartimento
_'] Taladre un agujero de 1/8 pulgadas para alinearlo
con los agujeros que hay en el marco de la cortina Ajuste
eImarco de ta cortina con el marco de ta ventana con
tornUiosdeI tipo B. (Fig 8)
NOTA: Comprobar todas Iasjuntas y sellar cualquier
abertura de aire restante con un selIante aislante
adecuado.
i
e_de
I
Tpo C Terni]lo Banda de
la ventar_
FIG. 8
_'L_si se trata de (ainstaIaci6n de una ventana de
bisagras, proceda segun ta Instalaci6n de ventana de
bisagras. Colocar eI budete de espuma entre la banda
vertical y et vidrio de la ventana (Fig. 9)
_-_ Fijar el soperte de bIoqueode (aventana con un
torniUode tipo B.(Fig. 9)
INSTALACION DE VENTANA
CON MARCO
• El proceso de montaje es el mismo proceso descrito
en los pasos t a 11 y paso 13 de ta instaiaci6n de
ventana corredera horizontal.
• Si el hueco de ta ventana tiene una anchura superior
a 15-3/4 putgadas, sera necesanrio colocar un panel
de Itenado. Fabricar este panel con madera de un
grosor de 3/4 de pulgada y con la Iongitud completa
de la ventana. Fijarlo at marco de la ventana para
protegerlo contra ta intemperie.
•A raiz de que Ios estilos y lostama_os de ia ventana
deI compartimiento varia ampliamente, es
aconsejabte tenet el aire acondicionado instalado por
un tecnico en este tipo de instaiaciones.
LA ELIMINACION DE LA
VENTANA
• Apague y desenchufe el aire acondicionado.
• Si ventana corredera horizontal, retire la mensula de
Bloqueo de ventana det marco de la ventana y ta
franja de seilante de espuma entre (as ventanas (En
caso de ventana corredera horizontal)
• Retire la mensuia de seguridad que instal6 en el
paso t2
• Desatornille la cortina de marco de la ventana.
• Retire el aire acondicionado de la abertura de la
ventana.
TENGA CUIDADO DE NO DEJARLO CAER. Una
vez retirada, cot6quelo de forma segura fuera de la
via.
• Retire ta cortina de marco y ia corLina
• Desatornilte tas guias lateraies y la guia superior.
• Cotoque la unidad y todo el equipo de ensamble en
la caja de embarque del aire acondicionado y guarde
en un lugar timpio y seco
• Persiana Lateral.
FIG. 9
• El aire acondicionado dei que se habla en este
manual afirma peligro de peso excesivo.
Dos o mas personas se requiere para mover e
instaiar la unidad. Para evitar hefidas o
agotamlento, use tecnicas apropiadas para
levntar y mover la unidad.
• AImanejar la unidad, tenga cuidado para evitar
cortarse con las alertas metalicas afiladas que
est&nen Ios serpentines frontal y posterior
• Asegurese que el aire acondioionado no se caiga
durante ta instalacion
- 22-

COMO Y POR QUI
Su equipo de aire acondicionado de habitaci6n
brinda las siguientes funciones para hacer que ta
vida en climas caIidos sea mas confortabte:
• Enfria y hace circular el aire por la habitaci6n
• Disminuye la humedad eliminando la humedad
excesiva.
• FiItra el polvo, el sucio y algunas impurezas
transportadas en el aire del clima veraniego.
Et equipo de aire acondicionado reatiza estas
funciones haciendo pasar el aire det medio
ambiente a traves de un fiItro que atrapa tas
particutas de poIvo y sucio. El aire pasa entonces
pot un serpentin de enfriamiento que refrigera el
aire y elimina el exceso de humedad. El mismo aire
regresa entonces al enfriador, secador y limpiador
deI aire del ambiente. La humedad extraida del aire
ambiente es Ilevada al exterior y evaporada.
Su aire acondicionado esta disefiado para operar y
suministrar una enorme potencia de enfriamiento.
SONIDOS NORMALES Figura 10
Ademas de los sonidos regulates del motor del
ventiIador y et compresor que salen de su equipo
de aire acondicionado, usted escuchara de vez en
cuando un sonido metatico. Este sonido es
producido per Ia humedad que es recogida deI aire
en el ambiente yes Ianzada contra el ventilador del
equipo de aire acondicionado. Esto es algo normal
que no debe ser motivo de preocupacion. De igual
modo, no se atarme si usted escucha un Iigero
sonido de silbido o borboteo proveniente de su
equipo de aire acondicionado despues que Io
apaga. Estos son ruidos normales del refrigerante.
CAPACIDAD Y TIEMPO DE
FUNCIONAMIENTO
AIdecidircualdebeserlacomodidaddeseadaparaelareaque
ustedquiereenfriar,esimportantedeterminareltamafiocorrecto
deia unidad.Unaunidadpequenanotendralacapacidadpara
enfriar,dejandolaareacaLurosa.Eltamafioadecuadoes
determinadopot elnOmerodemetroscuadradosquetieneel
areaquesedeseaenfriar,asi comopot ratemperaturainteriory
exteriory potLahurnedadUnaunidaddemasiadograndesi
enffia,peronodeshumedece,dejandolaareafriay humeda.
Siemprequelacargatermicadeiventiladoresteporencimade
tonormal,eIequipodeaireacondicionadodebefuncionarmas
tiempoparamantenerlatemperaturadeseadaqueustedha
seleccionado.Bajocondicionesdeunacargatermicamuy
pesada,puedesernecesarioqueet equipodeaire
acondicionadofuncioneconstantementeparamantenerla
temperaturadeseada.
Enocasiones,elusodeMEDFANparahacercircularelairepor
lahabitaci6nhaceque elambienteseamasconfortableaun
cuandoelequiponoesteenfriandoelaire.Mientrasmastiempo
y conmayorfrecuenciafuncioneelequipodeaire
acondicionado,maselectricidadconsumiray mayoresseranlos
costosdesu uso.
Compresor
El moderno compresor de gran
eficiencia puede producir un ruido
agudo de murmullo o un ruido de
putsaci6n que viene y se va.
....................... Vibraciones de la
_ Ventilador unidad
Usted puede La unidad puede vibrar y
escuchar el hacer ruido debido a la
movimiento deI deficiente construcci6n
Condeneador
Usted puede escuchargotas de agua que caen
sobre el condensador causando un sonido
metaIico o un sonido de chasquido.
FIG. 10
- 23 -

CARACTERJSTICAS
4
8
FIG. 11
1. Cabinete
2. Salida Deaire
3. Defleotor De Aire
Horizontal
(Vent Anillas
Horizontales)
4. Recoleotoor
De Aire
(Bandejade Entrada)
5. Fitro De Aire
6. Grillage Frontal
7. Panel De Control
8. Cable De Conexion
Electrica
9. Evaporador
10. Condensador
11. Compresor
12. Bandeja
13. Suspensores
14. Persiana Lateral
USO DEL EQUIPO DE AIRE
ACONDICIONADO
_Para reducir ei riesgo de incendio,
descargas electrica o tesiones personales, lea las
IMPORTANTES INSTRUCClONES DE
SEGURtDAD antes de operar este aparato.
Para comenzar a utilizar el equipo de aire
acondicionado, siga estos pasos:
1. Enchufe el equipo de aire acondicionado. (Para
prevenir riesgos de descargas electricas, no use
un cable de extension ni un enchufe adaptador.)
2. Ajuste el extractor de aire en ta posici6n CLOSE.
3. Ajuste el control de MODE at mas alto nivet
fresco.
4. Ajuste el control del ventilador al mas alto nivet.
5. Ajuste las rejillas desviadoras para Iograr un flujo
confer[able de aire.
6. Una vez que ta habitacion se haya enfriado,
ajuste ei control de temperatura TEMP a la
graduacion que usted considere mas confor[able.
NOTA: Si se apaga el aire acondicionado, espere 3
minutos antes de volver a encenderIo. Esto permite
que se estabilice ta presion dentro del compresor.
Si no sigue estas instrucciones, el equipo podria
funcionar con poca eficiencia.
Si usted mueve el TEMP el control a un warmer,
entonces inmediatamente espalda a una colocacion
mas fresca, ta unidad apagara. Espere 3 minutes.
CONTROL DE VENTILACION
El control de ventitaci6n permite que el equipo de
aire acondicionado haga recircular el aire en el
interior de la habitacion (CLOSE) o saque el aire
hacia el exterior (OPEN). (Figura 12)
• La posicion CLOSE sirve cuando se desea un
enfriamiento m&ximo. Tambien puede usarse para
hacer recircular el aire sin enfriar la habitacion
cuando el equipo de aire acondicionado se ajusta
en la posicion FAN.
• La posicion OPEN extrae el aire estancado de la
habitacion y to expuisa hacia fuera. El aire fresco
es Ilevado hacia el interior de la habitacion a traves
de los pasajes nermales de aire que se haIlan en
los hogares.
• La posicion OPEN o CLOSE puede usarse con
cualquier seleccion de ventilador.
!
CLOSE=hVENT-ILOPEN
(TIRARPARAABRIR/ EMPUJARPARACERRAR)
FIG. 12
- 24 -

PANTALLA.
ENERG[A
•Paraencenderelaireacondicionado,optimaelboronPars
apagarelaireacondic[onadovuelvaaoprimirelbot6n
•Estebotontienelaprforidadsobrecualesquieraotros
botones.
•CuandoIoenciendeporprimeravez,e[aireacondicionadoesta
ene]mododeenfriamientomasaltoylatemperatu_aen72°F
CONTROL REMOTORECEPTORDE SENAL.............
MODO
- Cadavezqueopdmeestebot6ncambiaraentre
COOL,ENERGYSAVERyFAN(ENFRIAMIENTO
AHORRODEENERGiAyVENTILADOR).
- AHORRO DEENERGIA
• El ventiladorsedetienecuandoelcompresordejadeenfriar
Aproximadamentecada3minutoselventiladorseencendera
y severificara]atemperaturadela habitaci6nparavetsi es
necesarioenfriar
VELOCIDAD
DEL VENTILADOR
• Cada vez que oprima este boton,seavanzaen et
ajustede un rangocomosigue:{HIGH(F3)_"
LOW(F1)_" MED(F2)_ HIGH(F3)}
TEMPORIZADOR I
-TIEMPODE APAGADO
• NormalmenteutitizaraeItemporizadorde apagadomientras
duerme.
• Si su unidadesta funcionando,el temporizadorfija el numero
dehoras antesde apagarse.
AJUSTE DE TEMPERATURA ............. • Para sucomodidadmientrasduerme, una vezque sefija eI
o
• Use este boton paracontrotarautomaticamenteIa temporizador,et ajustede temperaturaseelevara 2 F despues
temperaturade Iahabitacion, de30 minutosy unavezmas despucsde otros 30 minutos
La temperaturapuede ajustarsedentro de unrango • Cadavezqueoprimaet borondeItemporizador,hara que
de 60°Fa 86°F de I°F avanceel ajustedettempofizador comosigue:
1 Hora-_2 Horas-_etc _12 Horasmaximo.
1
En caso de fallo de la corriente electrica, la |
unidad funcionarb como antes cuando
J
vuelve la corriente.
- TIEMPODE tNICIODE FUNCIONAMtENTO
• Si su unidadesta apagada,el tempofizadorfija eI nOmerode
horasantesde enoenderse.
• Cada vez que oprima et botondeItemporizador,hara que
avariceel ajustedettemporizadorcomosigue:
1 Hora_" 2 Horas_" etc._'12 Horas maximo.
AJUSTE DE LA DIRECCION DEL AIRE
CONTROL HORIZONTAL DEL FLUJO DEAIRE
La direccion del flujo de aire horizontal se ajusta
moviendo las rejiIlas verticaIes a la derecha o
izquierda con la punta de sus dedos. (FIG. 13)
CONTROL VERTICAL DEL FLUJO DE AIRE
La direccion det flujo de aire vertical se ajusta
girando las rejillas horizonatales hacia arriba o
hacia abajo. (FIG. 14)
I
FIG. 13 FIG. 14
- 25 -

CONTROL REMOTO
Nota: El Control remote podria no funcionar
apropiadamente si hay un reflejo de Iuzsobre el sensor
del aire acondicionado o si hay obstacuIos entre el controt
remoto y Iaunidad de aire acondicionado.
Cada vez que oprime un boton, escuchara unaseSat
acustica desde el aire acondicionado
1 6 3
4 2 5
2
FIG. 15
LAS OPERACIONES DEL CONTROL
REMOTO
1. ENERGiA
• Paraencendere_aire acondicionado,oprimael boton.
Paraapagarel aireacondicionado,vuelvaa oprimirel
boton.
• Estebotontiene la prioridadsobrecualesquieraotros
botones
•Cuando Ioenciendeperpdmeravez,eIaire
acondicionadoesta enel modode enfriamientomasatto
y latemperaturaen 72F.
2. AJUSTE DE TEMPERATURA
• Use estebot6n paracontrolarautomaticamentela
temperatura Latemperaturapuedeajustarsedentrode
un rangode 60°Fa 86°Fde I°F
3. MODO
-Cada vezque oprimeeste boton,cambiaraentreCOOL,
ENERGYSAVERy FAN (ENFRiAMIENTO,AHORRO
DEENERGiAy VENTILADOR)
-AHORRODE ENERGiA
• Etventiladorse detienecuandoetcompresordejade
enfriar.
Aproximadamentecada3 minutosetventiladorse
encenderay severificaraIatemperaturade lahabitaci6n
para versies necesadoenfriar
- 26-
4. VELOCIDAD DEL VENTILADOR
• Cadavezque oprimaeste boton,se avanzaen el ajuste
comosigue:{High(F3)_ Low(F1)_ Med(F2)
High(F3)}
5. TEMPORIZADOR
-TIEMPO DE APAGADO
• Normalmente utilizara el tempofizador de apagado
mientras duerme.
• Si su unidad esta funcionando, el temporizador fija el
nL]merode horas antes de apagarse.
• Para sucomedidad mientras duerme, una vez que se
fija el temporizador, el ajuste de temperatura se
elevara 2"F despues de 30 minutos y unavez mas
despues de otros 30 minutos
Cada vez que oprima el boron det temporizador, hara
que avarice el ajuste del temporizador como sigue:
1Hera _ 2 Horas -,etc.-,12 Horas maximo.
- TtEMPO DE tNICIO DE FUNCIONAMIENTO
• Si su unidad esta apagada, et temperizador fija el
n_mero de horas antes de encenderse.
Cada vez que optima el borondeI temporizader, hat&
que avarice et ajuste del temporizador come sigue:
1Hora _ 2 Horas _etc._12 Horas maximo.
COMO COLOCAR LAS BATERiAS
AL CONTROL REMOTO
t. Retirela cubiertade la parte posteriordelcontrot remoto.
2. Insertedosbaterias.
• Aseguresede orientarcorrectamentetospolos (+)y (-).
• AsegQreseque ambas bateriassonnuevas.
3. Vuelvaacolocarla cubierta.
16
• No utilicebateriasrecargabies.Dichasbateriasson
diferentesde lasbaterias secasen laforma,dimensionesy
funcionamiento
• Saquelas bateriasdelcontrol remotosi nova autilizarel
aireacondicionadoporun periodoproiongado.
• Paraevitarel descargue,remuevalas pilasdelcontrol
remotosiel aireaoondicionadono vaa ser usadopot un
periodoextendidode tiempo. Mantengael control remoto
alejadode lugaresdeextramocaloro humedad.Para
mantenerla operacion6ptimadelcontrol remoto,el sensor
detremotono debeserexpuesto al rayosolar directo.
• El controlremotopuedeser colocadosobreuna pared
usandoel sopertemontabte
FIG. 17

LIMPIEZA DEL FILTRO DEL AIRE
El filtro del aire se ira ensuciando a medida queva
atrapando el poIvoproveniente deI aire interior. Es
preciso lavar etfiltro deI aire al menos cada dos
semanas. Si eI filtro deI aire permanece ttenode poIvo,et
flujo de aire disminuira y se reducira ta capacidad de
enfriamiento del equipo, con posibles daSos para Ia
unidad (Figura 18)
•Abra la rejilla de entrada de aire hacia arriba tirando de
la parte superior de esta rejilIa. (Figura 18)
• Remueva el filtro de aire de ta parbIlafrontal haland el
fitro suavemente hacia arribo. (Figura 19)
t.
FIG. 18
FIG. 19
LIMPIEZA DEL EQUIPO DE AIRE
ACONDICIONADO
Larejiltafrontaly ta rejilladeentradadet airepuedenlavarse
con un pasohumedecidoenuna soFuci6nde detergente
suave Ergabinetepuedelavarseconunjabon odetergente
suavey aguatibia, seguidamentepuedepulirseconcera
liquidaespecialpara electrodomesticos
Paraaseguraruna eficienciamaximacontinua,los
serpentinesdelcondensador(ladode enfrentede Faunidad)
deben revisarseperiadicamentey Eimpiarsesi estan
obstruidoscon hoLIino con suciode laatmosfera.
FIG. 20
COMO SACAR LA REJILLA
FRONTAL
•Saque eltomilIoquemantiene_arejillafrontalen posicion.
• QuiteettornilloqueaseguraIe rejadelantera.
• ErnpujeIa rejillahaciaarribadeabajoyjale la partede
arribade larejilralejosdela basepara levantarlas
lenguetasdearriba haciaafuerade las ranuras
Entrada
• FIG. 21
COMO A REEMPLAZA EL
GRILLE ANTERIOR
Pegue e{ panel frontal a ta caja insertando los fijadores
en el panel adentro los del panel de Ia caja.
FIG. 22
- 27 -

ANTES DE LLAMAR PARA SERVIClO
Cheque ta siguiente tista para asegurarse si en realidad es necesario Ilamar para servicio. Una referencia rapida a
este manual puede evitar una Ilamada para servicio innecesaria.
EL AIRE ACONDICIONADO NO FUNCIONA
Compruebe si...
El dispositivointerruptor decordente esta activado
El enchufe de pared esta desconectado
Fusible fundido o interruptor de circuito activado
EquJpo APAGADO
La unidadse apag6 y despues se encendi6 demasiado rapidamente
Elcontrol de TEMPesta mas calido que [atemperatura ambiente
Despues.,.
Presione el boton RESET situado en la carcasa del enchufe del cable de
alimentaci6n
Si el boton RESET no permanece presionado, deje de utilizar el equipo y
pongase en contacto con un tecnico de servicio cualifJcado
Empuje el enchufe firmemente contra la toma de pared
Sust_tuya el fusible pot uno de tipo de retardo o reinicie el interruptor decircu to.
Presione el bot6n Power
Apague la unidad y espere 3 minutos antes de volver a encendeda.
Establezca el control TEMP a un nPmero m&s inferior
EL AIRE DE LA UNIDAD NO SALE LO SUFICIENTEMENTE FRJO.
Compruebe sL.. Despues...
VELOC]DAD DEL VENTILADOR establecida en BAJA. Presione el bot6n FAN SPEED para fijar]o e_tH_
Control de TEMP estab[ecido en demasiado calido F[je el control TEMP a una temperatura mas inferior.
Temperatura ambiente por debajo de los 70 ° F (21° C) El enfriamiento puede no ocurdr basra que ]a temperatura ambiente sea
superior a 70 ° F (21 ° C)
El conducto de detecci6n de temperatura esta en contacto Enderece el conducto ]ejos de la bobina de evaporador
con ]a bobina del evaporador, ubicada tras la rejiita frontal
EL AIRE ACONDICIONADO ENFRJA,PERO EL CUARTO ESTA DEMASIADO CALIDO - SE ESTA FORMANDO HIELO TP.A$ LA REJILLA DE ENTRADA.
Compruebe sL.. Despues...
Temperatura ambfente por debajo de los 70" F (21 ° C) Para descongelar la bobina, fije el MODO a VENTILADOR,
y ]a velocJdad del venti]ador a A[ta
El filtro de aire puede estar sucio. Umpie el fiftro de aire Consulte la secci6n de mantenimiento en el manual
del propietarJo
Control TEMP fljado demasiado bajo Para descongelar ]a bobina, fije el MODO a Coo], la velocidad de[
ventflador a A[ta, y el control TEMP a una temperatura mas alta
EL AIRE ACONDICIONADO ENFRJA, PERO EL CUARTO ESTA DEMASIADO CALIDO
Compruebe sL.. Despues,,,
Fi]tro de aire sucio - aJre restdngJdo. Limpie e_filtro de aire Consulte la secci6n de mantenJmJento del manual del
propietado
EL control TEMP esta fijado a demasiado caliente F[je el control de TEMP a una temperatura mas inferior
La parte frontal de la unidad esta bJoqueada por persianas, ElimJne la obstrucci6n de delante de la unidad.
cortinas, mueb]es, etc La distfibucion del aire esta restrict&
Las puertas, ventanas registros etc Estan abieRos Cierre ]as puertas, ventanas, registros, etc
El aire frio se escapa
Unidad recientemente encendida en un cuarto caliente Concede un tiempo adicional para a eliminaci6n del caIor almacenado
en paredes, techo, suelo, y muebles.
EL AIRE ACONDICIONADO SE ENCIENDE Y APAGA R.&.PIDAMENTE.
Compruebe sL.. Despues...
La temperatura exterior es extremadamente caliente FFje[a VELOC]DAD del VENTILADOR en HI para reducir al minimo la
carga de enfriamiento
La unidad esta fijada en modo de ahorro de energia Aproximadamente cada 3 minutos, el venti[ador se encendera y ]a unidad
comprobara la temperatura del aire del cuarto para determinar si es
necesafio enfdado Este es el funcionamiento normal del modo ahorro de
energia
RUIDOS CUANDO LA UNIDAD ESTA ENFRIANDO.
Compruebe si... Despues...
Ruido del venti]ador go]peando agua - de[ sistema de Esto es normal cuando la humedad es alta Cierre puertas, ventanas, y
eliminaci6n de humedad registros.
Vibraci6n de la ventana - instalaci(_n defectuosa Consuffe Jasinstrucciones de insta}aci6n o consulte con el instalador
GOTEO DE AGUA DENTRO DEL CUARTO CUANDO LA UNIDAD ESTA ENFRIANDO.
Compruebe si... Despues...
E[ aire acondicJonado esta insta[ado incorrectamente Incfine e] aJre acondicionado ievemente hacJa e] exterior para permJtir el
drenaje del agua Consuite las instrucciones de instalaci6n o consulte con
el instaJador
GOTEO DE AGUA EN EL EXTERIOR CUANDO LA UNIDAD ESTA ENFRIANDO.
Compruebe si... Despues...
La unidad esta eliminando grandes cantidades de Esto es normal durante los dJas excesivamente hQmedos
humedad de un cuarto hOmedo
- 28-


- 30-

Master Protection Agreements
Congratulations on making a smart purchase.
Your new Kenmore ®product is designed and
manufactured for years of dependable operation.
But like all products, it may require preventive
maintenance or repair from time to time.
That's when having a Master Protection Agreement
can save you money and aggravation.
Purchase a Master Protection Agreement now and
protect yourself from unexpected hassle and
expense.
The Master Protection Agreement also helps extend
the life of your new product. Here's what's included
in the Agreement:
[] Expert service by our 12,000 professional
repair specialists
[] Unlimited service and no charge for parts and
labor on all covered repairs
[] "No-lemon" guarantee - replacement of your
covered product if four or more product failures
occur within twelve months
[] Product replacement if your covered product
can't be fixed
[] Annual Preventive Maintenance Check at your
request - no extra charge
[] Fast help by phone - phone support from a
Sears technician on products requiring in-home
repair, plus convenient repair scheduling
[] Power surge protection against electrical
damage due to power fluctuations
[] Rental reimbursement if repair of your covered
product takes longer than promised
Once you purchase the Agreement, a simple phone
call is all that it takes for you to schedule service.
You can calI anytime day or night, or schedule a
service appointment online.
Sears has over 12,000 professional repair
specialists, who have access to over 4.5 million
quality parts and accessories. That's the kind of
professionalism you can count on to help prolong
the life of your new purchase for years to come.
Purchase your Master Protection Agreement today!
Some limitations and exclusions apply.
For prices and additional information call
1-800-827-6655.
Sears Installation Service
For Sears professional instaflation of home
appliances, garage door openers, water
heaters, and other major home items, in the
U.S.A. call 1-800-4-MY-HOME '_
Acuerdos de Proteccion Especializada
iEnhorabuena! Ha realizado unacompra inteligente.
Su nuevoaparato Kenmore® esta diseflado y fabricado
para ofrecerle afios de baen funcionamiento.
Sin embargo, at igual que todos los productos, puede
precisar un mantenimiento preventivo o incluso atguna
reparaci6n de vez en cuando. En esas ocasiones, un
Master Protection Agreement puede ayudade a ahorrar
dinero e inconvenientes.
Adquiera un Master Protection Agreement ahora, y
prot_jase a si mismo de molestias y gastos inesperados.
El Master Protection Agreement Ie ayudara tambien a
pretongar la vida de su nuevo aparato. Los siguientes
servicios estan induidos:
[] Servicio experto por parte de cualquiera de
nuestros t2.000 tecnicos profesionales especialistas
de Sears.
[] Prestaci6n de servicios sin timitaciones y sin
cargarte las piezas o la mane de obra en todas tas
reparaciones cubiertas per el acuerdo.
[] Garantia seria de sustitucion de las piezas del
producto cubierto por el acuerde, si cuatro o mas
piezas se mostrasen defectuosas en un periodo de
doce meses.
[] Sustituci6n del producto por otro nuevo, si el
defectuoso no pudiese repararse
[] Control de mantenimiento anual preventivo
siempre que todesee y sin gasto adicienal alguno
[] Asistencia telef6nica inmediata de un tecnico
especialista en preductos quehart de ser reparades a
demicilio, ademas de una programaci6n adecuada de
Ia reparaci6n.
[] Protecci6n contra subidas de tension que
provoquen dafios eIectricos debidos alas
fluctuacienes en etsuministro
[] Reintegro del alquiter si la reparacion det preducto
tleva mas tiempo del promtetide
Unavez que haya adquirido elAgreement, no necesitara
masque una simple Ilamada para seticitaret servicio de
su aparato. Ademas, podra hacerlo en cualquier momente
del dia o de tanoche, o soticitar una citapara prestaci6n
de servicies online
Sears cuenta con mas de 12.000tecnicos profesionales
especiaIistas en reparaciones, con acceso amas de 4,5
millones de piezas de sustituci6n y accesorios de calidad.
Este serael tipo de profesionalidad y servicio con etque
podra contar para prolongar tavida de su nuevo producto
por muchos aSos.iAdquiera hoy mismo su Master
Protection Agreement!
Se aplicar_n algunas limitaciones y
restricciones.
Si desea hacer alguna consulta sobre los
precios u otra informaci6n adicional, le rogamos
Ilame al tel6fono 1-800-827-6655.
Servicios de Instalaci6n Sears
Para soliciter servicios de instalaci6n profesionales
de Sears de etectrodomesticos, mandos de apertura
de puertas de garajes, calentadores de agua y otros
aparatos en los Estados Unidos, puede IIamar a
1-800-4-MY-HOME ®

Your Home
For repair - in your home - of all major brand appliances,
lawn and garden equipment, or heating and cooling systems,
no matter who made it, no matter who sold it!
For the replacement parts, accessories and
owner's manuals that you need to do-it-yourself.
For Sears professional installation of home appliances
and items like garage door openers and water heaters.
1-800-4-MY-HOME ® (1-800-469-4663)
TM
SM
C4) Registered Trademark / Trademark / Service Mark of Sears Brands, LLC
TM SM
C4)Mama Registrada / Mama de Fabrica / Marca de Servicio de Sears Brands, LLC
McMarque de commerce / MoMarque deposee de Sears Brands, LLC © Sears Brands,LLC
Part No.: 3828A21007N