Loading ...
Loading ...
Loading ...

When the frost builds up on the evaporator coils, the compressor will cycle off and the fan will continue to run until the frost disappears.
Wait 3 minutes before resuming operation
After the unit has stopped, it can not be restarted operation in the first 3 minutes. This is to protect the unit. The operation will automatically start after 3 minutes.
Check filter feature
The system starts to count the time once the fan motor operates. The check filter feature can be only activated when the accumulated operation time achieves 250 hours or more. The
Reset light(Clean filter indicator light) flashes at one time per second, after finishing cleaning the air filter, press the Filter pad and the Reset light(Clean filter indicator light) go off.
Auto•Restart
If the unit breaks off unexpectedly due to the power cut, it will restart with the previous function setting automatically when the power resumes.
Setting the Timer
When the unit is on, first press the Timer button, the Timer Off indicator light It indicates the Auto Stop program is initiated. Press it again the Time On indicator light illuminates.lt
indicates the Auto Start is initiated.
When the unit is off, first press the Timer button, the TIMER ON indicator light It indicates the Auto Start program is initiated. Press it again the Time Off indicator light illuminates.lt
indicates the Auto Stop is initiated.
Press or hold the UP or DOWN pad to change the Auto time by 0.5-hour increments, up to 10 hours, then at 1-hour increments up to 24 hours. The control will count down the time
remaining until
The selected time will register in 5 seconds and the system will automatically revert back to display the previous humidity
When the Autostart & Auto-stop times are set, within the same program sequence, TIMER ON-OFF indicator lights illuminate identifying both ON and OFF times are now
programmed.
Turning the unit ON or OFF at any time or adjusting the timer setting to 0.0 will cancel the Auto Start/Stop function.
When the LED display window displays the code of P2, the Auto Start/Stop function will also be canceled.
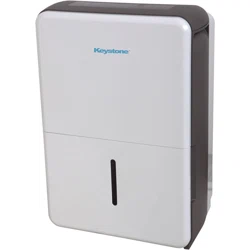
IDENTIFICATION OF PARTS
Identification of parts
Front
1. Control panel
2. Panel
3. Water bucket
4. Water level window
5. Handle (both sides)
Rear
1. Continuous drain hose outlet
2. Caster
3. Power Cord and plug
4. Power cord buckle (placed in the water bucket, used only when storing the unit. Installed as shown Fig.3a))
5. Pump drain hose outlet(some models without)
6. Air outlet grille
NOTE: All the pictures in the manual are for explanation purposes only. The actual shape of the unit you purchased may be slightly different, but the operations and functions are the
same.
Accessories:(placed in the water bucket of the unit)
pump drain hose(1pc)(only for the unit with pumpfeatrue)
power cord buckle(1pc)
OPERATING THE UNIT
Loading ...
Loading ...
Loading ...