Loading ...
Loading ...
Loading ...
—
Refrigerator Location
Clearances
Do not install refrigerator where temperature will
Allow the following clearances for ease of
go below
60”F.
because it will not run often enough
installation, proper air circulation and plumbing
to maintain proper temperatures.
and electrical connections:
Do install it on a floor strong enough to support it
Sides . . . . . . . . . . . . . . . . . . . . . . . . . . . . . . . . .
.3/4”
fully loaded.
Top . . . . . . . . . . . . . . . . . . . . . . . . . . . . . . . . . . . . . . . 1“
Also see Energy-Saving Tips.
Back . . . . . . . . . . . . . . . . . . . . . . . . . . . . . . . . . . . . . 1“
If Model 19,22, or 25 is to be installed against a wall
on the hinge side, allow
1’/2”
for door clearance.
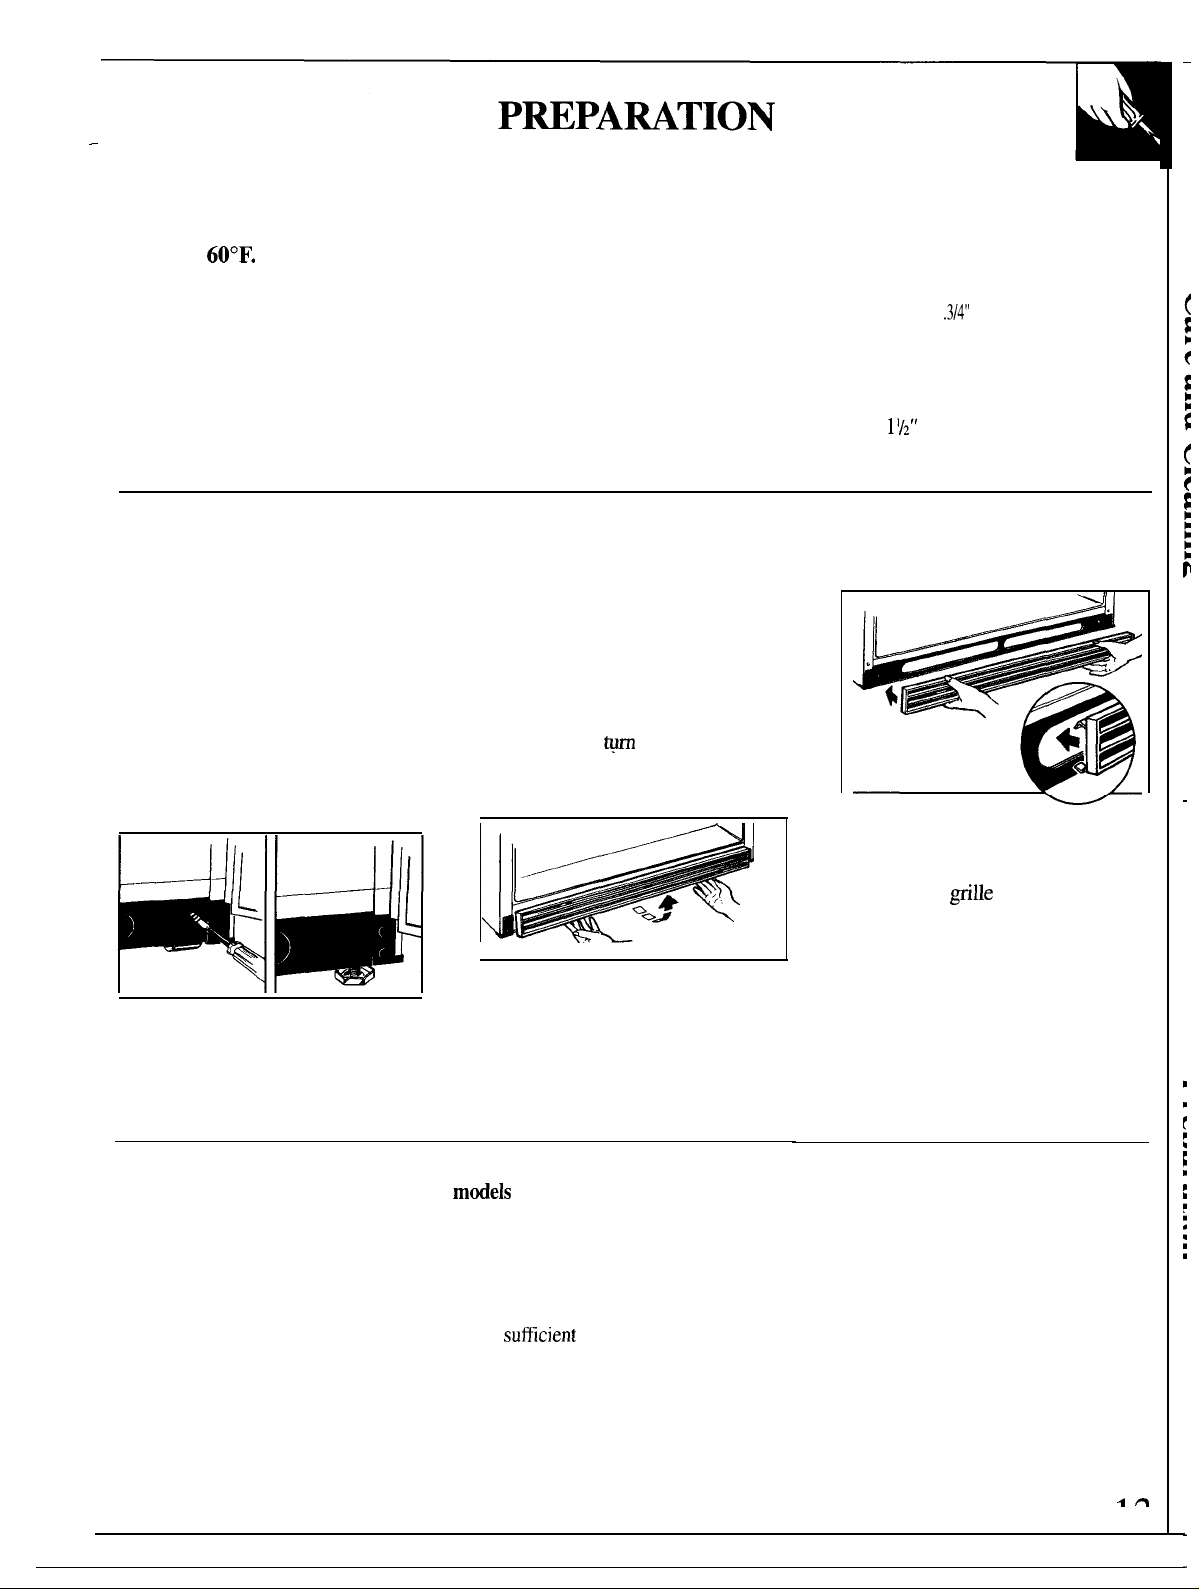
Rollers/Leveling Legs
Some models have adjustable
rollers that allow you to move
the refrigerator away from the
wall for cleaning; other models
have adjustable leveling legs.
Rollers or legs should be set so the
refrigerator is firmly positioned on
the floor and the front is raised just
enough that the doors close easily
when opened about halfway.
Turn the two front roller adjusting
screws or four corner leveling legs
clockwise to raise the
refrigerator,
counterclockwise to lower it.
When adjusting rollers or leveling
legs for proper door closure, we
recommend that the bottom front
edge of the cabinet be approximately
3/4” from the floor.
If your refrigerator has a base
grille, you can
@m
the adjusting
screws through openings in the
grille.
If you would rather remove the
base grille,
grasp the bottom of the
grille and pull it out.
To replace the base grille,
lineup
the clips on the back of the grille
with the openings in the baseplate
and push the
gdle
forward until it
snaps into place.
Water Supply to Icemaker
(on
models
so equipped)
When you move
If your refrigerator has an icemaker, or if you plan to add
an icemaker later, the icemaker will have to be connected
to a cold water line. A water supply kit containing copper
tubing, shut-off valve, fittings and instructions is available
at extra cost from your dealer. There should be
sufllcient
—
tubing for the icemaker from the cold water supply to
allow you to move the refrigerator out from the wall
several feet (approximately 9 feet of 1/4” copper tubing in
three 10” diameter coils).
Disconnect power cord from wall outlet, remove
all food, and clean and dry the interior.
Secure all loose items such as grille, shelves and
storage pans, by taping them securely in place to
prevent damage.
Be sure refrigerator stays in upright position during
actual moving and in van. Refrigerator must be
secured in van to prevent movement. Protect the
outside of the refrigerator with a blanket.
-in
Loading ...
Loading ...
Loading ...