Loading ...
Loading ...
Loading ...
EN
20
Installation
www.bora.com
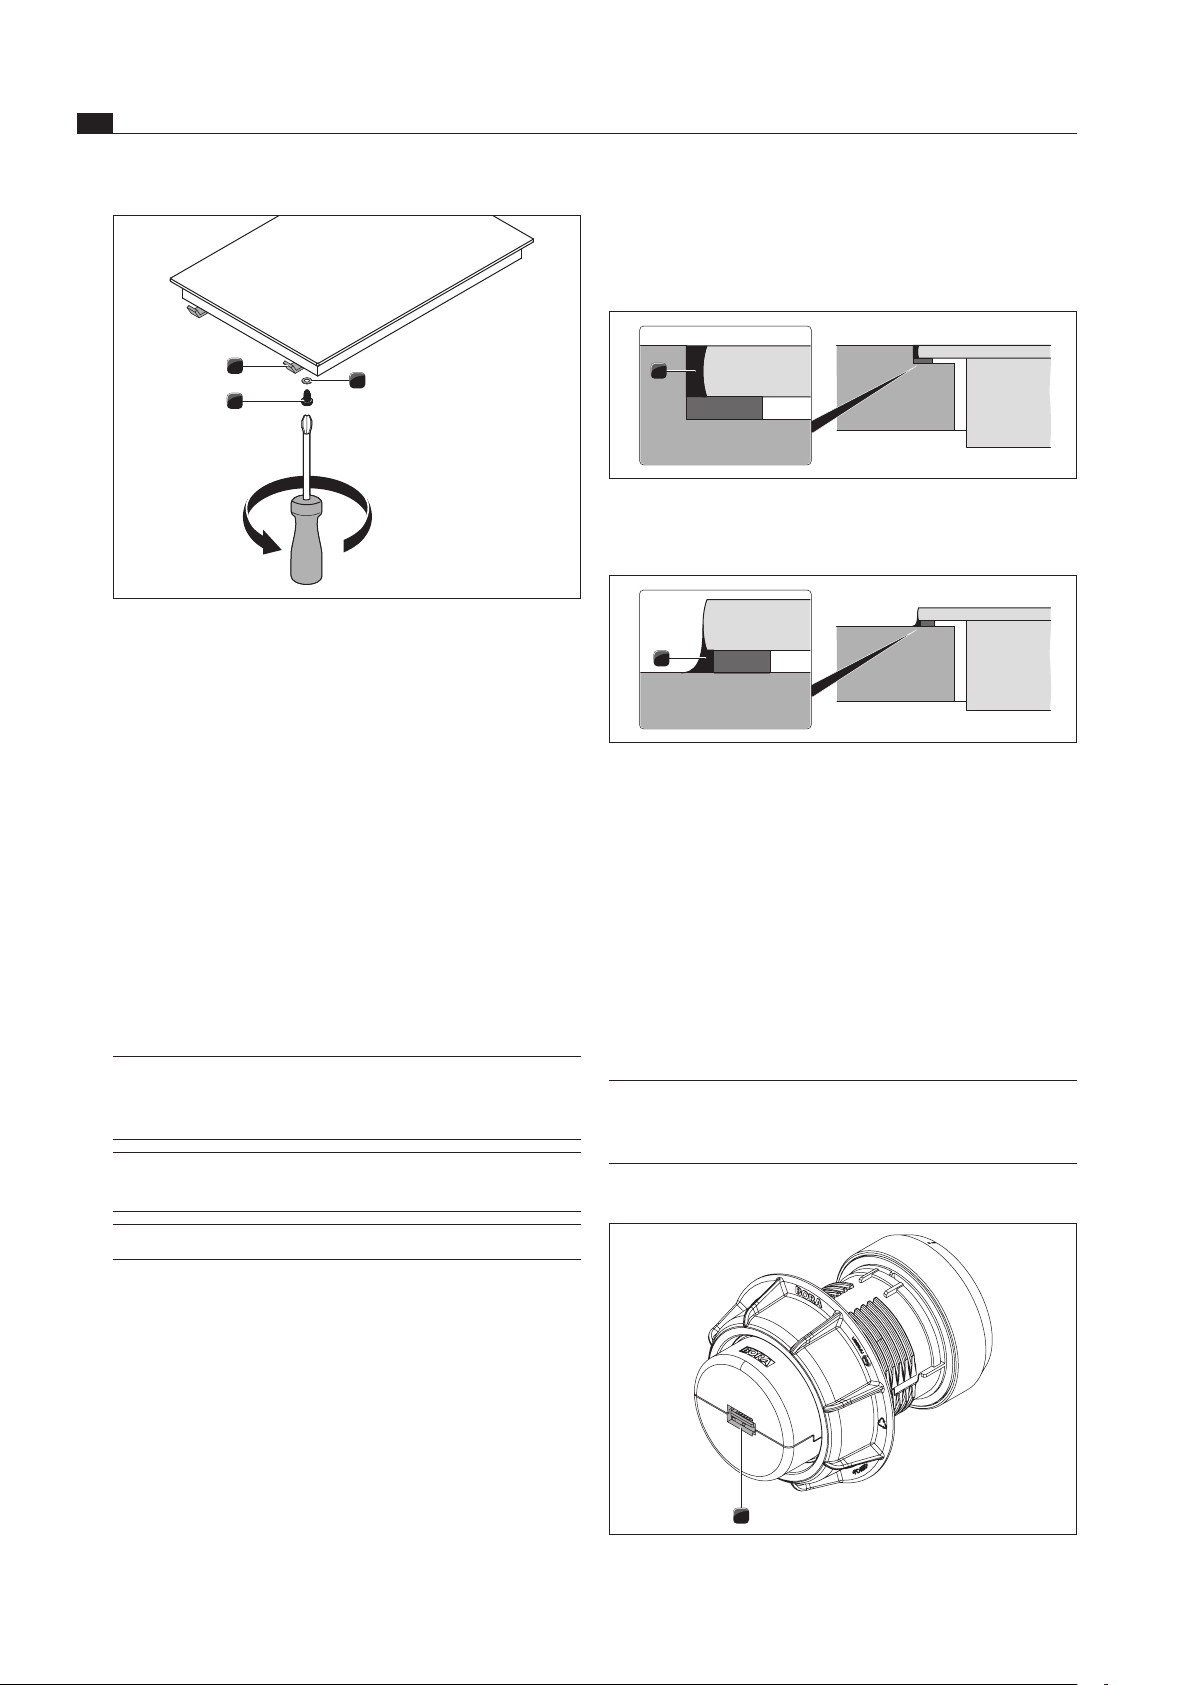
5.5.4 Sealing the cooktop
Make sure that no silicone sealant gets under the
cooktop.
1
Fig. 5.15 Silicone sealant for ush installation
[1] black, heat-resistant silicone sealant
1
Fig. 5.16 Silicone sealant for surface mounting
[1] black, heat-resistant silicone sealant
5.5.5 Establishing communication
The appliance components are linked by the ribbon cable
provided.
Create the connection between the cooktop and the
control knobs.
Create the connection between the cooktop and the
cooktop extractor.
Cooking zone connection
INFO According to the default settings, the left control
knob operates the front cooking zone and the
right control knob operates the rear cooking zone.
Connection on the control knob
1
Fig. 5.17 Connection on the rear of the control knob
[1] Connection on the rear of the control knob
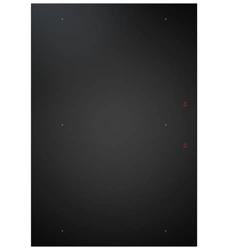
1
3
2
Fig. 5.14 Mounting brackets
[1] Mounting bracket
[2] Washer
[3] Screw
Fasten the cooktop using the mounting brackets [1].
Tighten the mounting brackets with the screw [3] using
the washer [2] with max. 2 Nm.
Verify that the alignment is correct.
Once all of the installation work is complete, seal the
devices with black, heat-resistant silicone sealant.
5.5.3 Installation rotated by 180°
Rotate the cooktop 180°.
For the installation, proceed as described above.
Change the installation direction in the configuration
menu (see Configuration menu).
INFO If installation is rotated by 180°, then the
connections for the control knobs and the
extraction system are at the rear.
INFO
If installation is rotated by 180°, the cooktop
display is automatically shown as rotated by 180°.
INFO Cables of sufficient length are provided.
Loading ...
Loading ...
Loading ...