OPERATING YOUR RANGE
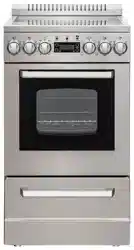
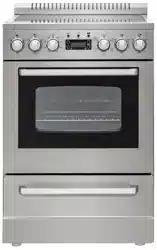
DIGITAL KITCHEN TIMER
When you first plug in the range or power has returned after 10 hours you will see 12:00 in the display and hear an alarm tone.
CLOCK: To set the clock, press the SET button once, the hour will flash. Adjust the hour by pressing the UP or DOWN buttons, when done, press the SET button and repeat the steps for the minutes. To confirm the setting simply wait approximately 5 seconds and the set time will show in the LED display.
COOK TIMER: Press and hold the SET button for approximately 3 seconds. The display will show 00:00. Press the UP or DOWN buttons to choose the desired cook time (1 – 99 minutes, default is 00 minutes). After 5 seconds, the setting will be confirmed, and the countdown will begin. The display will return to the CLOCK display mode, to see the countdown press the SET button 3 times. Once the selected time has elapsed, the alarm will sound 15 times or until a button is pressed.
OVEN LIGHT: To turn the oven light ON or OFF simply press the OVEN LIGHT / BACKLIGHT BUTTON.
BACKLIGHT: To turn the indicator lights behind the control panel knobs ON or OFF press and hold the OVEN LIGHT / BACK LIGHT button for approximately 3 seconds
OPERATING INDICATOR LIGHTS
The OVEN and BURNERS indicating lights will come separately when oven and top burners are in use.
Hot Surface Indicator Light will turn on when the cooktop is being used and will remain lit until the surface temperature of the glass cooktop returns to a safe temperature.
OVEN RACK
The rack is designed with stop-locks so that when placed correctly on the rack supporters, they will stop before coming completely out from the oven and will not tilt when removing food from or placing food on them. When placing cookware on the rack, pull the rack out to the bump on the rack support. Place the cookware on the rack, then slide the rack back into the oven. To remove the rack from the oven, pull it towards you, tilt the front end upward and pull it out.
HOW TO USE THE OVEN
The oven is controlled by two separate knobs, the Broil / Oven Control Knob is used to select the mode of operation used for cooking and the Oven Temperature Knob which is used to set the desired cooking temperature. When the Broil / Oven Control knob is in the or “standby” position, the heating elements will not operate. You must first select the appropriate cooking mode (Broil or Oven/Bake) and then select the desired temperature as described in the instructions below.
USING THE OVEN
Turn the Broil/Oven Control knob to select the desired function / mode as described above. Turn the Oven Temperature Knob clockwise to select the desired temperature up to 500° F. To switchoff the oven turn the thermostat control to the “standby” position.
You can use your range for Bake and Broil. For that reason, the oven has two different heating elements which are:
- Bake element 2100W (Lower heating element)
- Broil element 2000W (Upper heating element)
CAUTION: The oven door becomes very hot during operation. Keep children well out of reach.
WARNING: The door is hot, use the handle
WARNING: After use, turn the Oven Function Control and Oven Temperature Control knobs to the • STANDBY position to turn the oven off.
OVEN THERMOSTAT
Rotate clockwise until the required temperature is reached [From (Standby) to MAX (550ºF)].
USING THE BROILER
In this setting only the upper element is switched . Heat is distributed by radiation. In order to broil, use the following steps:
1. Place the meat on the broil grid in broiler pan. Always use the grid so that the fat drips into the broiler pan, otherwise the juices may catch on fire. Do not broil without using the broiler pan.
2. Position the broiler pan on the secondlevel from the top.
3. Turn the knob Oven Broil/Oven Control Knob to
4. Turn the knob Oven Temperature Knob clockwise to select the desired temperature up to 550° F.
5. To switchoff the oven turn the thermostat control and function control knobs to the “standby” position.
Always remember that when the oven is hot, outside surfaces of the range get hot.
IMPORTANT: Always use suitable protective gloves when inserting/removing the broiler pan, shelves, pans and other cooking utensils from the oven.
OVEN RACK
The rack is designed with stop-locks so that when placed correctly on the rack supporters, they will stop before coming completely out from the oven and will not tilt when removing food from or placing food on them. When placing cookware on the rack, pull the rack out to the bump on the rack support. Place the cookware on the rack, then slide the rack back into the oven. To remove the rack from the oven, pull it towards you, tilt the front end upward and pull it out.
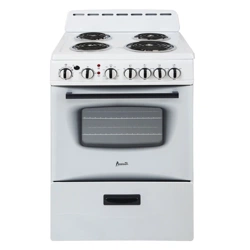
USING THE SURFACE UNITS
· Use care when touching the cooktop. The glass surface of the cooktop will retain heat after the controls have been turned off.
· Do not use the cooktop if broken. If the glass should break, cleaners and or spills may penetrate the broken cooktop and present a risk of electric shock. Contact a qualified technician immediately.
· Avoid scratching the glass. The cooktop can be easily scratched by using items similar to knives, sharp object, rings, jewelry.
· Avoid storing items that can melt or possibly catch fire on the glass cooktop, even if not in use. In the even the cooktop is accidentally turned on and or heat from the oven vent may cause items to melt or ignite.
· NEVER COOK DIRECTLY ON THE GLASS, ALWAYS USE APPROPRIATE COOKWARE.
BURNER CONTROL KNOB
The range comes with four burners. To operate the burners simply push in and turn the knob to the desired position. These controls go from low to high power output, having a number of positions To switch off the Burner, turn the burner control knob to the setting position.
Your range is equipped with four surface units with two different sizes. Twho of them are 6” and two of them are 8” in size. The surface controls are easily operated. Simply push in and turn the knob to the desired position.
- 8” Large burners: 1800 Watts
- 6” Small burners: 1200 Watts
When the element is energized, the indicator light will be lit regardless of the setting when one or more of the elements are turned on. The control has a variable of power output from LO to HI with a number of positions. The range of heat is increased by turning the knob to HI, decreased by turning the knob toLO.
IMPORTANT: To switch on, always lightly press the control knob inwards then turn.
TO AVOID OVERCOOKING, REMOVE POTS / PANS FROM THE COOKTOP WHEN THE FOOD IS COOKED. AVOID PLACING ANY OBJECTS ON THE COOKTOP UNTIL IT HAS COOLED DOWN COMPLETELY.
WARNING Make sure that the handles of cookware do not stick out over the edge of the range, to avoid them being knocked over by accident. This also makes it more difficult for children to reach the cooking pots/pans.
COOKWARE TIPS
The physical characteristics of pots and pans influence the performance of any cooking systems. Therefore, emphasis must be placed on the importance of using proper cookware.
· Use cooking vessels with flat bottoms and tight-fitting lids to conserve energy and shorten cooking times.
· Only certain types of glass, glass/ceramic, ceramic, earthenware or other glazed cookware are suitable for use on glass cooktops. Manufacturers suggest using low to medium heat selections when using glass cookware.
· Pan size should match the element size. A slightly larger pan covers the entire element and prevents spillovers from contacting the heat surface and burning in. Using a smaller pan than the element is a waste of energy.
· To avoid spattering and to maximize efficiency, pan bottoms should be clean and dry before coming in contact with the cooktop.