Loading ...
Loading ...
Loading ...
First Steps continued
creese and seaU properly, DO NOT let
food packages extend past the front
of shelves,
\,
SheUf Front
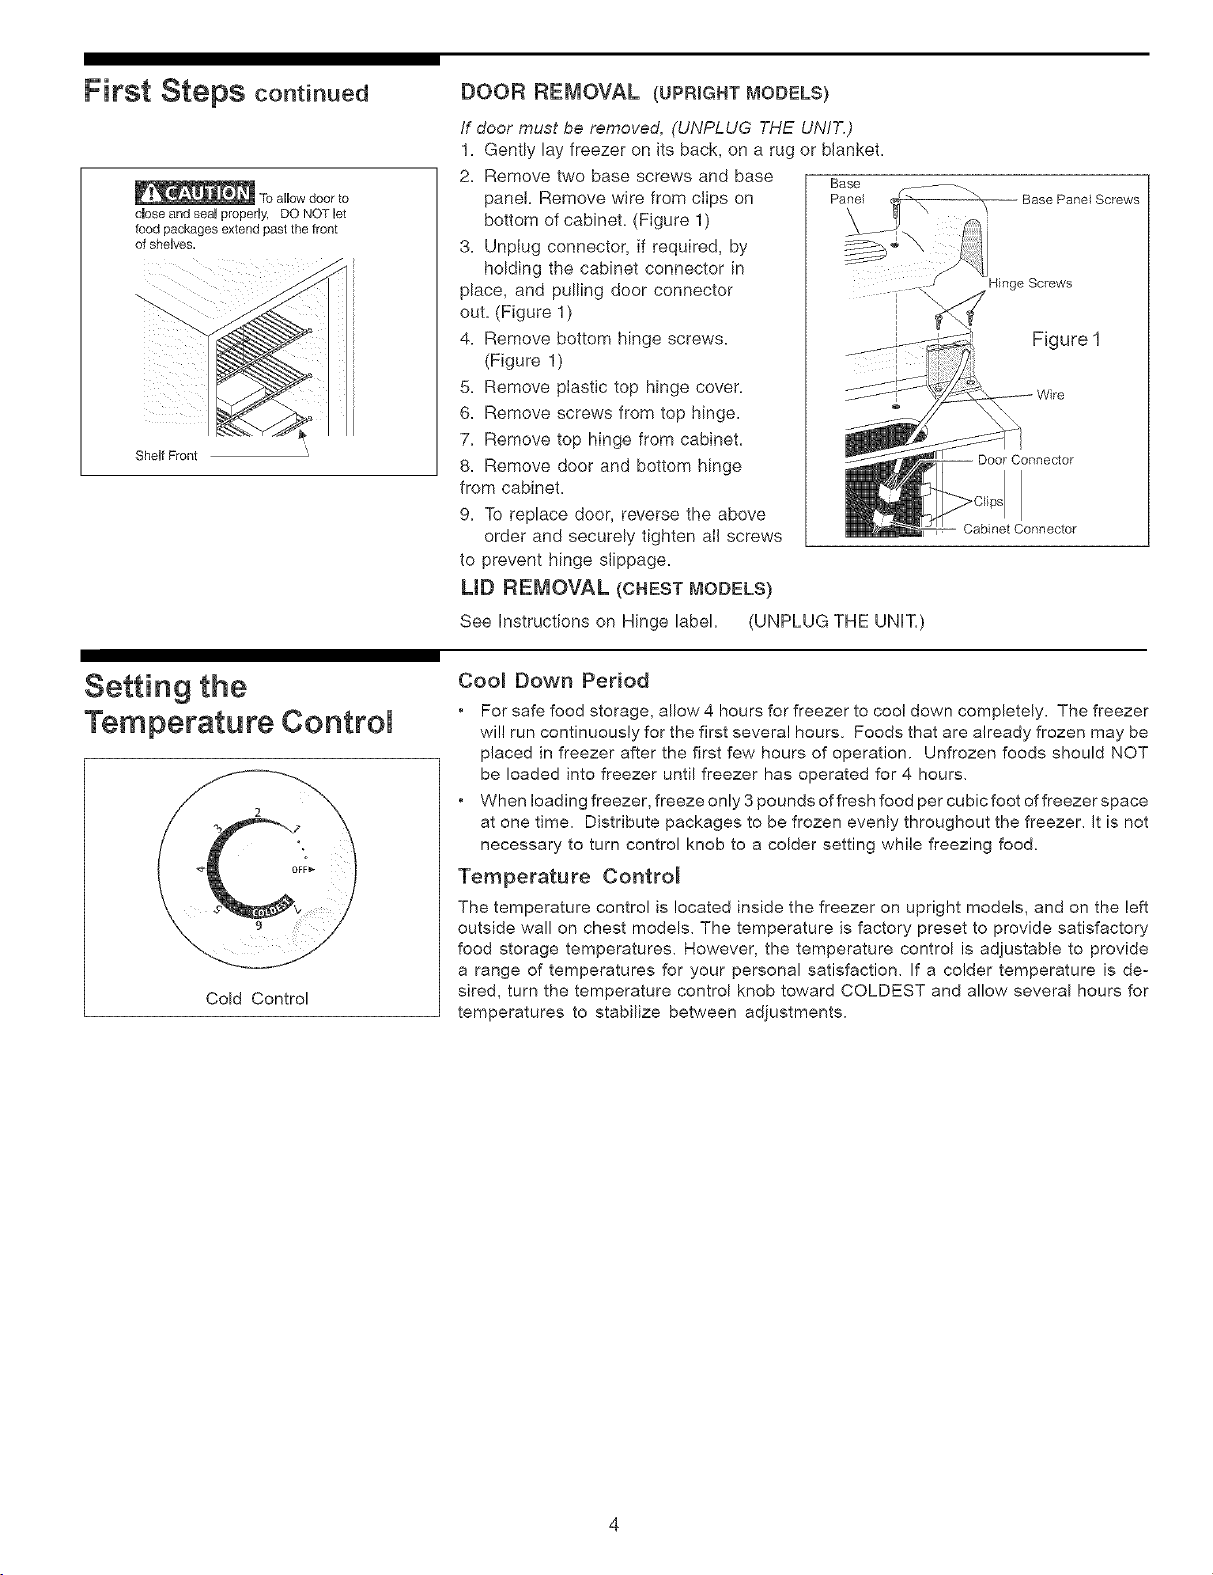
DOOR REMOVAL (UPRIGHT MODELS}
If door must be removed, (UNPLUG THE UNIT.)
1. Gently lay freezer on its back, on a rug or blanket.
2. Remove two base screws and base Base
panel. Remove wire from clips on PaiTel
bottom of cabinet. (Figure 1)
3. Unplug connector, if required, by
holding the cabinet connector in
place, and pulling door connector
out. (Figure 1)
4. Remove bottom hinge screws.
(Figure 1)
5. Remove plastic top hinge cover.
6. Remove screws from top hinge.
7. Remove top hinge from cabinet.
8. Remove door and bottom hinge
from cabinet.
9. To replace door, reverse the above
order and securely tighten alI screws
to prevent hinge slippage.
LiD REMOVAL (CHEST MODELS)
See Instructions on Hinge label.
-- Base Panel Screws
Hinge Screws
Figure I
Wire
Door Connector
Cabinet Connector
(UNPLUG THE UNIT.)
Setting the
Temperature Control
Cold Control
Coo_ Down Period
• For safe food storage, allow 4 hours for freezer to coo! down completely. The freezer
will run continuously for the first several hours. Foods that are already frozen may be
placed in freezer after the first few hours of operation. Unfrozen foods should NOT
be loaded into freezer until freezer has operated for 4 hours.
• When loading freezer, freeze only 3 pounds offresh food per cubicfoot of freezer space
at one time. Distribute packages to be frozen evenly throughout the freezer. It is not
necessary to turn control knob to a colder setting while freezing food.
Temperature Contro_
The temperature control is located inside the freezer on upright models, and on the left
outside wall on chest models. The temperature is factory preset to provide satisfactory
food storage temperatures. However, the temperature control is adjustable to provide
a range of temperatures for your personal satisfaction. If a colder temperature is de-
sired, turn the temperature control knob toward COLDEST and allow several hours for
temperatures to stabilize between adjustments.
Loading ...
Loading ...
Loading ...