Loading ...
Loading ...
mmportant Safety
mnstructions continued
Avoid fire hazard or elec-
tric shock. Do not use an extension cord
or an adapter plug. Do not remove any
prong from power cord.
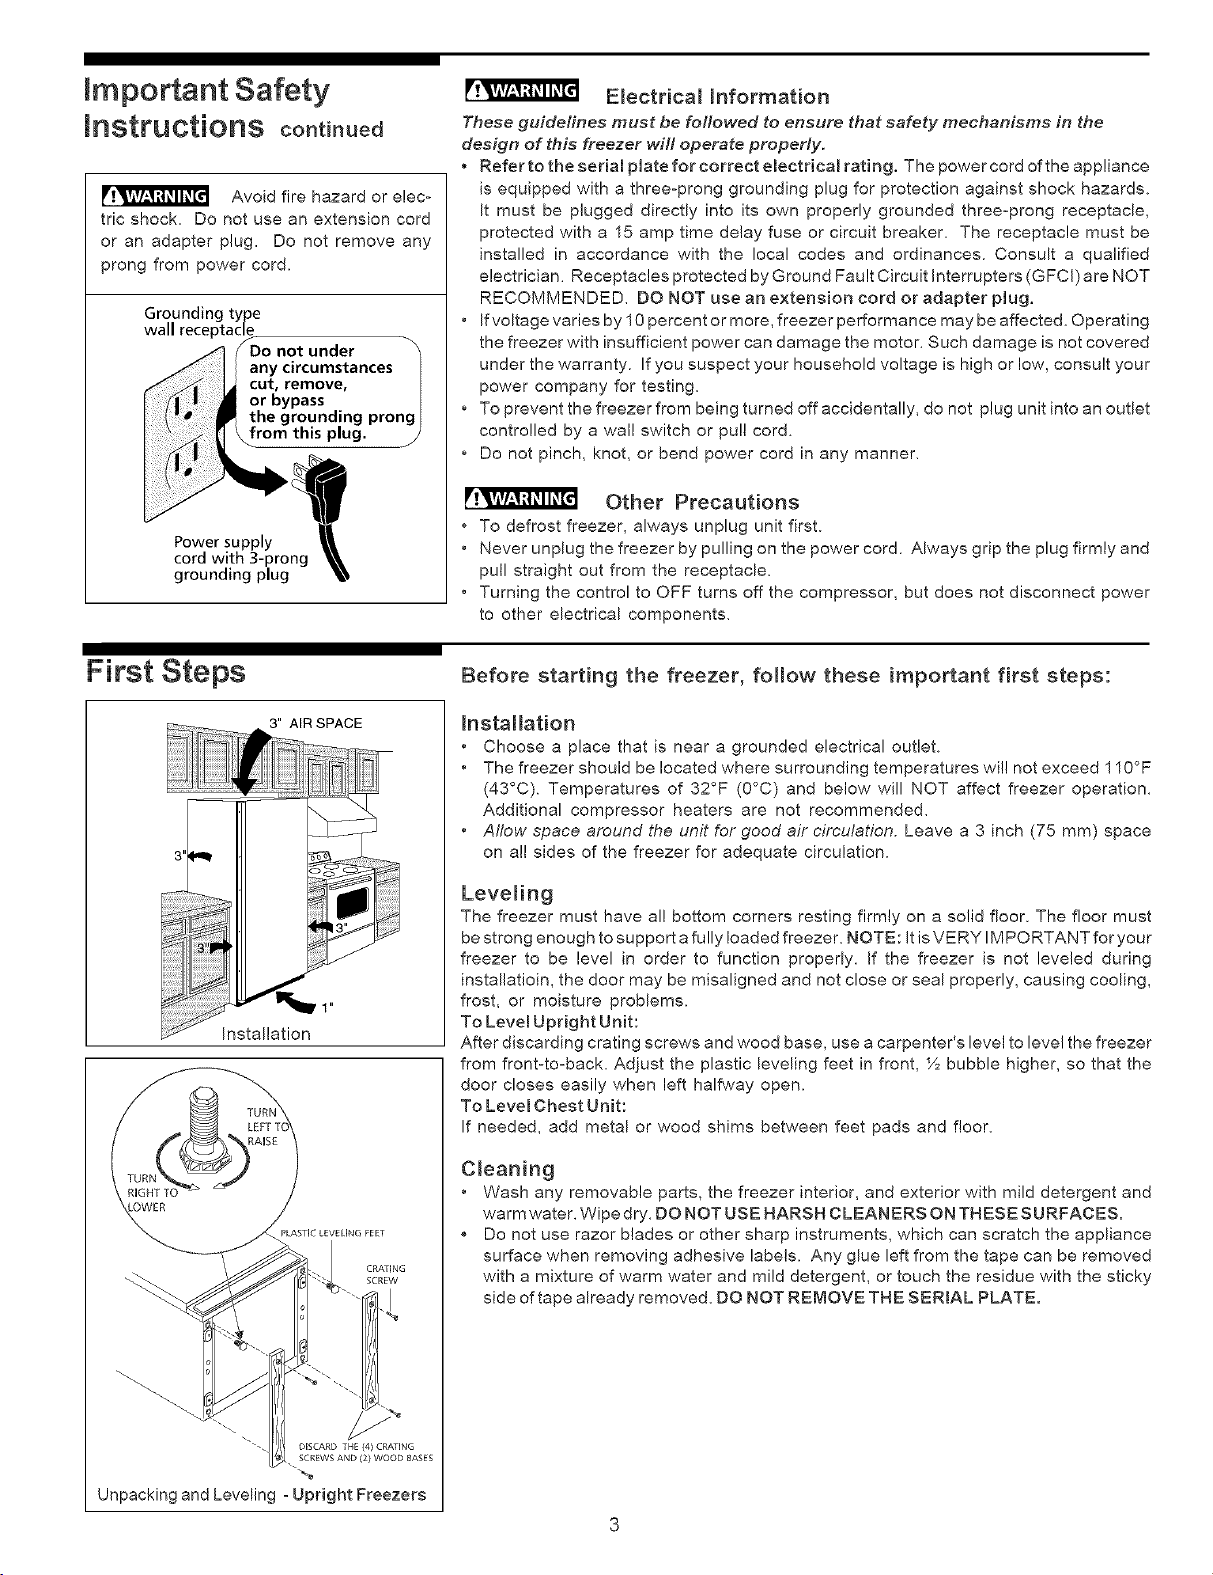
Grounding type
wall receptacle
Do not under
any circumstances
cut, remove,
or bypass
the grounding prong
from this plug. j
Power supply
cord with 3-prong
grounding plug
Electrica_ mnformation
These guidelines must be followed to ensure that safety mechanisms in the
design of this freezer will operate properly.
• Refer to the serial plate for correct electrical rating. The power cord of the appliance
is equipped with a three-prong grounding plug for protection against shock hazards.
It must be plugged directly into its own properly grounded three-prong receptacle,
protected with a 15 amp time delay fuse or circuit breaker. The receptacle must be
installed in accordance with the local codes and ordinances. Consult a qualified
electrician. Receptacles protected by Ground Fault Circuit Interrupters (GFCI) are NOT
RECOMMENDED. DO NOT use an extension cord or adapter plug.
• Ifvoltage varies by 10 percent or more, freezer performance may be affected. Operating
the freezer with insufficient power can damage the motor. Such damage is not covered
under the warranty. If you suspect your household voltage is high or low, consult your
power company for testing.
• To prevent the freezer from being turned off accidentally, do not plug unit into an outlet
controlled by a wal! switch or pull cord.
• Do not pinch, knot, or bend power cord in any manner.
Other Precautions
* To defrost freezer, always unplug unit first.
, Never unplug the freezer by pulling on the power cord. Always grip the plug firmly and
putl straight out from the receptacle.
, Turning the control to OFF turns off the compressor, but does not disconnect power
to other electrical components.
First Steps
Before starting the freezer, follow these important first steps:
3" AIR SPACE
Installation
PLASTIC LEVELING FEET
CRA{ING
DESCARD 1HE (4) CR,_/ING
SCREWS AND (2) WOOD BASES
"-%
Unpacking and Leveling _Upright Freezers
Installation
Choose a place that is near a grounded electrical outlet.
• The freezer should be located where surrounding temperatures wi!! not exceed 110°F
(43°C). Temperatures of 32°F (0°C) and below will NOT affect freezer operation.
Additional compressor heaters are not recommended.
• Allow space around the unit for good air c/mulation. Leave a 3 inch (75 mm) space
on all sides of the freezer for adequate circulation.
Leveling
The freezer must have al! bottom corners resting firmly on a solid floor. The floor must
be strong enough to support a fully loaded freezer. NOTE: It is VE RY IMPORTANT for your
freezer to be level in order to function properly. If the freezer is not leveled during
installatioin, the door may be misaligned and not close or seal properly, causing cooling,
frost, or moisture problems.
To Levem Upright Unit:
After discarding crating screws and wood base, use a carpenter's level to level the freezer
from front-to-back. Adjust the plastic leveling feet in front, ½ bubble higher, so that the
door closes easily when left halfway open.
To Level Chest Unit:
If needed, add metal or wood shims between feet pads and floor.
Cleaning
• Wash any removable parts, the freezer interior, and exterior with mild detergent and
warm water. Wipe dry. DO NOT USE HARSH CLEANERS ON THESE SURFACES.
Do not use razor blades or other sharp instruments, which can scratch the appliance
surface when removing adhesive labels. Any glue left from the tape can be removed
with a mixture of warm water and mild detergent, or touch the residue with the sticky
side of tape already removed, DO NOT REMOVE THE SERIAL PLATE.
Loading ...
Loading ...
Loading ...