Loading ...
Loading ...
Loading ...
REQUIRED TOOLS
• Screwdrivers: Phillips and fl at head.
• Power Drill: 1/8” (3.2mm) diameter drill bit
• Pencil
• Measuring Tape
• Scissors
• Carpenter’s Level
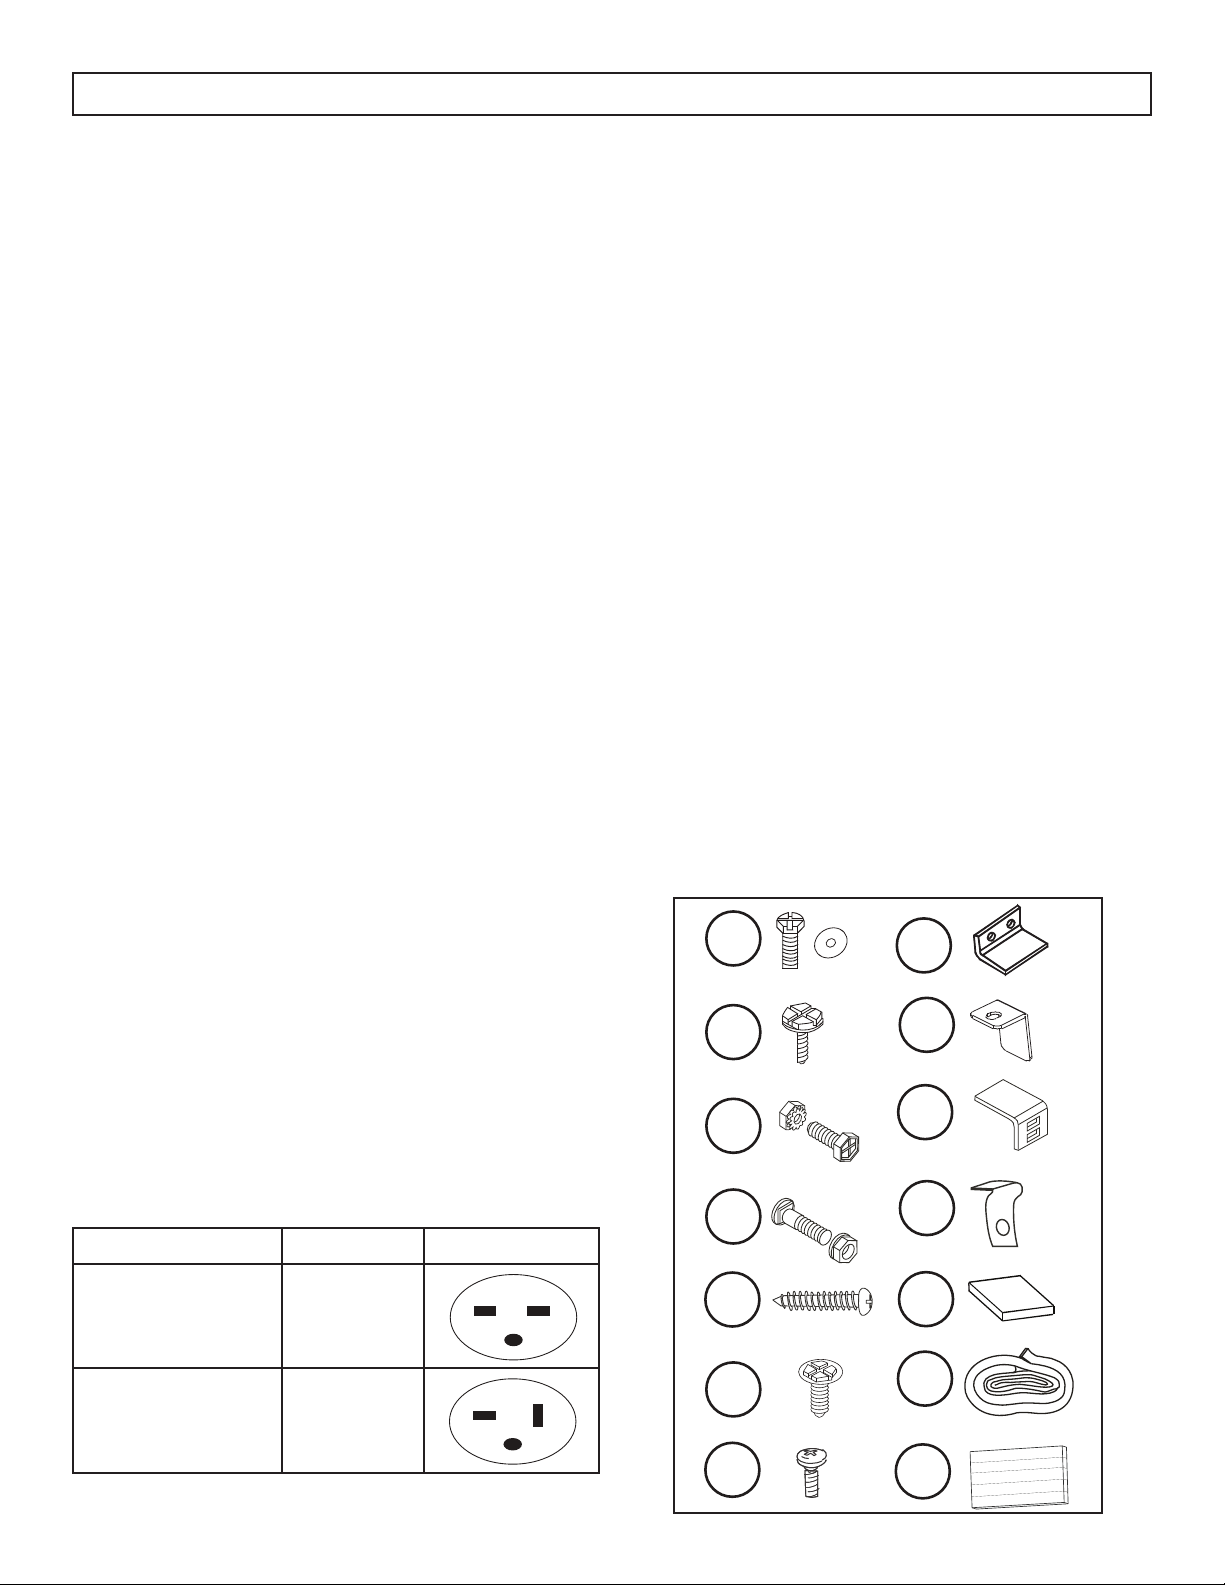
ACCESSORIES
The following accessories are included with
the appliance and should be used during the
installation.
1. 7/16” (11 mm) locking screw and fl at washer
(x2)
2. 1/2” (13 mm) hex-head screw (x7)
3. 1/2” (13 mm) screw and locknut (x4)
4. 3/4” (19 mm) fl at head bolt and locknut (x2)
5. 3/4” (19 mm) screw (x2)
6. 5/16” (8 mm) hex-head locking screw (x10)
7. 1/4” (8 mm) screw (x2)
8. Safety lock for wood window frames
9. Safety lock for vinyl window frames (x2)
10. Sill angle bracket (x2)
11. Frame lock (x2)
12. Foam insert (x2)
13. Window sash foam seal
14. Weather stripping (x5)
1
2
3
4
5
6
12
7
8
9
10
11
13
14
POWER SUPPLY CORD
The power cord contains a device that senses
damage to the power cord. To test if the power cord
is working properly:
1. Connect the power supply cord to an electrical
outlet.
2. The power supply cord has two buttons located
on the head of the plug. One button is marked
“Test” and the other is marked “Reset”. Press the
“Test” button and the “Reset” button will pop out
and click.
3. Press the “Reset” button and a click will sound as
the button engages.
4. The power supply cord is now energized and
supplying electricity to the appliance.
Notes:
• If the appliance looses power, the reset button
may need to be reengaged when the power
resumes.
• This button should not be used to turn the
appliance on and off.
• The “Reset” button must always be pushed in for
correct operation.
• The power supply cord must be replaced if it
fails to reset when the “Test” button is pushed in.
POWER RECEPTACLES
These appliances require higher voltage receptacles
than standard household receptacles. Consult the
table below to fi nd the required receptacle for your
model number.
Model Number Voltage Receptacle
DAC180EB3WDB 240
DAC250EB3WDB 240
INSTALLATION INSTRUCTIONS
8
Loading ...
Loading ...
Loading ...