Loading ...
2
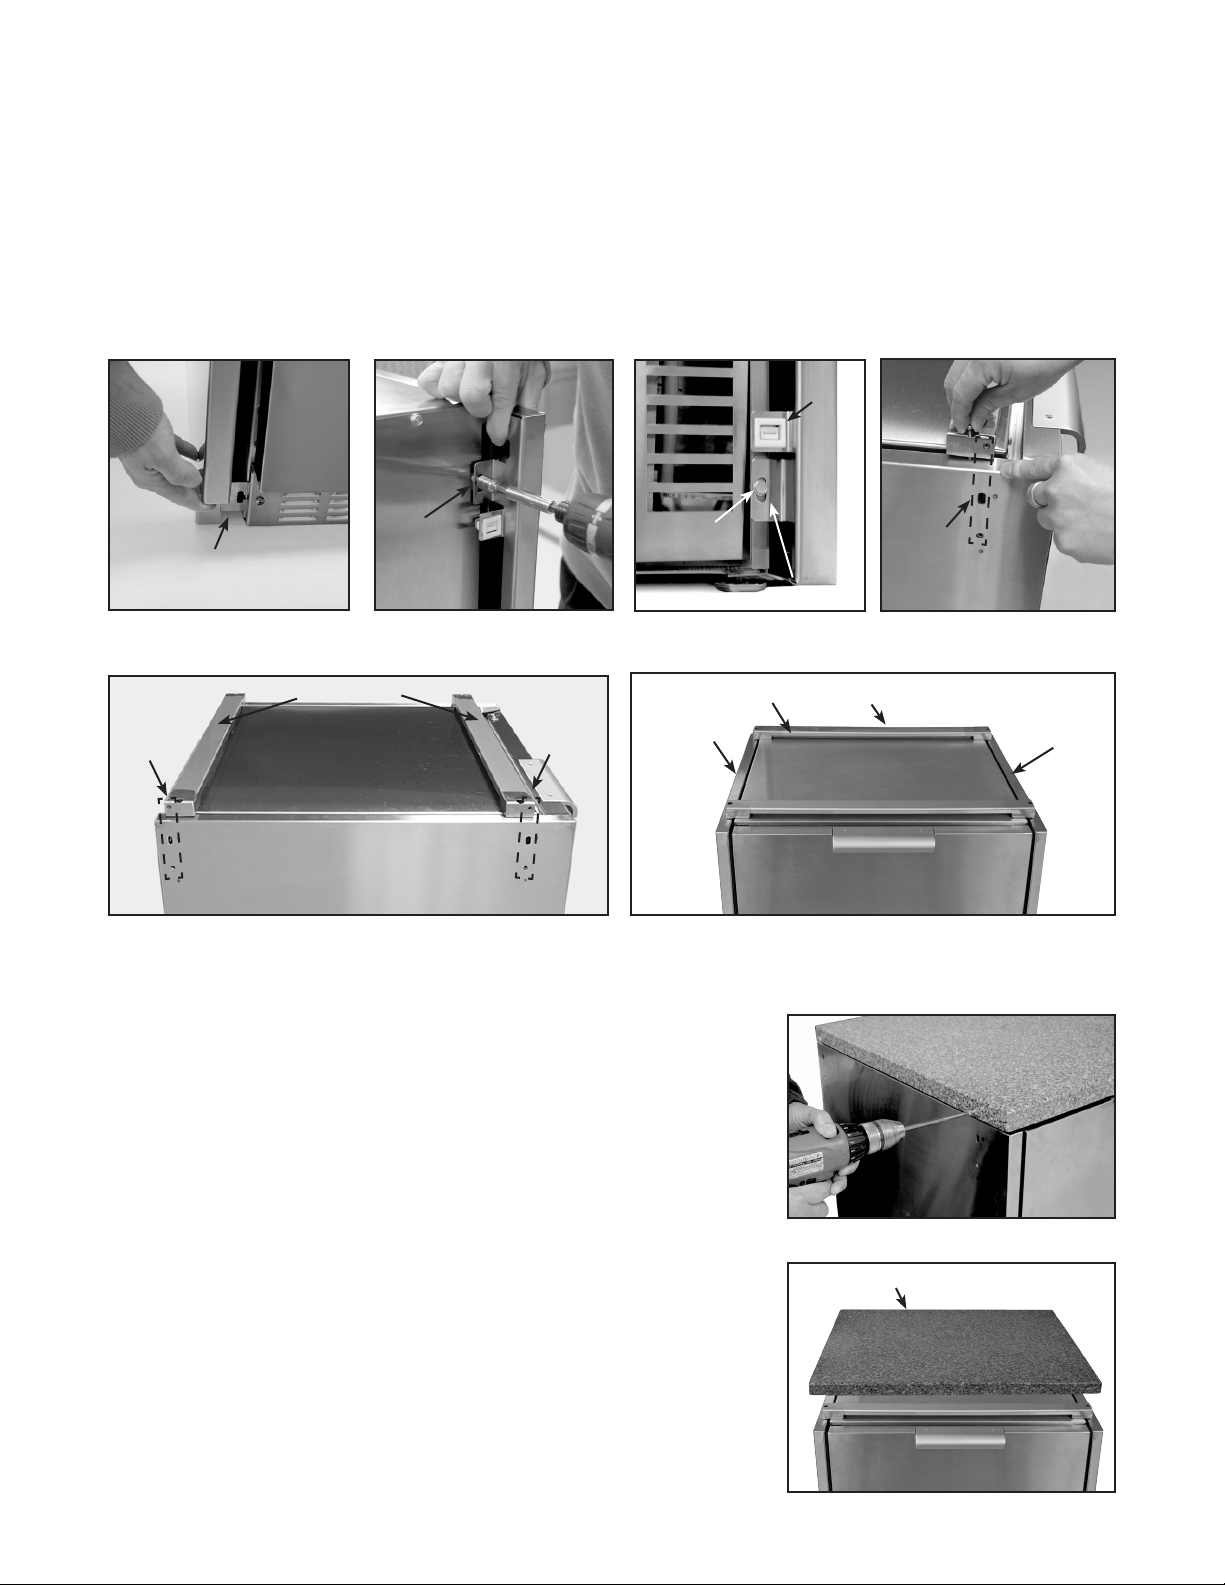
Repeat Steps 2 and 3 for the other side panel. 4.
Place both top risers on top of unit as shown in (Fig. 07). 5.
Using screws provided (10-24 X 1-1/8 Pan Head SS), attach riser to the side panels. Take note of the 6.
alignment of the holes on the riser and side panel (Fig. 06).
Adjust the side panels to be level with the top of the refrigerated unit, then tighten all ange screws. 7.
The 4 male catch clips are preinstalled in the back panel. Feed the power cord thru the back panel and 8.
install protective grommet supplied with the hardware kit (Fig. 14).
Align the bottom male clips to the preinstalled female clips of the side panels, push at the outer corners to 9.
engage clips. See Fig. 08 for nal assembly.
Solid Surface Installation – Required Accessory (sold separately):
Solid Surface for Refrigerator and Refrigerated Drawer (WRT24RD) ■
Solid Surface for Beer Dispenser (WRT24T) ■
Locate holes on the solid surface and place onto the refrigerated 1.
unit so the holes align on the sides. Check for proper t and
alignment. Insert screws (10-24 X 1-1/8 PH SS) to anchor solid
surface to risers (Fig. 09). See Fig. 10 for nal assembly.
Final check to see that all spacing and gaps are even and level. The 2.
Refrigerated Drawer Unit (RF24D) must have the anti-tip device
installed. (Refer to the Installation Instructions that came with the
unit.)
Assembly Instructions for Modular application (linked to a
CAD cart):
Remove the screws and the front bottom grill cover from the refrig-1.
erated unit and set them aside (Fig. 01).
Fig. 03 Fig. 04
Fig. 07
Fig. 06
Fig. 05
top risers
Screw
Lower rear ange
Fig. 09
Female
cup
Fig. 10
Solid surface
Side View
Ensure
holes
are
aligned
Bottom front
ange
Upper
ange
Fig. 08 Wrapper Kit Assembly shown with Refrigerated Drawers
Right panel
Back panel
Top riser
Left panel
Ensure
holes
are
aligned
Ensure
holes
are
aligned
Loading ...
Loading ...