Loading ...
Loading ...
3
Installation Instructions
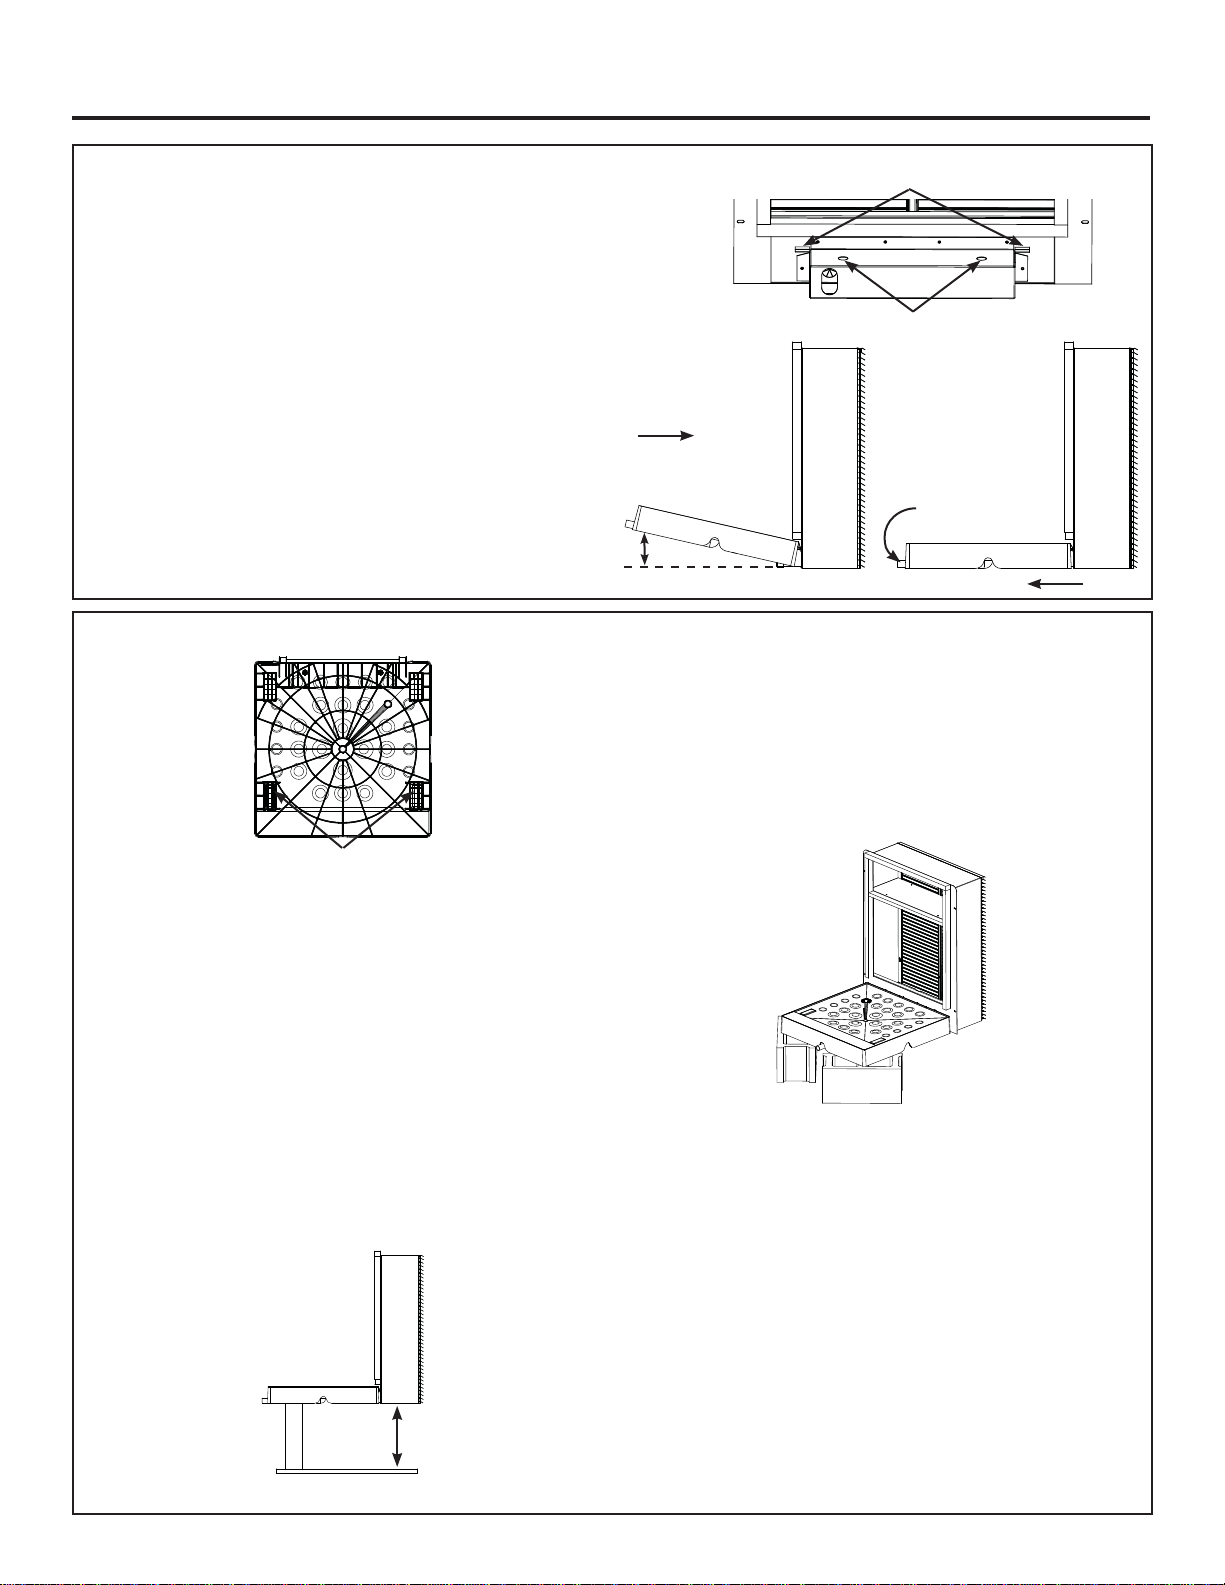
STEP 2
Install drain platform to plenum
• Drain platform MUST be held at approximately 15
degrees when inserting into the plenum to engage
locator pins.
- Two locator pins will engage with the plenum
VKHOIEUDFNHWZKLOHWZRÀDWWDEVZLOOLQVHUW
through rectangular holes in the plenum as
shown.
• Slowly rotate the drain platform to a level position.
- The drain platform should hang level if installed
correctly.
• Pull the platform away from the plenum to check that the
locator pins are engaged.
DO NOT INSTALL UNIT UNTIL STEP 6 IS
COMPLETED.
STEP 3
For installations using 2x4 lumber:
0HDVXUHIURPWKHÀRRUWRWKHERWWRPRIWKHVLGHÀDQJH
Add 3” to this measurement, and cut two 2x4’s to this
length.
• Insert 2x4’s into the two support pockets farthest from
the plenum.
3UHVVGRZQ¿UPO\RQLQVWDOOHGSODWIRUPZLWKOHJV
inserted to ensure they are seated completely.
• Use a bubble level on the front and sides of the drain
platform to verify levelness left-to-right and front-to-
back.
• Shim as necessary to achieve level condition. Each
2x4 may need to be shimmed or trimmed individually to
achieve a level condition on the drain platform.
For installations using other supporting means, such
as cinder blocks:
• Place blocks under corners of drain platform farthest
from plenum as shown.
• Use a bubble level to verify levelness of drain platform
left-to-right and front-to-back.
• Shim as necessary to achieve level condition.
)RULQVWDOODWLRQVRQWKHÀRRU
• Use a bubble level to verify levelness of drain platform
left-to-right and front-to-back.
• Shim as necessary to achieve level condition.
rectangular plenum holes
Holes for locator pins
Rotate to level
Slide towards plenum
15°
Support Pockets
Measure and add 3” for
cut length
Pull to test engagement
Loading ...
Loading ...
Loading ...