Loading ...
Loading ...
Loading ...
HB-110920 EN
CHOPPER ATTACHMENT
1. Don’t touch the sharp blades.
2. Remove the chopper blades before emptying the bowl.
3. Never remove the cover until the blade has completely stopped.
IMPORTANT
1. This device is designed to handle average amounts of food. It can be used without interruption for a
maximum of 1 minute. After that, it should be allowed to cool for 5 minutes otherwise it will overheat.
2. Disconnect the appliance from power supply before changing accessories or approaching parts that move
in use.
3. Care shall be taken when handling the sharp cutting blades, emptying the bowl and during cleaning.
4. Only use your hand blender for its intended domestic use.
BEFORE USING FOR THE FIRST TIME
1. Remove all packaging and throw away the blades covers.
2. Wash the parts: see “CLEANING”.
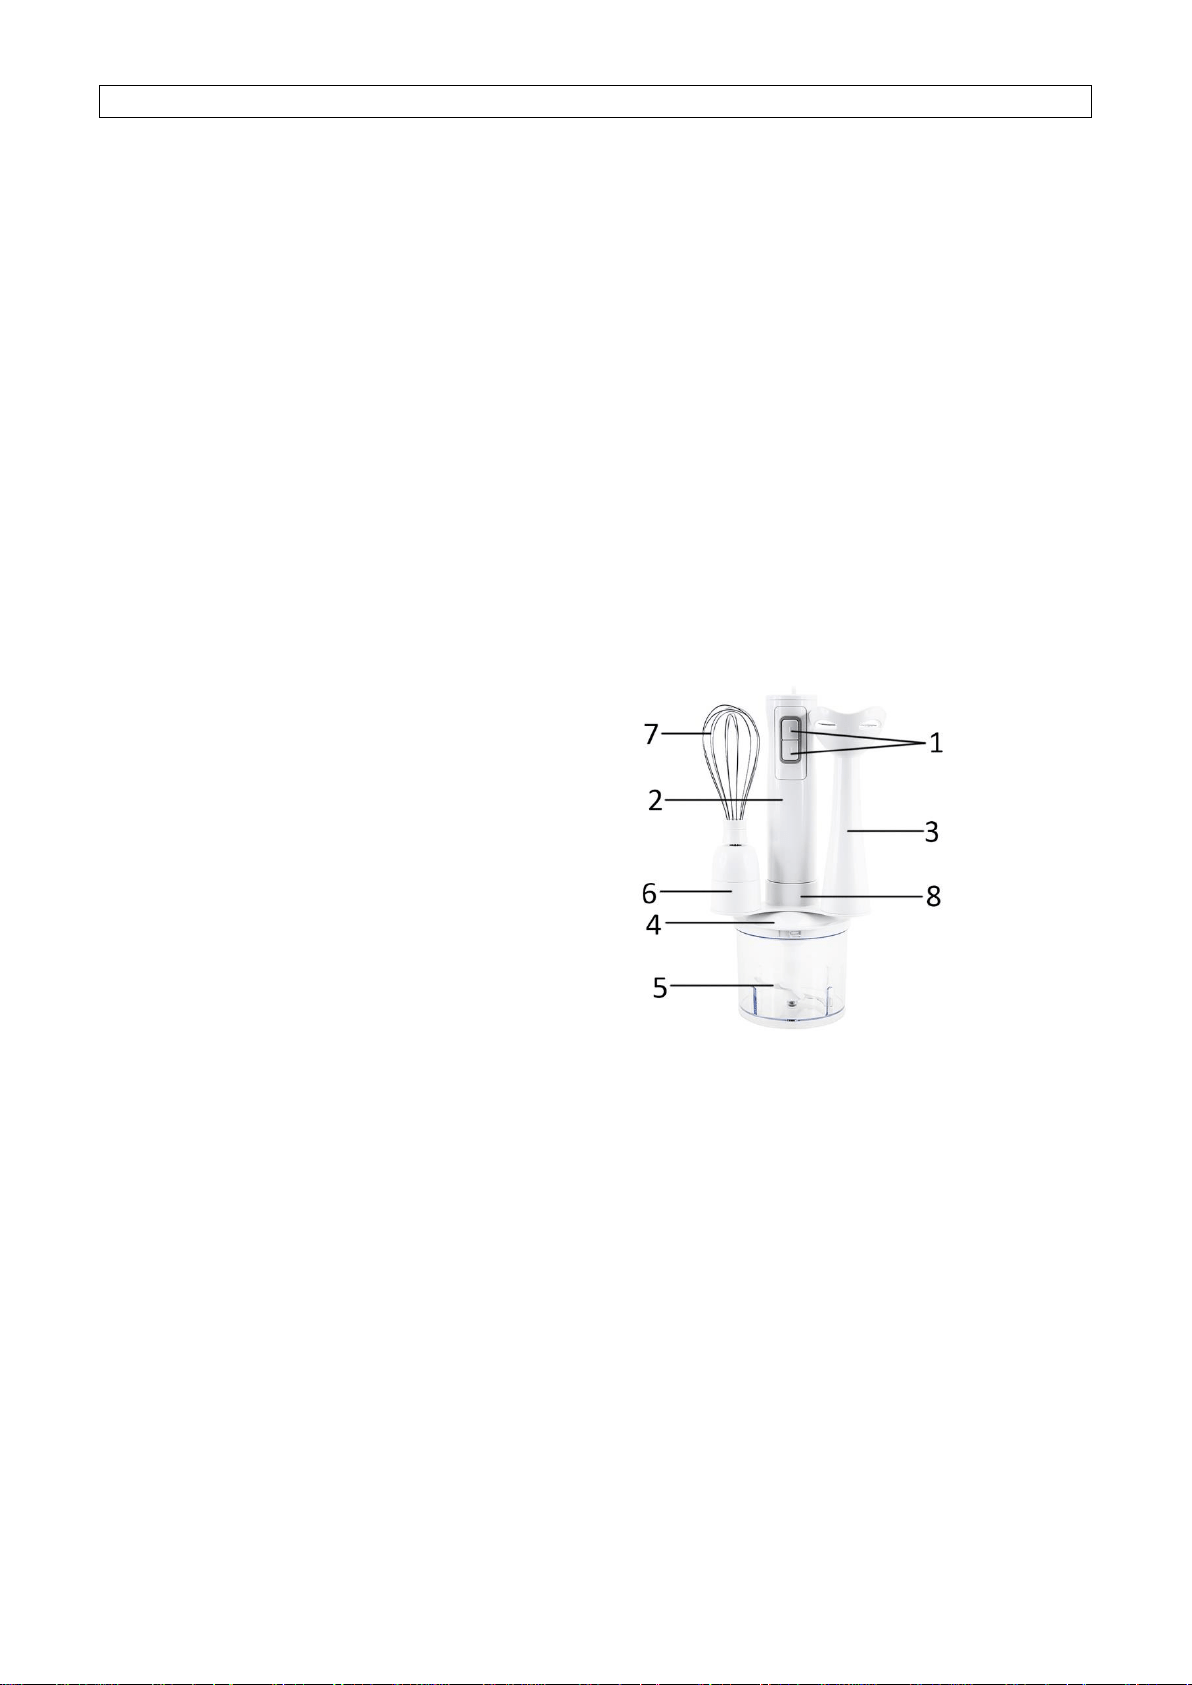
KNOW YOUR HAND BLENDER
1. Speed buttons
2. Power handle
3. Blender shaft(removable)
4. Chopper cover
5. Chopper blade
6. Whisk collar
7. Wire whisk
8. Holder for accessories
FOR SAUCEPAN BLENDING
Take the pan off the heat and let it cool slightly. Otherwise your hand blender could overheat.
1. Fit the power handle inside the blender shaft, turn and lock.
2. Plug in. To avoid splashing, place the blade in the food before switching on.
3. Hold the container steady. Then press either speed button (use speed “I” for slower blending to reduce
splashing).
4. Don’t let liquid get above the join between the power handle and blender shaft.
5. If your blender gets blocked, unplug before cleaning.
6. After use, unplug and dismantle.
TO USE THE CHOPPER
You can chop meat, cheese, vegetables, herbs, bread, biscuits and nuts.
Don’t chop hard foods such as coffee beans, ice cubes, spices or chocolate, otherwise you will damage the blade.
1. Remove any bones and cut food into 1-2cm cubes.
2. Fit the chopper blade over the pin in the bowl.
3. Add your food.
4. Fit the chopper cover, turn and lock.
5. Fit the power handle, turn and lock.
Loading ...
Loading ...
Loading ...