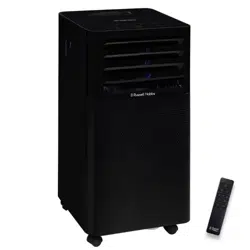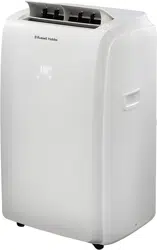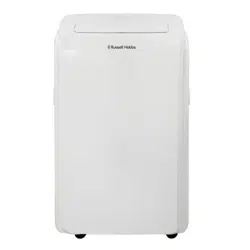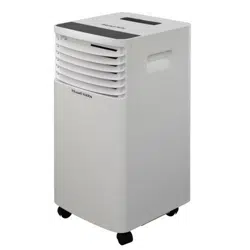
Portable 3in1 Air Conditioner,
Dehumidifier & Air Cooler
For Customer Services & Spare Parts please call 0345 209 7461
Or visit us at https://mda.russellhobbs.com
PLEASE RETAIN
FOR FUTURE REFERENCE
Model Number: RHPAC3001
220-240V AC 50Hz

Page(s)
Safety Instructions and Electrical Safety
3 - 5
Feature
Diagram
6
Control Panel
Diagram
7
Installing your Air Conditioner
8 - 10
Using your Air Conditioner
11 - 20
Draining your Air Conditioner
21 - 23
Cleaning your Air Conditioner
24
Start/End of Season Operations
25
Troubleshooting
26
Guarantee and Customer Services
27
Spare Parts
28
Specification
29
Notes
30-31
CONTENTS
Page 2

Page 3
Safety Instructions
Important note: Please read this booklet before installing and switching on this
appliance. The manufacturer assumes no responsibility for incorrect installation and
usage as described in this booklet.
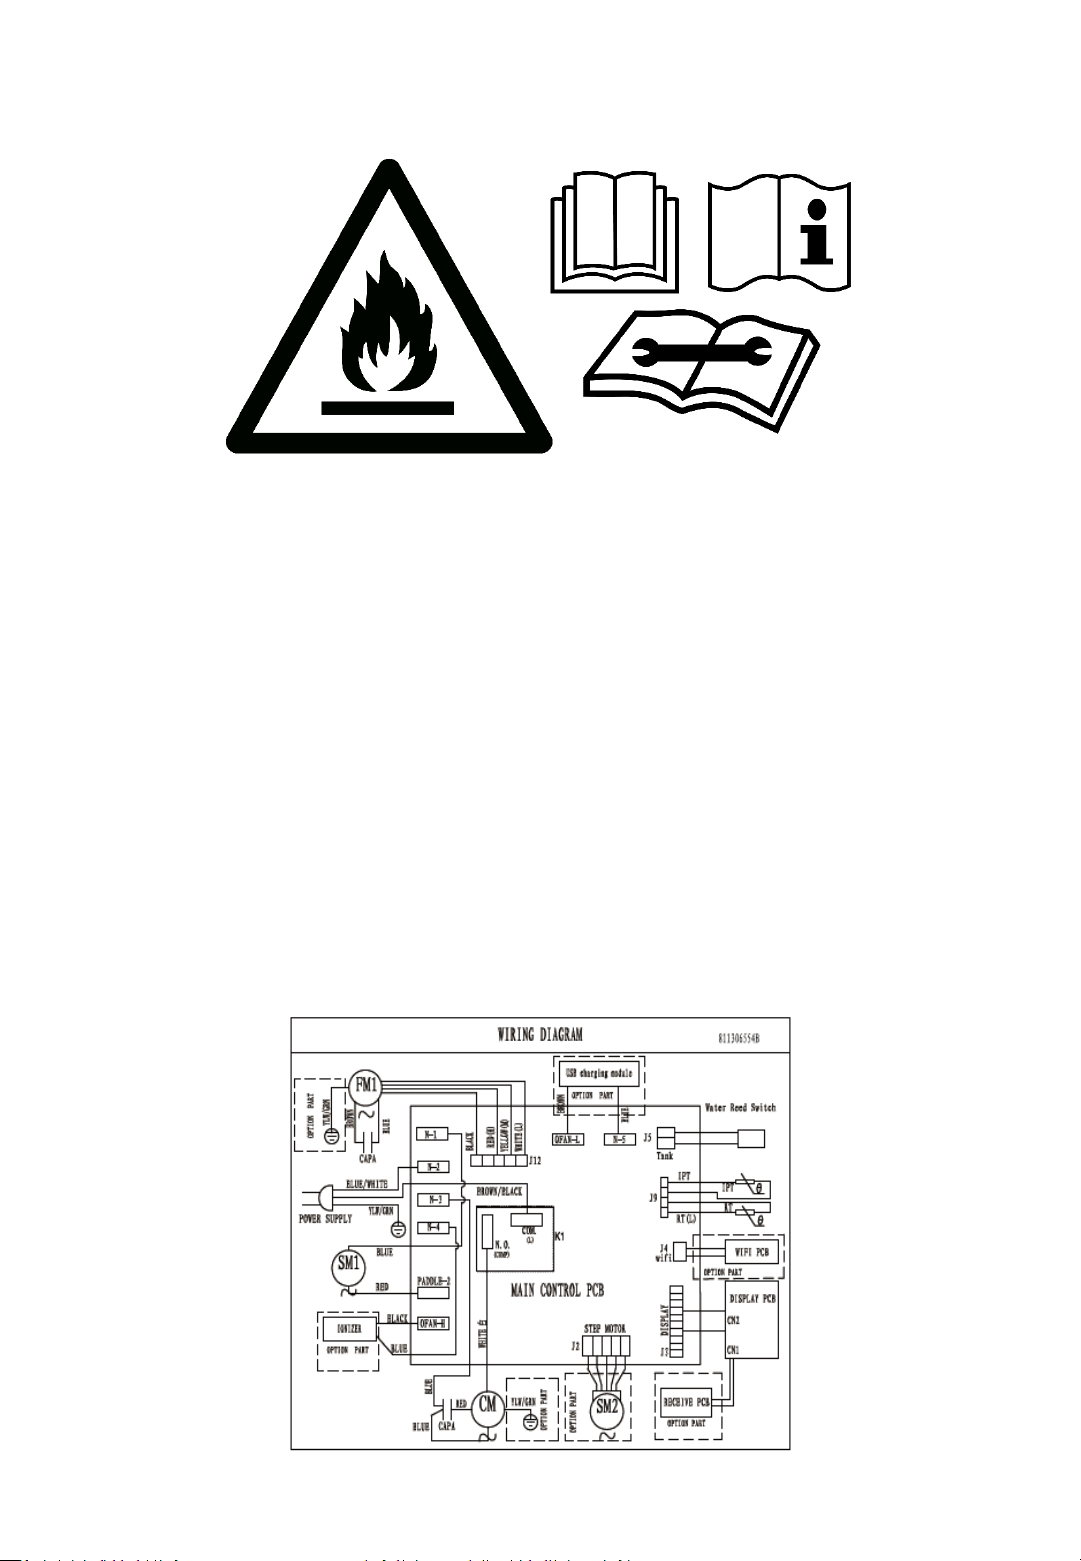
• This model uses natural refrigerant gas as part of its cooling system. This
gas is known as R290 (Propane) and is environmentally friendly but can be
combustible. Care should therefore be taken when handling or transporting
the product to ensure that none of the refrigeration circuit components are
damaged.
• Do not obstruct ventilation openings on the appliance and never insert your
finger or any other object into the air outlet.
• Do not cover the appliance or place any object on the control panel.
• The appliance must not be placed or rested on its power cord.
• Do not use adaptors or extension leads when connecting the appliance to the
electrical power supply.
• Do not use the appliance if the plug is damaged.
• Do not pull, twist or damage the power cable.
• Do not plug-in or un-plug the appliance with wet hands to prevent electrical
shock.
• Always store the unit in an upright position in order to maintain the
compressor working in a proper condition.
• This appliance can be used by children aged from 8 years and above and
persons with reduced physical, sensory or mental capabilities or lack of
experience and knowledge if they have been given supervision or instruction
concerning use of the appliance in a safe way and understand the hazards
involved. Children should not play with the appliance.
• This appliance is designed to be used by adults, do not allow children to play
with the appliance.
• The appliance is intended for residential use only.
• When defrosting and cleaning the appliance, do not use any tools other
than those recommended by the manufacturing company.
• The appliance must be installed, used and stored in an area that is greater
than 13 m2.

Page 4
Safety Instructions
• The appliance must be placed in an area without any continuous sources of
ignition (for example: open flames, gas or electrical appliances in
operation).
• R290/R32 is a refrigerant gas that complies with the European directives on
the environment. Do not puncture or damage any part of the refrigerant
circuit.
• If the appliance is installed, operated or stored in a non-ventilated area, the
room must be designed to prevent the accumulation of refrigerant leaks.
• Individuals who operate or work on the refrigerant circuit must have the
appropriate certification issued by an accredited organisation that ensures
competence in handling refrigerants according to a specific evaluation
recognized by associations in the industry.
• Maintenance and repairs that require the assistance of other qualified
personnel must be performed under the supervision of an individual
specified in the use of flammable refrigerants.
• Be aware that the refrigerants may not contain an odour.
• Compliance with national gas regulations shall be observed.
• The appliance shall be stored so as to prevent mechanical damage from
occurring.
• WARNING: System contains refrigerant under very high pressure. The
system must be serviced and repaired as recommended by the equipment
manufacturer and by qualified persons only.
• Do not use in the following locations: -
Next to a source of fire.
An area where oil is likely to splash.
An area exposed to direct sunlight.
An area where water is likely to splash.
Near a bath, shower or a swimming pool.
In a greenhouse.
An area where flammable gasses or liquids are present.
Page 5
Electrical Safety
THIS APPLIANCE MUST BE PLUGGED INTO AN EARTHED SOCKET
• Before switching on, make sure that the voltage of your electricity supply is the
same as that indicated on the rating plate. This product is designed to operate
on 220 – 240V AC; 50Hz. Connection to any other power source may damage the
unit.
• This product may be fitted with a non rewireable plug. If it is necessary to
change the fuse in the plug, the fuse cover must be refitted. If the fuse cover
becomes lost or damaged, the plug must not be used until a suitable
replacement is obtained.
• If the plug has to be changed because it is not suitable for your socket, or
becomes damaged in any way, it should be cut off and an appropriate plug fitted.
This should be carried out by a qualified electrician. The plug removed must be
disposed of safely, as insertion into a 13 Amp socket is likely to cause an
electrical hazard.

FEATURE DIAGRAM
For Customer Services & Spare Parts please call 0345 209 7461
Or visit us at https://mda.russellhobbs.com
Front
1. Control panel
2. Handle (both sides)
3. Castors
4. Deflector
13. Remote control slot
Rear
5. Intake grill
6. Air outlet grill
7. Intake grill
8. Power cable
9. Plug fixer
10. Condensation drain
(Dehumidification)
11. Condensation drain
(Heating)
12. USB Charging slot
Page 6
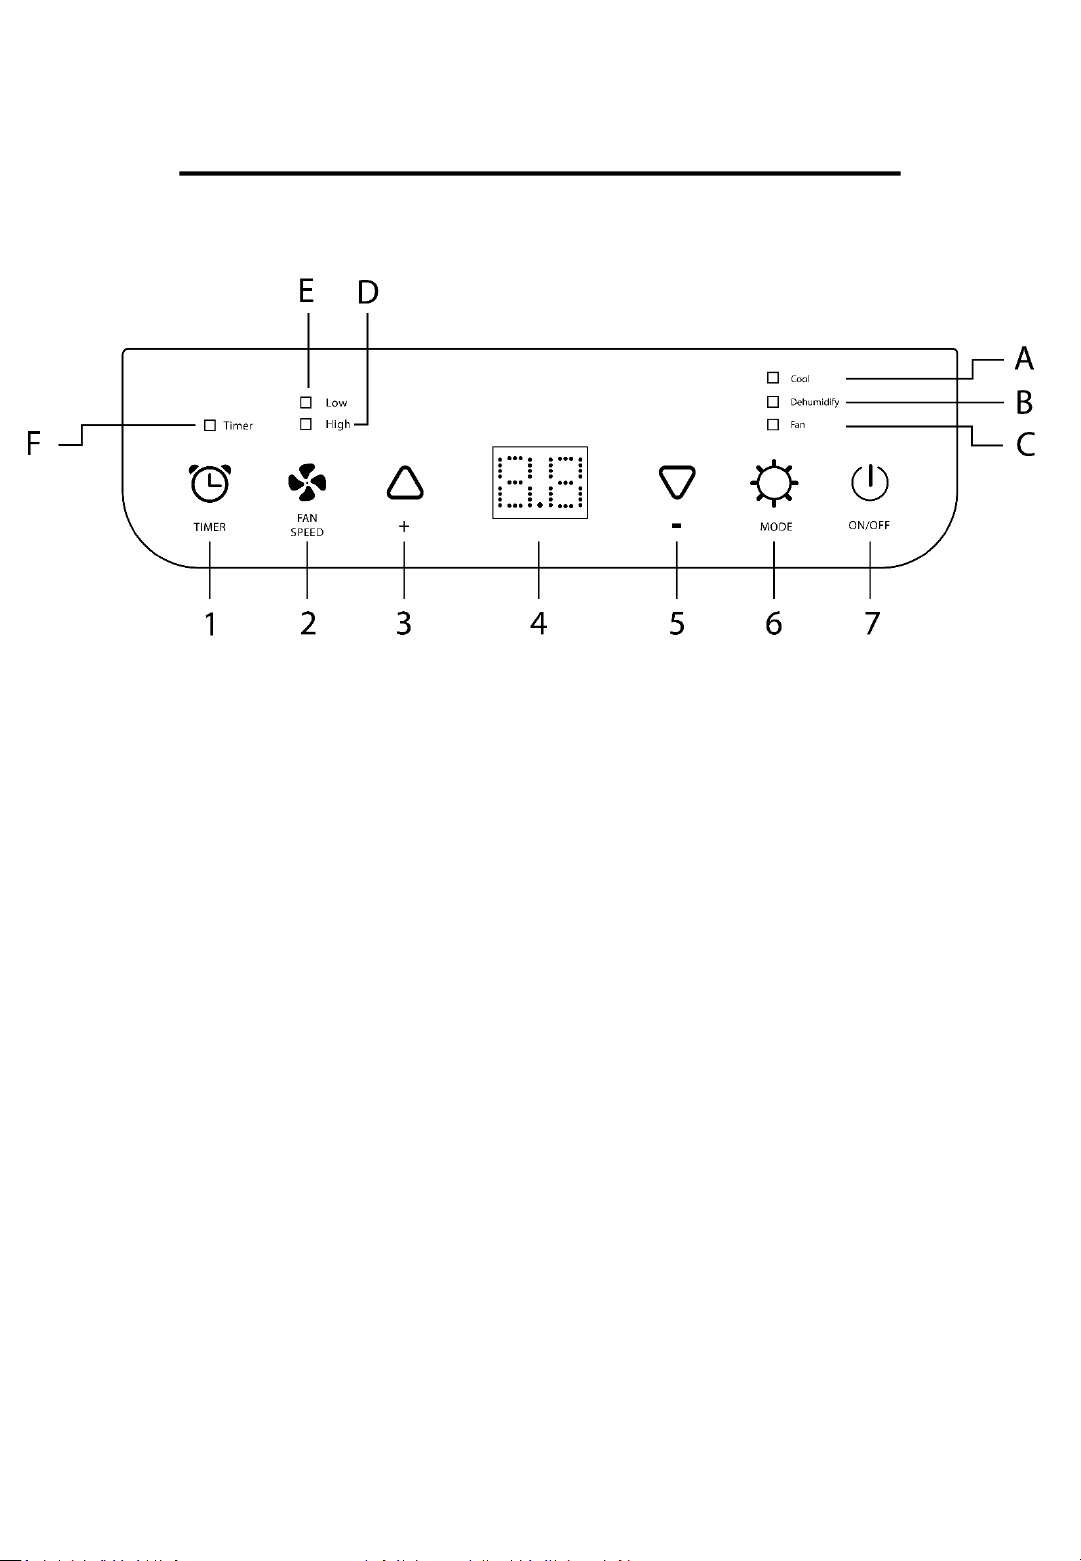
CONTROL PANEL DIAGRAM
Page 7
Front
1. Timer button
2. Fan button
3. Increase button
4. Display screen
5. Decrease button
6. Mode button
7. ON/OFF button
Rear
A. Cool mode
B. Dehumidify mode
C. Fan mode
D. High fan speed
E. Low fan speed
F. Timer mode
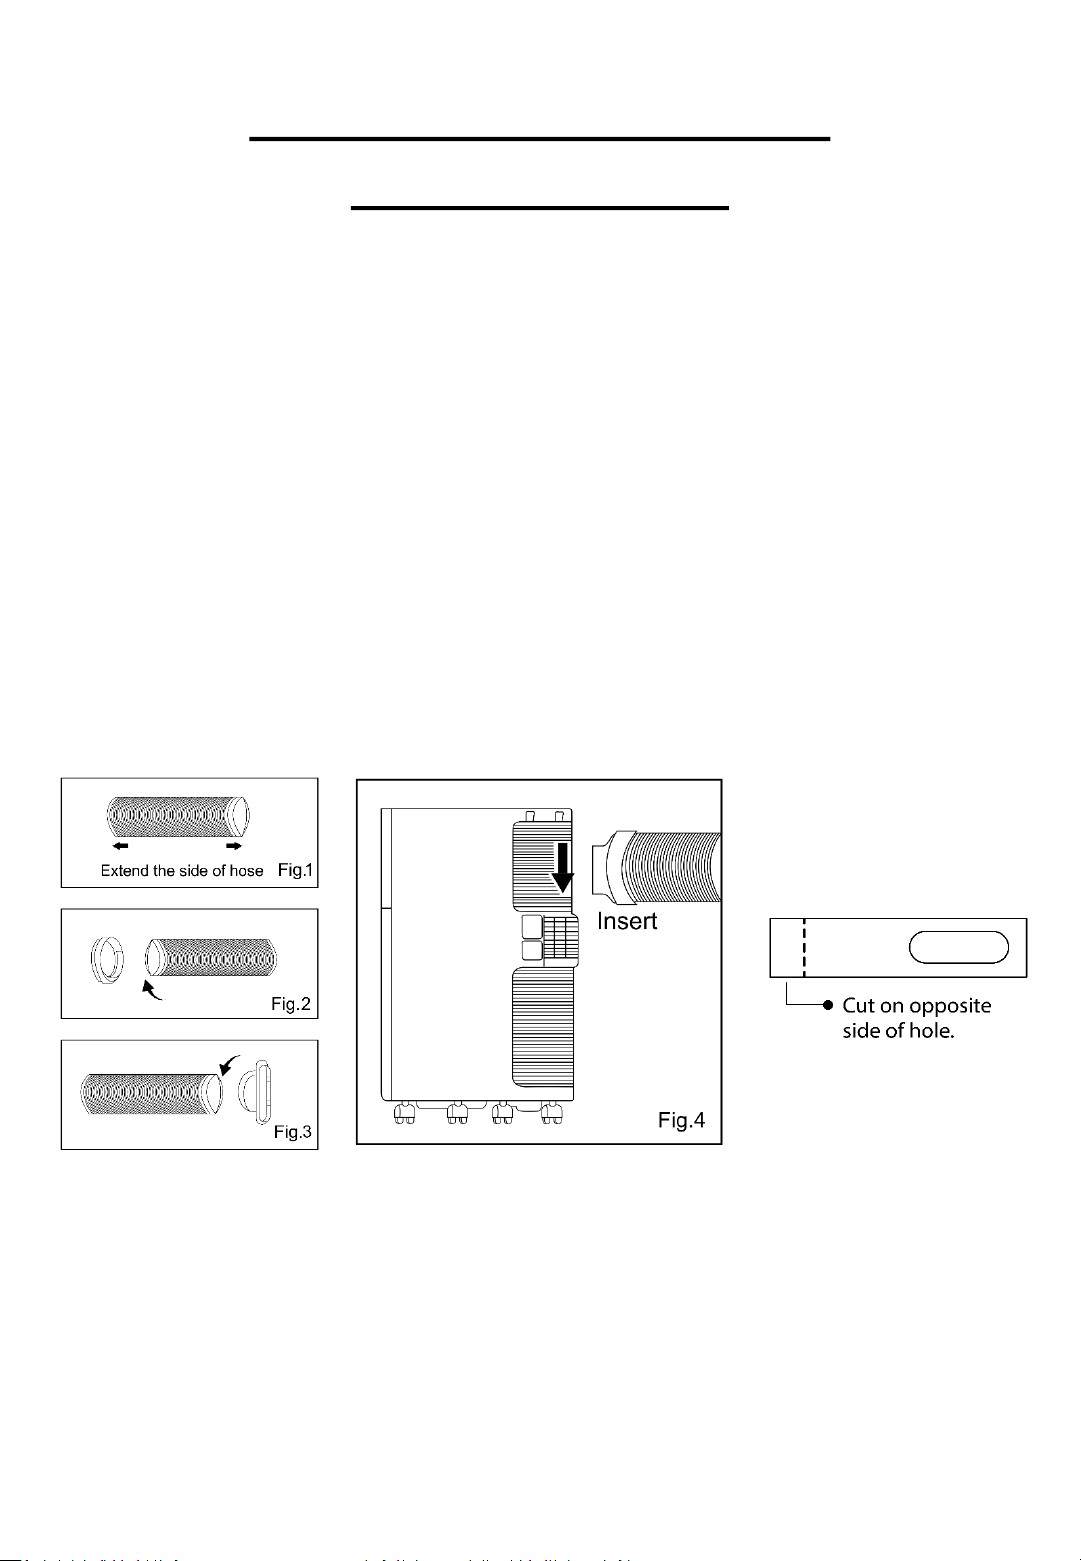
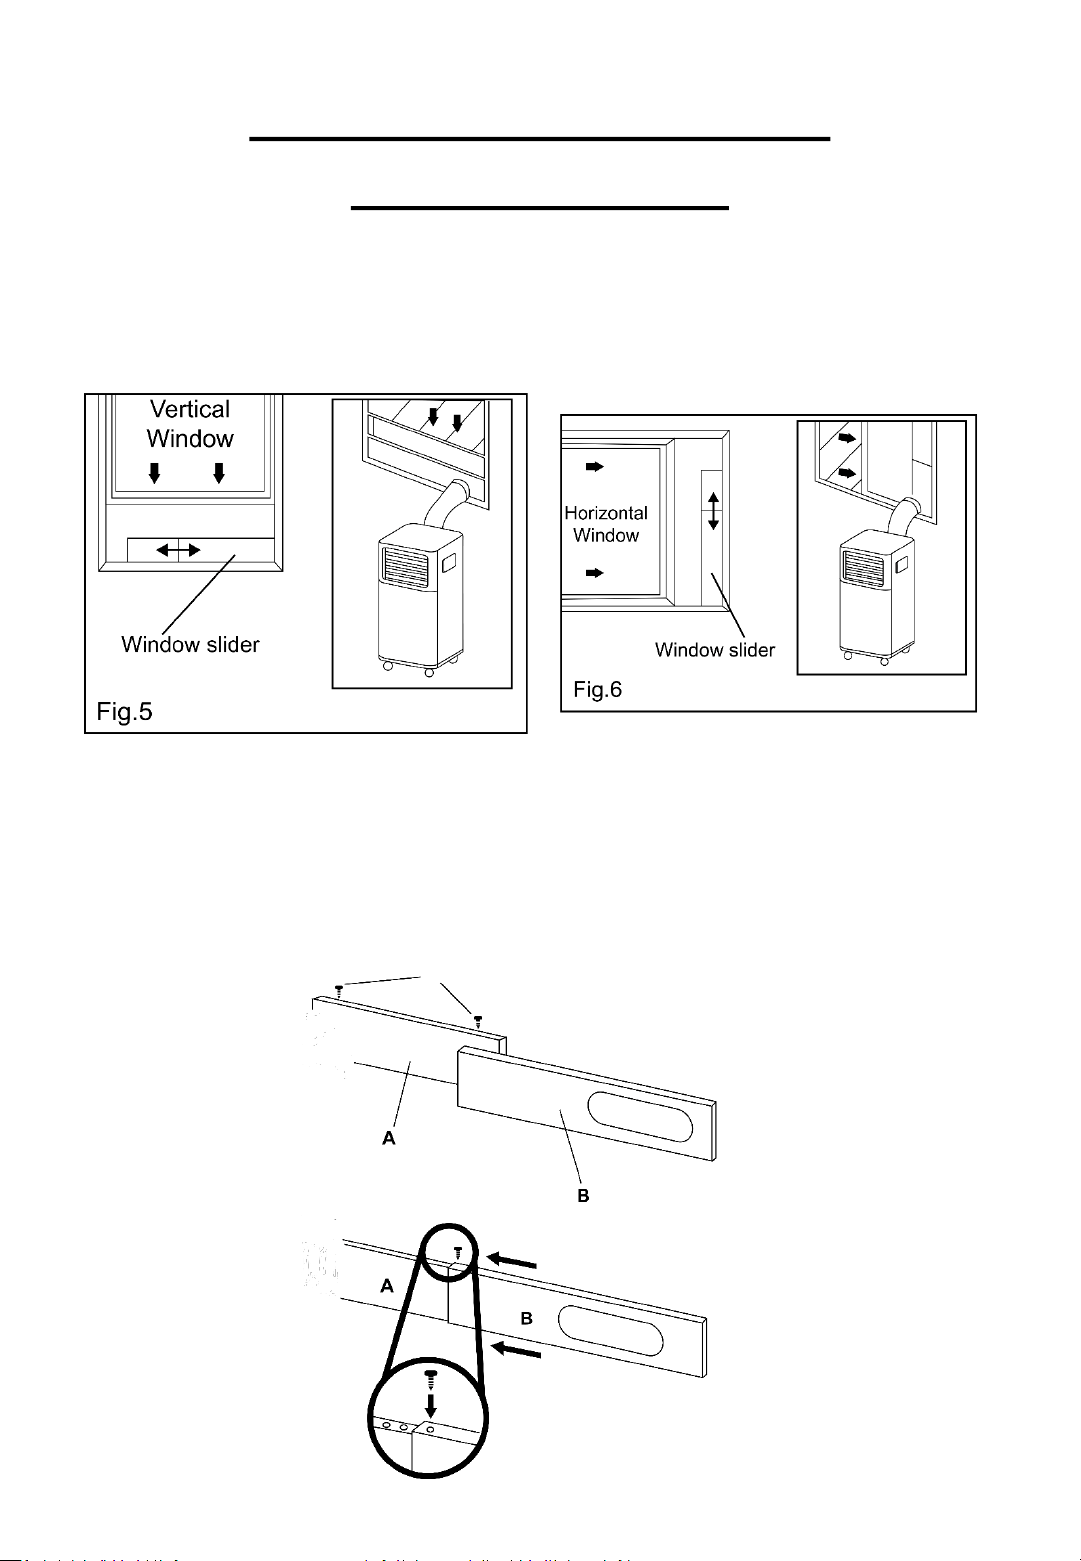
Exhausting Hot Air
In the COOL mode the appliance must be placed close to a window
or opening so that the warm exhaust air can be ducted from outside.
First position the unit on a flat floor and make sure there is a
minimum of a 45cm (18inch) clearance around the unit and ensure
this is within the vicinity of a plug socket.
1. Extend either side of the hose (Fig. 1) and screw on the hose
inlet (Fig. 2).
2. Extend the other side of the hose and screw it into the hose
outlet (Fig. 3)
3. Install the hose inlet into the unit (Fig. 4)
4. Affix the hose outlet into the window slider kit and seal (Fig. 5+6)
Your window slider kit has been designed to fit most standard vertical
and horizontal windows; however, it may be necessary for you to
modify some aspects of the installation procedures for certain types
of windows. The window slider kit can be fastened with screws (may
not be supplied).
INSTALLING YOUR AIR
CONDITIONER
Page 8
NOTE: If the window opening is less than the minimum length of the
window slider kit, cut the end without the hole in so that it is short
enough to fit in the window opening. Never cut out the hole in the kit.
Window Slider Kit Installation
1. Parts
A = Panel
B = Panel with one hole
C = Locking Pin
INSTALLING YOUR AIR
CONDITIONER
Page 9
C
2. Assembly
• Slide Panel B into Panel A and size to the width of the window
(window size may vary). When sizing the window width, be sure
that the window assembly kit is free from any gaps and/or air
pockets when taking measurements.
• Place the locking pin into the corresponding hole. Ensuring the
installation kit is the correct size, without gaps or air pockets.
Location
• The unit should be placed on firm ground to help minimise noise
and vibration. For safe and secure positioning, place the unit on a
smooth, level floor which is strong enough to support the unit.
• This unit has castors to aid placement but it should only be rolled
on smooth, flat surfaces. Use caution when rolling on carpeted and
wooden surfaces. Do not attempt to roll the unit over other
objects.
• The unit must be placed within reach of a properly rated grounded
socket.
• Never place any obstacles around the air inlet or outlet of the unit.
• Allow at least 45cm of space around, above and away from the
wall to ensure the appliance works efficiently.
• The hose can be extended but it is best to keep it to the minimum
length required. Also ensure that the hose does not have any sharp
bends or sags.
INSTALLING YOUR AIR
CONDITIONER
Page 10

USING YOUR AIR CONDITIONER
Page 11
Operating from the control panel
The control panel is on top of the appliance and it enables you to manage
functions without using the remote control. However, to use the appliance
to its full potential you are advised to use the remote control.
To turn the appliance on plug it into a mains socket and the appliance will
enter standby mode.
Press the ON/OFF button to turn the appliance on, the last function that
was active when the appliance was turned off will appear.
“Never turn the appliance off by unplugging it from the mains. Always
press the ON/OFF button, then wait for a few minutes before
unplugging. This allows the appliance to perform a cycle of checks to
verify the operation”
COOL Mode
Ideal for hot humid weather when you need to cool and dehumidify the
room.
To set this mode correctly:
- Press the MODE button several times until the COOL mode indicator
light appears.
- Select the desired temperature by pressing the INCREASE and
DECREASE buttons until the value you want is displayed. The
temperature ranges from 18-32°C (64-90°F) in this mode.
- Select the required fan speed by pressing the FAN button.
- There are 2 fan speeds to choose from: High & Low
HIGH: To achieve the desired temperature as fast as possible.
LOW: Lowers the noise of the appliance.
The most suitable temperature for a room during the summer varies from
24-27°C. You are recommended not to set a temperature much lower than
the outdoor temperature, this will cause unnecessary power
consumption.
USING YOUR AIR CONDITIONER
Page 12
FAN Mode
When using the appliance in this mode, the air hose does not need to be
attached.
To set this mode correctly:
‐ Press the MODE button several times until the FAN mode indicator
light appears.
‐ Select the required fan speed by pressing the FAN button.
‐ There are 2 fan speeds to choose from: High & Low
= HIGH SPEED = LOW SPEED
As figured here:
DRY Mode
Ideal to reduce room humidity (good for use in spring, autumn, damp
rooms and rainy periods)
When in DRY mode the appliance should be prepared in the same way as
for COOL mode, with the air exhaust hose attached to enable the moisture
to be discharged outside.
To set this mode correctly:
‐ Press the MODE button several times until the DRY mode indicator
light appears, will also appear on the display screen. (as seen
below)
‐ In this mode, the fan speed is automatically selected by the appliance
and can not be set manually.
USING YOUR AIR CONDITIONER
Page 13
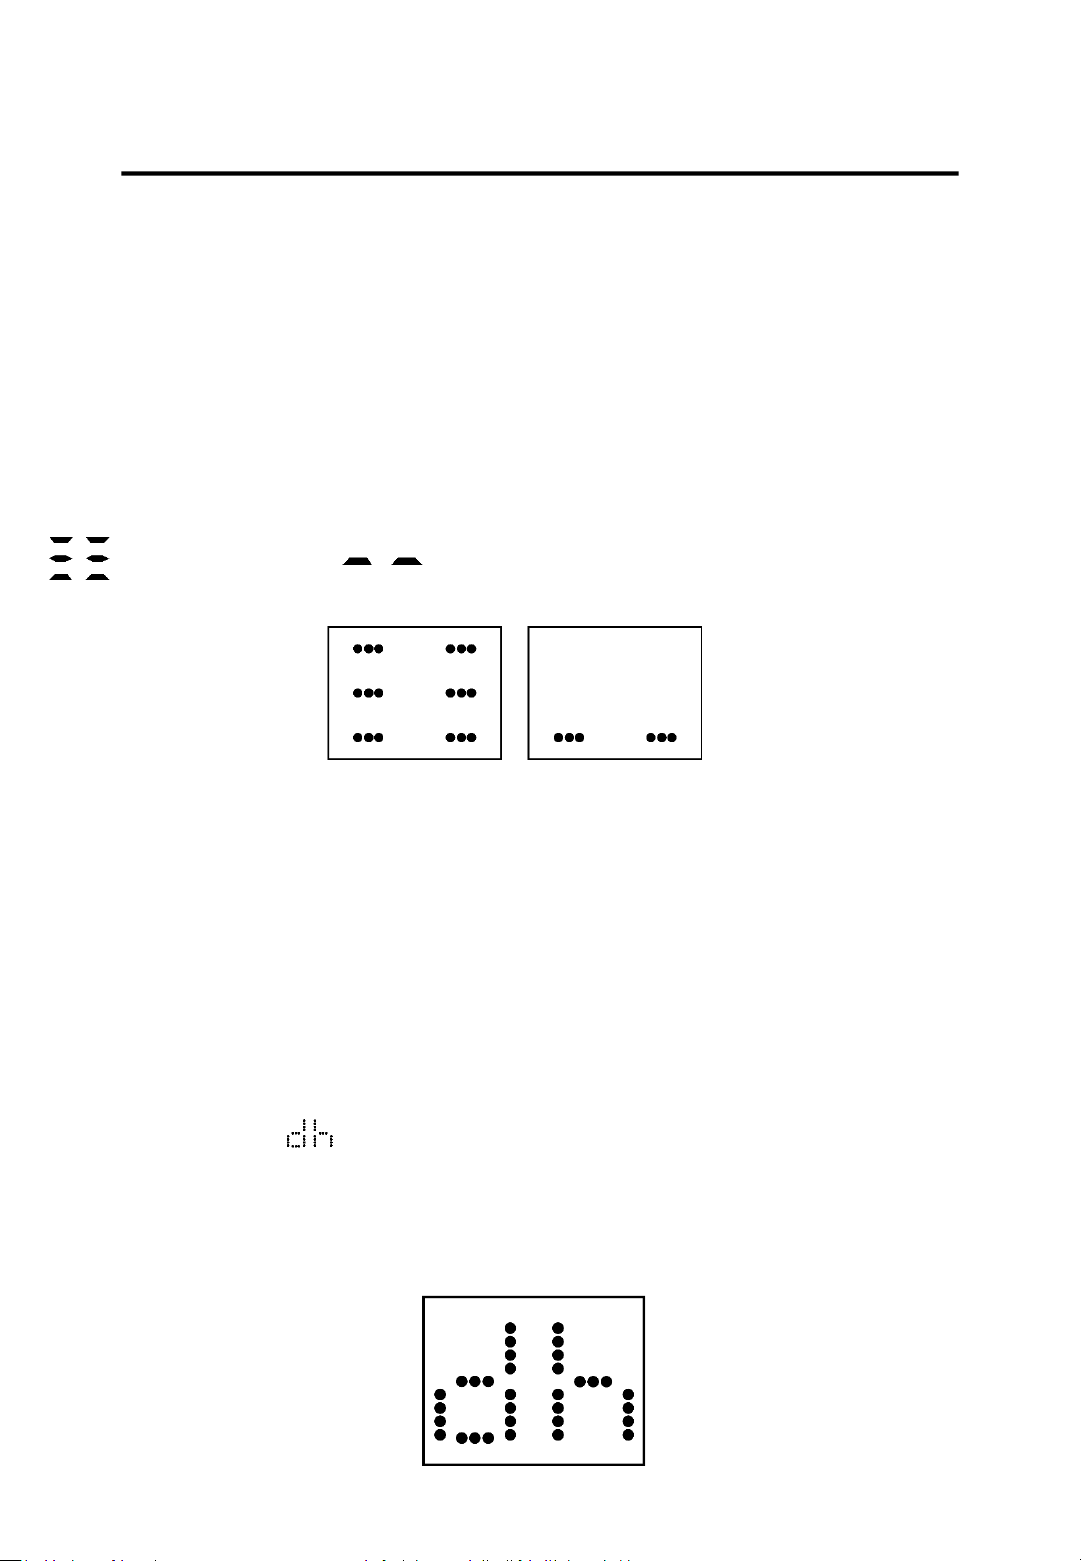
Switching the unit of temperature
Hold both the INCREASE and DECREASE buttons at the same time until the
appliance beeps (approx. 5 seconds). Once the appliance has beeped you
will be able to change the unit of temperature.
For example:
Before change and when in cool mode the screen
will display like this.
After the change the screen will then display like
this.
Setting the timer
The timer can be used to schedule the start up or shutting down of the
appliance.
Programming start up:
‐ Turn on the appliance and select the mode, temperature and fan
speed you desire, then turn off the appliance.
‐ Press the TIMER button and the screen will display 1-24 hours.

USING YOUR AIR CONDITIONER
Page 14
‐ Continue to press the TIMER button until the desired time is displayed.
Wait for approximately 5 seconds and then the timer will then be
active. Only the TIMER mode indicator light should be on.
‐ Press either the TIMER or the ON/OFF button and the timer will be
cancelled. The TIMER mode indicator light will then go off.
Programming shut down:
‐ When the appliance is running press the TIMER button, the screen will
display 1-24 hours.
‐ Continue to press the TIMER button until the desired time is displayed.
Wait for approximately 5 seconds and then the timer will be active.
The TIMER mode indicator light should appear.
‐ Press either the TIMER button and the timer will be cancelled. The
TIMER mode indicator light should then go off.
USB Charging Function
To open or close the USB Charging port, press the FAN button for
approximately 10 seconds.
When the port is opening the appliance will ‘BEEP’ once, when you close
this function the appliance will ‘BEEP’ twice.
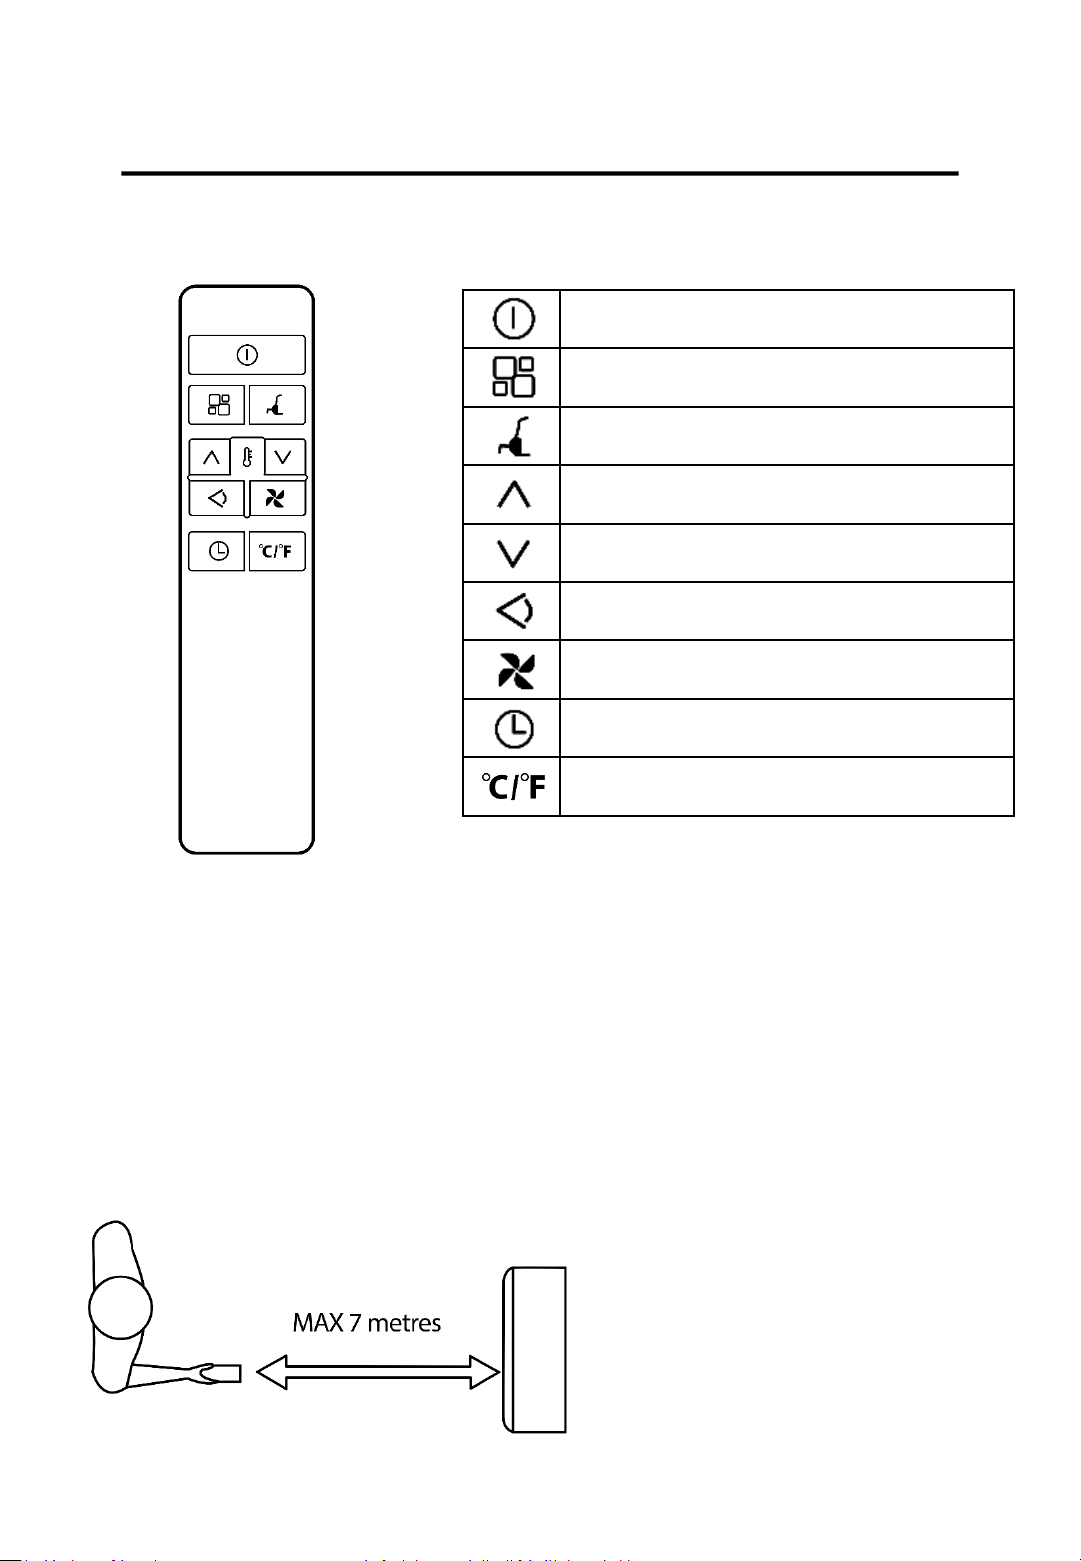
Operating from the remote control
USING YOUR AIR CONDITIONER
Page 15
On/Off button
Mode button
Night Mode button
Increase button
Decrease button
Oscillating button
Fan button
Timer button
Unit Switch button
• Point the remote control at the receiver on the appliance.
• The remote control must be no more that 7 meters away from the
appliance (without obstacles between the remote control and the
receiver).
• The remote control must be handled with extreme care to ensure
continuous usage. Do not drop or expose the remote to direct sunlight
or sources of heat. If the remote stops working, please remove and
replace the batteries.
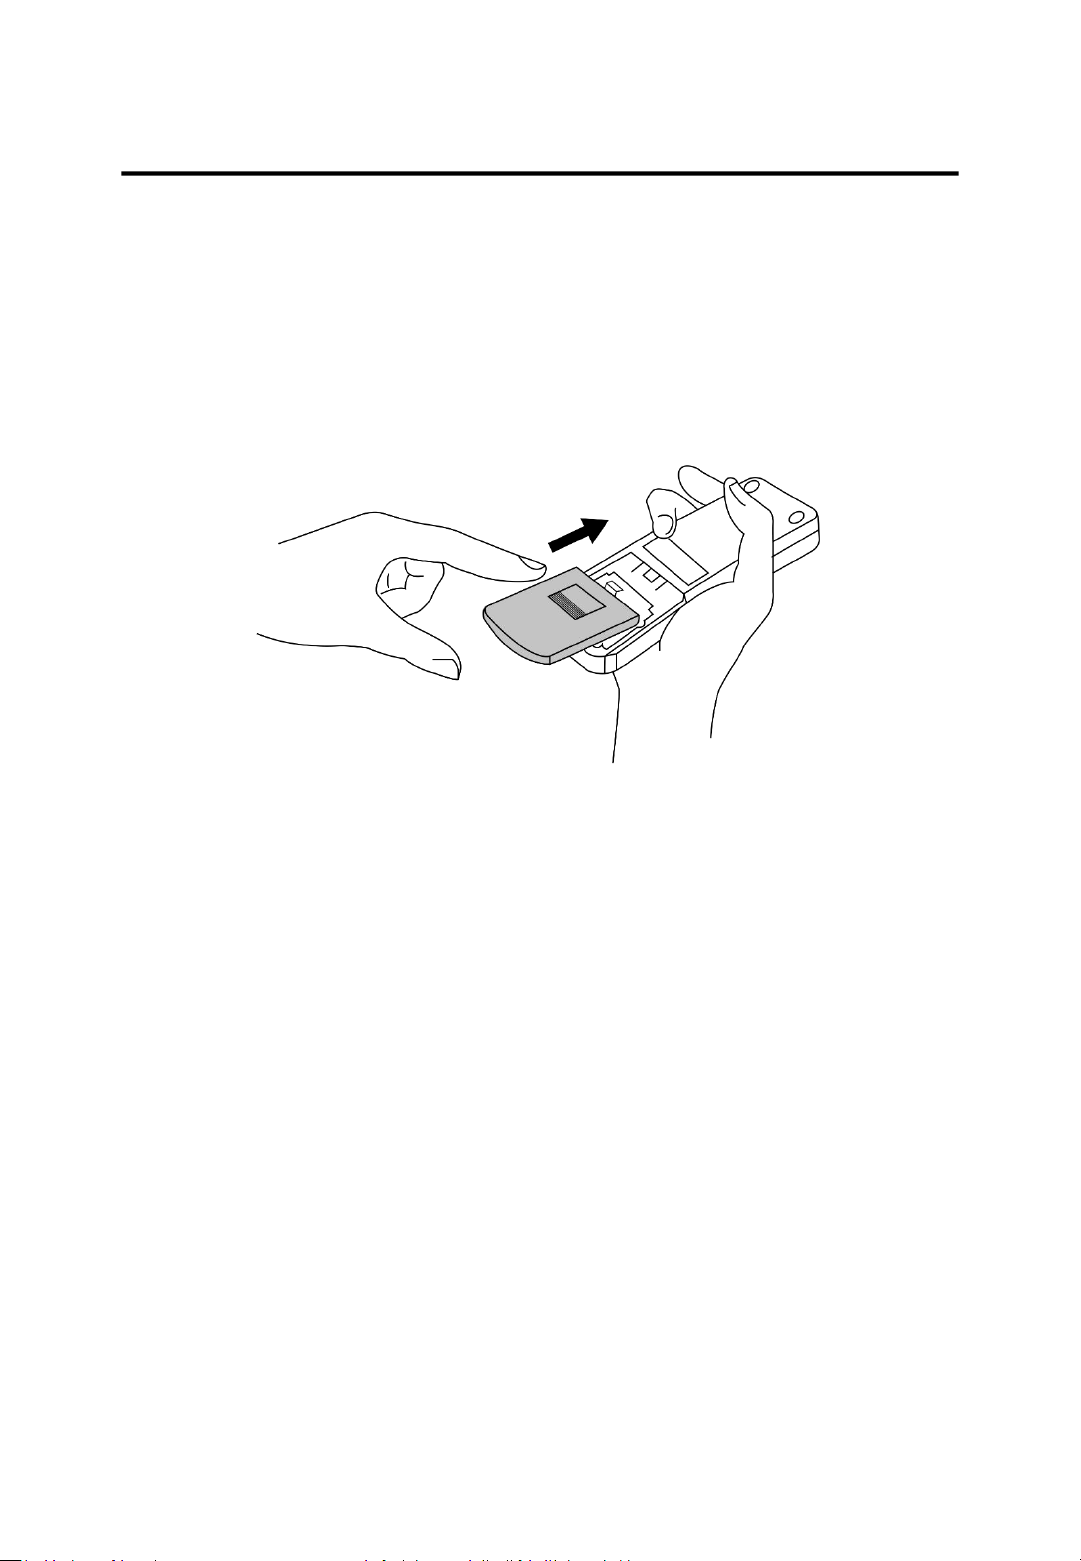
Inserting or Replacing the Batteries
To insert or replace the batteries follow the steps below:
1. Remove the cover on the rear of the remote control.
2. Insert two “AAA” 1.5V batteries into the correct positions (see
instructions inside the battery compartment).
NOTE:
‐ If the remote control is replaced or disposed of, the batteries must
be removed and discarded in accordance with current legislation as
they are harmful to the environment.
‐ Do not mix old and new batteries.
‐ Do not mix alkaline, standard (carbon-zinc) or rechargeable (nickel-
cadmium) batteries.
‐ Do not dispose of batteries in fire, they may explode or leak.
‐ If the remote control is not going to be used for a long period of
time remove the batteries.
USING YOUR AIR CONDITIONER
Page 16
COOL Mode, FAN Mode, DRY Mode, Setting the Timer
To correctly set these four modes/functions using the remote
control, follow the same steps that are stated in the ‘Operating from
the control panel’ section of this manual but instead of pressing the
buttons mentioned on the control panel press the corresponding
buttons on the remote control.
Oscillating function
This function is useful for selecting the up and down flow of air
delivery.
NOTE: There is no auto swing function on this appliance.
To set this function correctly:
- Select the desired operating mode as detailed above.
- Press the OSCILLATING button and adjust the swing blades to the
desirable position.
A. Horizontal deflector: Four
B. Vertical deflector: One
USING YOUR AIR CONDITIONER
Page 17
Page 18
Night Mode function
This function is useful for the night as it gradually reduces the
operation of the appliance.
To set this function correctly:
- Select the COOL or HEAT mode.
- Press the NIGHT MODE button.
The appliance will then operate in the previously selected mode.
When in this function the display screen will reduce in brightness and
the room will be maintained at the optimum temperature without
excessive fluctuations in temperature or humidity with silent
operation. The fan speed will always be low so you are not disturbed
by excessive noise while you sleep.
When in COOL mode, the selected temperature will increase by 1°C
(1°F) per hour over a 2-hour period. This new temperature will then
be maintained for the next 6 hours. After 6 hours the appliance will
turn itself off.
When the appliance is in the FAN or DEHUMIDIFYING mode, the
NIGHT MODE function cannot be set.
This function can be cancelled at any time during operation by
pressing either the NIGHT MODE, MODE or FAN SPEED button.
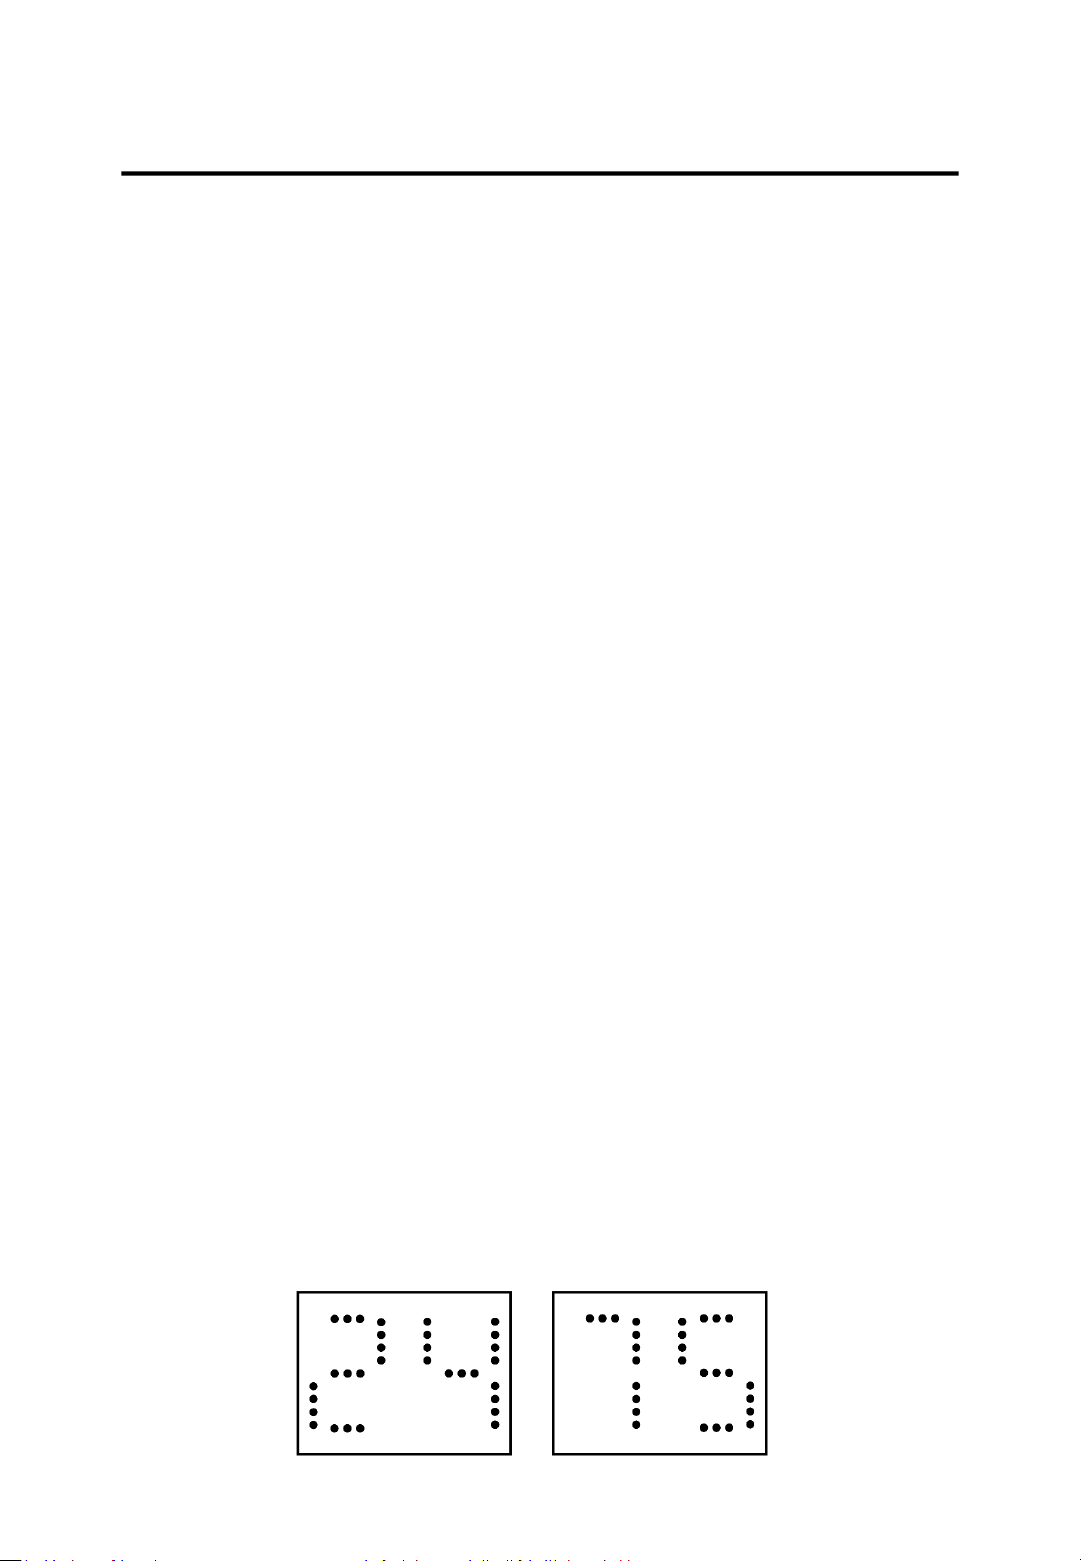
Switching the unit of temperature
When the appliance is in standby, press the UNIT SWITCH button and
this will allow you to change the unit of temperature from °C to °F
and vice versa, as seen below.
USING YOUR AIR CONDITIONER
USING YOUR AIR CONDITIONER
Page 19
Tips for correct use
To get the best out of your appliance, follow these
recommendations:
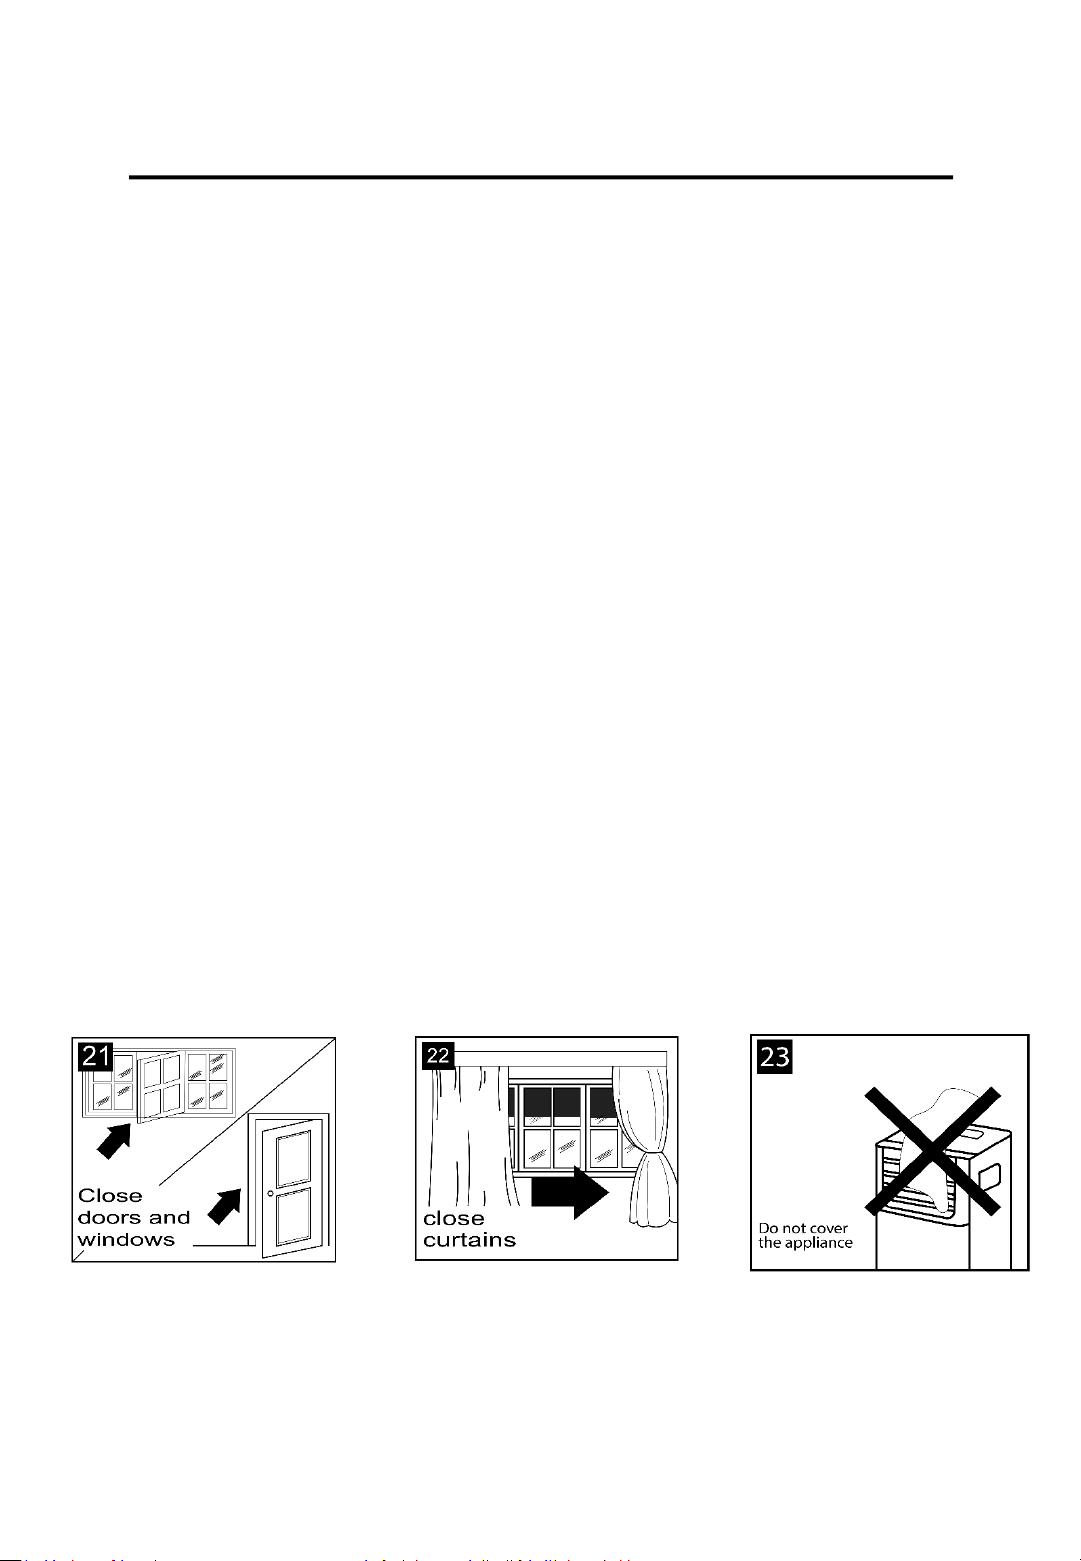
• If possible, close the windows and doors in the room you want to
be air conditioned (Fig 21). When installing the appliance semi-
permanently you should leave a door slightly open (as little as 1cm)
to guarantee correct ventilation.
• Protect the room from direct exposure to the sun by partially
closing curtains and/or blinds to make the appliance much more
economical to run (Fig 22).
• Never rest objects of any kind on the appliance.
• Do not obstruct the air intake and outlet (Fig 23). Ensure the grills
are left free.
• Make sure there are no heat sources within the room.
• Never use the appliance in very damp rooms (e.g. Laundry Rooms).
• Never use the appliance outdoors.
• Make sure the appliance is standing on a level surface. If necessary,
place the castor locks under the front wheels.
USING YOUR AIR CONDITIONER
Page 20
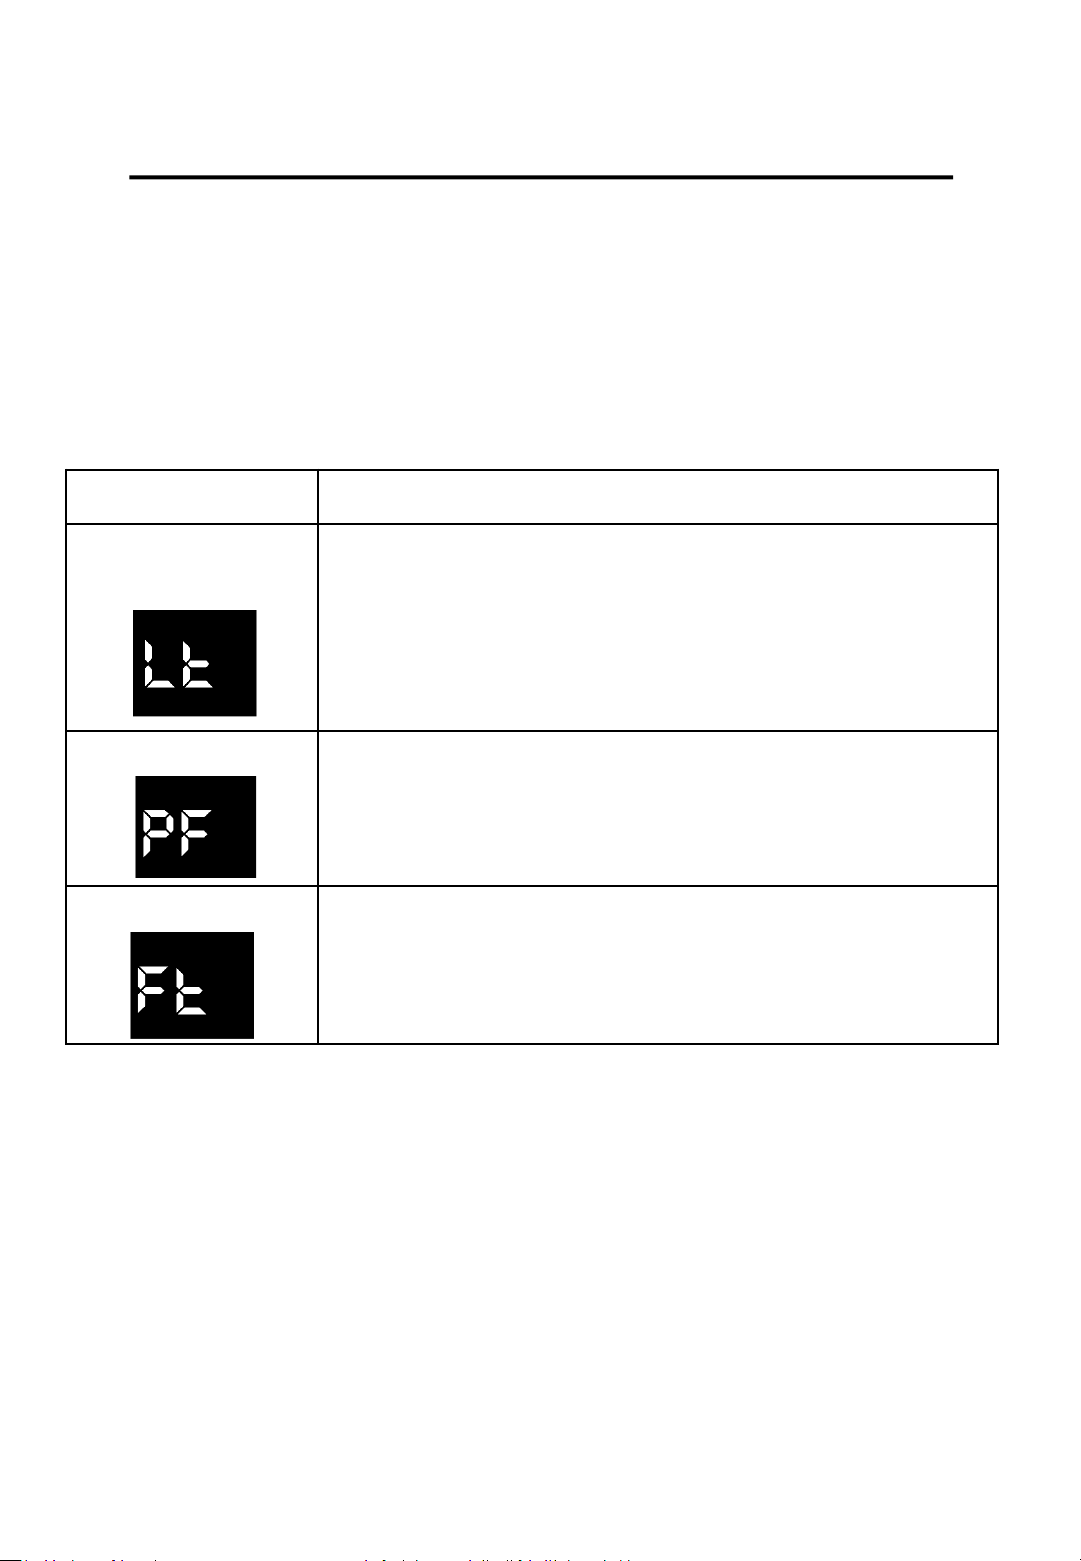
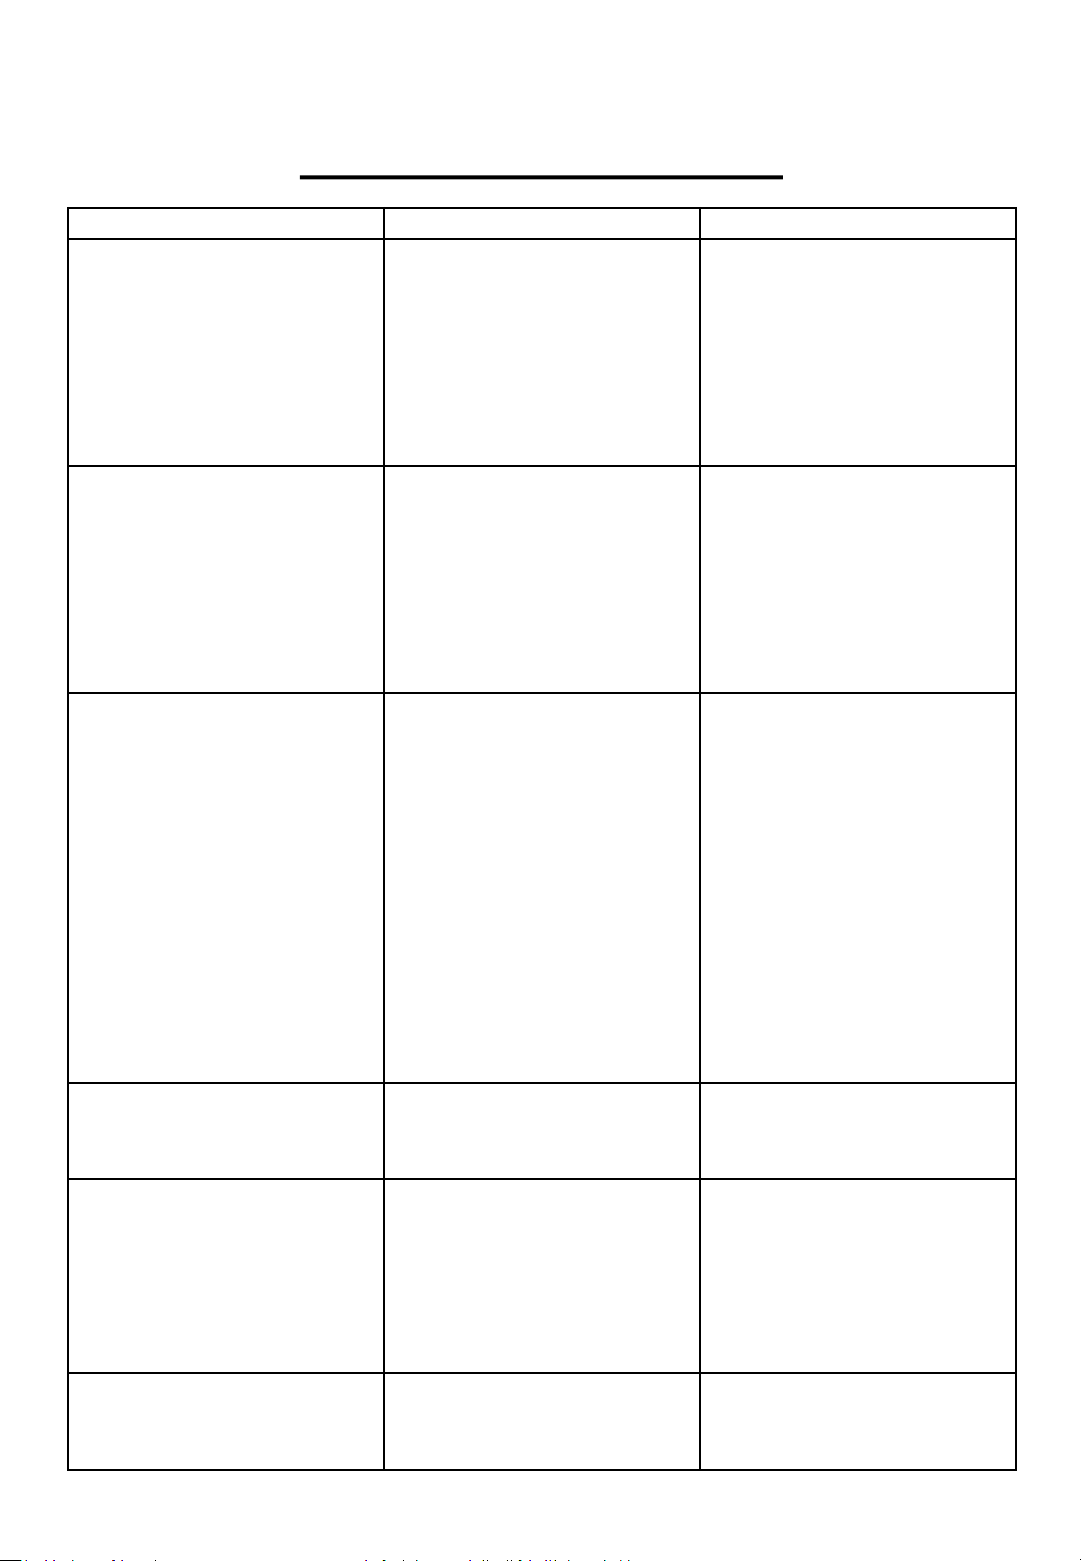
Self-Diagnosis
This appliance has a self-diagnosis system to help identify a number
of malfunctions.
The following error messages will be displayed is the appliance has
identified a malfunction.
DISPLAY WHAT SHOULD YOU DO?
LOW
TEMPERATURE
The appliance is fitted with a frost protection
device to avoid the excessive formation of ice.
You DO NOT need to do anything when this
happens, the appliance will start back up
automatically once defrosted.
PROBE FAILURE
If this is displayed please contact our Customer
Service team by calling
0345 209 7461.
FULL TANK
Empty the internal safety tank, following the
instructions in the “End of Season Operations”
section of this Instruction Manual
DRAINING YOUR AIR CONDITIONER
Page 21
Water drainage method
When there is excess water condensation inside the unit, the
appliance will stop running and ‘Ft’ will display (FULL TANK as
mentioned in the self diagnosis). This indicates that water needs to
be drained out using one of the following procedures.
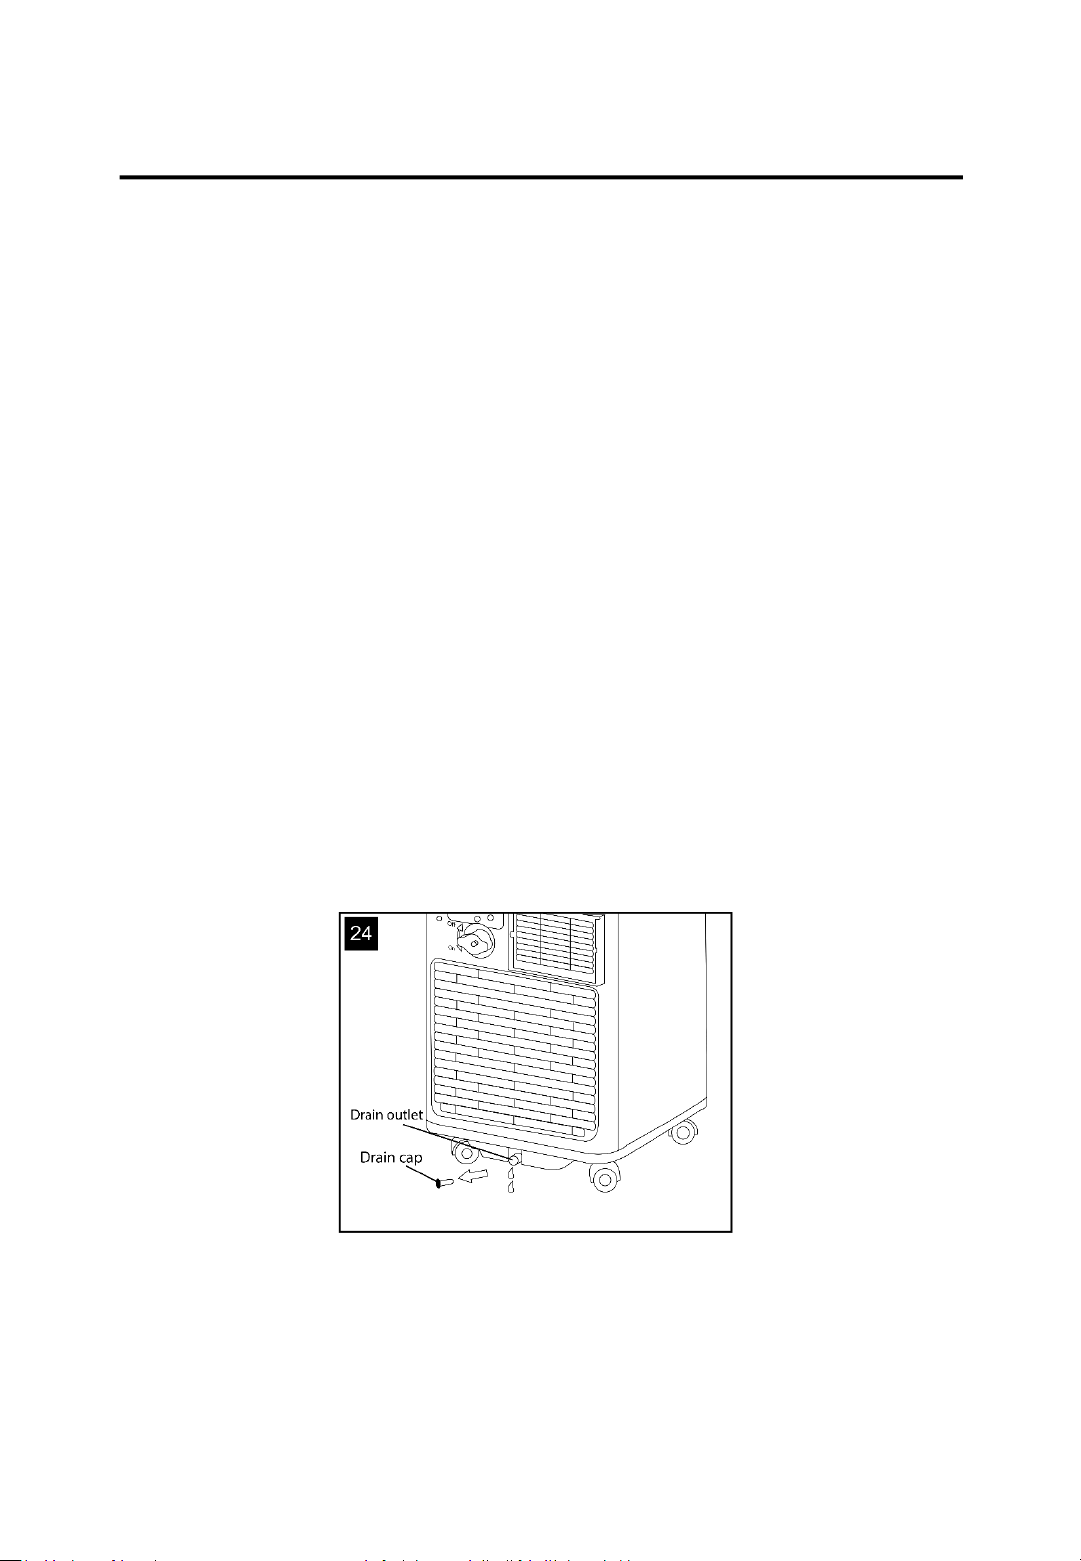
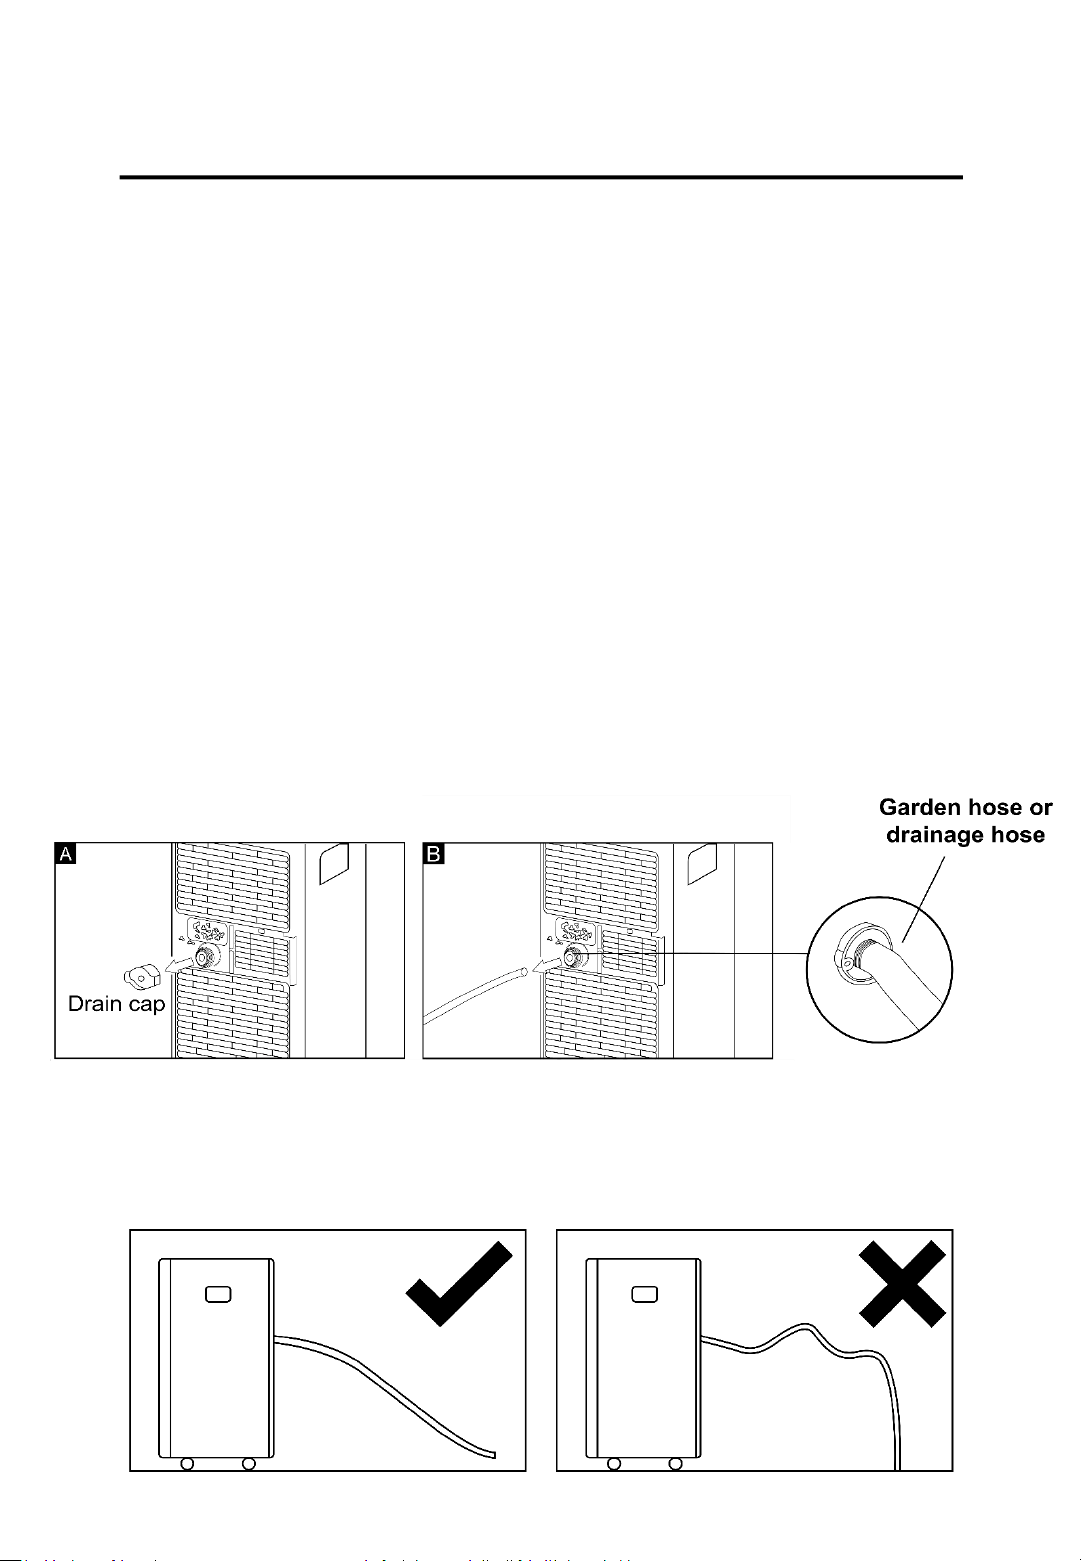
Manual Draining (Fig. 24)
Water may need to be drained in high humidity areas.
1. Unplug the unit from the power source.
2. Place a drain pan under the lower drain plug (see Fig. 24).
3. Remove the lower drain plug
4. Water will drain out and collect in the drain pan (drain pans not
supplied).
5. After all the water has been drained out, replace the lower drain
plug firmly.
6. Plug the unit back into the power source and turn it back on.
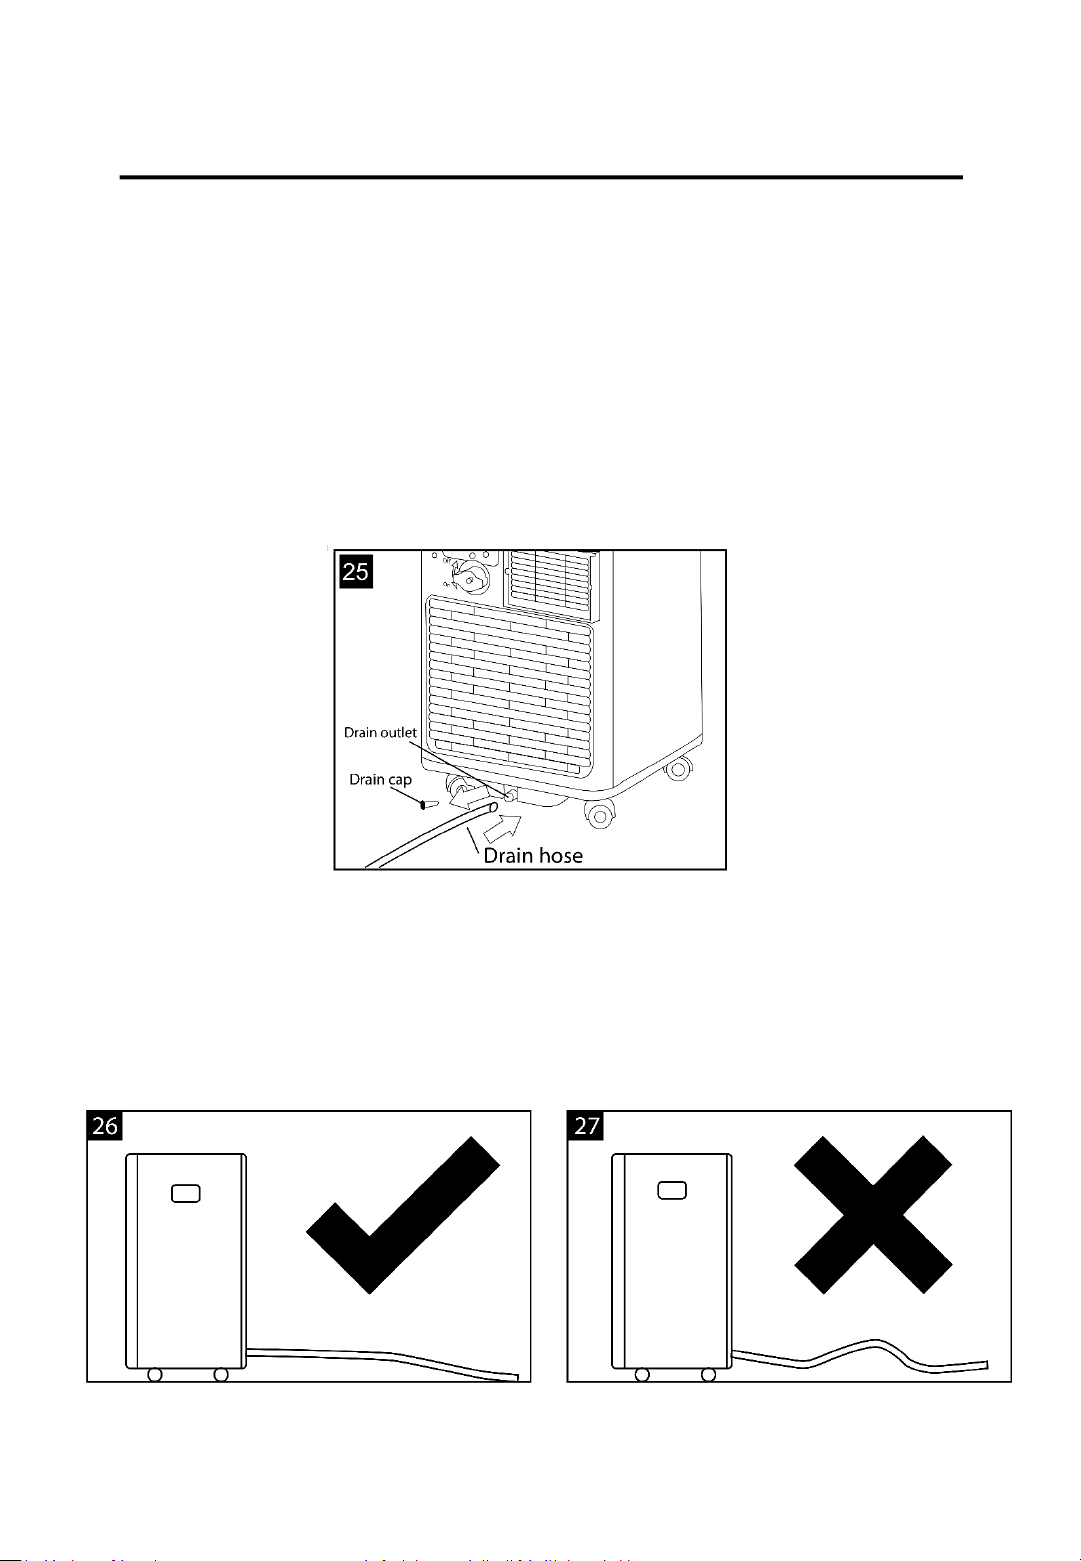
Continuous Draining (Fig. 25)
While using the unit in the dehumidifier mode, it is recommended to
use this method of draining.
1. Unplug the unit from the power source.
DRAINING YOUR AIR CONDITIONER
Page 22
2. Remove the drain plug. When removing the plug some residual
water may spill out, so ensure you have a pan to collect the
water.
3. Connect the supplied drain hose to the drain outlet.
4. The water can be continuously drained through the hose into a
floor drain or bucket.
5. Plug the unit back into the power source and turn it back on.
NOTE – Please ensure that the height of and the section of the drain
hose should not be higher than the drain outlet , or the water tank
may not be drained (Fig. 26 and 27).
DRAINING YOUR AIR CONDITIONER
Page 23
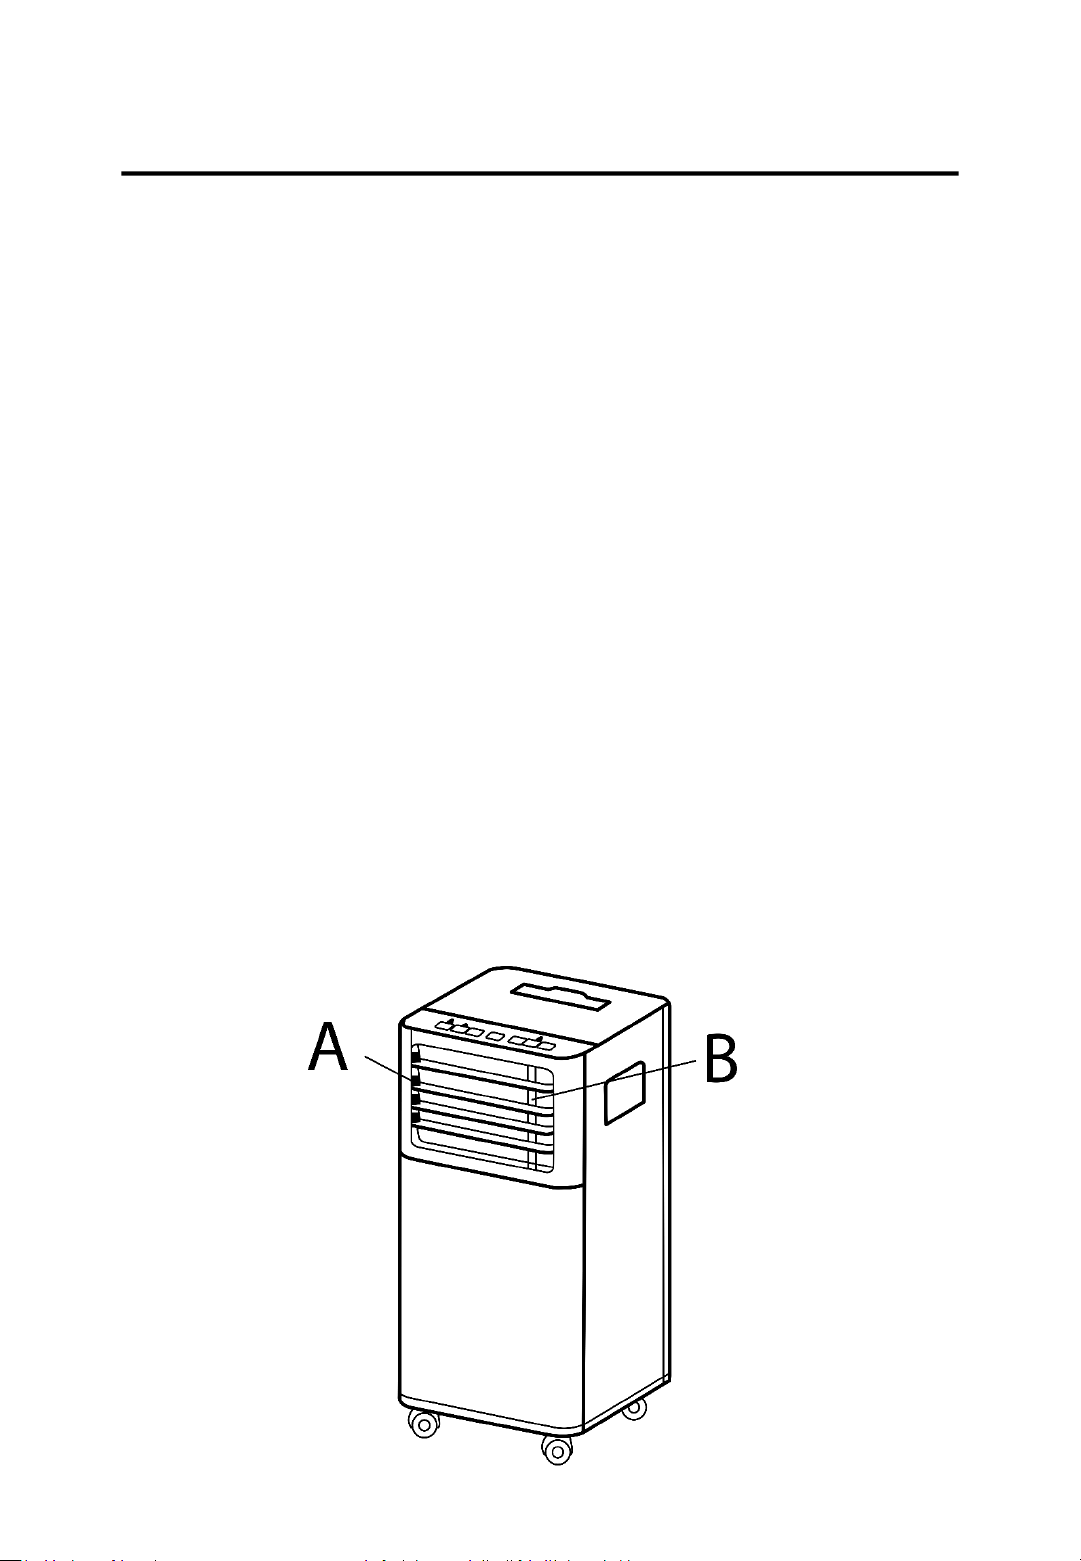
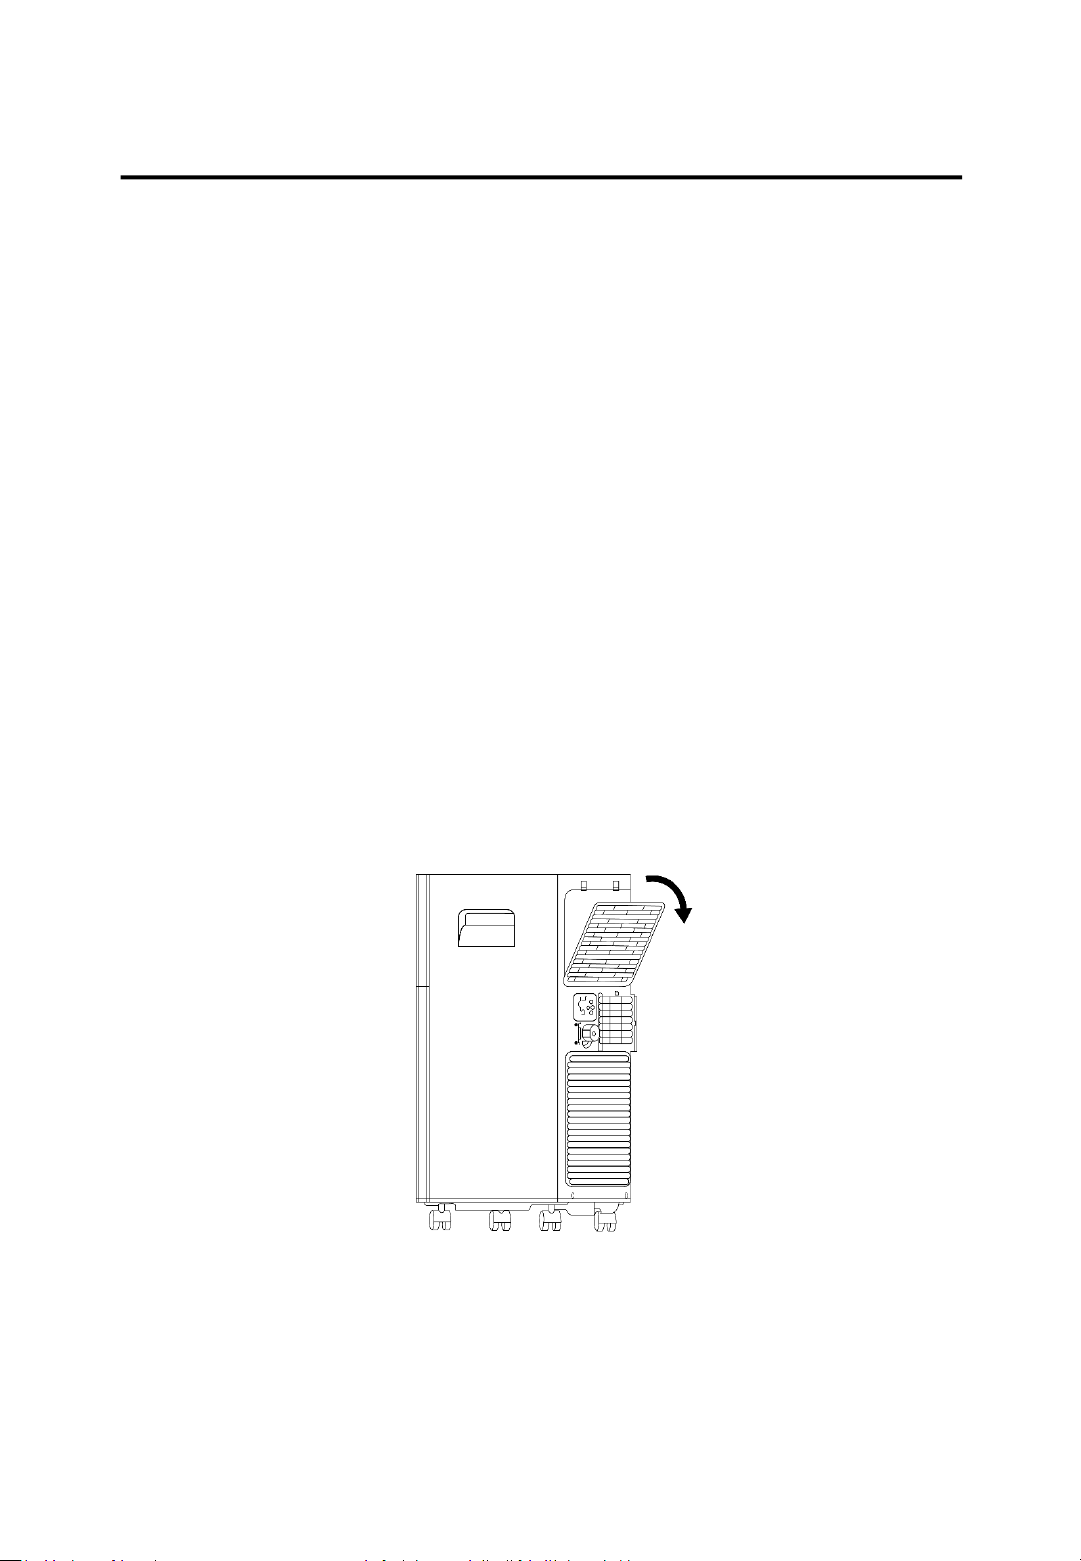
Middle drainage
When the unit is running in DEHUMIDIFY mode, you can chose to
drain the appliance through the middle drainage hole. This is done as
follows:
1. Unplug the unit from the power source
2. Remove the drain plug (Fig A). While doing this some residual
water may spill out, so ensure you have a pan to collect the
water.
3. Connect the supplied drain hose to the middle drainage outlet.
(Fig B)
4. The water can be continuously drained through the hose into a
floor drain or bucket.
5. Plug the unit back into the power source and turn it back on.
NOTE – Please ensure that the height of and the section of the drain
hose should not be higher than the drain outlet , or the water tank
may not be drained.
CLEANING YOUR AIR CONDITIONER
Page 24
Before any cleaning or maintenance, turn the appliance off by
pressing the ON/OFF button on either the control panel or remote
control, wait for a few minutes and then unplug the appliance from
the mains socket.
Cleaning the cabinet
You should clean the appliance with a slightly damp cloth and then
pat dry with a dry cloth.
- Never wash the appliance with water it could be dangerous.
- Never use petrol, alcohol or solvents to clean the appliance.
- Never spray with insecticide or similar liquids.
Cleaning the air filters
To keep your appliance working efficiently, you should clean the filter
every week of operation.
You can remove the evaporator filter as seen below.
Use a vacuum cleaner to remove dust accumulation from the filter. If
it is very dirty, immerse the filter in warm water and rinse it several
times, the water should never be hotter than 40°C (104°F). After
washing, leave the filter out to dry and then re-attach the intake grill
to the appliance.

START/END OF SEASON OPERATIONS
Page 25
Start of season checks
Make sure the power cable and plug are undamaged and the earth
system is efficient.
Follow the installation instructions within this manual precisely.
End of season operations
To empty the internal circuit completely of water, remove the cap
and run all the water off into a pan.
When all the water has been drained, firmly put the cap back in
place. Clean the filter and dry thoroughly before putting it back into
the appliance.
Limit conditions
Temperature of room: 18-35°C (64-95°F) (Cooling)
Humidity of room: 30%RH ~ 80%RH
TROUBLESHOOTING
Page 26
PROBLEM CAUSE SOLUTION
The appliance does not come
on
-
There is no current
-
It is not plugged into the
mains
-The internal safety device has
tripped
-
Wait
-
Plug it into the mains
-Wait 30 minutes and if the
problem persists please
contact our Customer Service
team on
0345 209 7461.
The appliance works for a
short time only
-
There are bends in the air
exhaust hose
-
Something is preventing the
air from being discharged
-
Position the air exhaust
correctly, keeping it as short
and free of curves as possible.
-
Check and remove and
obstacles obstructing the air
discharge.
The appliance works but does
not cool the room
-
Windows, doors and/or
curtains are open
-There are heat sources in the
room (oven, hairdryer etc.)
-
The air exhaust hose is
detached from the appliance
-The technical specification of
the appliance is not adequate
for the room in which it is
located
-
Close doors, windows and
curtains, bearing in mind the
“tips for correct use” given
above
-
Remove the heat sources
-
Fit the air exhaust in the
housing at the back of the
appliance
During operation, there is an
unpleasant smell in the room
-
The air filter in clogged
-
Clean the filter as described
earlier within this instruction
booklet
The appliance does not
operate for about three
minutes after restarting it
-
The internal compressor
safety device prevents the
appliance from being
restarted until three minutes
have elapsed since it was last
turned off
-
Wait, this delay is part of the
normal operation of the
appliance
The following message
appears on the display:
LT/PF/FT
-
The appliance has a self-
diagnosis system to identify a
number of malfunctions
-
See the SELF-DIAGNOSIS
section of this booklet

GUARANTEE AND CUSTOMER SERVICES
At Russell Hobbs, we take all our customer feedback seriously.
Feel free to contact our Customer Service Team, on 0345 209
7461 who will be more than happy to assist you.
This product is guaranteed for 12 months from the date of the
original purchase. If any defect arises due to faulty materials or
workmanship, the faulty product must be returned to the place of
purchase.
Refund or replacement is at the discretion of the retailer.
The following conditions apply:
• The product must be returned to the retailer with the original
proof of purchase.
• The product must be installed and used in accordance with the
instructions contained in this instruction guide and any other
instructions for use which are supplied.
• It must be used for domestic purposes only and for its intended
use.
• This warranty does not cover wear and tear, damage, misuse
or consumable parts.
This does not affect your statutory rights.
For Customer Services & Spare Parts please call 0345 209 7461
Or visit us at https://mda.russellhobbs.com
Page 27

SPARE PARTS
For Customer Services & Spare Parts please call 0345 209 7461
Or visit us at https://mda.russellhobbs.com
To check the availability of the following spare parts, simply contact
our friendly Customer Services team using the details provided at the
bottom of this page.
Remote Control
Exhaust Hose
Page 28

SPECIFICATION
Page 29
Model
RHPAC3001
Voltage
220
– 240V 50Hz
Power
Input
780W
Maximum Cooling Capacity
7000 BTU
Suitable Room Size
8
-14 (m2)
Refrigerant
R290/0.17kg
Overall Size (W x H x D)
32 x 67 x 32 (cm)
Weight
24.5 KG
Moisture
Removal
0.6 L/hr
Operating Temperature
18
°C - 35°C
Operating Humidity
30%RH
~ 80%RH

NOTES
Page 30

NOTES
Page 31
Revision 1.2
Model: RHPAC3001
This symbol is known as the 'Crossed-out wheelie bin Symbol'.
When this symbol is marked on a product/batteries, it means that
the product/batteries should not be disposed of with your general
household waste. Only discard electrical/electronic/battery items
in separate collection schemes, which cater for the recovery and
recycling of materials contained within. Your co-operation is vital
to ensure the success of these schemes and for the protection of
the environment. For your nearest disposal facility, visit
www.recycle-more.co.uk or ask in store for details.
We reserve the right, due to possible changes to design, to alter
the instruction manual without prior notice.
For Customer Services & Spare
Parts please call
0345 209 7461
Or visit us at
https://mda.russellhobbs.com/
Made by G2S Ltd
under license.
G2S Limited, Wigan,
WN2 4AY