Loading ...
Loading ...
Loading ...
Casseroles MED-MOIST highrack
• Casseroles MEDHIGH-MOISTlowrack
Coffeecake MED-MOIST lowrack
• Cookedcereal MEDHIGH-MOISTlowrack
• Eggs HIGH-MOIST pan
Fish,seafood
(breaded) HIGH-MOIST lowrack
• (nobreading)
• Friedfoods HIGH-MOIST pan
• Gravy,cream HIGH-MOIST lowrack
sauces
Ham MEDHIGH-MOISTlowrack
Horsd'oeuvres
(crisp) HIGH-MOIST pan
• (soft)
Lamb MED HIGH - MOIST low rack
• Pancakes, waffles HIGH - MOIST pan
Pies, single crust MED - MOIST high rack
Pies, double crust MED LO - DRY high rack
• Pizza HIGH - MOIST low rack
Pork MED HIGH - MOIST low rack
Potatoes, baked MED - MOIST high rack
• Potatoes, mashed MED HIGH - MOIST low rack
• Poultry HIGH - MOIST low rack
• Vegetables MED HIGH - MOIST low rack
• Use only cookware approved for oven use. Follow cookware
manufacturer's instructions, especially when using glass or
plastic cookware.
Do not line drawer with aluminum foil.
• Keep food covered if it was cooked with a cover on it.
• Use narrow strips of foil to shield piecrust edges from
further browning in drawer.
• Place tent-shaped foil loosely over meat or poultry to
prevent dryness and further browning while in the drawer.
• The use of aluminum foil to cover foods may cause
moisture to collect and drip into the drawer.
WARMING DRAWER
CARE
The drawer slides allow you to fully extend the drawer for
easier cleaning. If necessary, the drawer can be removed.
Load capacity for the drawer and slides is 100 Ibs
(45 kg).
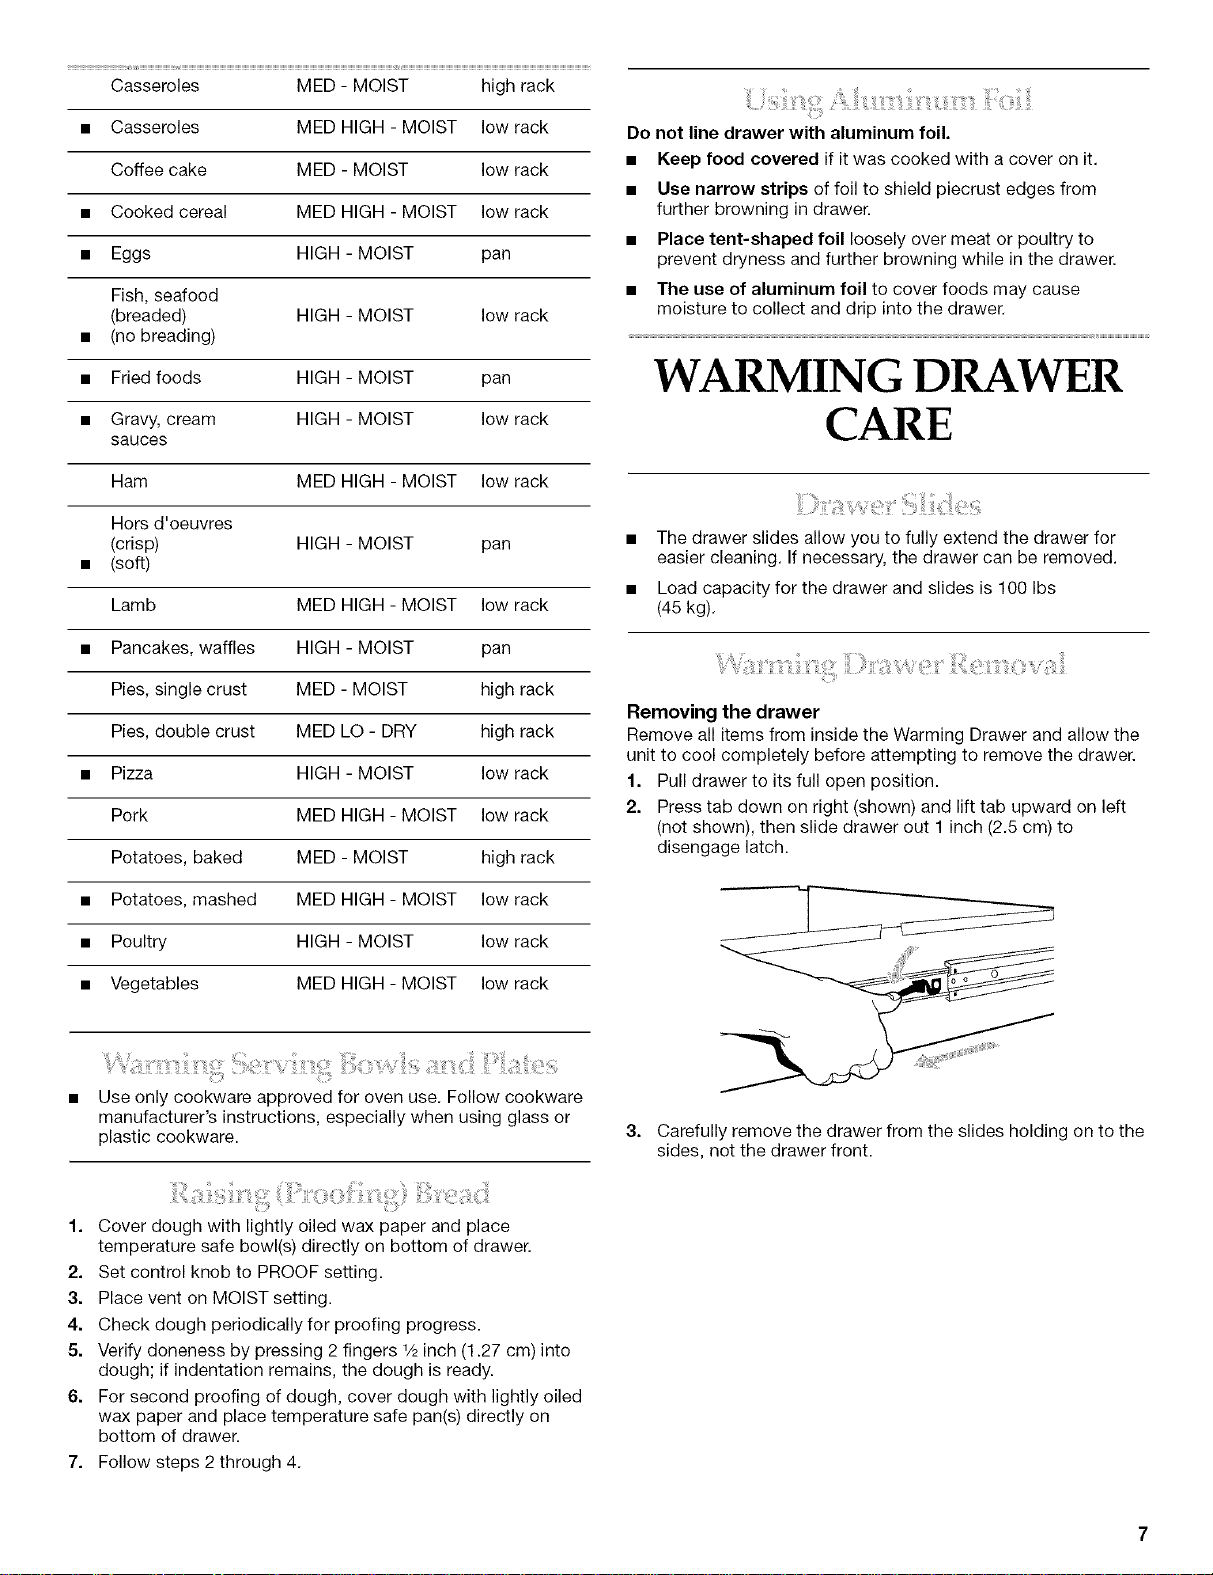
Removing the drawer
Remove all items from inside the Warming Drawer and allow the
unit to cool completely before attempting to remove the drawer.
f. Pull drawer to its full open position.
2. Press tab down on right (shown) and lift tab upward on left
(not shown), then slide drawer out 1 inch (2,5 cm) to
disengage latch.
3. Carefully remove the drawer from the slides holding on to the
sides, not the drawer front.
f. Cover dough with lightly oiled wax paper and place
temperature safe bowl(s) directly on bottom of drawer.
2. Set control knob to PROOF setting.
3. Place vent on MOIST setting.
4. Check dough periodically for proofing progress.
5. Verify doneness by pressing 2 fingers 1/2inch (1.27 cm) into
dough; if indentation remains, the dough is ready.
6. For second proofing of dough, cover dough with lightly oiled
wax paper and place temperature safe pan(s) directly on
bottom of drawer.
7. Follow steps 2 through 4.
Loading ...
Loading ...
Loading ...