Important
Safety Information ,., 2-11
Grounding
Instructions ........... 9
Features ........... 12,29
Getting Started ........ 13
Operating
Instructions ........ 14-28
Care and
Cleaning .......... 3o-31
Troubleshooting .... 32-33
Consumer
Services
Warranty& Service ..... 34-36
READ AND SAVE THESE INSTRUCTIONS PIN3161372o412-ooJR
IMPORTANT SAFETYINFORMATION
READ ALL INFORMATION
BEFOREUSING
PRECAUTIONSTO AVOID
POSSIBLEEXPOSURETO
EXCESSIVEMICROWAVE ENERGY
For your safety the information in this manual must be followed to
minimize the risk of fire or explosion or to prevent property damage,
personal injury or loss of life.
Do Not Attempt to operam this oven
with file door open since open-door
operation can result in harmful
exposure to microwave energy. It is
imporlant not to defeat or tamper
with dae safely imerlocks.
Do/got Place any object between the
oven ti-ont thce and the door or allow soil
or cleaner residue to ac(umulate on
sealing surfaces.
Do Not Operate the oven if it is
damaged. It is particularly important
that the oven door close properly and
that there is no damage to the:
1.door (bent),
2. hinges and latches (broken or
loosened),
3. door seals and sealing surtaces.
The Oven Should Not be adjusted or
repaired hy anyone except properly
qualified selwice personnel.
NEED HELP? Help us, help you: 1-800-944-9044.
Visit the Frigidaire Web Site at:
http://www.frigidaire.com
Beiore you call ior sen,ice, there are a
few things you (;an do to help us serve
you hetter.
Read this manual.
It contains instructions to help you use
and maintain your microwave properly.
If you received a damaged
oven,,,immediately (ontact the dealer
(or builder) that sold you the oven.
Save time and money.
Check file section tided "Trouhleshooting"
betbre calling. This se( tion helps you solve
common problems that might occur. If you
do need se_wice, you (;an relax knowing help
is only a phone call away. A list of toll-free
customer sen,ice numhers is included in
the back of this manual. Or call Frigidaire
Consumer Selwices at 1-800-944-9044,
24 hours a day, 7 days a week.
IMPORTANT SAFETYINFORMATION
To reduce the risk of fire, burns, electric shock, injury to persons, or exposure
to excessive microwave energy when using your appliance, follow basic
precautions, including the following sections.
SAFETYPRECAUTIONS
I This microwave oven is not approved or tested for marine use. I
I
,, Read and follow the specific "Precautions
m Avoid Possible Exposure to Excessive
Microwave Energy" on page 2.
,, This appliance must be grounded.
Connect only to properly grounded
outlet. See Grounding Insmu:tions
section on page 9.
" Do not mount ltais appliance over a sink.
,, Install or locam this appliance only in
accordance with the provided
Installation Instructions.
• Be certain Io place the front surface of
file door three inches or more Dack fi-om
lhe counlenop edge to avoid accidemal
tipping of Ihe appliance in no,anal usage.
• Do not operate this appliance if it has a
damaged power cord or plug, if it is not
working properly, or if it has been
damaged or dropped.
• Do not cover or hlock any openings on
the appliance.
• Use this appliance only fi)r its intended
use as described in this manual. Do not
use corrosive chemicals or vapors in this
applian(e. This microwave oven is
spe( ifically designed to heat, d U or cook
fi)od, and is not intended ibr lahoratory
or induslrial use.
IMPORTANT SAFETYINFORMATION
READ ALL INFORMATION
BEFOREUSING
,, Do not store this appliance outdoors.
Do not use tbis product near water--
fi)r exanlple, in a wet basement, near a
swimming pool or near a sink.
,, Keep power cord away fronl heated
surtixces.
" Do not immerse power cord or plug in
water.
"See door surtace cleaning instructions in
dm (;are and Cleaning section (s) of this
manual.
"This appliance should be serviced only
by qualified service personnel. Contact
nearest amborized sen,i( e tiacility tor
examination, repair or adjustment.
,, As with any appliance, close supervision
is necessary when used by children.
• Do not nlount the microwave ()Veilover or
near any portion of a heating or cooking
appliance.
" Do not store maylhing direcdy on mp
of the microwave oven surface when dae
mi( rowave oven is in opeFatiorL
• Do not let power cord hang over edge of
table or counter.
"To reduce the risk of fire in the oven
cavity:
-- Do not overcook lood. Carefully attend
appliance if paper, plastic or other
combustible materials are placed inside
the oven while cooking.
-- Remove wire t_ist-ties and metal
handles li-om paper or plastic com_ainers
before placing tbem in the oven.
-- Do not use d_e oven fl)r storage
puq0oses. Do not leave paper products,
cooking mensils or lood in tbe oven
when not in use.
-- If materials inside oven should ignite,
keep the oven door closed, turn tbe
oven offand disconnect the power cord,
or shut offpower at the fuse or circuit
breaker panel. If the door is opened,
the fire may spread.
SAVE THESE
INSTRUCTIONS.
4
IMPORTANT SAFETYINFORMATION
Special Notes About Microwaving
Arcing
I If you see arcing, press the CLEAR/OFF pad and correct the problem. I
Arcing is the microwave term tbr sparks in
the oven. Arcing is caused hy:
,, Metal or tbil touching the side of
the oven.
"Foil not molded to lbod (uptunmd
edges act like antennas).
,, Metal, such as twist-ties, pouhry pins, or
gold-rimmed dishes, in the microwave.
,, Recycled paper towels containing
small metal pieces being used in the
microwave.
Foods
,, Do not pop popcorn in your microwave
oven unless in a special microwave
pop( orn accessory or unless you use
popcorn laheled lot use in microwave
()veils.
,, Some products such as whole eggs and
sealed containers-for example, closed
jars--will explode and should not be
healed in dais microwave oven. Such use
of the microwave oven could result in
ir_jmy.
" Do not boil eggs in a microwave oven.
Pressure will build up inside egg yolk
and will cause it to burst, possihly
resulting in injury.
"Operating the microwave with no ff_od
inside tbr more than a minute or two
may cause damage to the oven and could
start a fire. It increases the heat around
the magnetron and can shorten the lith
of the oven.
"Foods with unbroken outer "skin"
such as potatoes, hot dogs, sausages,
tomatoes, apples, chicken livers
and other giblets, and egg ),)lks
should be pierced to allow smam
to escape during cooking.
IMPORTANT SAFETYINFORMATION
READ ALL INFORMATION
BEFOREUSING
Safety Fact- SUPERHEATEDWATER
Microwaved water and other liquids do not always bubble when they reach
the boiling point. They can actually get superheated and not bubble at all.
Superheated liquid will bubble up out of the cup when it is moved or when
something like a spoon or tea bag is put into it.
Toprevent this from happening and causing injury, do not heat any liquid for
more than 2 minutes per cup. After heating, let the cup stand in the
microwave for 30 seconds before moving it or putting anything into it.
"Avoid heating baby lood in glass jars,
even wilh the lid off. Make sure all inl_tnt
lbod is dmroughly cooked. Stir fi)od to
distrihme the heat evenly. Be caretul to
prevent scalding when wanning lormula
or hreast milk. 'ltae container may t;eel
cooler than the milk really is. Always test
lhe milk hetore feeding the baby.
,, Spontaneous boiling-Under cerlain
special circumstances, liquids may start
m boil during or shortly a fief removal
from the microwave (wen. To prevent
bums ii-om splashing liquid, we
recommend the lollowing: befi)re
removing the container fi-om the oven,
allow the comainer m stand in lhe oven
ibr 30 to 40 seconds afief lhe oven has
shut o{t. Do not boil liquids in narrow-
necked comainers such as soft drink
bottles, wine flasks and especially
narrow-necked co{tee cups. Even if the
container is opened, excessive smam can
build up and cause it m burst or
over[low.
,, Do not defi-ost fi-ozen beverages in
narrowmec ked botdes (especially
carbonated beverages). Even if the
container is opened, pressure can build
up. This can cause the container to
burst, possihly resulting in injury.
,, Hot ioods and smam can cause burns.
Be €areiul when opening any containers
of hot lbod, inOuding popcorn hags,
cooking pouches and boxes. To prevent
possible injury, direct steam away fi-om
hands and l:ace.
,, Do not overtook potatoes. They could
dehydrate and catch fire, causing
damage to your oven.
,,Cook meat and poulny thoroughly-meal
mal least ml INTEP.NALlempevamre of
16{)°F.and poulu y m at least an
INTERNAL temperature of 180°F.
Cooking m lhese lempevatures usually
promc Isagainst lbodbome illness.
IMPORTANT SAFETYINFORMATION
Special Notes About Microwaving
Microwave-Safe Cookware
Make sure all cookware used in your
microwave oven is suitable fi)r
microwaving. Most glass casseroles,
cooking dishes, measuring cups, custard
cups, potmry or china dinnm_vare which
does not have melallic trim or glaze witb a
metallic sheen (an be used. Some
cookware is labeled "suitable ibr
microwaving."
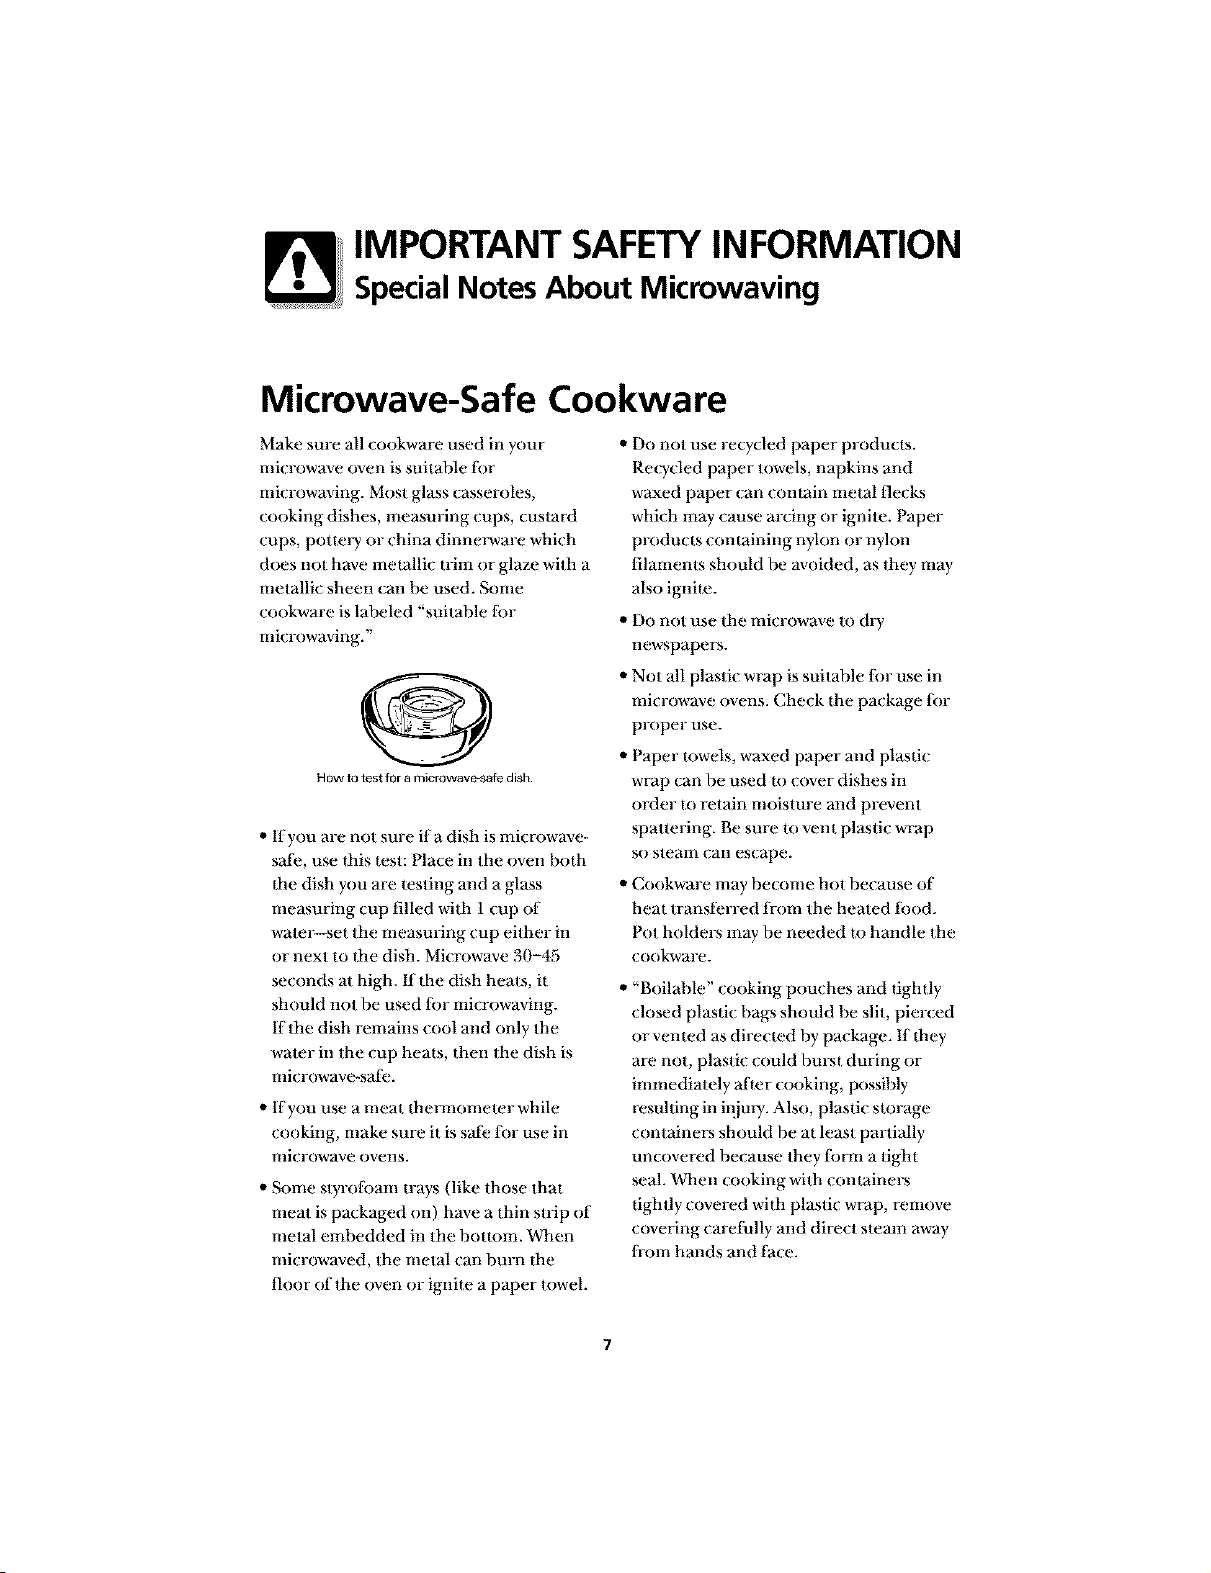
O
HOW to test for a microwave-safe dish
,, If you are not sure ifa dish is microwave-
sat;e, use flais test: Place in the oven both
ltae dish you are testing and a glass
measuring cup filled with 1 cup of
water--set the measuring cup either in
or next to ltae dish. Mi{rowave 30-45
seconds at high. fflbe dish heats, it
should not be used lbr microwaving.
If the dish remains cool and only the
water in the cup heals, then tbe dish is
microwave-safe.
,, If you use a meat flm_anometer while
cooking, make sure it is safe lor use in
microwave ovens.
,, Some styrolban_ trays (like those that
meat is packaged on) have a thin strip of
metal embedded in the bouom. When
microwaved, the metal can burn dm
floor of the oven or ignite a paper towel.
" Do not use recycled paper products.
Recycled paper towels, napkins and
waxed paper can comain metal flecks
which may cause arcing or ignite. Paper
products comaining nylon or nyhm
filaments should be avoided, as they may
also ignim.
,, Do not use the microwave to dry
newspapers.
,, Not all plastic wrap is suitable lbr use in
microwave ovens. Check the package lbr
proper use.
,, Paper lowels, waxed paper and plastic
wrap can be used m cover dishes in
order m retain moisture and prevent
spattering. Be sure to vent plastic wrap
so stemn can escape.
,, Cookware may become hot because of
heat transferred ti-om the heated tood.
Pot holders may be needed m handle tbe
cookware.
,, "Boilable" cooking pouches and lightly
closed plastic bags should be slit, pierced
or vented as dire_ led by package. If dmy
are not, plastic could burst during or
immediately after _ooking, possibly
resulting in injm'i. Also, plastic storage
containers should be at least partially
un_ overed because they titan a tight
seal. When _ooking with comainers
lightly covered wida plastic wrap, remove
covering carefully and direct steam away
from hands and thee.
IMPORTANT SAFETYINFORMATION
READ ALL INFORMATION
BEFOREUSING
M icrowave-Safe Cookwa re (continued)
"Use tk,il only as directed in this manual.
TV dinners may be microwaved in ti)il
Irays less than 3/4" high; remove the top
li)il cover and relurn the tray to the box.
When using lk)il in the microwave oven,
keep the lk)il at least 1 inch away fronl
Ihe sides of the oven.
,, Plastic cookware--Plastic cookware
designed li)r microwave cooking is very
uselial, hut should be used carelully. Even
microwave_safe plastic may not be as
tolerant of overcooking conditions as are
glass or ceramic materials and may
soften or char if suhjecIed m short
periods of overcooking.
In longer exposures to overcooking, the
lood and cookware could ignite. Follow
these guidelines:
1. Use microwave-sath plastics only and use
them in slrict compliance wilh lhe
cookware nlanul_ac|uFer's
recommendations.
9. Do not microwave empty containers.
3. Do nol pe_a_nitchildren to use plasti(
cookwm-e wilhoul complete super_,ision.
8
IMPORTANT SAFETYINFORMATION
Grounding Instructions
Grounding Instructions
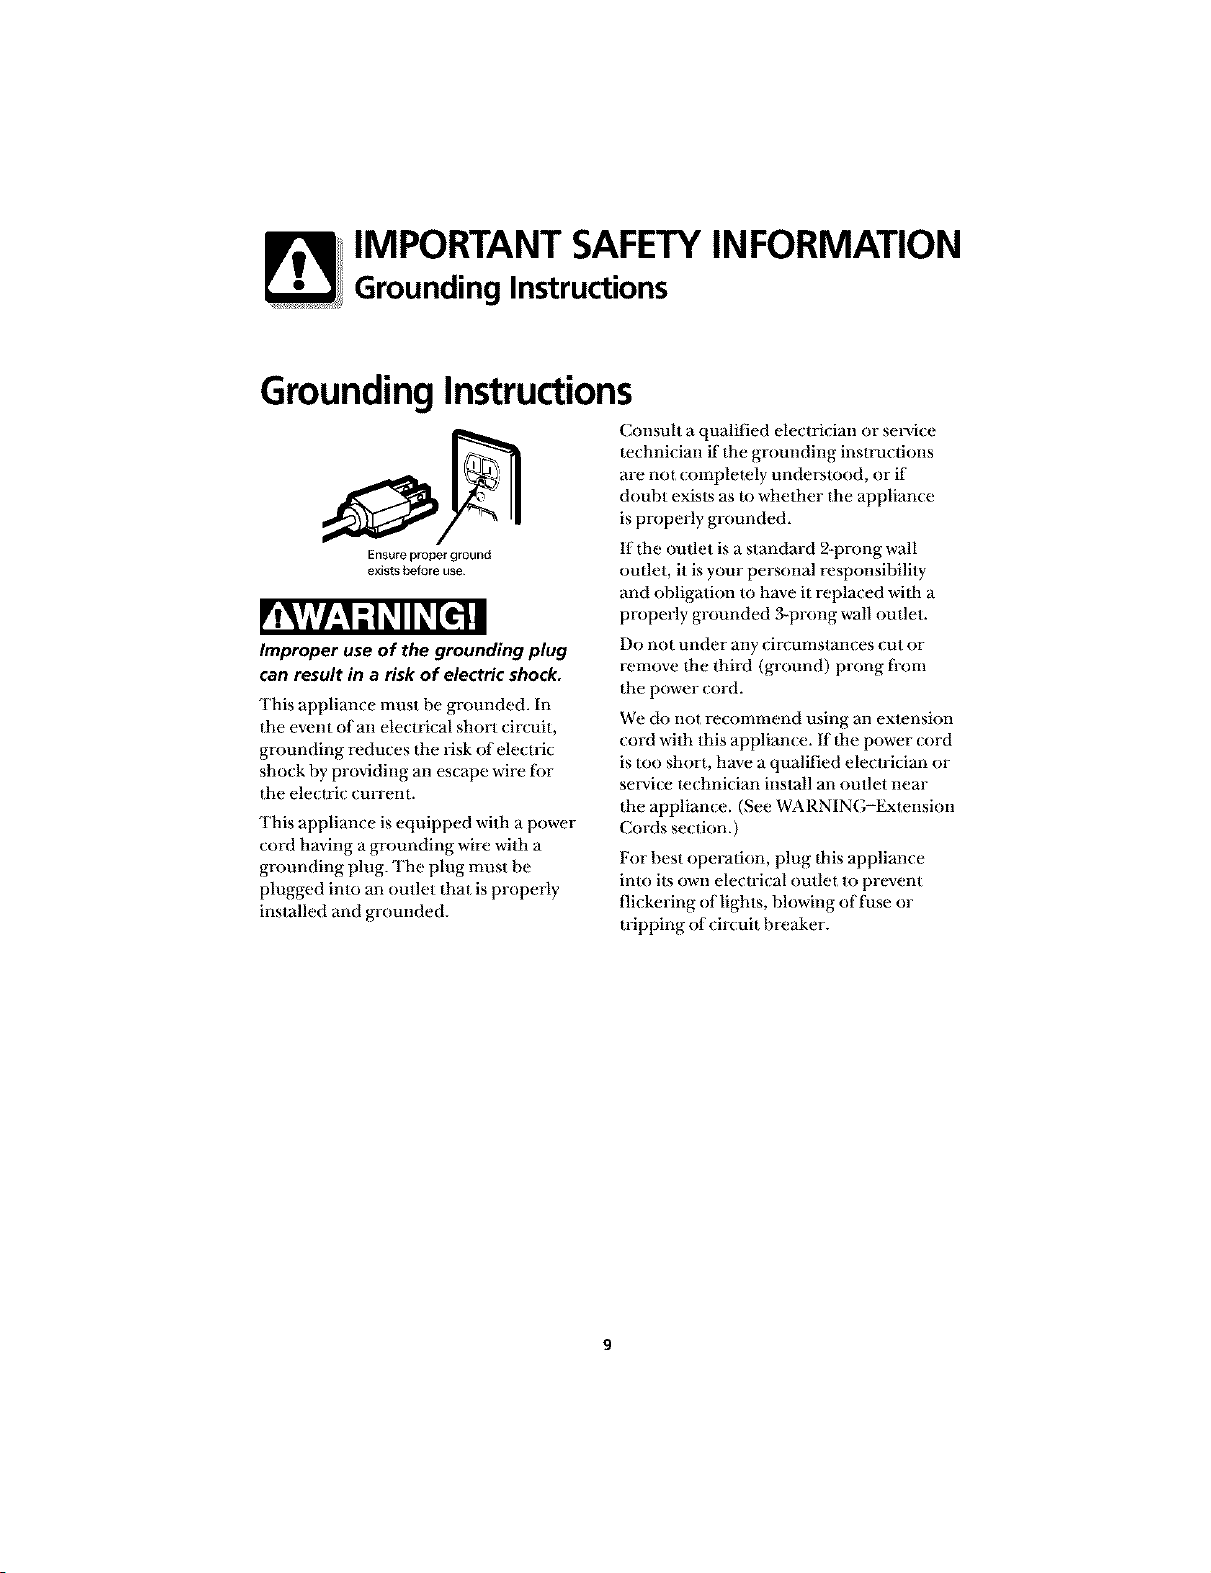
Ensureproperground
exists before use
Consult a qualified electrician or seia,ice
technician if the grounding instructions
are not completely understood, or if
doubt exists as to whether the appliance
is properly grounded.
If the outlet is a standard 2-prong wall
outlet, it is your personal responsibility
and obligation to have it replaced with a
properly grounded 3-prong wall outlet.
Improper use of the grounding plug
can result in a risk of electric shock.
This appliance must be grounded. In
the event of an electrical short circuit,
grounding reduces the risk of electric
shock by providing an escape wire fi>r
the electric current.
This appliance is equipped with a power
cord having a grounding wire with a
grounding plug. The plug must be
plugged into an outlet that is properly
installed and grounded.
Do not under any dr(mnstan(es (ut or
remove the third (ground) prong fiom
the power {ord.
We do not recommend using an extension
cord with this appliance, ff the power cord
is too short, have a qualified electrician or
service technician install an outlet near
the appliance. (See WARNING-Extension
Cords section.)
For best operation, plug this appliance
into its own electrical outlet to prevent
flickering <)flights, blowing oft_ase or
tripping of circuit breaker.
IMPORTANT SAFETYINFORMATION
Adapter Plugs
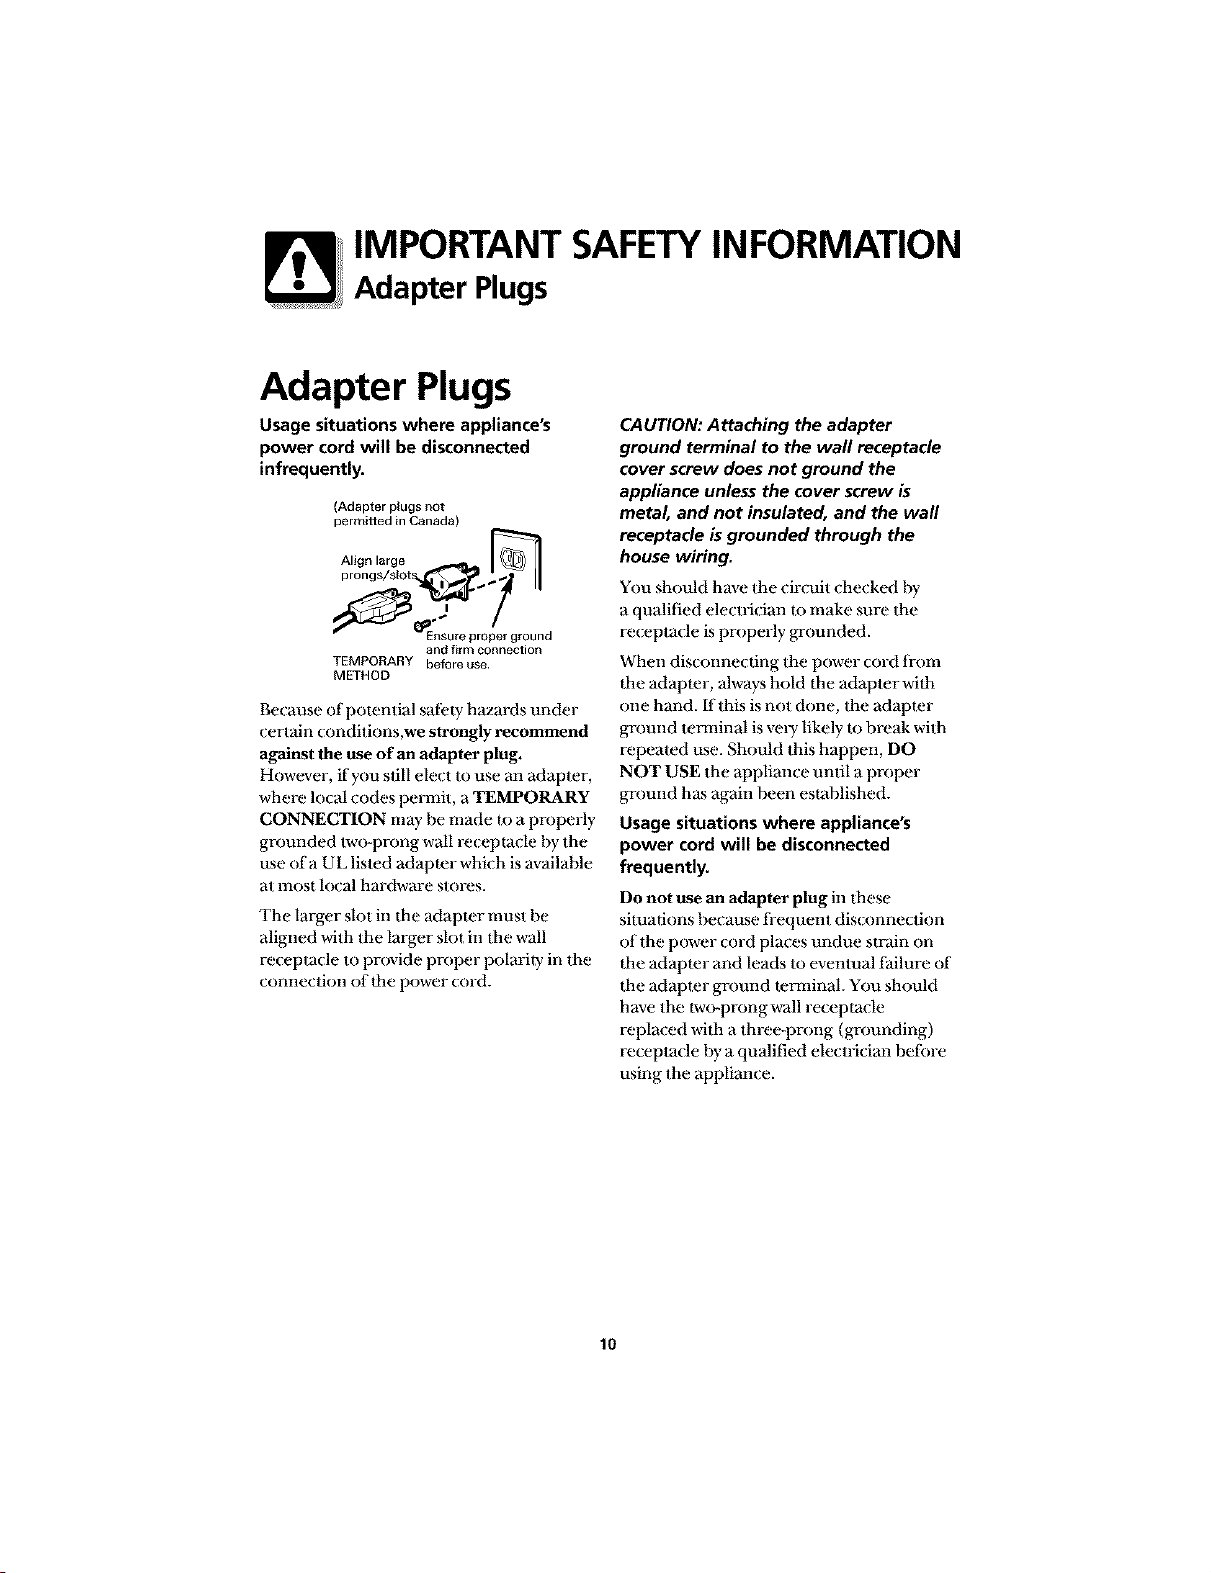
Adapter Plugs
Usage situations where appliance's
power cord will be disconnected
infrequently.
(Adapter plugs not
permitted in Canada)
__1_Align large
prongs/slot _ ..
_J_'_""_ I_Ensu re pro_er gr oun d
and firm connection
TEMPORARY before use
METHOD
Because of potential safi:ty hazards under
certain ( onditions,we strongly recommend
against the use of an adapter plug.
However, if you still elect to use an adapter,
where local codes permit, a TEMPORARY
CONNECTION may he made to a properly
grounded two-prong wall re{ eptacle hy the
use of a UL listed adaptor which is available
at most local hardware stores.
The larger slot in the adapter must be
aligned with the larger slot in the wall
re(epta(le to provide proper polarity in the
commction of flae power cord.
CAUTION: Attaching the adapter
ground terminal to the wall receptacle
cover screw does not ground the
appliance unless the cover screw is
metal, and not insulated, and the wall
receptacle b grounded through the
house wiring.
You should have the circuit checked hy
a qualified electrician to make sure the
re(epta(le is properly ga-ounded.
When disconne( ring the power cord from
the adapter, always hold the adapter wifla
one hand. If this is not done, the adapter
ground tma_ninal is vely likely to break with
repeated use. Should this happen, DO
NOT USE the appliance until a proper
ground has again been established.
Usage situations where appliance's
power cord will be disconnected
frequently.
Do not use an adapter plug in these
situations because fi-equent dis_ onnection
of the power cord places undue strain on
the adapter and leads to eventual failure of
the adapter ground tma'ninal. You should
have the two-prongwall receptacle
replaced with a three-prong (grounding)
receptacle hy a qualified electrician before
using the appliance.
10
IMPORTANT SAFETYINFORMATION
Extension Cords/Optional Kits
Extension Cords
A short power supply cord is provided to
redu_ e Itae risks resulting li-om becoming
enlangled in or u-ipping over a longer cord.
Extension cords may be umd if you are
cm-eii_l in using them.
If an extension cord is used-
1. 'llae marked elecu-ical rating of the
extension cord should Im at least as great
a.sthe electrical rating of the applimace;
2. 'llae extension cord must be a grounding-
type 3-wire cord and it must be plugged
imo a.B-slot outlet;
3. 'llae extension cord should be an-anged so
that it will not dFape over the (xmmerlop
or tabletop where it (:an be pulled on by
children or tripped over unintentionally.
If you use an exlension (x)rd, the inlefior
light may flicker and the Dlower sound may
va U when flae microwave oven is on. Cooking
times may be longer, too.
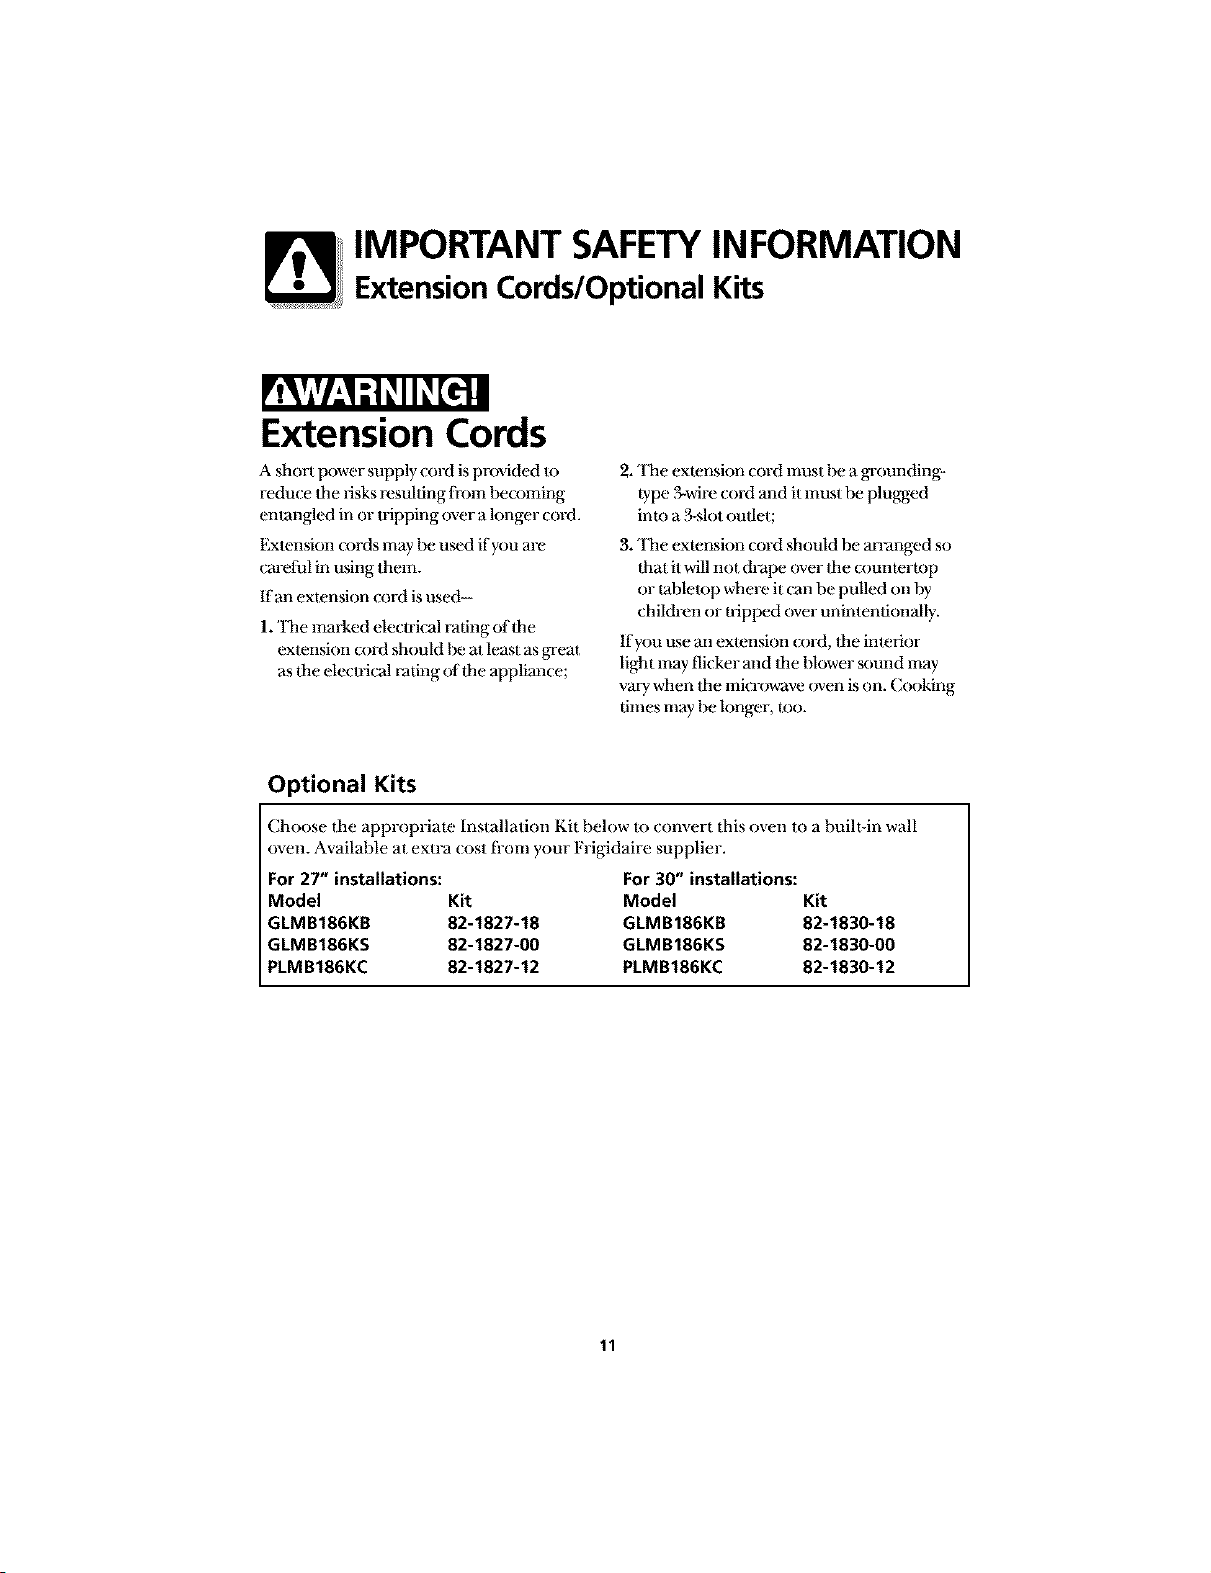
Optional Kits
Choose the appropriate Installation Kit below Io com,ert this oven to a built-in wall
oven. Available at extra cost ti-om your Frigidaire supplier.
For 27" installations: For 30" installations:
Model Kit Model Kit
GLMB186KB 82-1827-18 GLMB186KB 82-1830-18
GLMB186KS 82-1827-00 GLMB186KS 82-1830-00
PLMB186KC 82-1827-12 PLMB186KC 82-1830-12
11
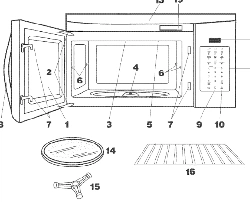
Microwave Features
Here is a quick guide to the features and
controls of your microwave oven.
NOTE: This manual covers several models so the illustralion may not look exa( l]y
like your model. However, operating instruclions ior each of the l_:atures and iunctions
of your microwave will he lbund in Ibis manual.
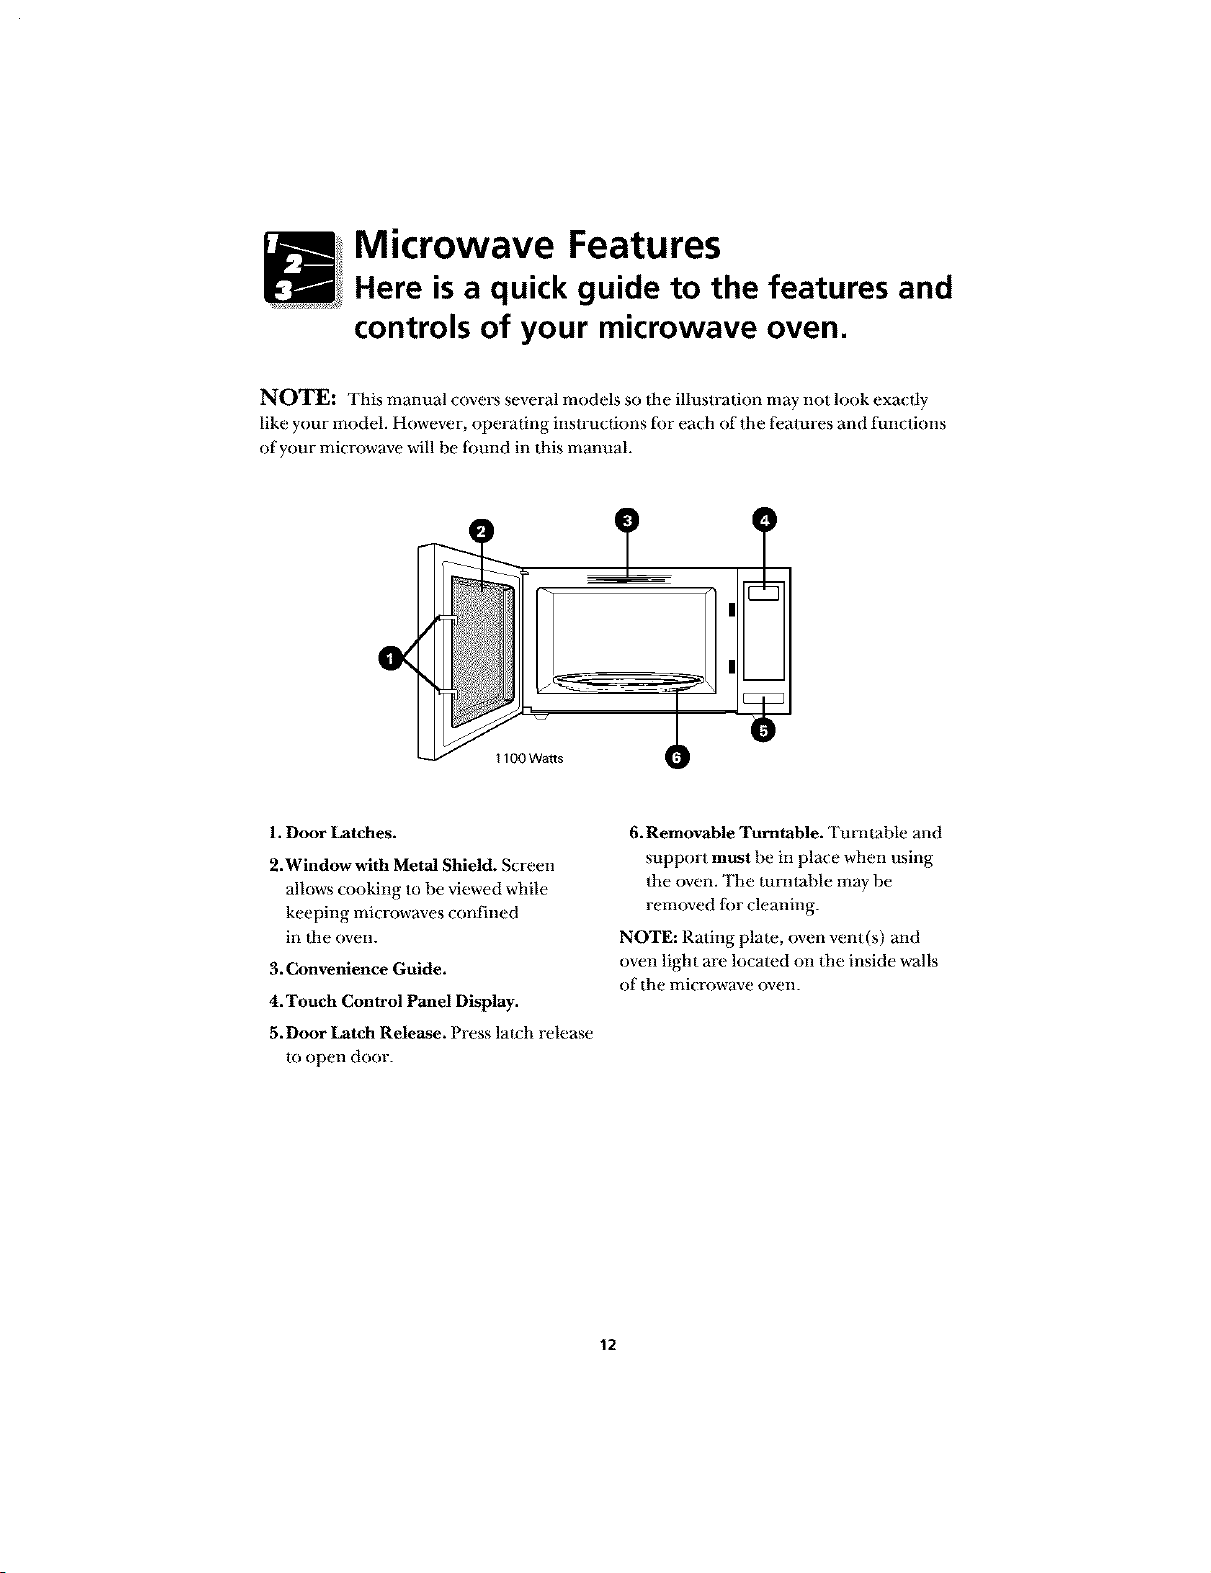
1. Door Latches.
2.Window with Metal Shield. Screen
allows cooking to be viewed while
keeping mi( rowaves confined
in _he oven.
3. Convenience Guide.
4. Touch Control Panel Display.
5.Door Latch Release. Press la_ch release
to open door.
6.Removable Turntable. Tumlable and
support must be in place when using
the oven. The mmmble may be
removed lbr cleaning.
NOTE: Rating plate, oven vent(s) and
oven light arc located on the inside walls
of the mk rowave oven.
12
Getting Started
You can microwave by time
or with the sensor features.
(Throughout this manual, features and appearance may vary from your model.)
@® ®®®
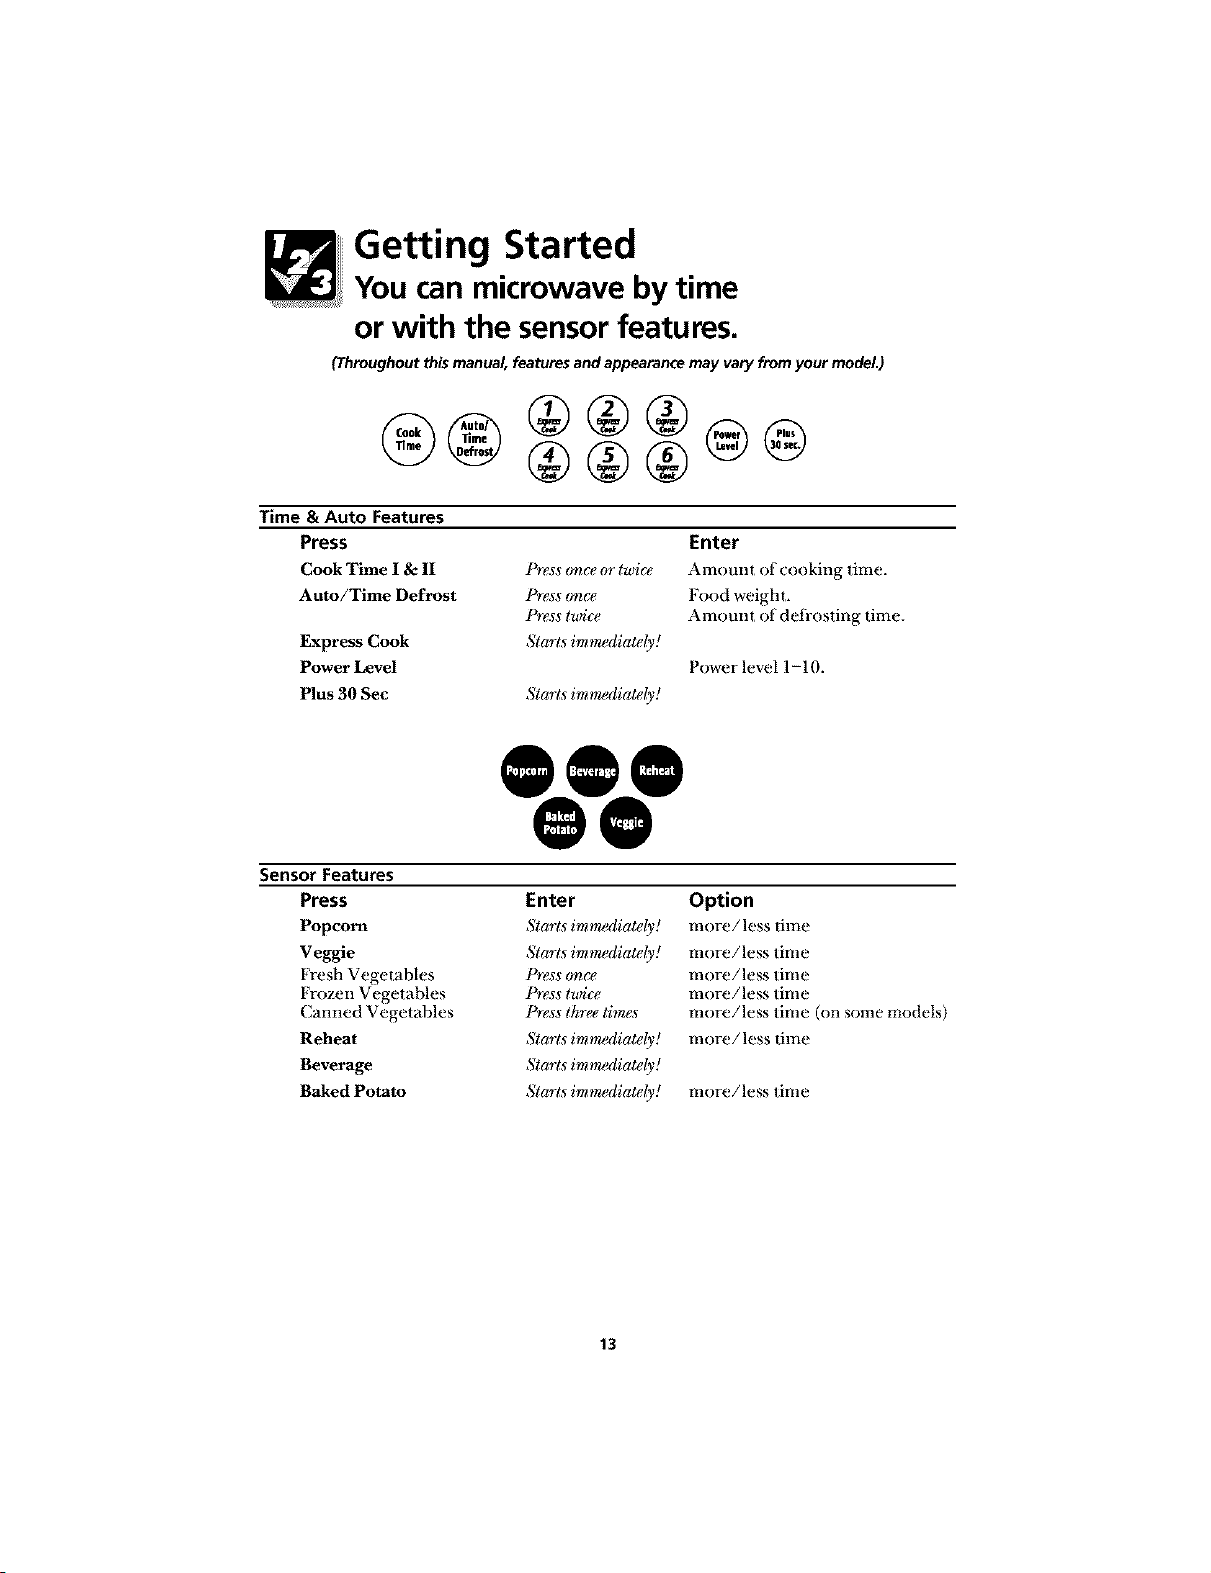
Time & Auto Features
Press
Cook Time I & II
Auto/Time Defrost
Express Cook
Power Level
Plus 30 Sec
P_gss oqTce oT l_)i€_
P_ess o_€t"
Pr#ss lwic_
Starts immediately!
Starts immediately!
Enter
Amount of cooking time.
Food weight.
Amount of deti-osting time.
Powerlevell-10.
@0@@@
Sensor Features
Press
Popcorn
Veggie
Fresh Vegetables
Frozen Vegetables
(;armed Vegetables
Reheat
Beverage
Baked Potato
Enter
Starts imm_diatdy!
Starts immediately!
P_gss o_€t"
Prg$s lwic_
Press t&ee timgs
Starts imm_diatdy!
Starts imm_diatdy!
Starts imm_diatdy!
Option
i_lore/less time
Rlore/less tinle
more/less time
more/less time
more/less time (on some models)
more/less time
more/less time
13
Operating Instructions
Changing Power Levels
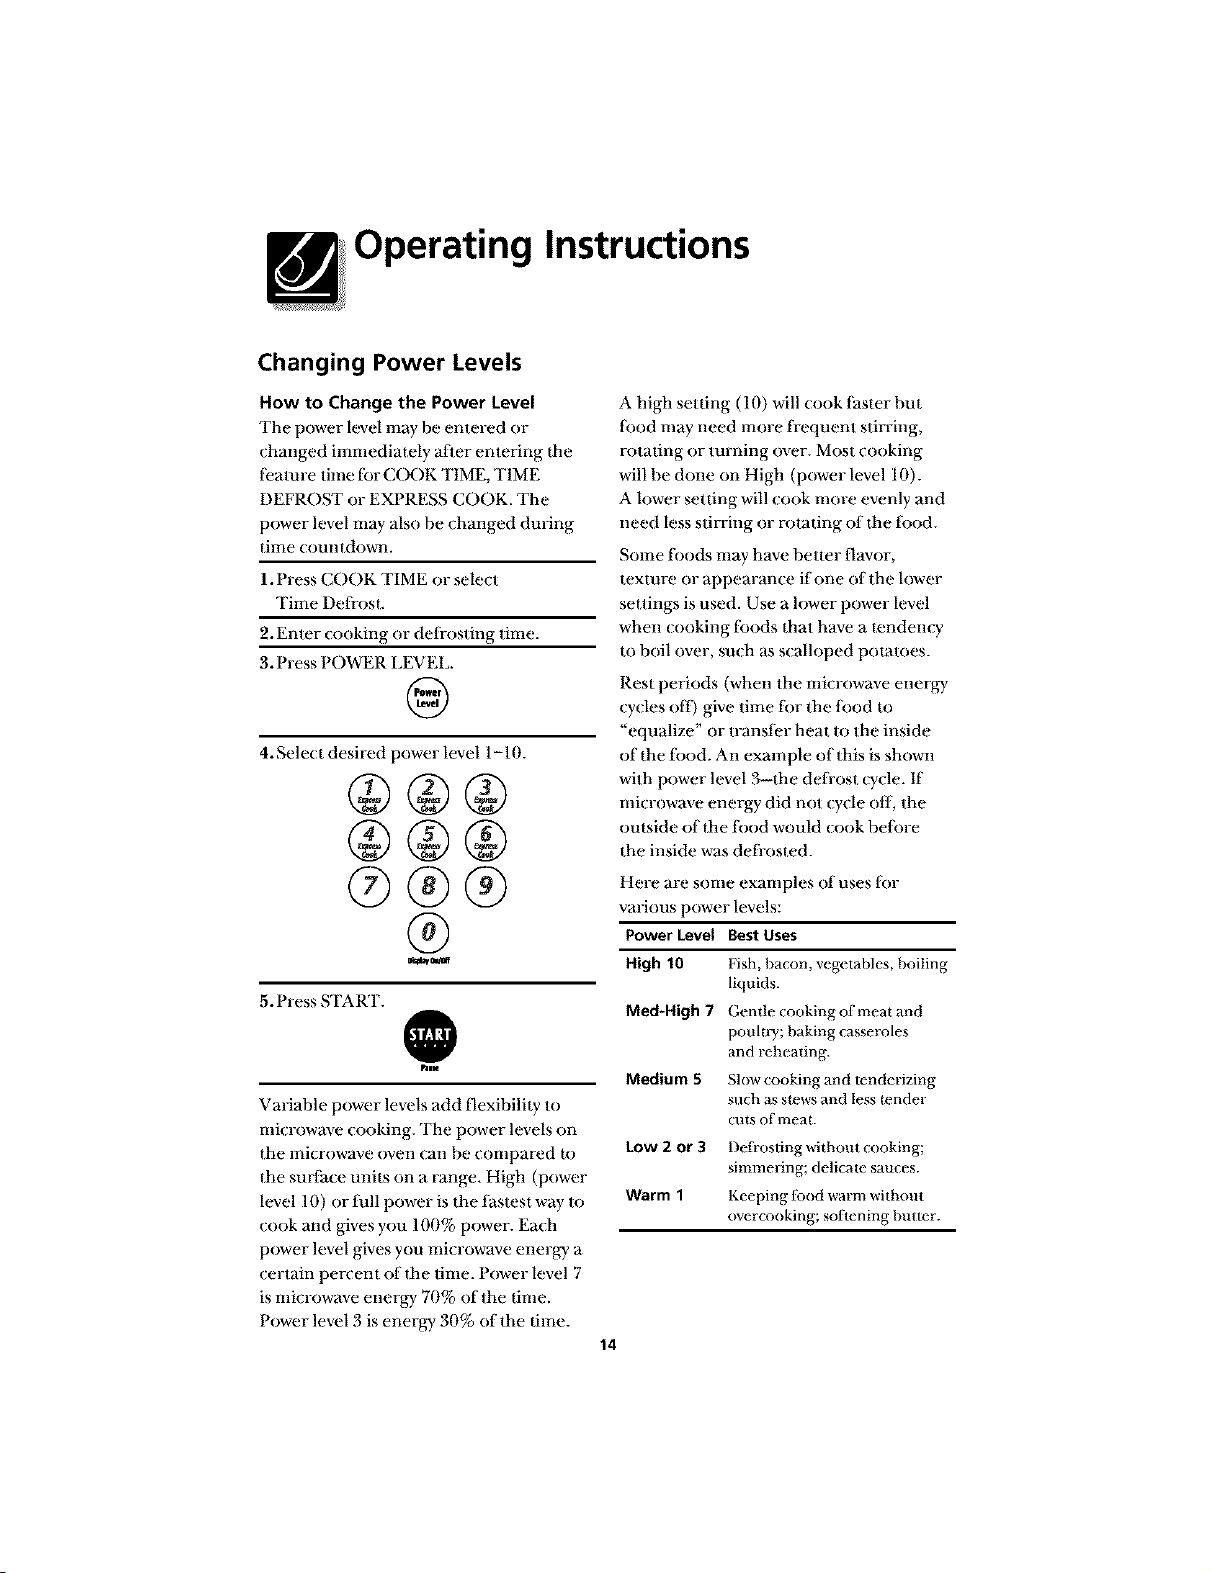
How to Change the Power Level
The power level may be entered or
changed immediately after entering the
li:amre time tor C(X)K TIME, TIME
DEFROST or EXPRESS COOK. The
power level may also be changed during
time coumdowrl.
1. Press COOK TIME or select
Time Defrost.
2. Enter cooking or defrosting time.
3. Press POWER LEVEL.
@
4. Select desired power level 1-10.
@®@
@@@
@@@
@
5. Press START.
@
him
Variable power levels add flexibility to
microwave _ooking. The power levels on
the microwave oven can be compared to
the surt_ace units on a range. High (power
level 10) or tull power is the tastest way to
cook and gives you 100% power. Each
power level gives you microwave energy a
certain percent of dae time. Power level 7
is microwave energy 70% of the time.
Power level 3 is energy 30% of the time.
A high setting (10) will cook lhster but
Iood may need more frequent stirring,
rotating or turning over. Most cooking
will be done on High (power level 10).
A lower setting will cook more evenly and
need less stirring or rotating of dae tbod.
Some tbods may have better flavor,
texture or appearance if one oftbe lower
settings is used. Use a lower power level
when cooking toods daat have a tendency
m boil over, such as scalloped pot;ames.
Rest periods (when the microwave energy
cycles off) give time tor the lood to
"equalize" or transfer heat to the inside
of the tood. An exmnple of this is shown
with power level 3--flae defi-ost cycle. If
microwave energy did not cycle off, the
outside of dae tood would cook belore
the inside was defi-osted.
Med-High 7
Medium 5
Low 2 or 3
Warm 1
Here are some examples of uses tor
various power levels:
Power Level BestUses
High 10 Fish, bacon, vegetables, boiling
liquids.
Gentle cooking of meat and
poulw/; baking casseroles
and reheating.
Slow cooking and tenderizing
sllch as slews and less tender
cuts of meat.
Defrosting without cooking;
simmering; delicale sauces.
Keeping lbod warm without
overcooking; softening butter.
14
Operating Instructions
Time features
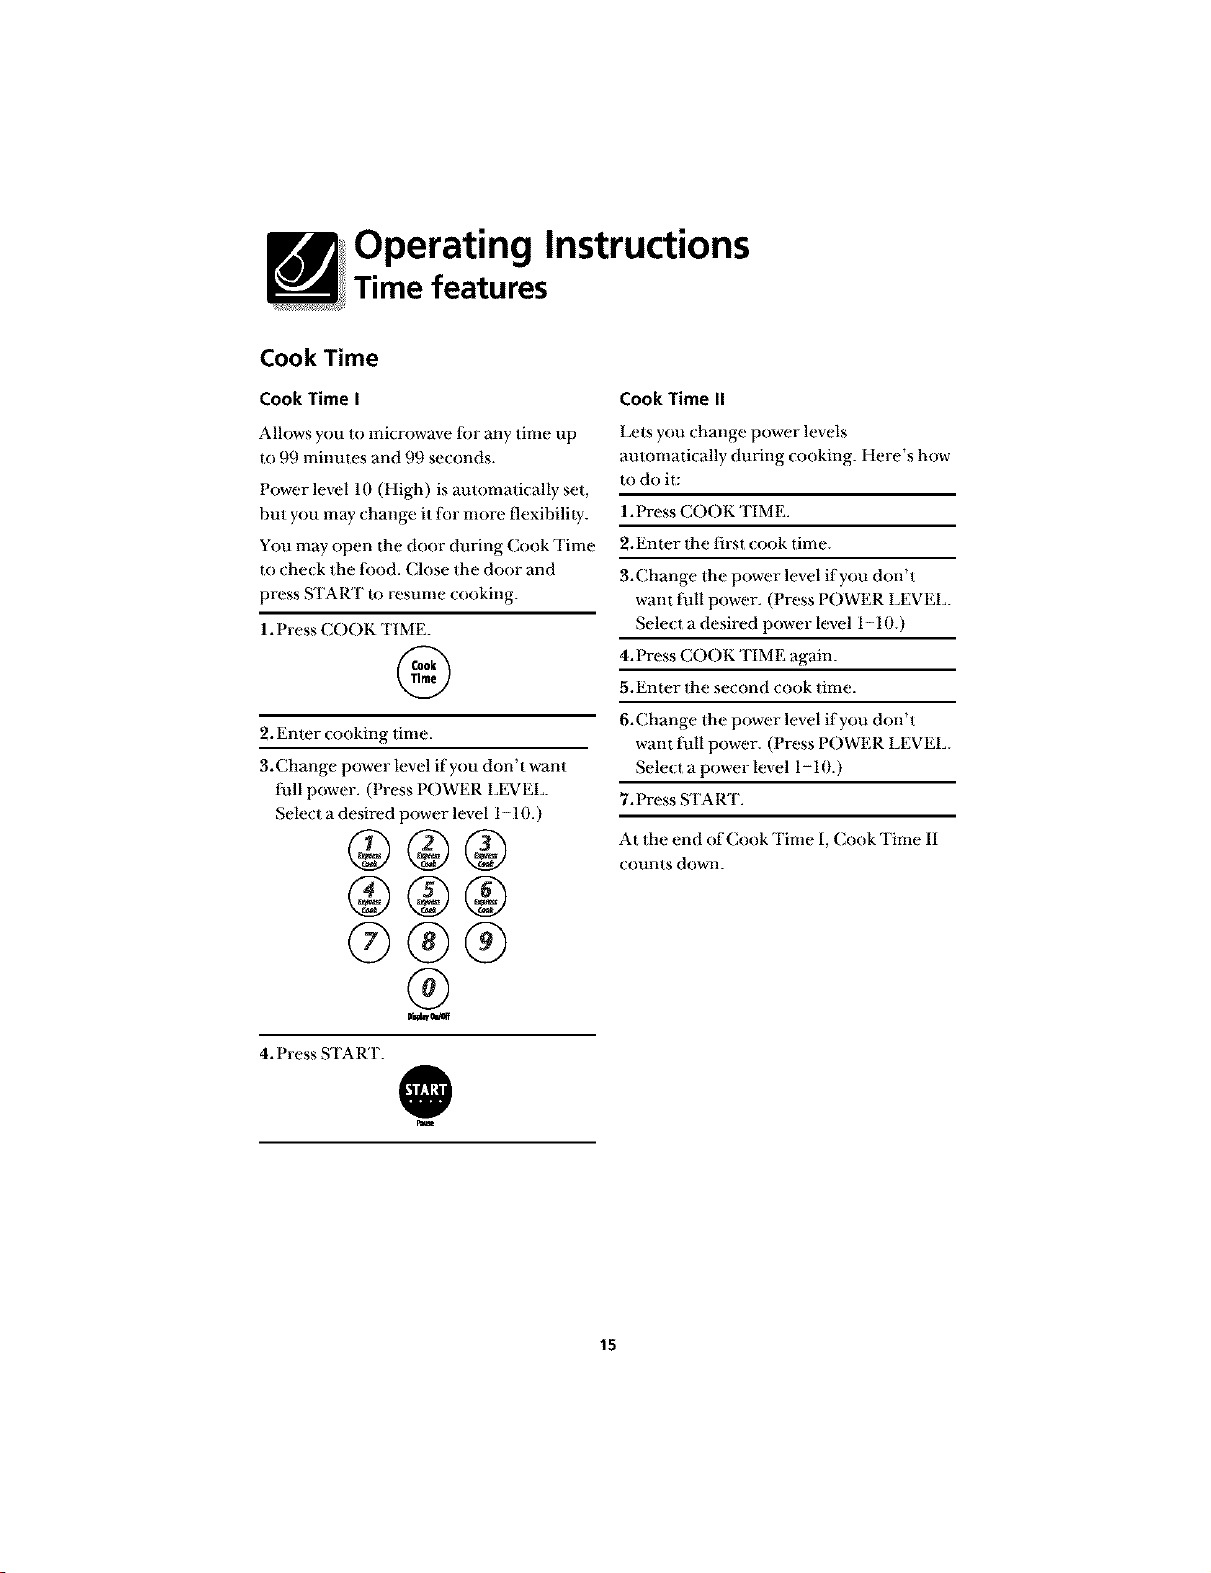
Cook Time
CookTimel
Allows you to microwave li)r any time up
lo 99 minules and 99 seconds.
Power level 10 (High) is amomatically set,
but you may change it lot more flexibilily.
You may open the door during Cook Time
to check the {ood. Close the door and
press START to resume cooking.
1. Press COOK TIMF.
@
2. Enter cooking time.
3.Change power level if you don't want
full power. (Press POWER LEVEL.
Select a desired power level 1-10.)
®®®
®
4. Press START.
@
CookTimen
Lets you change power levels
automaticany dur'ng cooking. Here s how
to do i_:
1.Press COOK TIME.
2.Enter the first cook time.
3.Change the power level if you don't
want tull power. (Press POWER LEVEL.
Select a desired power level 1-10.)
4.Press COOK TIME again.
5.Enter the second cook time.
6.Change the power level if you don't
want tull power. (Press POWER LEVEL.
Select a power level 1-10.)
7. Press START.
A_ the end of Cook Time I, Cook Time II
counts down.
15
Operating Instructions
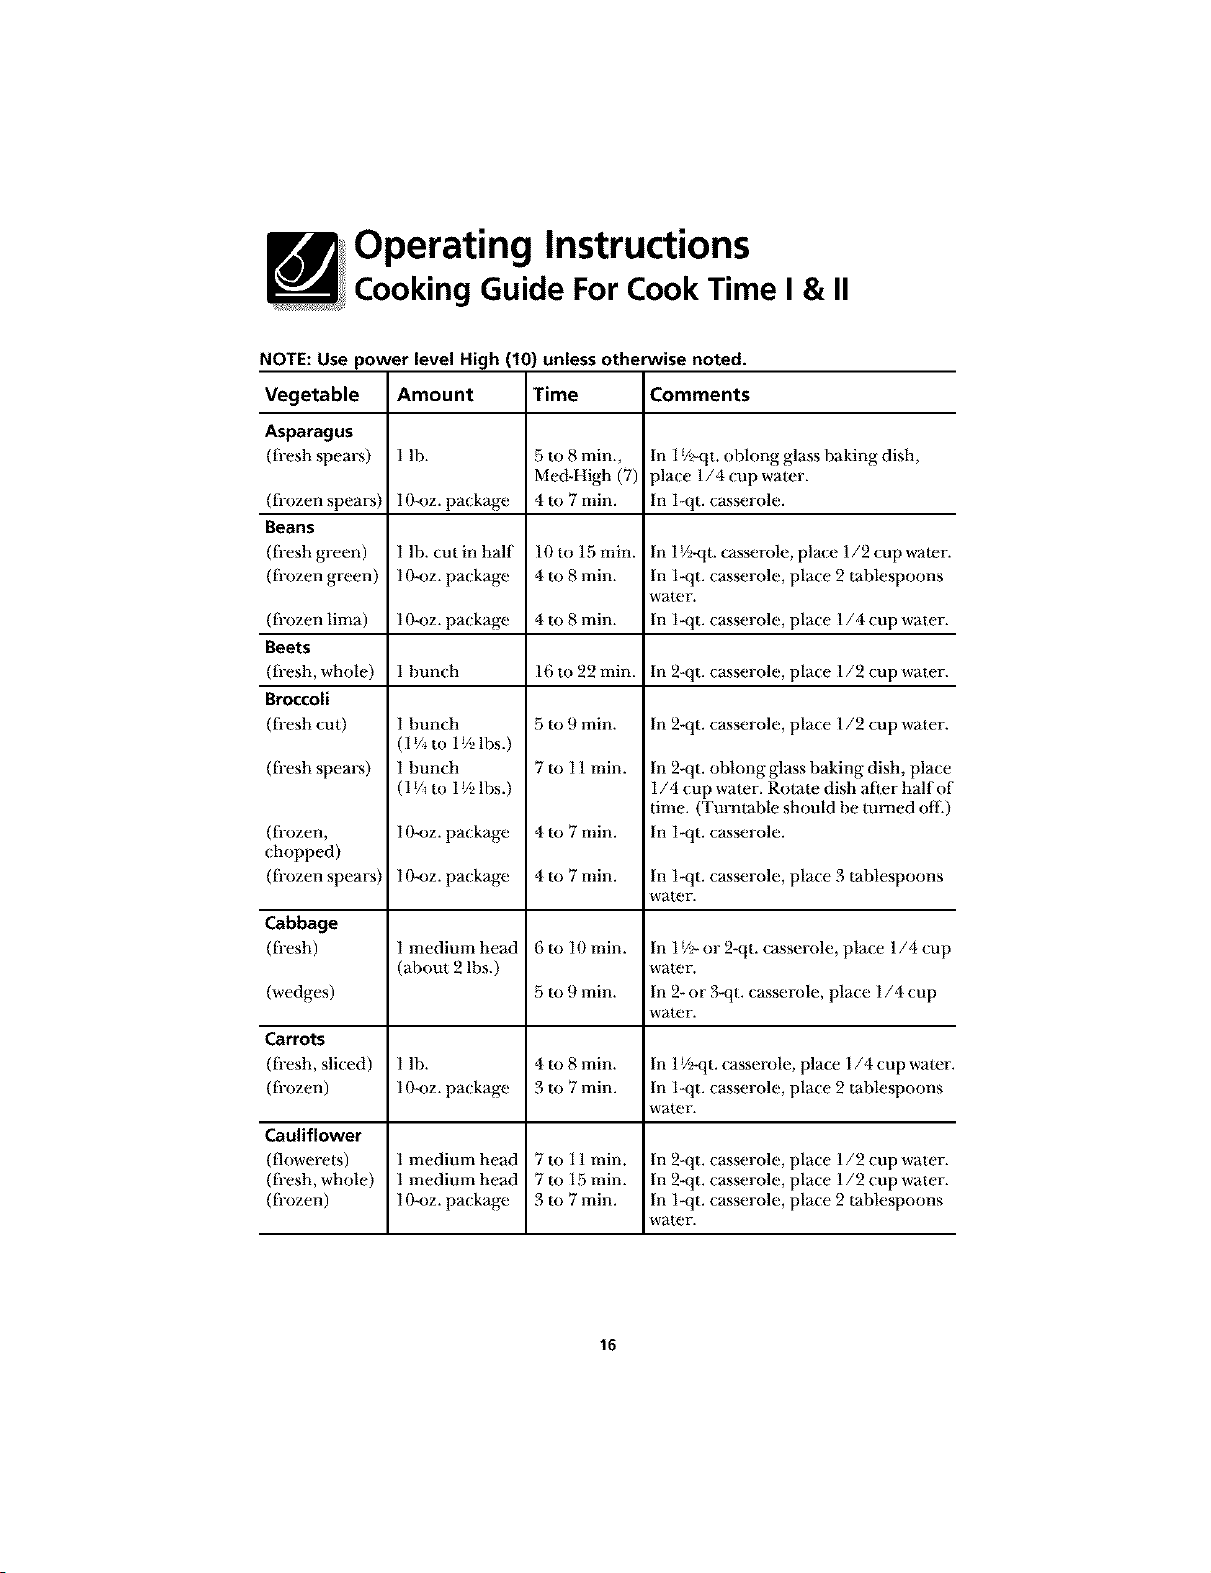
Cooking Guide For Cook Time I & II
NOTE: Use power level High (10) unless otherwise noted.
Vegetable Amount Time Comments
Asparagus
(fi-esh spears) 1 lh. In 1_A_qt.ohlong glass haking dish,
place 1/4 cup water.
(fi-ozen spears) 1O-oz. package In l-qt. casserole.
Beans
(fi-esh green) l lh. cut in half In l J/_qt. casserole, place 1/2 cup water.
(ti-ozen green) 10-oz. package In 1-qt. casserole, place 2 tablespoons
water.
(ti-ozen lima) 10-oz. package In l-qt. casserole, place 1/4 cup water.
Beets
(fi-esh, whole) l bunch In 2-qt. casserole, place l/2 cup water.
Broccoli
(fi-esh cut) In 2-qt. casserole, place l/2 cup water.
(ti-esh spears)
(ti-ozen,
chopped)
(ti-ozen spears)
Cabbage
(_esh)
(wedges)
Carrots
(fi-esh, sliced)
(ti-ozen)
Cauliflower
(flowerets)
(ti-esh, whole)
(ti-ozen)
1 bunch
(1_/_to 1_/_lbs.)
1 bunch
(1 _/_to 1_/_lbs.)
10-oz. package
10-oz. package
I medium head
(about 2 lbs.)
5 to 8 min.,
Me&High (7)
4 to 7 rain.
lOto 15 rain.
4 to 8 min.
4 to 8 min.
16 to 22 rain.
5 to 9 min.
7 to 11 rain.
4to 7rain.
4to 7rain.
6 to 10 rain.
5 to 9 min.
In 2-qt. oblong glass baking dish, place
1/4 cup water. Rotate dish a[]er half ot
time. (Turntable should be turned off
In l-qt. casserole.
In 1-qt. casserole, place 3 tablespoons
water.
In 1_/>or 2-qt. casserole, place 1/4 cup
water.
In 2-or 3-qt. casserole, place 1/4 cup
water.
1lb. 4to 8 min. In 1_/_qt.casserole, place 1/4 cup wamr
1O-oz.package 3to 7min. In 1-qt. casserole, place 2 tablespoons
water.
1medimn head 7 to 11rain. In 2-qt. casserole, place 1/2 cup water.
1medimn head 7 to 15 rain. In 2-qt. casserole, place 1/2 cup water.
1O-oz.package 3to 7min. In 1-qt. casserole, place 2 tablespoons
water.
16
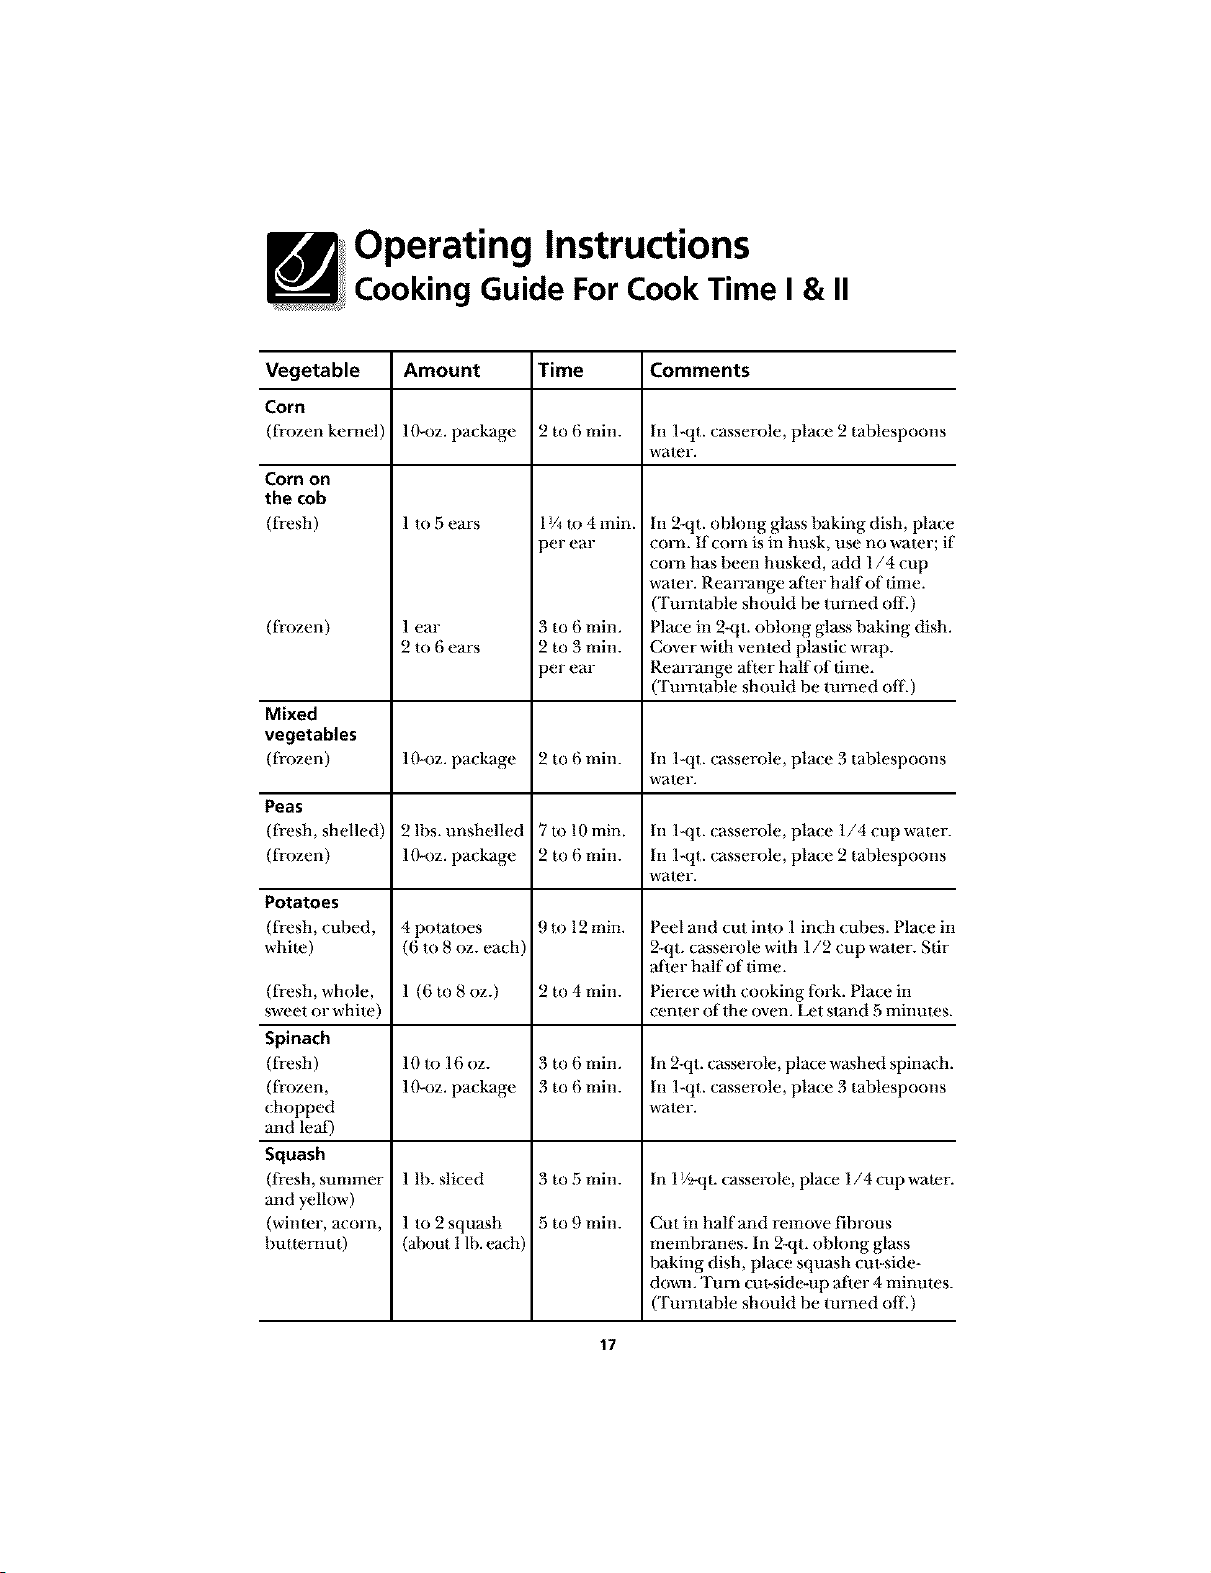
Operating Instructions
Cooking Guide For Cook Time I & II
Vegetable Amount Time Comments
Corn
(frozen kenml) ]O-oz. package 2 m 6 rain. In l-qt. casserole, pla(e 2 tahlespoons
water.
Corn on
the cob
(fresh)
(frozen)
Mixed
vegetables
(frozen)
Peas
(fresh, shelled)
(frozen)
Potatoes
(fresh, cuhed,
whim)
(fresh, whole,
sweet or white)
Spinach
(fresh)
(frozen,
(hopped
and lea[)
Squash
(fresh, summer
and yellow)
(winmr, acorn,
hutmmut)
1to 5ears
] ear
2 to 6 ears
10-oz. package
2 lhs. unshelled
10-oz. package
4 potatoes
(6 m 8 oz. each)
1 (6 to 8 oz.)
10 to 16 oz.
10-oz. package
1 lh. sliced
1 to 2 squash
(ahout 1 lb. each)
1¼ to4min.
3er ear
3 to 6 rain.
2 m 3 rain.
3er ear
2 to 6 rain.
7 to 10min.
2 m 6 min.
9 to 12 rain.
2 to 4 min.
3 m 6 min.
3 m 6 min.
3 to 5 rain.
5 to 9 rain.
In 2-qt. oblong glass baking dish, plac_
corn. If corn is in husk, use no water; it
corn has been husked, add 1/4 cup
water. Rearrange a_ter half of time.
(Turntable should be turned off.)
Place in 2-qt. obhmg glass baking dish.
Cover wilh vented plastic wrap.
Rearrange afmr half of time.
(Turntable should be turned off.)
In l-qt. casserole, place 3 tablespoons
water.
In l-qt. casserole, place 1/4 cup water.
In 1-qt. casserole, place 2 tablespoons
water.
Peel and cut into l inch cubes. Place i_
2-qt. casserole with 1/2 cup water. Stir
after half of time.
Pierce with cooking lork. Place in
cenmr of the oven. Ix_t stand 5 minums.
In 2Nt. casserole, place washed spinach
In 1-qt. casserole, pla(e 3 tablespoons
water.
In 1V_qt. casserole, place 1/4 cup wamr
Cut in half and remove fibrous
membranes. In 2-qt. oblong glass
baking dish, place squash cut-side-
down. Turn era-side-up a[ier 4 minutes
(Turntable should be turned off.)
17
Operating Instructions
Time Features
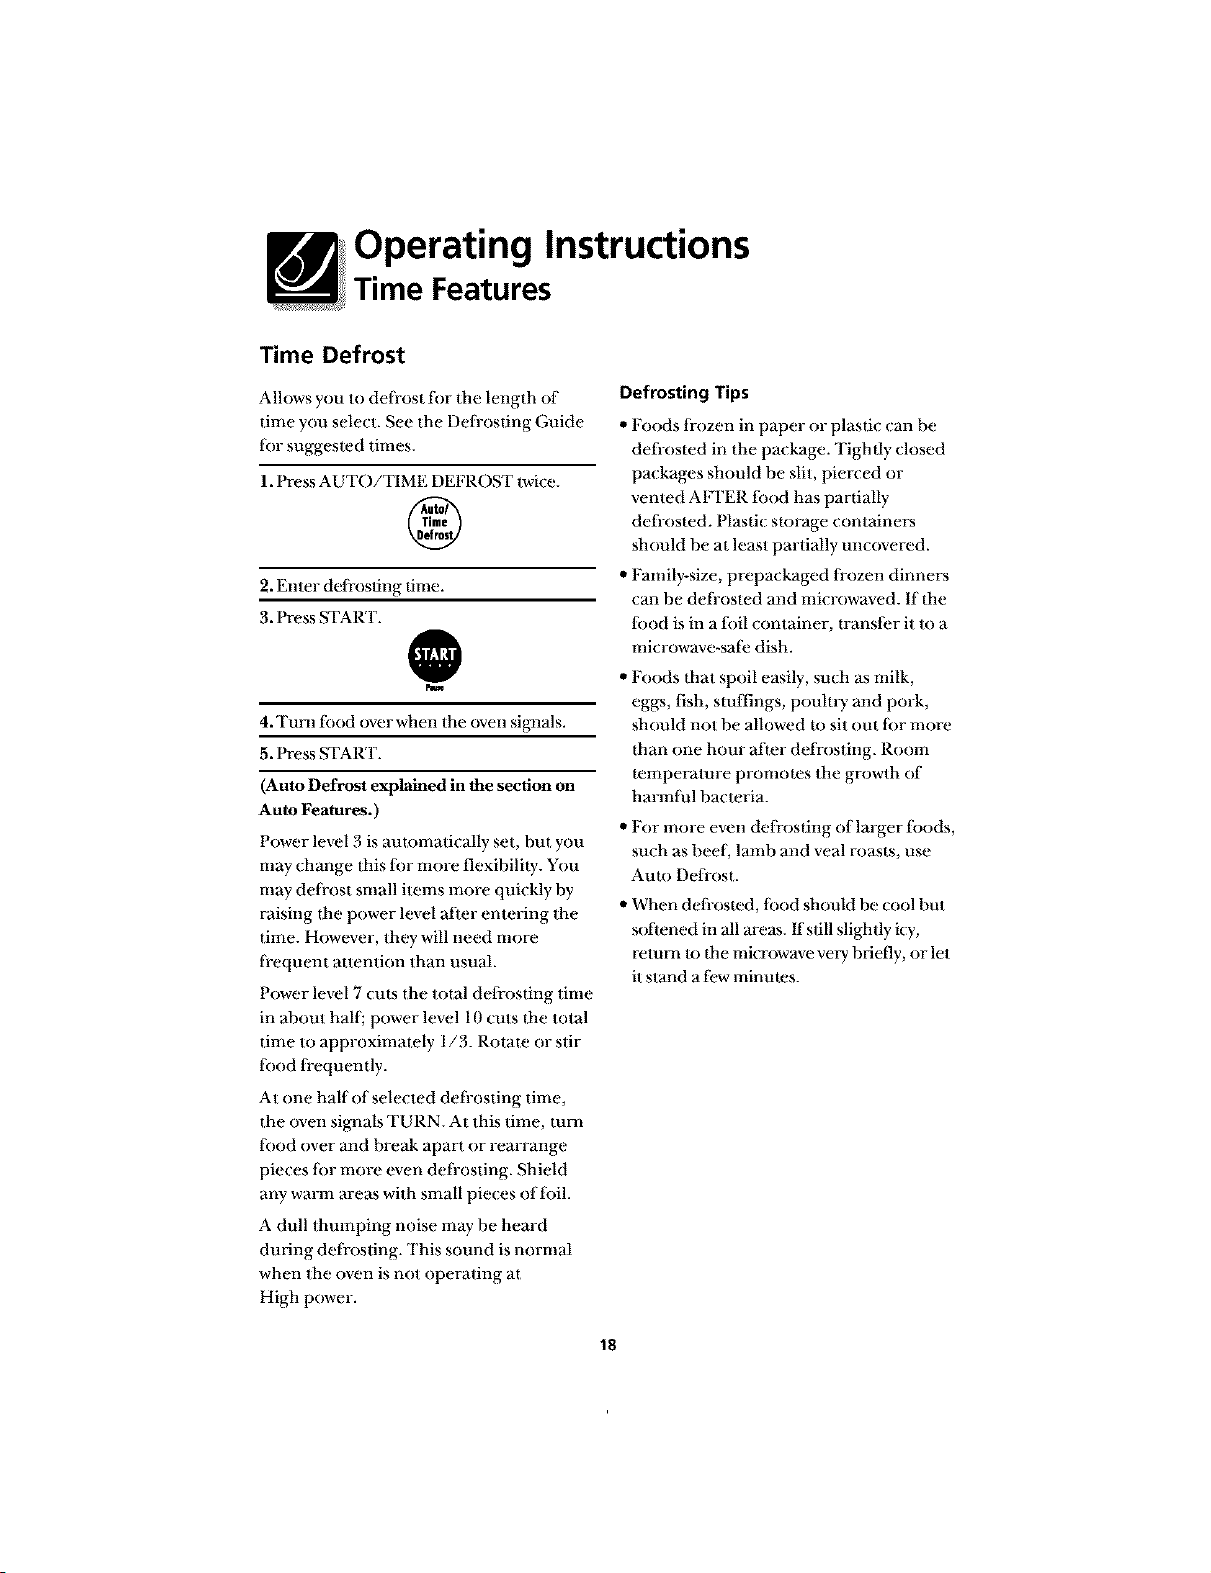
Time Defrost
Allows you to defi-ost fi)r the length of
time you select. See the Defi-osdng Guide
fiat suggested times.
1. Press AUTO/TIME DEFROST twice.
®
2. Enter defi-os_ng dine.
3. Press START.
@
4. Turn t_aod over when the oven sigl_als.
5. Press START.
(Auto Defrost explained in the section on
Auto Features.)
Power level 3 is automatically set, but you
may change this fflr more flexibility. You
may deli-ost sman items more quickly by
raising the power level after entering the
time. However, they will need more
li-equent attention than usual.
Power level 7 cuts the total defrosting dine
in about hall; power level 10 cuts the total
time to approximately 1/3. Rotate or stir
fiaod fi-equently.
At one half of selected defi-osting time,
the oven signals TURN. At this time, tma'l
fiaod over and break apart or rearrange
pieces fi)r more even defi-osting. Shield
any warm areas with small pieces of fi)il.
A dull thmnping noise may be heard
during defi-osting. This sound is normal
when the oven is not operating at
High power.
Defrosting Tips
• Foods li-ozen in paper or plastic can he
defi-osted in the package. Tightly closed
packages should be slit, pierced or
vented AIq'ER tood has partially
defi-osted. Plastic sR)rage containers
should be at least partially uncovered.
"Family-size, prepackaged fi-ozen dinners
can be defi-osted and microwaved. If the
lbod is in a fi)il container, transi;er it m a
microwave-sai;e dish.
,, Foods that spoil easily, such as milk,
eggs, fish, stuffings, pouln T and pork,
should not be allowed to sit out fi)r more
than one hour after defi-osting. Room
temperature promotes the growth of
harmtul bacteria.
"For more even defrosting of larger fi)ods,
such as heel, lamb and veal roasts, use
Auto Deft-cast.
,, When deli-osted, tood should be cool but
softened in all areas, ffsdll slightly icy,
return to the microwave vmy briefly, or let
it stand a few minutes.
18
Operating Instructions
Defrosting Guide
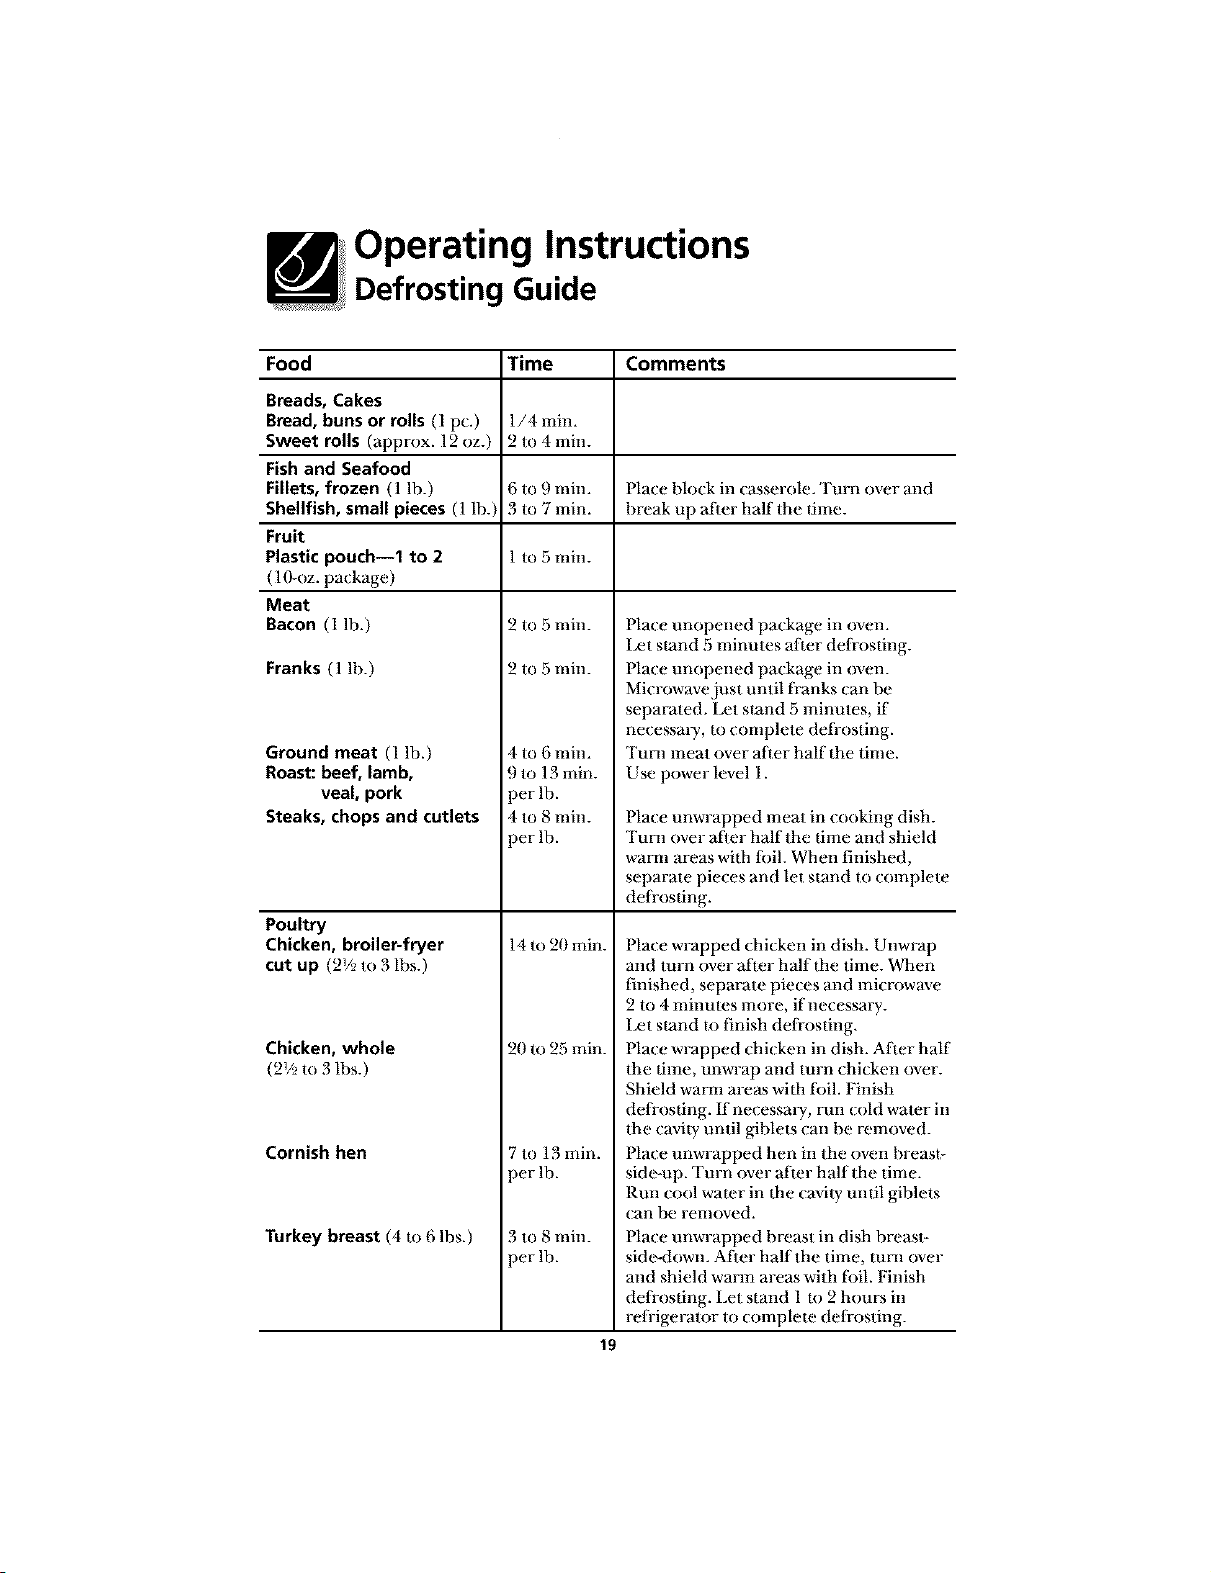
Food Time Comments
Breads, Cakes
Bread, buns or rolls (1 pc.) 1/4 min.
Sweet rolls (approx. 12 oz.) 2 to 4 min.
Fishand Seafood
Fillets, frozen (1 lh.) 6 to 9 rain. [}lace hlock in casserole. Turn over and
Shellfish, small pieces (1 lb.) 3 to 7 rain. hreak up afier half the time.
Fruit
Plastic pouch--1 to 2 1m 5 rain.
( 1O-oz. package )
Meat
Bacon (1 lb.)
Franks (1 lh.)
Ground meat (1 lb.)
Roast: beef, lamb,
veal, pork
Steaks, chops and cutlets
Poultry
Chicken, broiler-fryer
cut up (2_/2m 3 lbs.)
Chicken, whole
(2V2to 3 lbs.)
Cornish hen
Turkey breast (4 to 6 lbs.)
2 to 5 rain.
2 to 5 rain.
4 to 6 min.
9 to 13 rain.
per lb.
4 to 8 rain.
)er lb.
14 to 20 rain.
20 m 25 rain.
7 to 13 rain.
)er lb.
_to 8 min.
)erlb.
Place unopened package ii] oveIL
I_t stand 5 minmes alter defrosting.
Place unopened package in oven.
Microwave just until franks (an be
separated. Let stand 5 minutes, if
necessm T, to complete defi-osting.
Tun] meat over alter half the time.
Use power level 1.
Place unwrapped meat in cooking dish.
Tun] over afier half the time and shield
wman areas with fi)il. When finished,
separate pieces and let stand to complete
deliosfing.
Place wrapped chicken in dish. Unwrap
and turn over a_ter half the time. When
finished, separate pieces and microwave
2 to 4 minmes more, if necessary.
Ix_t stand U) finish deli-osfing.
Place wrapped chicken in dish. Alter half
the time, unwrap and turn chicken over.
Shield warn] areas with fi)il. Finish
deliosfing. If necessmT, run cold water in
the cavity until giblets can be removed.
Place unwrapped hen in the oven breast-
side-up. Turn over after half the time.
Run cool wamr in the cavi W until giblets
can be removed.
Place unwrapped breast in dish breasl-
side-down. Afier half the time, mm over
and shield warm areas with tbil. Finish
deliosfing. Let stand l to 2 hours in
relHgerator to complete defrosting.
19
Operating Instructions
Time Features
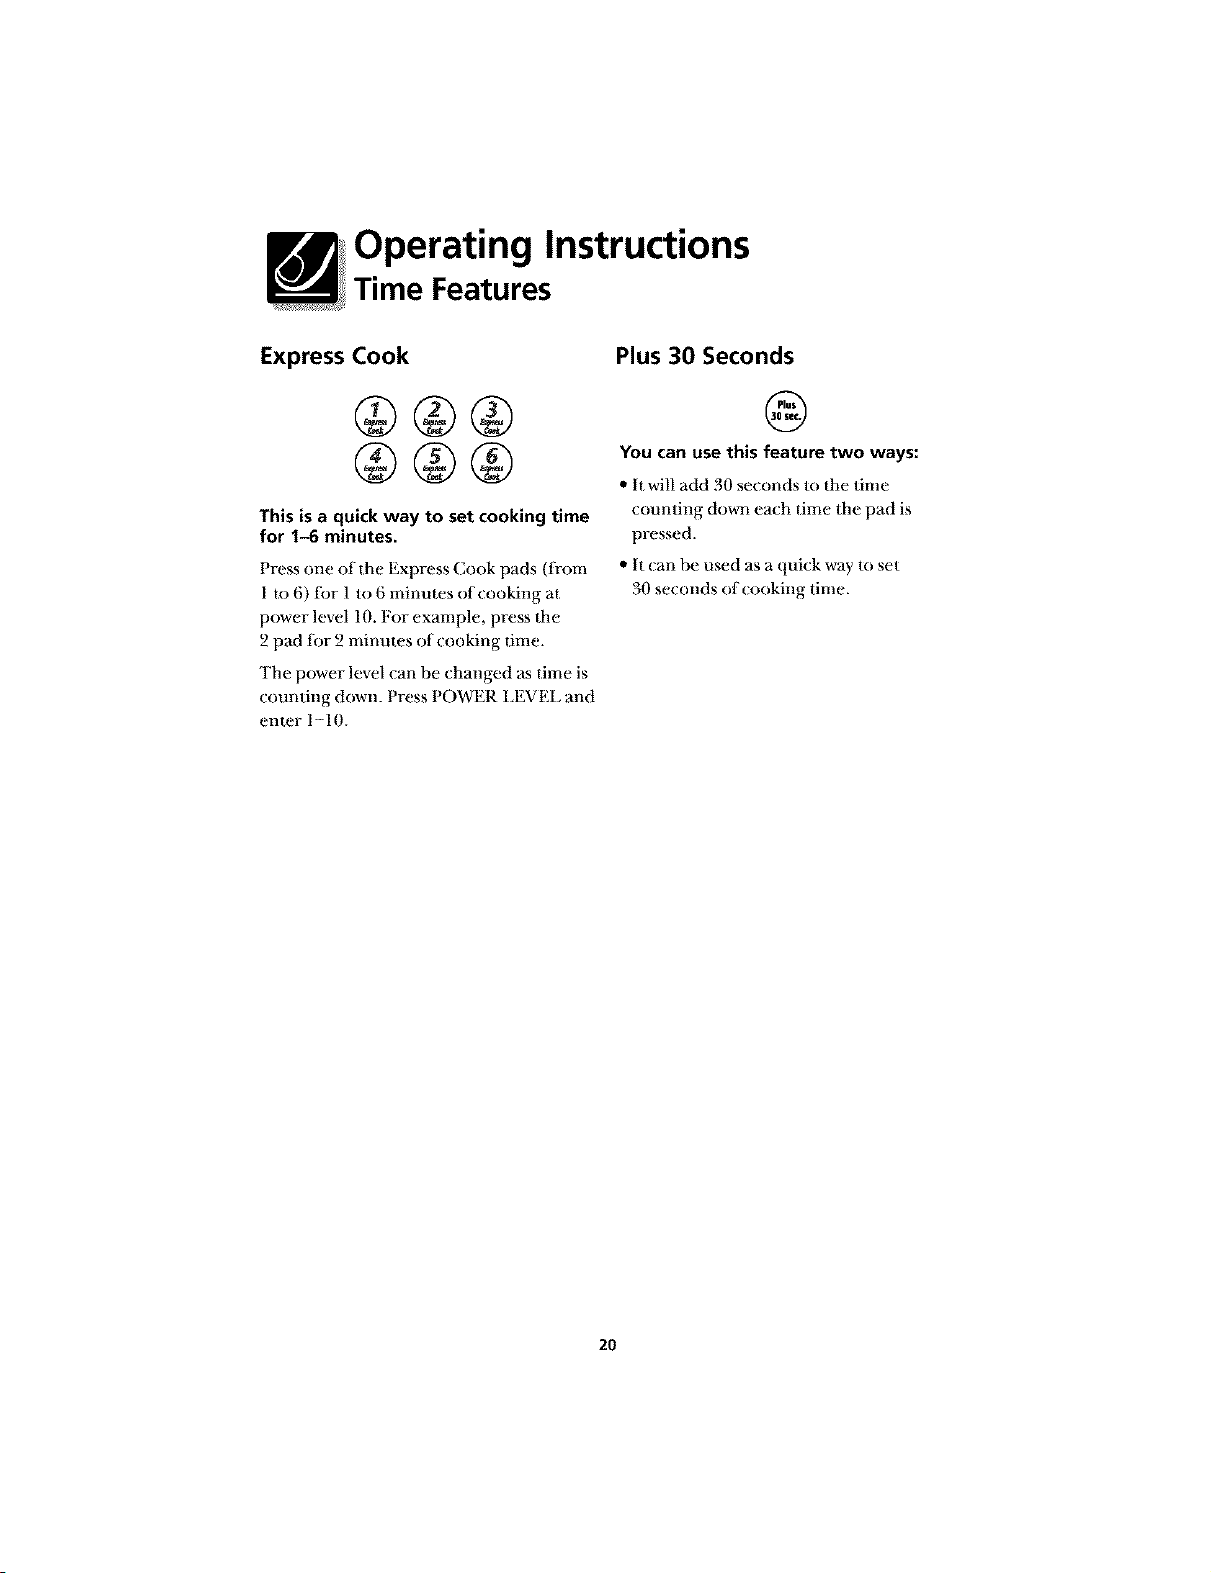
Express Cook
This is a quick way to set cooking time
for 1-6 minutes.
Press one of the Express Cook pads (ti-om
1 to 6) tbr 1 to 6 minutes of cooking at
power level 10. For example, press flae
2 pad tbr 2 minutes of cooking time.
The power level can be changed as time is
counting down. Press POWER LEVEL and
emer 1-10.
Plus 30 Seconds
@
You can use this feature two ways:
,, It will add 30 seconds to the time
counting down each time the pad is
pressed.
" It _an be used as a quick way m set
30 seconds of_ ooking time.
2O
Operating Instructions
Auto Features
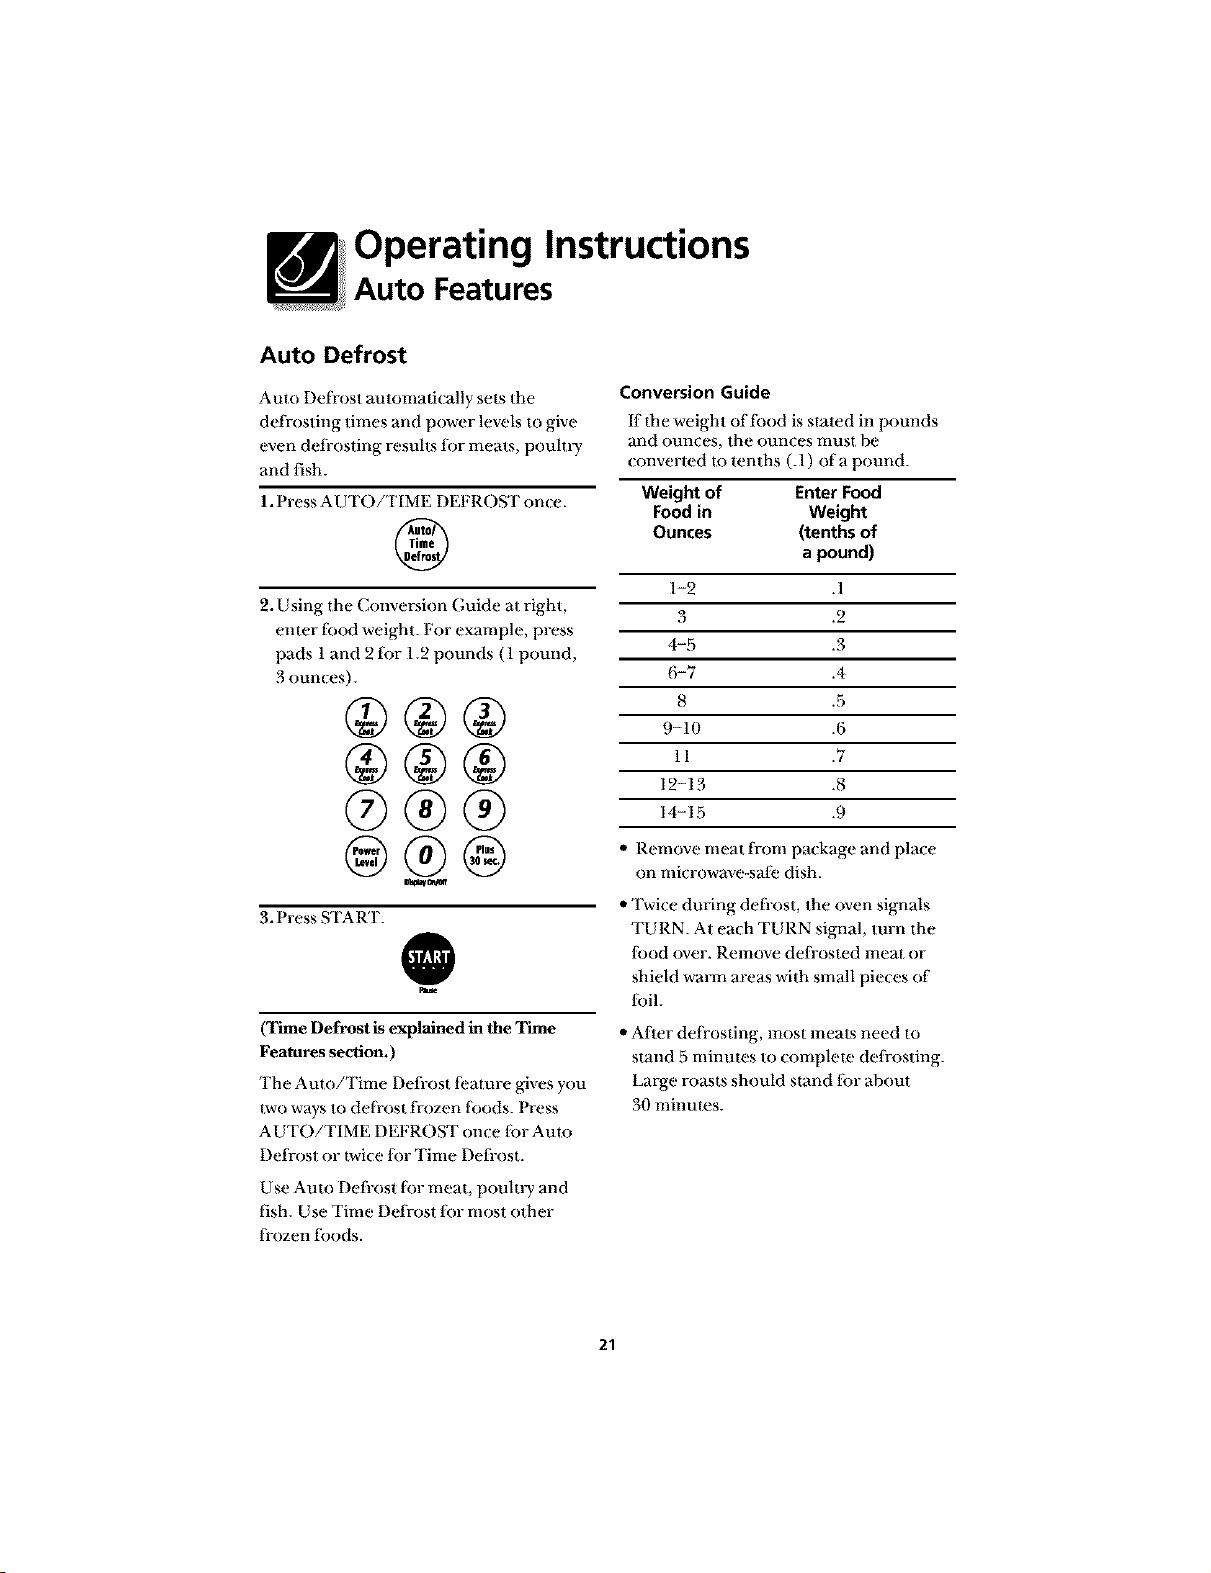
Auto Defrost
Auto Defrost automad(ally sets the
defrosting times and power levels to give
even defi-osting results tbr meats, poulu T
and fish.
1. Press AUTO/TIME DEFROST once.
®
2. Using the Conversion Guide at right,
enter tbod weight. For example, press
pads 1and 2 tbr 1.2 pounds (1 pound,
3 ounces).
®®®
@®@
3. Press START.
@
(Time Defrost is explained in the Time
Features section.)
The Auto/Time Defi-ost l;eamre gives you
_vo ways to del]-ost frozen foods. Press
AUTO/TIME DEFROST once fi)r Aura
Defrost or _vice fiJr Time Defi-ost.
Use Auto Defrost fi.)r meat, pouln T and
fish. Use Time Defrost fi.lr most other
l]-ozen toods.
Conversion Guide
If the weight of tbod is slated in pounds
and ounces, the ounces mus[ be
_onverted m tenths (.1) of a pound.
Weight of Enter Food
Food in Weight
Ounces (tenths of
a pound)
1-2 .1
3 .2
4-5 .3
6-7 .4
8 .5
9-10 .6
11 .7
12-13 .8
14-15 .9
,, Remove meal from package and place
on microwave-sai;e dish.
,, Twice during defi-ost, the (wen signals
TURN. At each TURN signal, turn the
lbod over. Remove del]-osted meat or
shield warm areas with small pieces of
ibil.
,, After defi-osting, most meats need to
stand 5 minmes to complete defrosting.
Large roasts should s_nd lbr ahout
30 minmes.
21
Operating Instructions
Sensor Features
Humidity Sensor
What happens when
using the Sensor Features,..
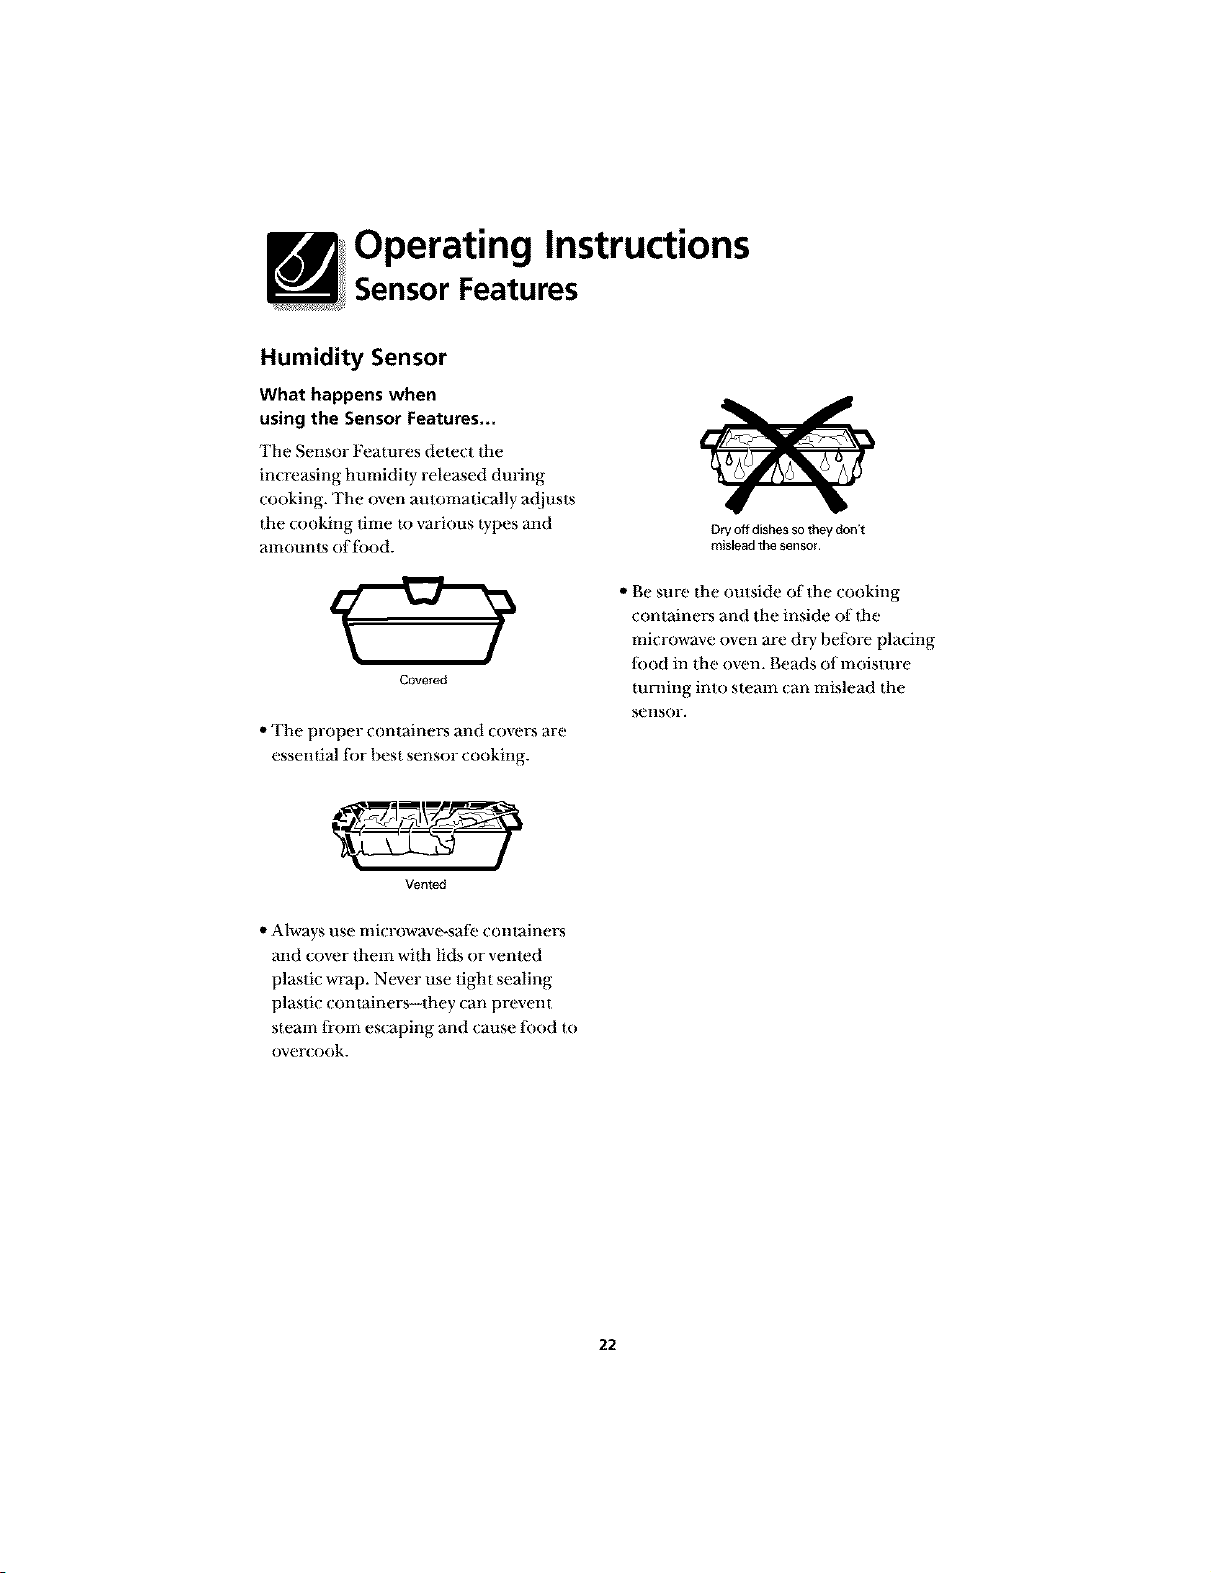
The Sensor Features detect the
increasing humidity released during
cooking. The oven automatically adjusts
the cooking time m various iypes and
amounts of ti_od.
Covered
,,The proper containers and covers are
essenlial ti)r hesl sensor cooking.
Vented
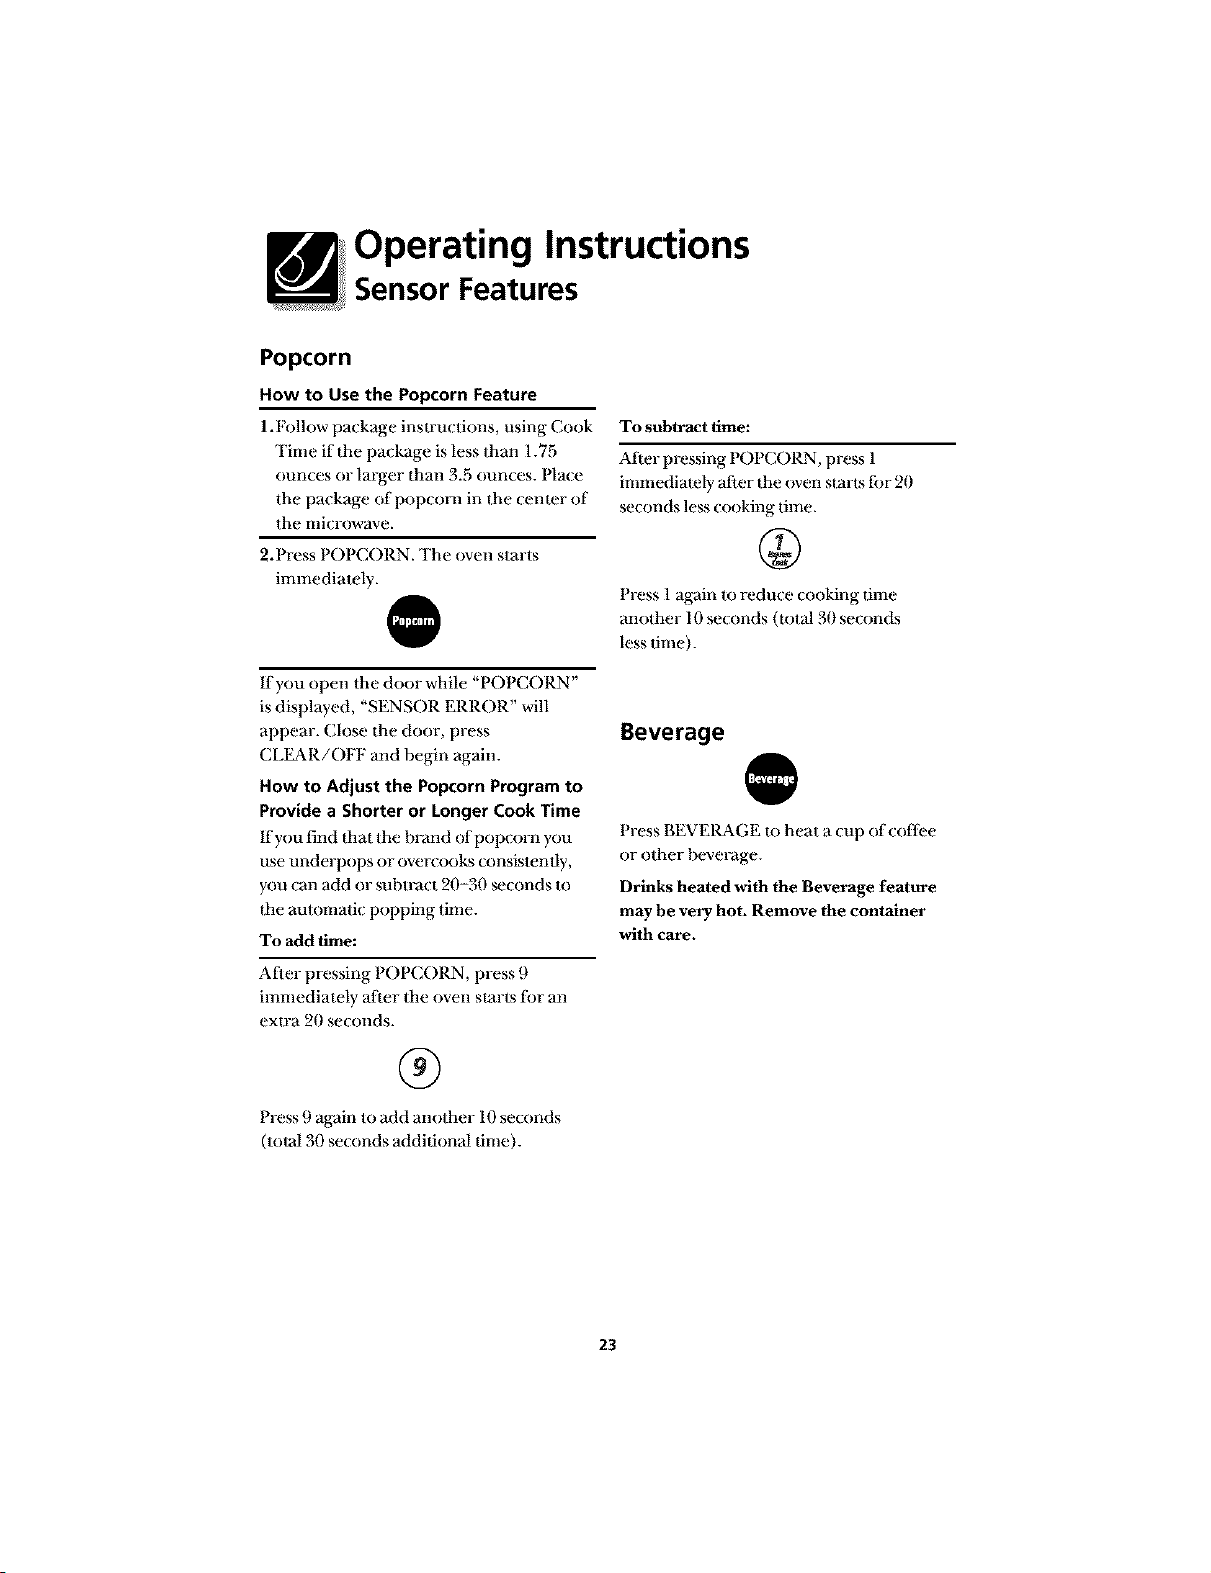
,,Alwaysuse microwave-sati_ containers
and cover them wilh lids or vented
plastic wrap. Never use tight sealing
plastic conlainers--they can prevent
steam li-om escaping and cause lood to
over{ook.
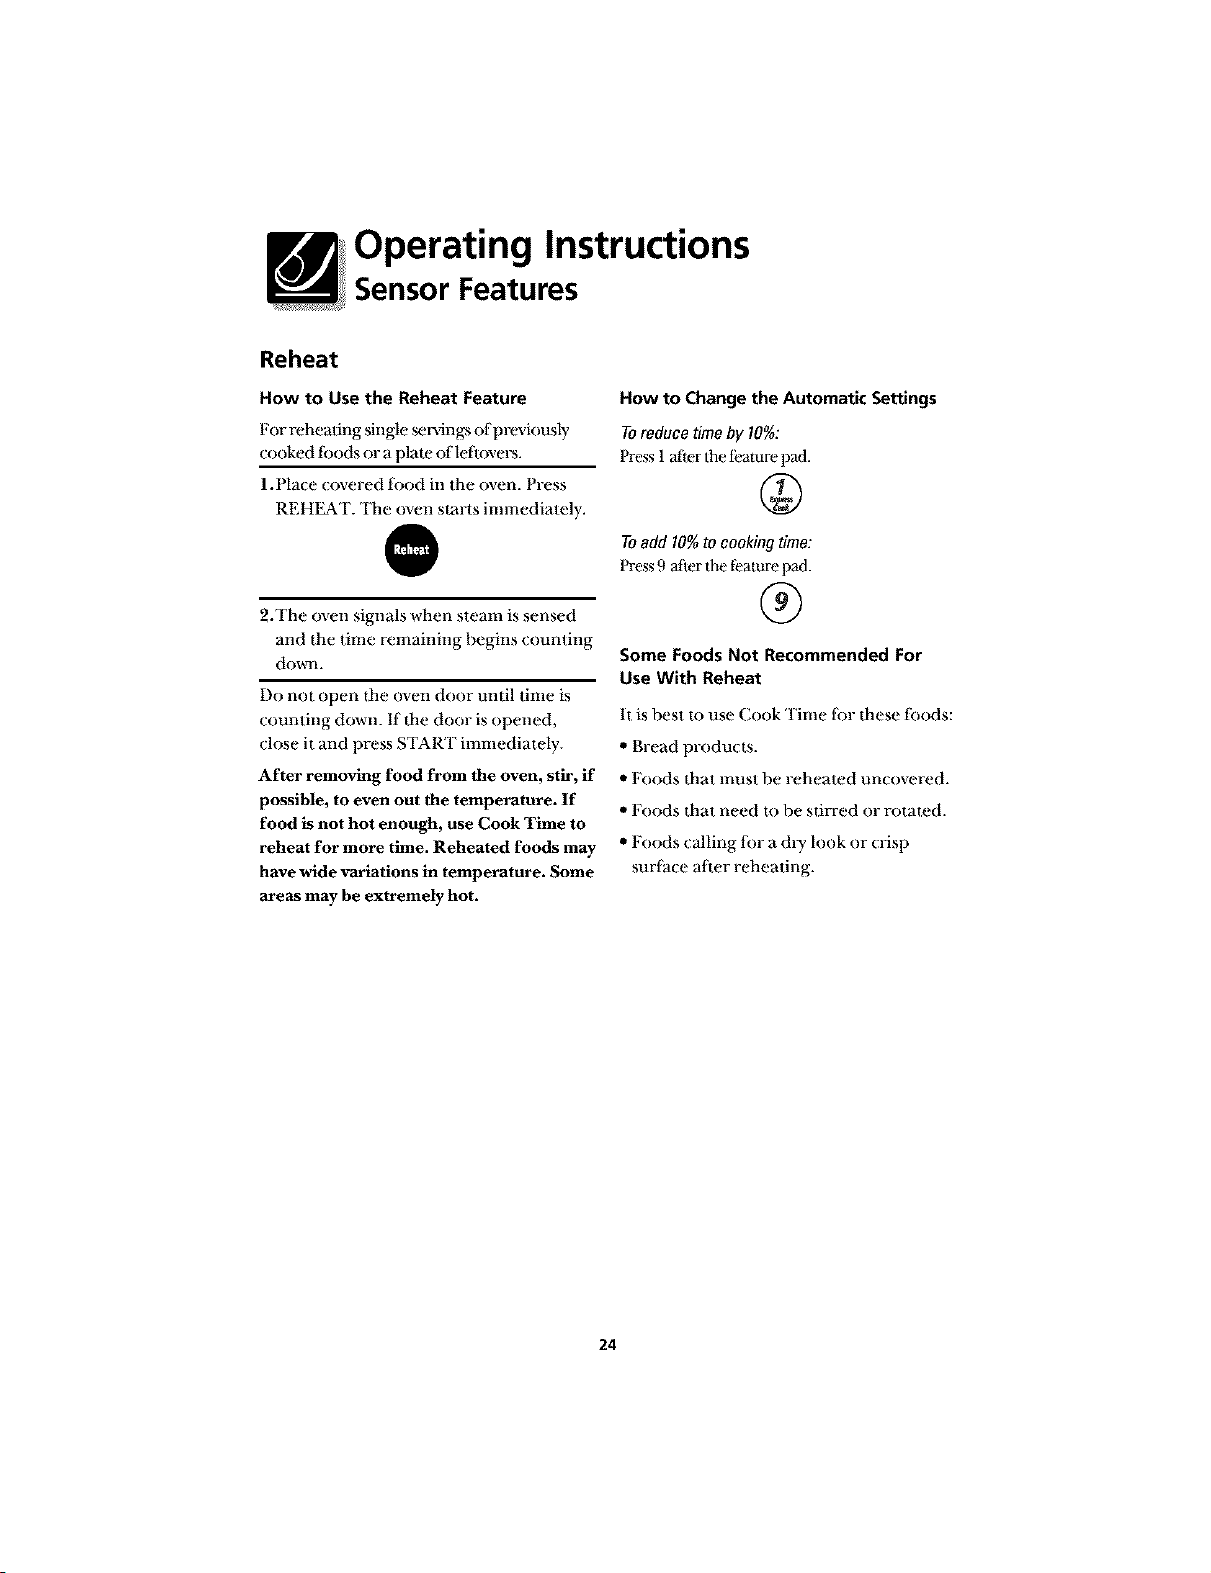
Dry off dishes so they don't
mislead the sensor
,, Be sure the outside of the cooking
containers and the inside of lhe
microwave oven are dry belore placing
lbod in the oven. Beads of moisture
mining into steam can mislead the
seI]sOr.
22
Operating Instructions
Sensor Features
Popcorn
How to Use the Popcorn Feature
1.1:_llow package inslructions, using Cook
Time if the package is less than 1.75
ounces or larger than 3.5 (mnces. Pla(e
the package of popcorn in the cemer of
the microwave.
2. Press POPCORN. The oven starts
immediately.
If you open the door while "POPCORN"
is displayed, "SENSOR ERROR" will
appear. (;lose the door, press
CLEAR/OFF and begin again.
How to Adjust the Popcorn Program to
Provide a Shorter or Longer Cook Time
If you find ttlat the hFand of popcorn you
use underpops or overcooks consistently,
you can add or subwact 20-30 _(onds to
file automatic popping time.
To add time:
After pressing POPCORN, press 9
immediately after the oven starts tor an
extra 20 seconds.
®
Press 9 aKain to add another 10 seconds
(total 30 seconds additional time).
To subtract time:
Ariel- pressing POPCORN, press 1
immediately after 1he oven starts fbr 20
seconds less cooking time.
Press 1 again to reduce cooking time
another 10 seconds (total 30 seconds
less time).
Beverage
Press BEVERAGE to heat a (;up of coflbe
or other beveFage.
Drinks heated with the Beverage feature
may be very hot. Remove the container
with care.
23
Operating Instructions
Sensor Features
Reheat
How to Use the Reheat Feature
For reheating single _r_ngs of previously
cooked tbods or a plate of leftovers.
1.Place covered tbod in the oven. Press
REHEAT. The oven starts immediately.
@
2.The oven signals when steam is sensed
and the time remaining hegins couming
dowel.
Do not open the oven door until time is
counting down. If the door is opened,
close it and press START immediately.
After removing food from the oven, stir, if
possible, to even out the temperature. If
food is not hot enough, use Cook Time to
reheat for more time. Reheated foods may
have wide variations in temperature. Some
areas may be extremely hot.
How to Change the Automatic Settings
To reduce time by 10%:
Press 1 after the t;eature pad.
To add 10% to cooking time:
Press 9 atier the feature pad.
®
Some Foods Not Recommended For
Use With Reheat
It is best Io use Cook Time lbr these toods:
,, Bread products.
"Foods that must be reheated uncovered.
"Foods that need to be stirred or rotated.
"Foods calling lor a &y look or crisp
surtace after reheating.
24
Operating Instructions
Sensor Features
Sensor Cooking
Baked Potato
'ltae Baked Polato t_amre cooks 1/2-2 lbs. of
polames.
1.Pierce skinwilh tbrk and place potatoes on
lhe mmlable, ffcooking Ihree or more
polaloes, mTange in a slar patlem.
2.Press I'_KED POTATO. '111eovensmrls
imnmdiately. '111eoven signalswhen sleam
is sensed and lhe time remaining begins
cxmnting down.
Do not open dm oven door until time is
counting down. ff tbe door is opened,
ch)se it and press START immediately. If
lbod is not done enough, um Cook Time m
cook tbr more lime.
How to Change the Automatic Settings
Toreduce timeby 10%:
Press 1after tim t_ature pad.
Toadd 10%to cookingtime:
Press 9 after the fealure pad.
®
Veggie
Use lhe Veggie _amre to cook 4-16 ounces
of flesh, fl-ozen or canned vegetables.
1.For flesh vegelables, add 2 tablespoons of
water per serving. For frozen vegetaNes,
tbllow package inswacfions tbr adding
water. Cover with lid or plastic wrap. Nax;e
vegetables in the oven.
2. Press VEGGIE once lbr flesh vegetables,
twice tbr frozen vegetaDles, or lhree times
tbr canned vegelables. 'llae oven slarls
immediately. 'llae oven signals when steam
is mnsed and time remaining is counting
down.
@
Do not open tbe (wen door until time is
counting down. ff tbe door is opened,
ch)se it and press START immediately. If
lbod is not done enough, um Cook Time m
cook tbr more lime.
How to Change the Automatic Settings
(automaticsettingsfor cannedvegetables
cannotbeadjustedonsomemodels)
Toreduce timeby 10%:
Press 1after/tae t;eamre pad.
@
Toadd 10%to cookingtime:
Press 9 after the fealure pad.
®
25
Operating Instructions
Other Features
Help
G
'ltle HELP pad displays t_amre infbm_ation
and helpful hirers. Press HELP, Ihen select a
leature pad.
Cooking Complete Reminder
To remind you It]at you have fbod in the
oven, Itae oven will display "FOOD IS
READY" and beep once a minme until
you either open the oven door or press
CLEAR/OFF.
Clock
Press to enter lt]e time of day or to check
the time of day while mi_ rowaving.
1.Press CLOCK.
@
2.Enter time of day.
3. Select AM or PM.
@
d_
4.Press START or CLOCK.
@o
Scroll Speed
@
s_ls_d
The scroll speed of the display can he
changed. Press and hold the AM/PM pad
about 3 seconds to bring up the display.
Select 1-5 lk_rsh)w to thst scroll speed.
Display On/Off
®
To mm the ch)ck display off, press and
hold l) tor about three seconds.
The Display On/Offl_:amre cannot be
used while a cooking ti:amre is in use.
Start/Pause
@
hm
In addition to starting many lhnctions,
START/PAUSE allows you U) stop
cooking without opening the door or
clearing the display.
26
Operating Instructions
Other Features
Timer On/Off
Timer On/Offoperates as a minute timer
and can be used at any time, even when
Ihe oven is operating.
1.Press TIMER ON/OFF.
@
2.Enler time you warn to (ounl down.
3.Press TIMER ON/OFF to slart.
@
When time is up, the oven will signal. To
ran1 off Ihe timer signal, press TIMER
ON/OFF.
NOTE: The timer indicator will be Ill
while Ihe timer is operating.
Remind
The Remind leamre can be used like an
alarm Oo{k and can be used at any time,
even when the oven is operating. The
Remind time {an he set up m 24 hours
lamr.
1.Press REMIND.
2.Enter the time you want lhe oven m
remind you. (Be sure lhe microwave
{lo{k shows the correct time of day.)
3.gele{ t AM or PM.
@
4.Press REMIND. When Remind signal
occurs, press REMIND to turn it off. The
Remind time may be displayed by
pressing REMIND.
NOTE: The REM indicator will remain lit
to show that Remind is set. To clear
Remind belore it o{cm_, press REMIND,
then 0. The REM indicator will no longer
be lit.
27
Operating Instructions
Other Features
Child Lock-Out
You may lock the control panel to prevent
the microwave fl-om being accidentally
started or used by children.
To lock or unlock the controls, press
and hold CLEAR/OFF lbr about three
seconds. When the control panel is
lo(ked, an "L" will be displayed to the
extreme right.
Beeper
@
Press BEFPER to turn the oven beeper
on or off.
Turntable
For best cooking results, leave the
rotatable on. It (;an be turned offlor large
dishes. Press TURN TABLE to turn the
rotatable on or off.
Sometimes the turntable can become too
hot to touch. Be caretul touching the
mmtal)le during and after (ooking.
28
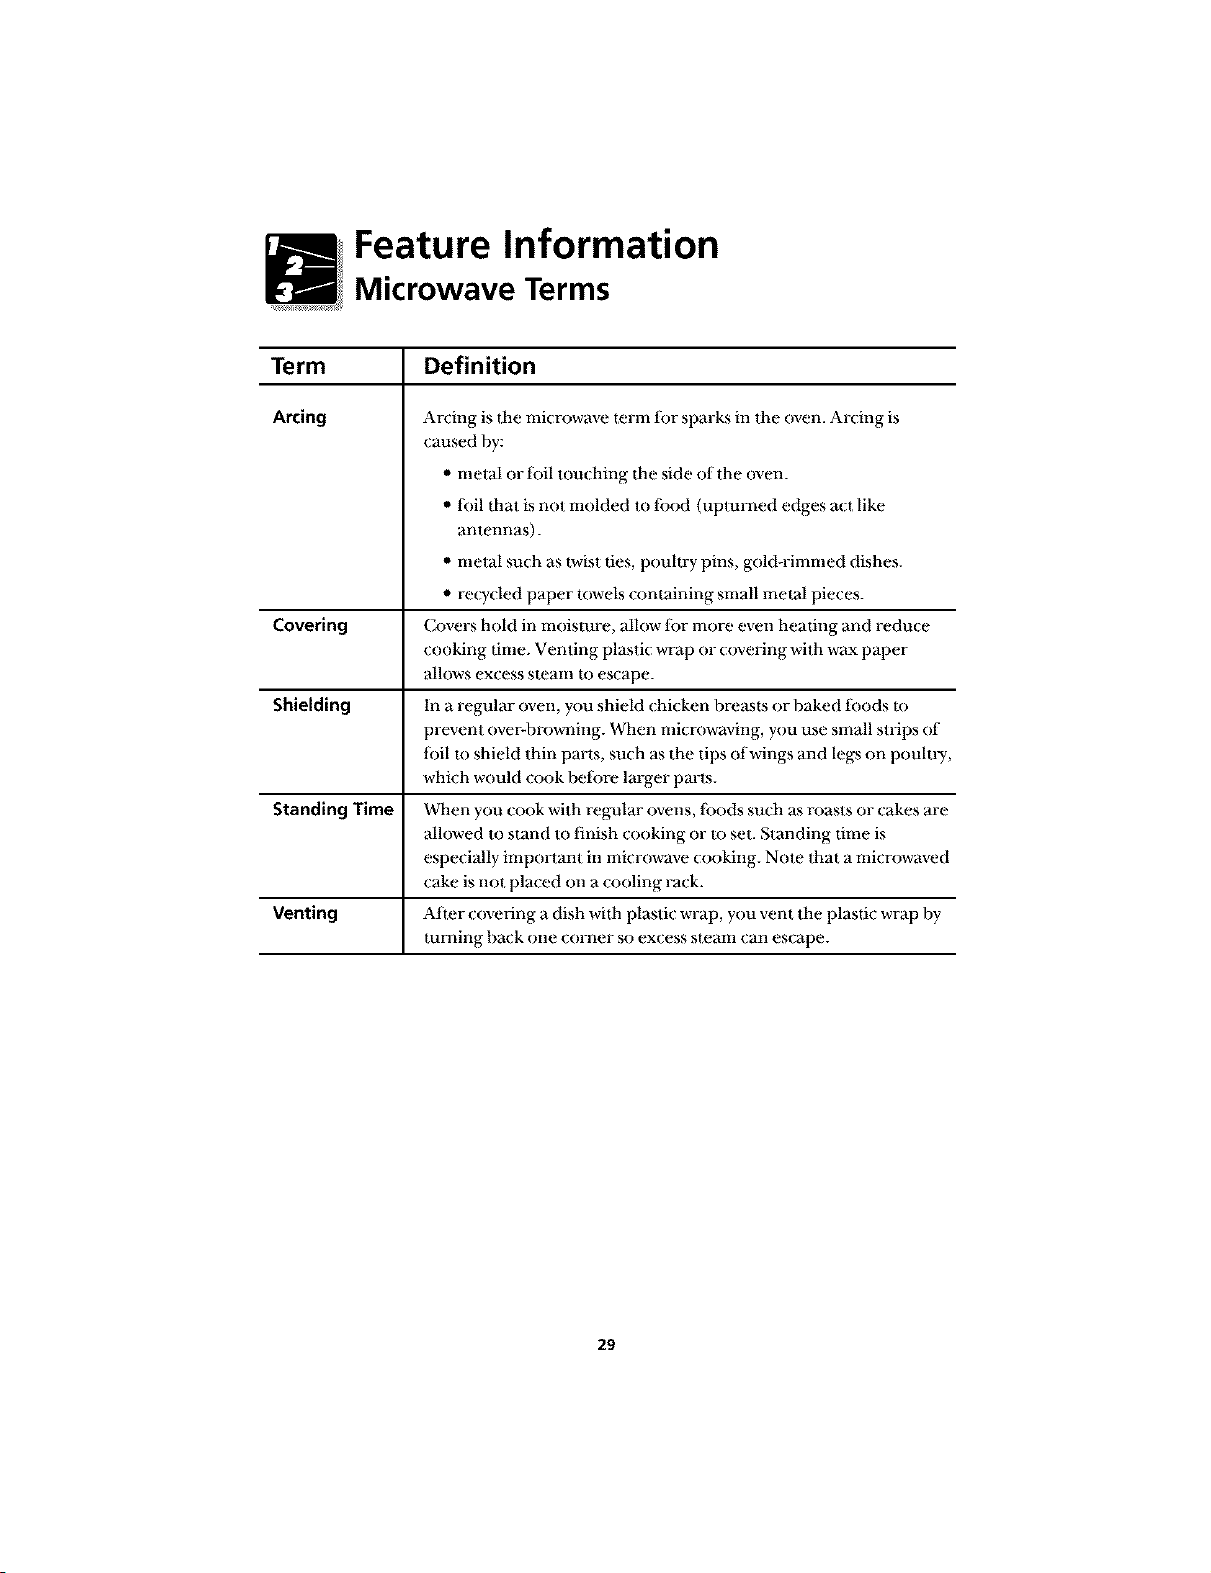
Feature Information
Microwave Terms
Term
Arcing
Covering
Shielding
Standing Time
Venting
Definition
Arcing is tbe microwave term tbr sparks in the oven. Arcing is
caused by:
• metal or toil touching tbe side of the oven.
• loll ttaat is not molded m lbod (upturned edges act like
antennas).
• metal such as t_vist ties, poultry pins, gold-rimmed dishes.
• recycled paper rowels containing small metal pieces.
Covers hold in moisture, allow fi)r more even heating and reduce
cooking time. Venting plastic wrap or covering with wax paper
allows excess stealtl to escape.
In a regular oven, you shield chicken breasts or baked tbods to
prevent over-browning. When microwaving, you use small strips of
lbil m shield thin parts, such as the tips of wings and legs on poultry,
which would cook betbre Ira-get parts.
When you cook with regular ovens, fi)ods such as roasts or cakes are
allowed to stand to finish cooking or m set. Standing time is
especially important in microwave cooking. Note that a microwaved
cake is not placed on a cooling rack.
Al_er covering a dish witb plastic wrap, you vent the plastic wrap by
mining back one corner so excess steam can escape.
29
Care and Cleaning
Helpful Hints
()pen dae oven door a few minutes
after cooking to air out ttae inside. An
o( casional thorough wiping with a
solution of baking soda and water keeps
the inside fi-esh.
NOTE: Unplug the cord belbre (;leaning
any part of tiffs oven.
How to Clean the Inside
Wails, Floor, Inside Window, Metal
and Plastic Parts on the Door
Some spatters can be removed widl a
paper towel, odmrs may require a damp
clofl_. Remove greasy spatlers wifl_ a
sudsy cloth, titan rinse with a damp
clofla. Do not use abrasive cleaners or
shm_p utensils on oven walls. Never use
a commercial oven cleaner on any part
of your microwave.
To clean the surface of thedoor and the
surface of the oven thatcome together upon
dosing, useonlymild, nonabrasive soaps or
detergents usinga sponge orsoft cloth.
Rh_sewithadamp doth and dry.
Removable Turntable and
Turntable Support
To prevent breakage, do not place lbe
tumlal)le into water just after cooking.
Wash it carelully in warm, sudsy water or
in lbe dishwasher. The mnllable and
support can be broken if dropped.
Rememl)er, do not operate the oven
without lbe rotatable and support in
place.
3O
Care and Cleaning
How to Clean the Outside
Do not use cleaners containing
ammonia or alcohol on the
microwave oven. Ammonia or
alcohol can damage the appearance
of the microwave.
Case
Clean the outside of the microwave with a
sudsy cloth. Rinse and then dry. Wipe the
window clean with a damp cloth.
Control Panel and Door
Wipe with a damp cloth. Dry thoroughly.
Do not use cleaning sprays, large mnounts
of soap and water, abrasives or sharp
oI)iects on the panel--they can dmnage it.
Some paper rowels (;an also scratch the
control panel.
Door Surface
It's imporlant to keep the area clean
where the door seals against the
microwave. Use only mild, non-abrasive
detergents applied with a clean sponge
or soft (loth. Rinse well.
Stainless Steel Surfaces
(on some models)
Do not use a steel-wool pad; it will scratch
the surface.
To clean stainless steel sin-faces, use a hot,
damp cloth with a mild detergent suitable
lor stainless steel sin-faces. Use a clean,
hot, damp cloth m remove soap. DlT with
a dry, (;lean cloth.
lflbod soil remains, try a general kitchen
cleaner, such as Fantastik, ®Simple Green_ _
or Formula 409?
For hard-to-clean soil, use a standard
stainless steel (;leaner, such as Bon-Ami °
or Cameo_ _
Apply (;leaner with a damp sponge. Use a
dean, hot, damp cloth to remove (leaner.
Dry with a dry, clean cloth. Always scrub
lightly in the dire(don of dae grain.
After cleaning, use a stainless steel polish,
such as Stainless Steel Magi( _;)Revere
Copper and Stainless Steel Cleaner¢, _or
Wenol All Purpose Metal Polish? Follow
the product instructions tot cleaning the
stainless steel sin-face.
31
Troubleshooting
Before You Call For Service...
Troubleshooting Tips
Save time and tnoney_ Review Ibis list first and
you may not need to (all ti)r _lwi( e.
Food amount is too large for
Sensor Reheat?
Sensor Reheat islot single seiwingsof
recommended tbods. U_ CookTime tor
laige mnounls of lbod.
Oven will not start?
A ti_se in your home may be blown or the
ciroait hreaker tripped. Replace tiara or reset
circuit hreaker.
Power surge. Unplug lhe microwaveoven,
then plug ithack in.
Plug not l_ally inserted into wall oudet. Make
sure dae 3-prong plug on dae oven is tully
inserted into wall oudet.
"LOCKED" appears in the
display?
'ltae control has been locked. (Dkaen the
conu-ol panel islocked, m_"L" will be
displayed.) Press and hold CLFAR/OIq: tbr
about 3 seconds to unlock timconlrol.
"SENSOR ERROR" appears in
the display?
When using a Sen_)r tbamre, the door was
opened heft)re steam could be dete(ted.
Close the door, press CLFAR/OIq: and
begin again.
Steam was not detected in maximum amount
of dine. Use Cook Time to heat lot more
time.
32
Troubleshooting
Before You Call For Service...
Control Panel Lighted, Yet
Oven Will Not Start?
,, Door not mcurely dosed. Open the door
and close _curely.
,, START pad not pressed alier enmring
cooking mlecfion. Press START.
• Another _lecfion emered ah-eady in oven
and CLEAR/OFF pad not pressed m
can(el it. Press CLEAR/OFF.
"Cooking time not emered after pressing
COOK TIME. Make sure you have entered
cooking time after pressing COOK TIME.
,, CLEAR/OFF was pressed accidentally.
Reset cooking program and press START.
,, Food weight not emered after selecting
Auto Defi-ost. Make sure you have entered
Iood weight after selecting Aura Defrost.
Things That Are Normal
• Steam or vapor escaping d-ore m-ound the
door.
,, Light reflection around door or omer case.
,, Dilnming oven light and change in the
blower sound at power levels other than
high.
" Dull thumping sound while oven is
operating.
"'l'V-Fadio inmflbrence might be noticed
while using flae microwave. Similar m
the inleflbrence caused by other small
appliances, it does not indicale a problem
vvifl_ Ihe microwave. Hug the microwave
into a dilIbrent eleclrical circuit, move
the Fadio or 'IV as tar away li-om tim
microwave as l_)ssible, or check dm
position mad sigaaal (ffdle TV/l-adio
artlenna.
33
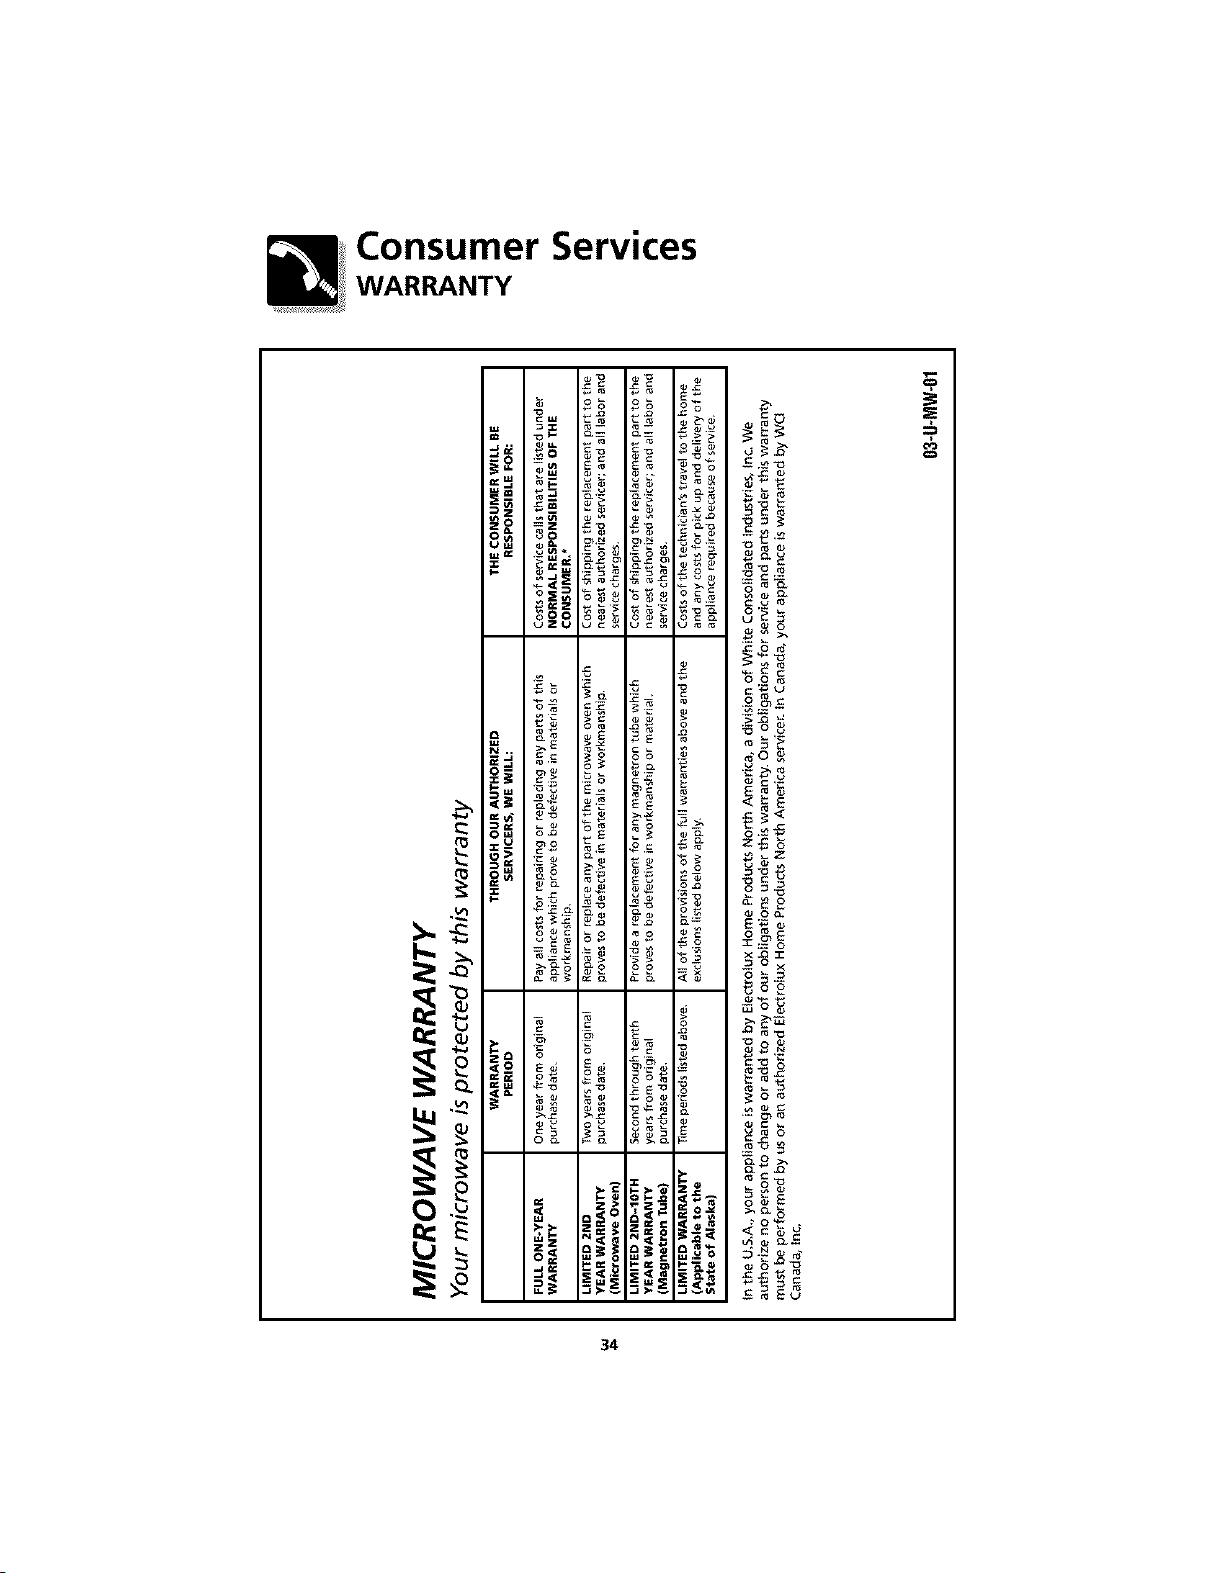
Consumer Services
WARRANTY
o_ o_ o_ _,
_: o _
_=
"_ _=_ _=_
@ _._ _ _ o _o_
N.. o__ _
_0 _oo
_o_
_ o_
_l_ _ z__ "_ _ _- _
_ o_ _o_ _ o
_-_o_ _o_ !oi
_ o_ _ _o
_._'_ @,_o _-
9
34
Consumer Services
WARRANTY (Continued)
* NORMAL RESPONSIBILITIES OF THE CONSUMER
This warranty applies only to products in ordinary household use, and
the consumer is responsible for the items listed below:
1. Proper use of the appliance in accordance with instructions provided with
the product.
2. Proper installation by an authorized servicer in accordance with instructions
provided with the appliance and in accordance with all local plumbing,
electrical and/or gas codes.
3. Proper connection to a grounded power supply of sufficient voltage,
replacement of blown fuses, repair of loose connections or defects in
house wiring.
4. Expenses for making the appliance accessible for servicing, such as removal
of trim, cupboards, shelves, etc., which are not a part of the appliance when
it was shipped from the factory.
5. Damages to finish after installation.
6. Replacement of light bulbs and/or fluorescent tubes (on models with
these features).
EXCLUSIONS
This warranty does not cover the following:
1. CONSEQUENTIAL OR INCIDENTAL DAMAGES SUCHAS PROPERTYDAMAGE
AND iNCiDENTAL EXPENSESRESULTINGFROM ANY BREACH OF THIS
WRITTEN OR ANY IMPLIED WARRANTY.
Note: Some states do not allow the exclusion or limitation of incidental or
consequential damages, so this limitation or exclusion may not apply to you.
2. Service calls which do not involve malfunction or defects in workmanship or
material, or for appliances not in ordinary household use. The consumer shall
pay for such service calls.
3. Damages caused by services performed by servicers other than Electrolux
Home Products North America or its authorized servicers; use of parts other
than genuine Electrolux Home Products parts; obtained from persons other
than such servicers; or external causessuch as abuse, misuse, inadequate
power supply or acts of God.
4. Products with original serial numbers that have been removed or altered
and cannot be readily determined.
35
Consumer Services
IF YOU NEED SERVICE
Keep your bill of sale, delivery slip or some other appropriate payment
record. The date on the bill establishes the warranty period should
service be required. If service is performed, it is in your best interest to
obtain and keep all receipts. This written warranty gives you specific
legal rights. You may also have other rights that vary from state to state.
Service under this warranty must be obtained by contacting Electrolux
Home Products:
This warranty only applies in the 50 states of the U.S.A., Puerto Rico
and Canada. Product features or specifications as described or
illustrated are subject to change without notice. All warranties are
made by Electrolux Home Products North America, a division of
White Consolidated Industries, Inc. In Canada, your appliance is
warranted by WCI Canada, Inc.
USA
800,944,9_14
Electrolux Home Products
North America
P.O.Box 212378
Augusta, GA 30917
Canada
866.213.9397 (English)
866.294.9911 (French)
Electrolux Home Products
North America
6150 McLaughlin Road
Mississauga, Ontario, Canada
L5R4C2
164D3370P141
49-40146
Printed in Korea
36
GLMB186
PLMB186
12-00 JR