Loading ...
Loading ...
Loading ...
6
Setting Up and Connecting your Subwoofer
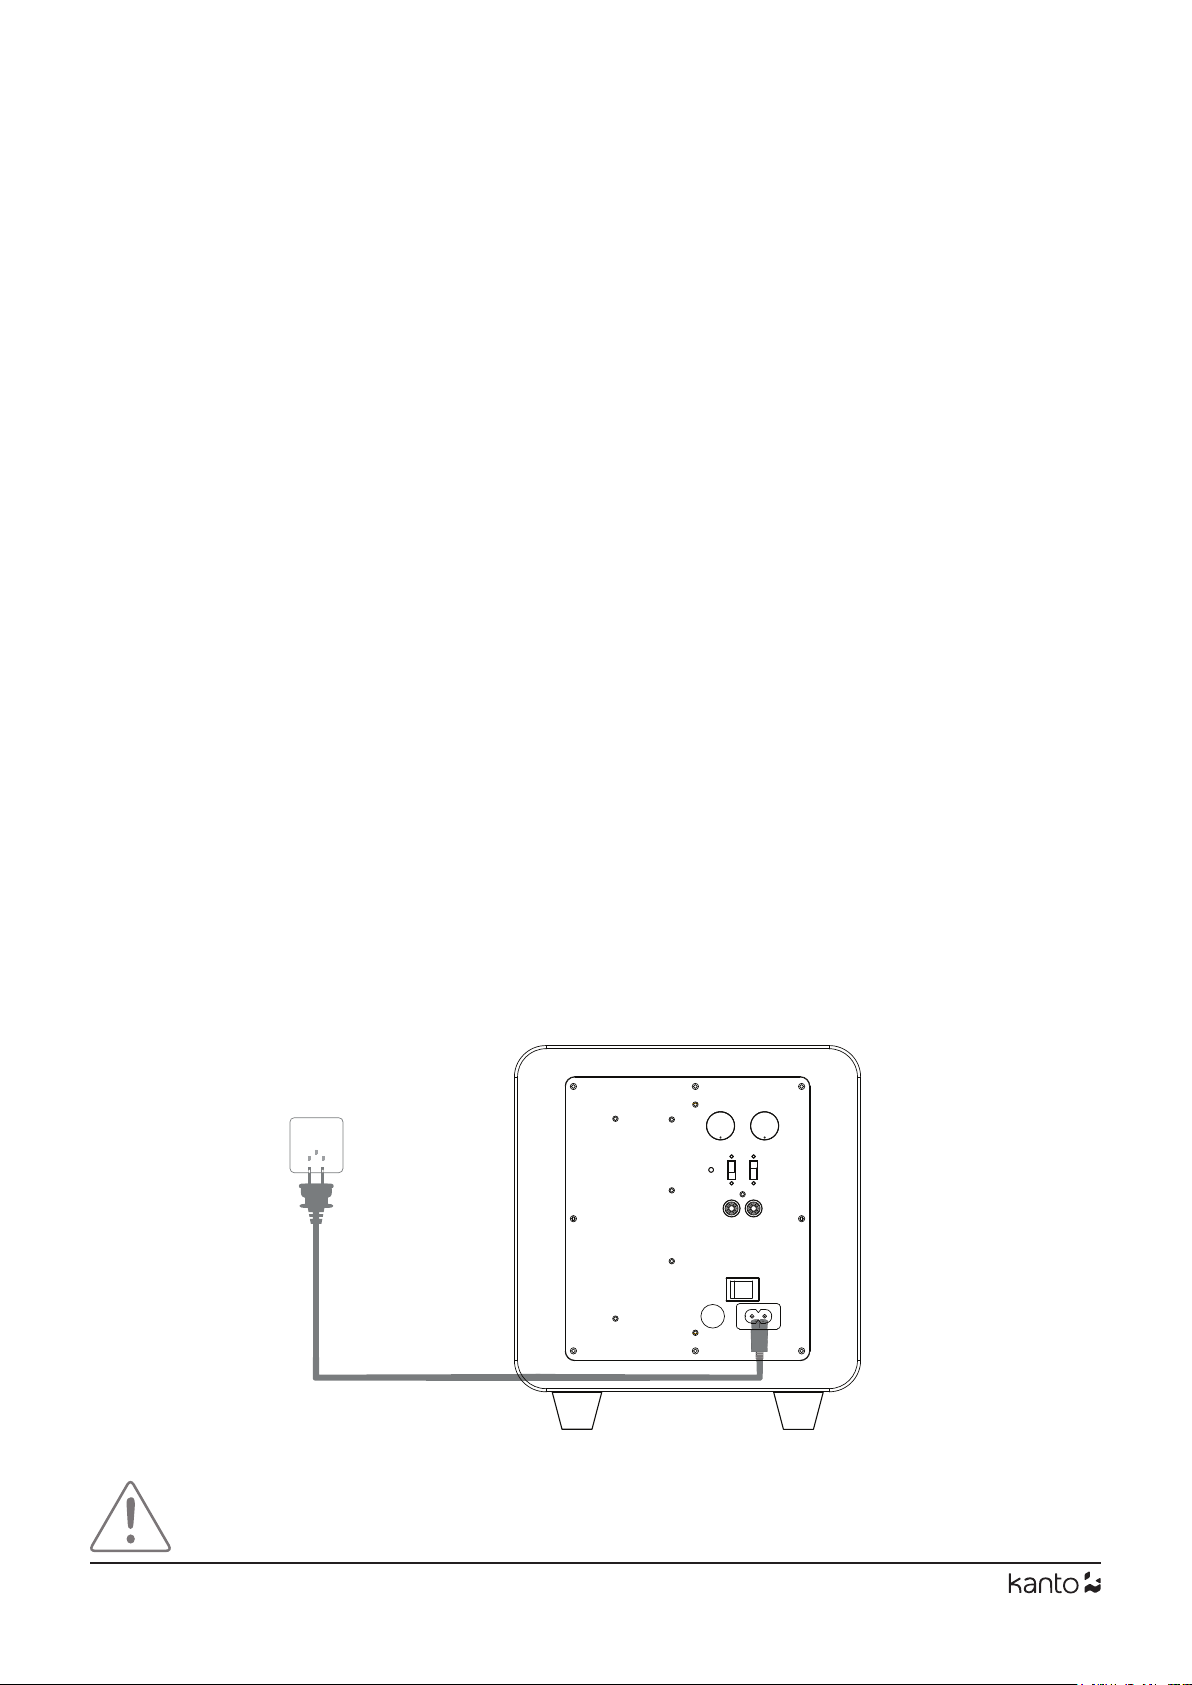
Ensure that the ON/OFF Switch is in the OFF position before connecting any component.
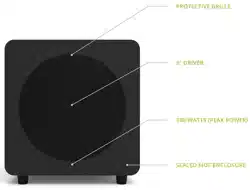
To some degree, positioning the subwoofer is less critical because it produces only non-
directional low-frequency sounds. However, best results are obtained if the subwoofer
is placed either between the left and right speakers or in the vicinity of either the left
channel or right channel speaker.
As with all speakers, moving the sub8 very close to room boundaries will enhance
the bass frequencies but will tend to muddy the sound. Room characteristics and
positioning have a profound eect on the performance of the subwoofer, so time and
eort devoted to achieving the optimum operating position will be rewarded.
In a typical full range application using one subwoofer like the sub8 thru a single wire
connection, you can connect to either the Left or Right Line Level Input. Connect your
stereo component such as powered speakers with subwoofer output (e.g. YU, YU2, YU4,
YU6), power or integrated ampliers with preamplier output , or multi-channel home
theater receivers with subwoofer output. If your components are equipped with both
L/R subwoofer outputs or L/R preamplier outputs, we recommend connecting the
component to the sub8 by using both Left and Right Line Level Input channels.
The Low-Pass Filter Control is used to set the upper limit of the frequencies that sub8
will reproduce, typically within the range of 40Hz-120Hz. Refer to your manufacturer’s
information for the cut-o frequency of your main speakers.
The Phase Switch is normally set to 0°. If the sub8 is positioned signicantly farther from
the main speakers or if the subwoofer is used in a stereo setup where the amplier
driving the main speakers inverts the phase signal, the 180° setting may be desirable.
Listen with the switch in both positions and select the setting that gives the fullest
sound. If in doubt, or if there is little dierence, leave the switch set to 0°.
Follow the instructions on the following page to connect your components to sub8. The
examples are not meant to be exhaustive - just examples.
ATTENTION
When connecting audio cables the ON/OFF Switch must be turned OFF. After connecting all cables, the unit can be
turned ON.
Loading ...
Loading ...
Loading ...