Loading ...
Loading ...
Loading ...
17
English
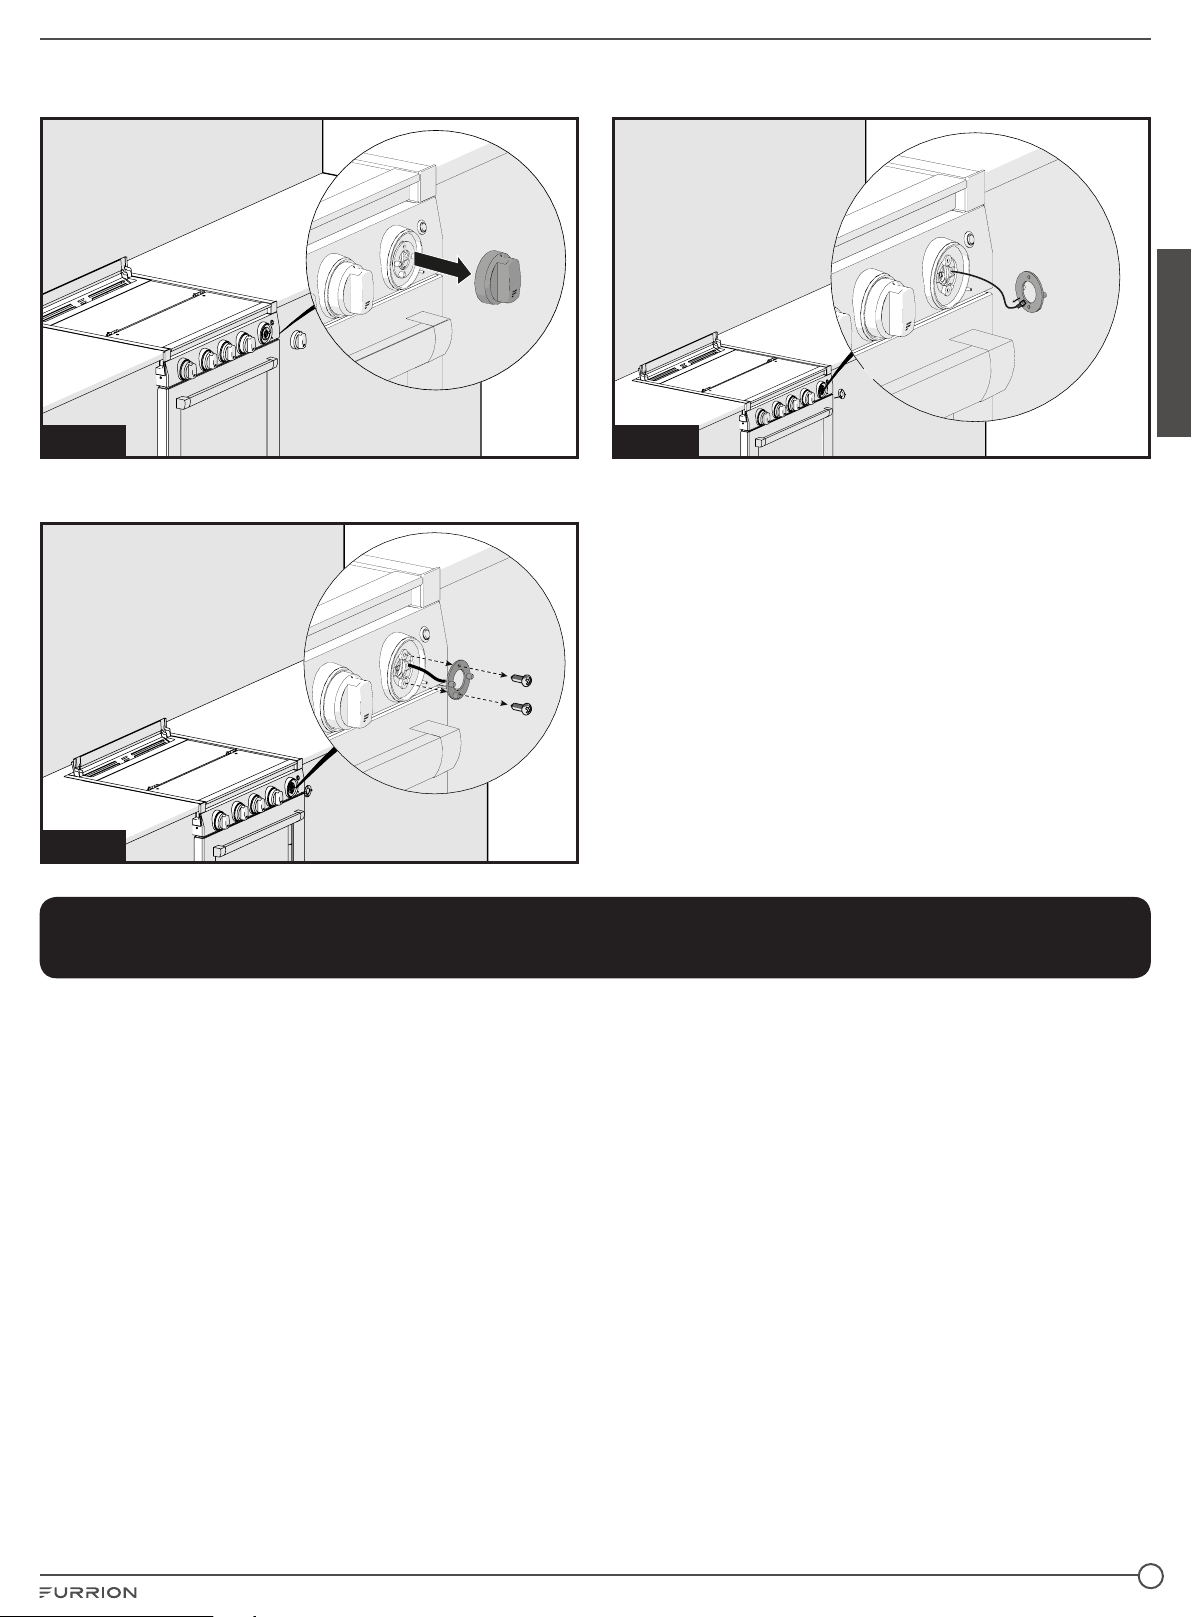
2. Grasp and pull on the control knob with the broken LED
light. (Fig. 28)
Fig. 28
3. Remove the two screws holding the LED light using a
Phillips screwdriver. (Fig. 29)
Fig. 29
4. Remove the LED assembly and disconnect the wire from
the base of the LED assembly. (Fig. 30)
Fig. 30
5. Plug the wire harness connector into the new LED
assembly.
6. Reattach the LED assembly to the console with the
2 screws removed in step 3. Ensure the wires are not
pinched during this process.
7. Reattach the control knob by aligning the stem of the
control into the opening in the control knob housing and
pushing it back into position.
Storage
Dry all surfaces and burner box, then spray surfaces with cooking oil substance to preserve the surface from rusting during
long term storage. Wipe off oil coating before reuse.
Loading ...
Loading ...
Loading ...