Loading ...
Loading ...
Loading ...
En-7
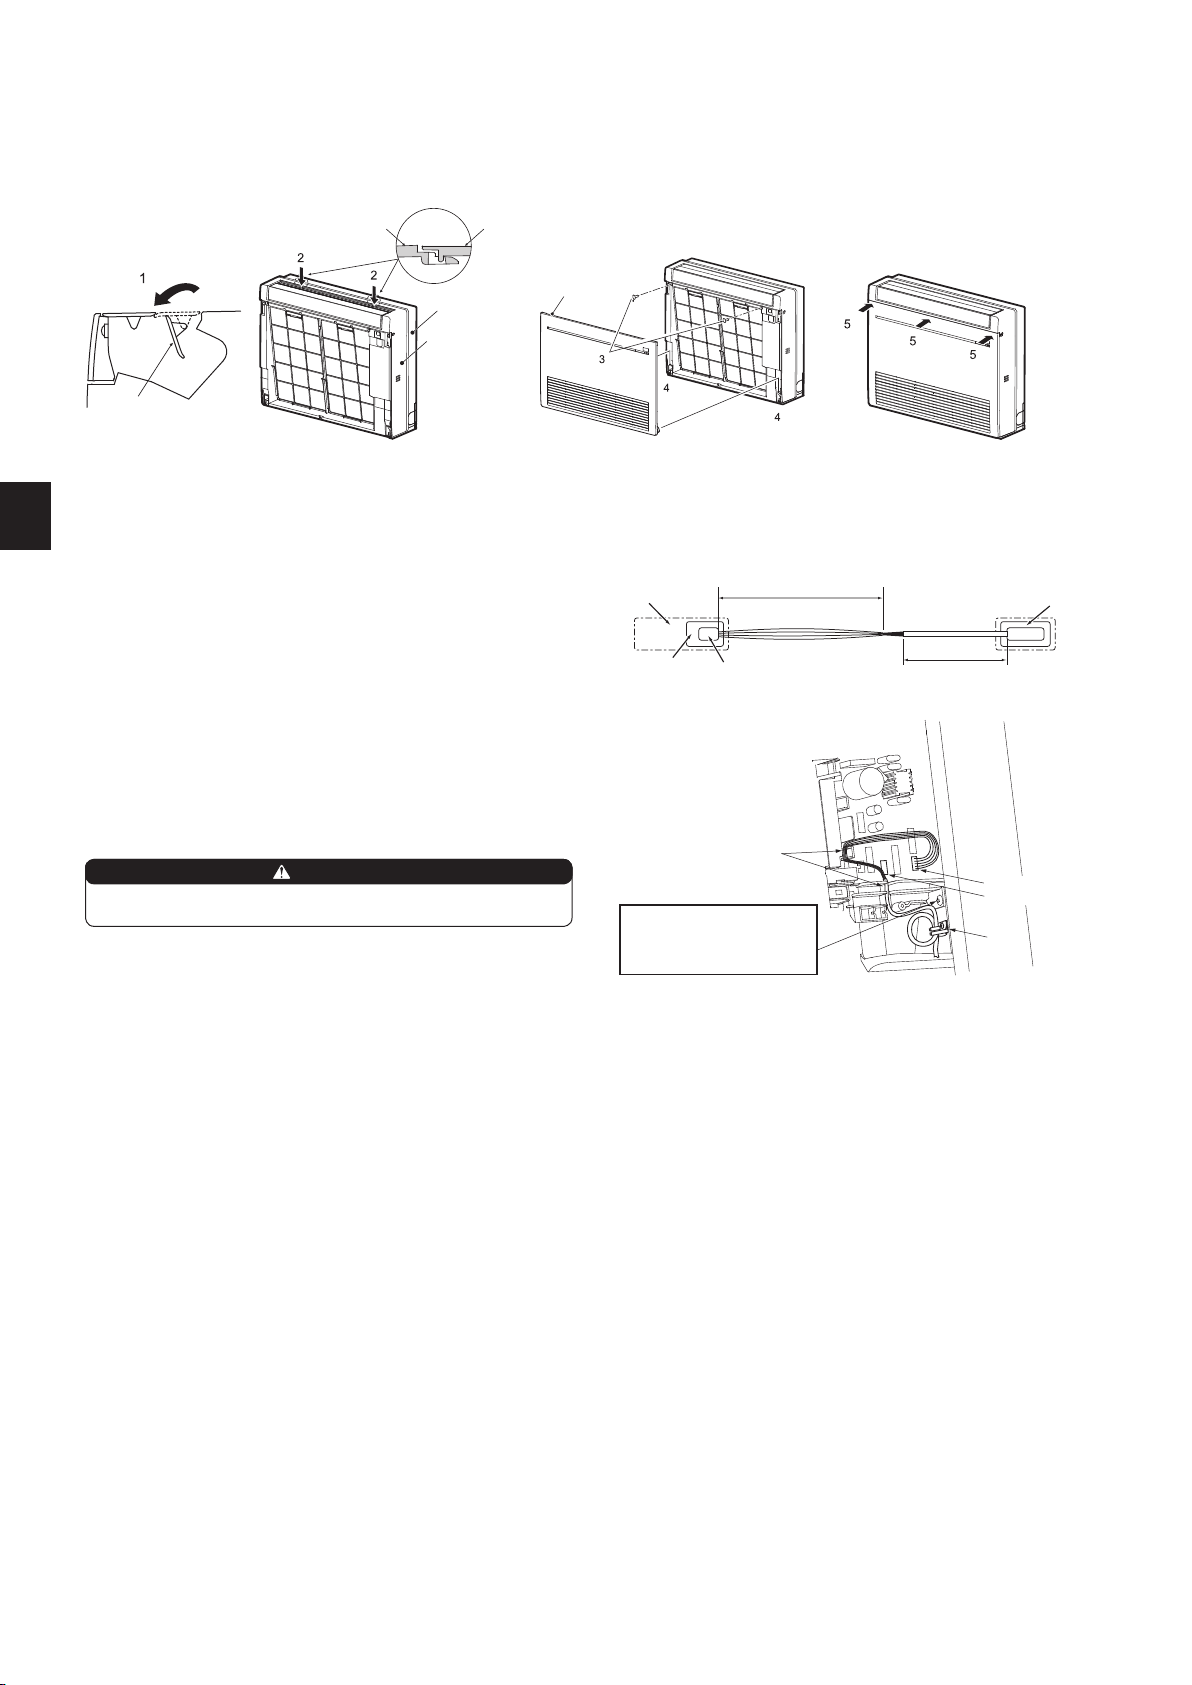
1) Remove the panel.
2) Open the cover of the indoor control P.C. board.
3)JointheconnectingcabletoCN105and/orCN24ontheindoorcontrolP.C.
board.
4)Routetheconnectingcablethroughthispointinthegure.
5) Attach the cable clamp provided with interface/connector cable to the thick
partoftheconnectingcablewithascrew4×16asshowninthegure.
6) Close the cover of the indoor control P.C. board. Be careful not to catch the
thin part of the connecting cable in the cover. Reinstall the panel.
5)
4)
3) CN105
WARNING
Fix the connecting cable at the prescribed position securely.
Incorrectinstallationmaycauseelectricshock,re,and/ormalfunction.
When mounting the interface
and the connector cable, use
thisscrewtoxtheconnect-
ing cable.
3) CN24
2-9.CONNECTING AN INTERFACE (option)/CONNECTOR CABLE (option) TO THE AIR CONDITIONER
Thin part of the connecting cable.
Place this part where customers
cannot touch it.
Room air
conditioner
Main body of an interface
Thick part of the connecting
cable
Indoor control
P.C. board
CN105 for interface
CN24 for connector cable
• Connect an interface/connector cable to the indoor control P.C. board of
an air conditioner with a connecting cable.
• Cutting or extending the connecting cable of the interface/connector ca-
ble results in defects in connecting. Do not bundle the connecting cable
together with power supply cord, indoor/outdoor connecting wire, and/or
earthwire.Keepasmuchdistanceaspossiblebetweentheconnecting
cable and those wires.
• The thin part of the connecting cable should be stored and placed
where customers cannot touch it.
2-8. FRONT PANEL INSTALLATION
1) Open the rear horizontal vane.
2) Attach the panel. Make sure that the catches are engaged.
3) Fix the panel with screws.
4) Insert the bottom part of the front panel.
5) Push 3 places on the upper part of the front panel to close it.
Front panel
Indoor unit
Indoor unit
Panel
Panel
Rear horizontal
vane
RG79Y918H02_en.indd 7 2019/05/10 8:54:09
Loading ...
Loading ...
Loading ...