Loading ...
Loading ...
Loading ...
10
8. Warning!
Never attempt to vacuum liquid, glass fragments or
ashes! Wet surfaces can expose the operator to
possible electrical shock.
9. Filter
The filters are located inside the lid. Grasp the snap
lockings and pull them outwards. Lift up the lid from
container. To reach them lift out the filter holder (a).
The standard filter(b) and fine filter (c) should be
inspected at regular intervals,e.g. when you change
dust bags, and replace if necessary. Instead of these
two filters you can fit a micro filter of HEPA-quality
(e), wich traps 99,99% of all particles larger than 0,3
microns.
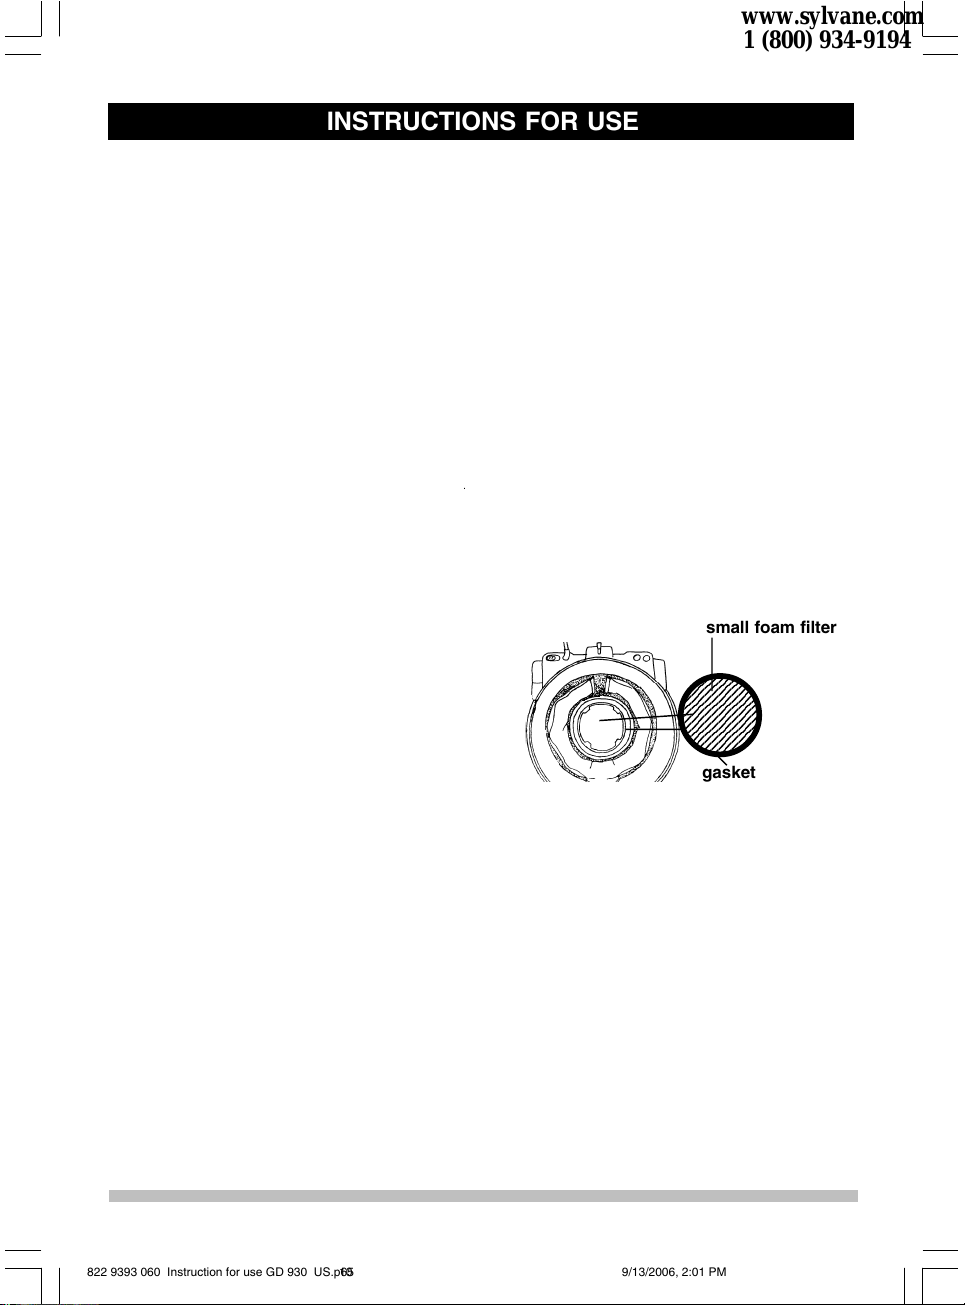
IMPORTANT! There is the possibility that the gasket
on the motor stand will adhere to the HEPA filter (e)
when the top cover is removed. If this should
happen, check the following: Clean any debris from
the gasket prior to seating it securely around the top
of the motor housing. Be sure that the wider/softer
part of the gasket seals up against the HEPA filter.
Also make sure the gasket is securely in place
completely around the upper part of the motor
housing.
The machine is also fitted with a Pre filter (d)
located above the motor. This filter should also be
inspected and replaced if necessary.
WARNING!
Remove the plug from the socket before performing
service or maintenance.
1. To open
a) Pull the retaining clips upward and outward.
b) Lift the cover from the container.
2. Dust bag
Fit the opening on the dust bag over the air inlet.
Press the membrane over the flanged edge on the
inlet. Secure with locking collar. Use only original
dust bags.
3. Hose connection
Push the hose coupling all the way in and turn
clockwise.
4. Wand assembly
a)Telescopic: Push down the catch and then adjust
the length. Max.950mm,min.630mm.
b)Standard: Fit the sections together and twist to
lock in place.
5. Tools
The accessories shown in the pictures may vary
from model to model.
a-b) Combination nozzle
Adjust the nozzle according to the requirements of
the floor you are cleaning. Work with the brush on
hard floors and without it on soft floors.
c) Universal nozzle
for both hard floors and carpets.
d) Crevice nozzle
Use to clean furniture, radiators and others hard-to-
reach places.
e) Small combi-nozzle:
The small combi-nozzle combines a dusting brush
for furniture, picture frames, mouldings etc. with a
fold-out nozzle for cleaning curtains, furniture and
other soft surfaces. The clip on the hose handle
holds the nozzle when it is not in use.
6. Suction control
The suction control in the hose handle lets you
regulate the air-flow to prevent the nozzles from
fastening to the surfaces you are vacuum cleaning.
7. Start/Stop
a)Foot-operated on/off switch.
b)On the S 2 version a separate switch is provided
to change the motor speed .
c)Plug-in point for powered carpet nozzle. Power is
supplied to the socket when the machine is switched
on.
123456789012
123456789012
123456789012
123456789012
123456789012
123456789012
123456789012
123456789012
123456789012
123456789012
123456789012
123456789012
123456789012
gasket
small foam filter
INSTRUCTIONS FOR USE
822 9393 060 Instruction for use GD 930 US.p65 9/13/2006, 2:01 PM10
www.sylvane.com
1 (800) 934-9194
Loading ...
Loading ...
Loading ...