Loading ...
Loading ...
Loading ...
15
USING YOUR OVEN
KNOW YOUR OVEN
■ Odors and smoke are normal when the oven is used the first
few times, or when it is heavily soiled.
■ IMPORTANT: The health of some birds is extremely sensitive
to the fumes given off. Exposure to the fumes may result in
death to certain birds. Always move birds to another closed
and well-ventilated room.
■ IMPORTANT: This oven automatically adjusts for 208V
operation without affecting cooking performance. Preheat
times may be longer.
Aluminum Foil
■ IMPORTANT: To avoid permanent damage to the oven
bottom finish, do not line the oven bottom with any type of
foil or liner.
■ On models with bottom oven vents, do not block or cover
the vents.
■ For best cooking results, do not cover rack with foil because
air must be able to move freely.
Positioning Rack and Bakeware
IMPORTANT: To avoid permanent damage to the porcelain
finish, do not place food or bakeware directly on the oven door
or bottom.
Racks
■ Position racks before turning on the
oven.
■ Do not position racks with bakeware
on them.
■ Make sure racks are level.
To move a rack, pull it out to the stop position, raise the front
edge, then lift out. Use the following illustration and charts as
a guide.
Bakeware
To cook food evenly, hot air
must be able to circulate. Allow 2"
(5.0 cm) of space around bakeware
and oven walls. For convection
cooking, allow 1" (2.5 cm) of space
around bakeware and oven walls.
1
2
3
4
5
2"
(5 cm)
2"
(5 cm)
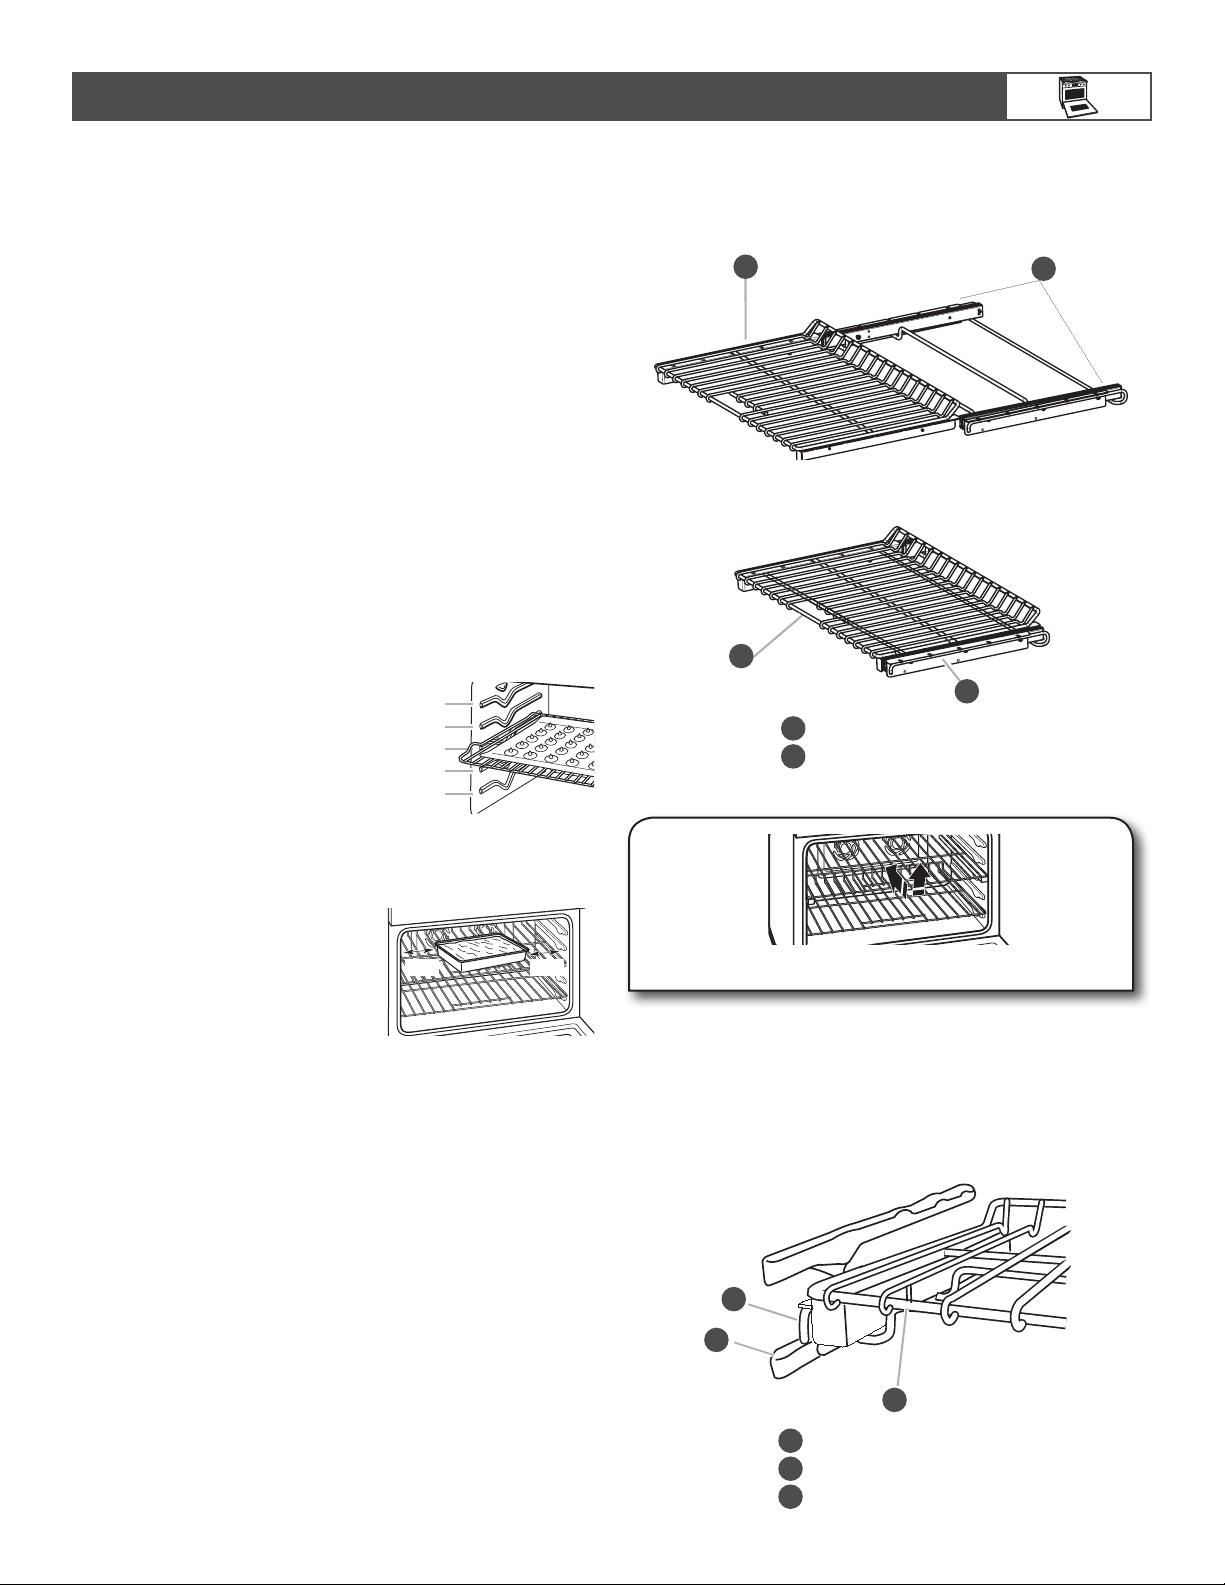
Roll-Out Extension Rack
The roll-out extension rack allows easy access to position and
remove food in the oven. It can be used in rack positions 1
through 4. The roll-out extension rack will not fit in position 5.
Open Position
Closed and Engaged Position
To Remove the Roll-Out Extension Rack:
Rack must be closed and engaged with sliding shelf. Using 2
hands, lift up on front edge of rack and sliding shelf together.
Slowly push both to back wall of oven.
The front edge of the sliding shelf should sit on the rack guide
located on the sides of the oven.
The front edge of the rack and the sliding shelf should be higher
than the back edge.
1.
Lift up rack/shelf front and slide in.
B
A
1
2
1
Roll-out extension rack
2
Sliding shelves
B
A
1
2
B
A
C
1
Sliding shelf
2
Rack guide
3
Roll-out extension rack
1
2
3
Loading ...
Loading ...
Loading ...