Loading ...
Loading ...
Loading ...
MaintenanceandServi_
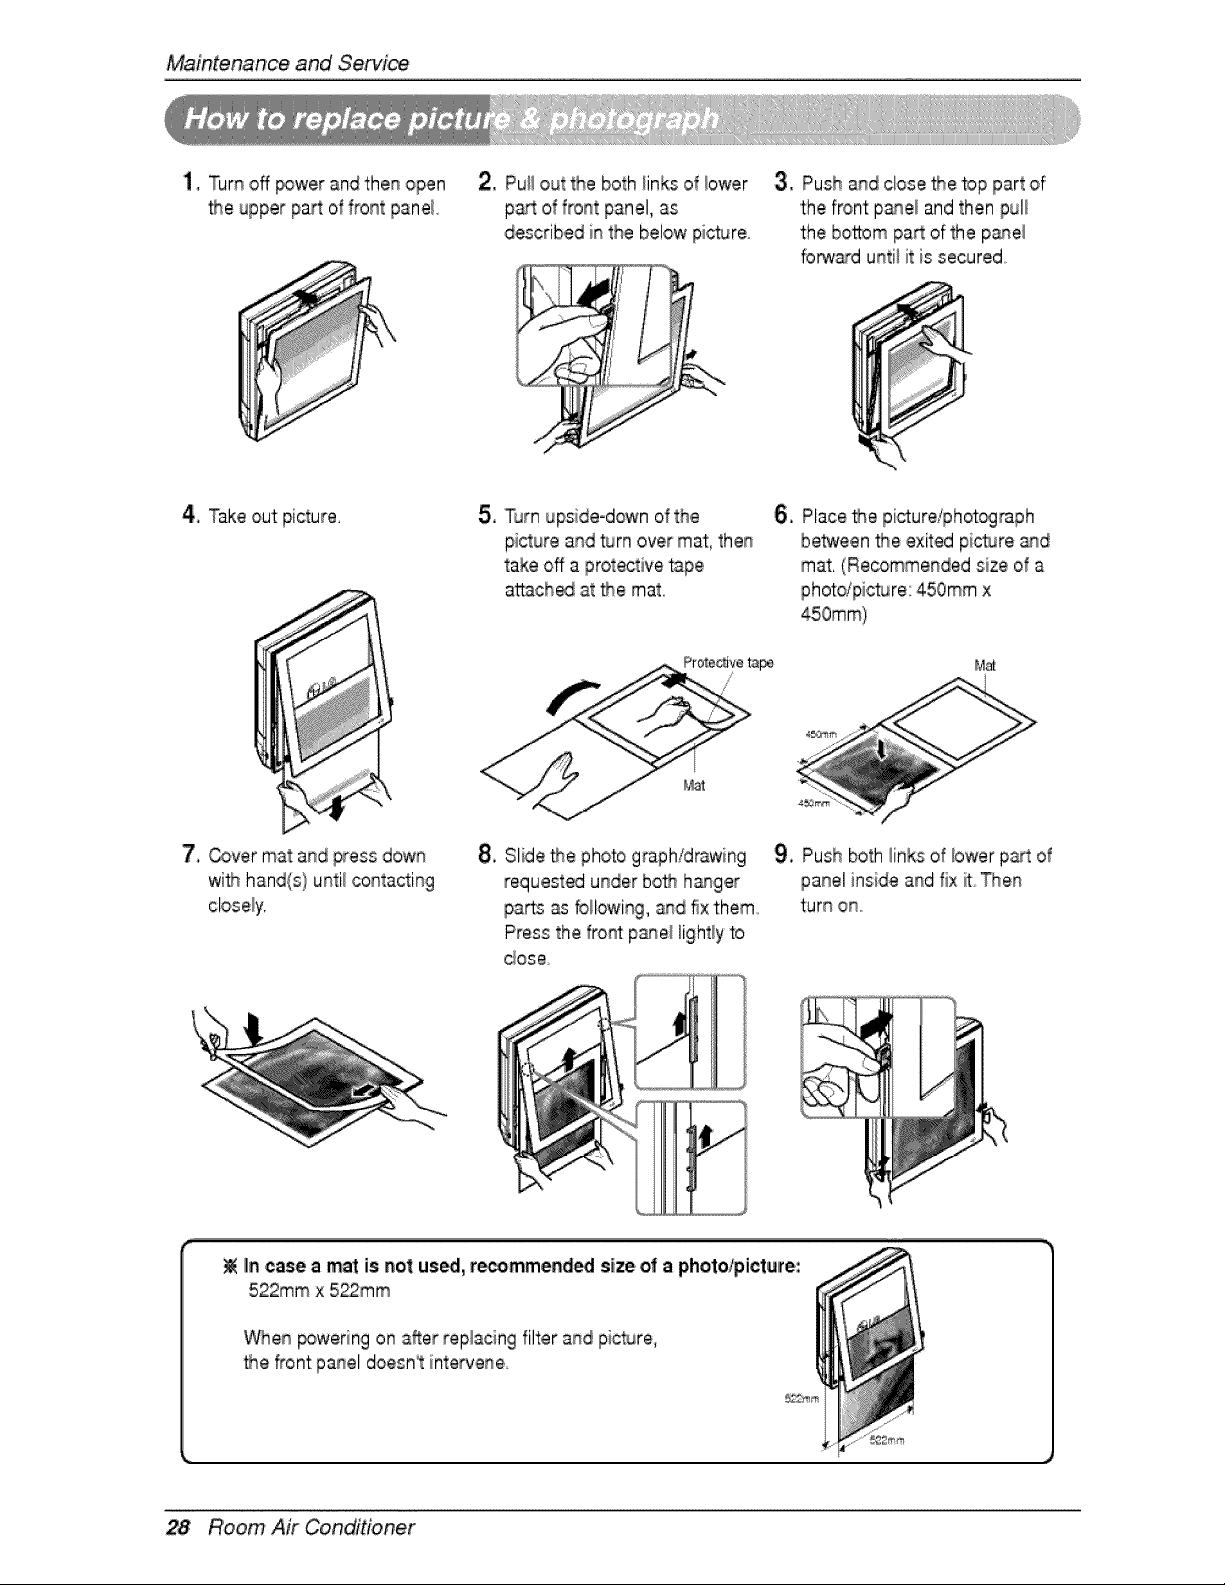
1, Turn off _wer and then open
the upper pa_ of front panel,
2, Pu!i out the both iinks of iower
part of front panel, as
described in the below pic_re
3, Push and close Me top part of
t:hefront pane! and then pul!
the bottom pa_ of the p_el
fo_ard until it is secured°
4, Take out picture, 5, T_rn upside-down of the
picture and turn over mat, then
take off a protective tape,
attach_ at the mat,
6, Place Me picture/phot_raph
between Me exited picture and
mat, (Recommended size of a
photdpicture: 450ram x
M_
7, Cover mat and press down
wifn hand(s} until contacting
8, Slide Me photo graph/d_wing
requested under both hasger
parts as foilowi%, and fix them
Press the front panel lightly to
dose
9, Push both links of lower part of
panel inside and fix ff Then
turn ono
IIn,case a mat is not us_, r_mmend_ size o! a photo/picture:
522mm x 522mm
When _wering on after replacing filter and pic_re,
• ,e,_ont panel doesn_ intervene
28 Room Air Conditioner
Loading ...
Loading ...
Loading ...