Loading ...
Loading ...
Loading ...
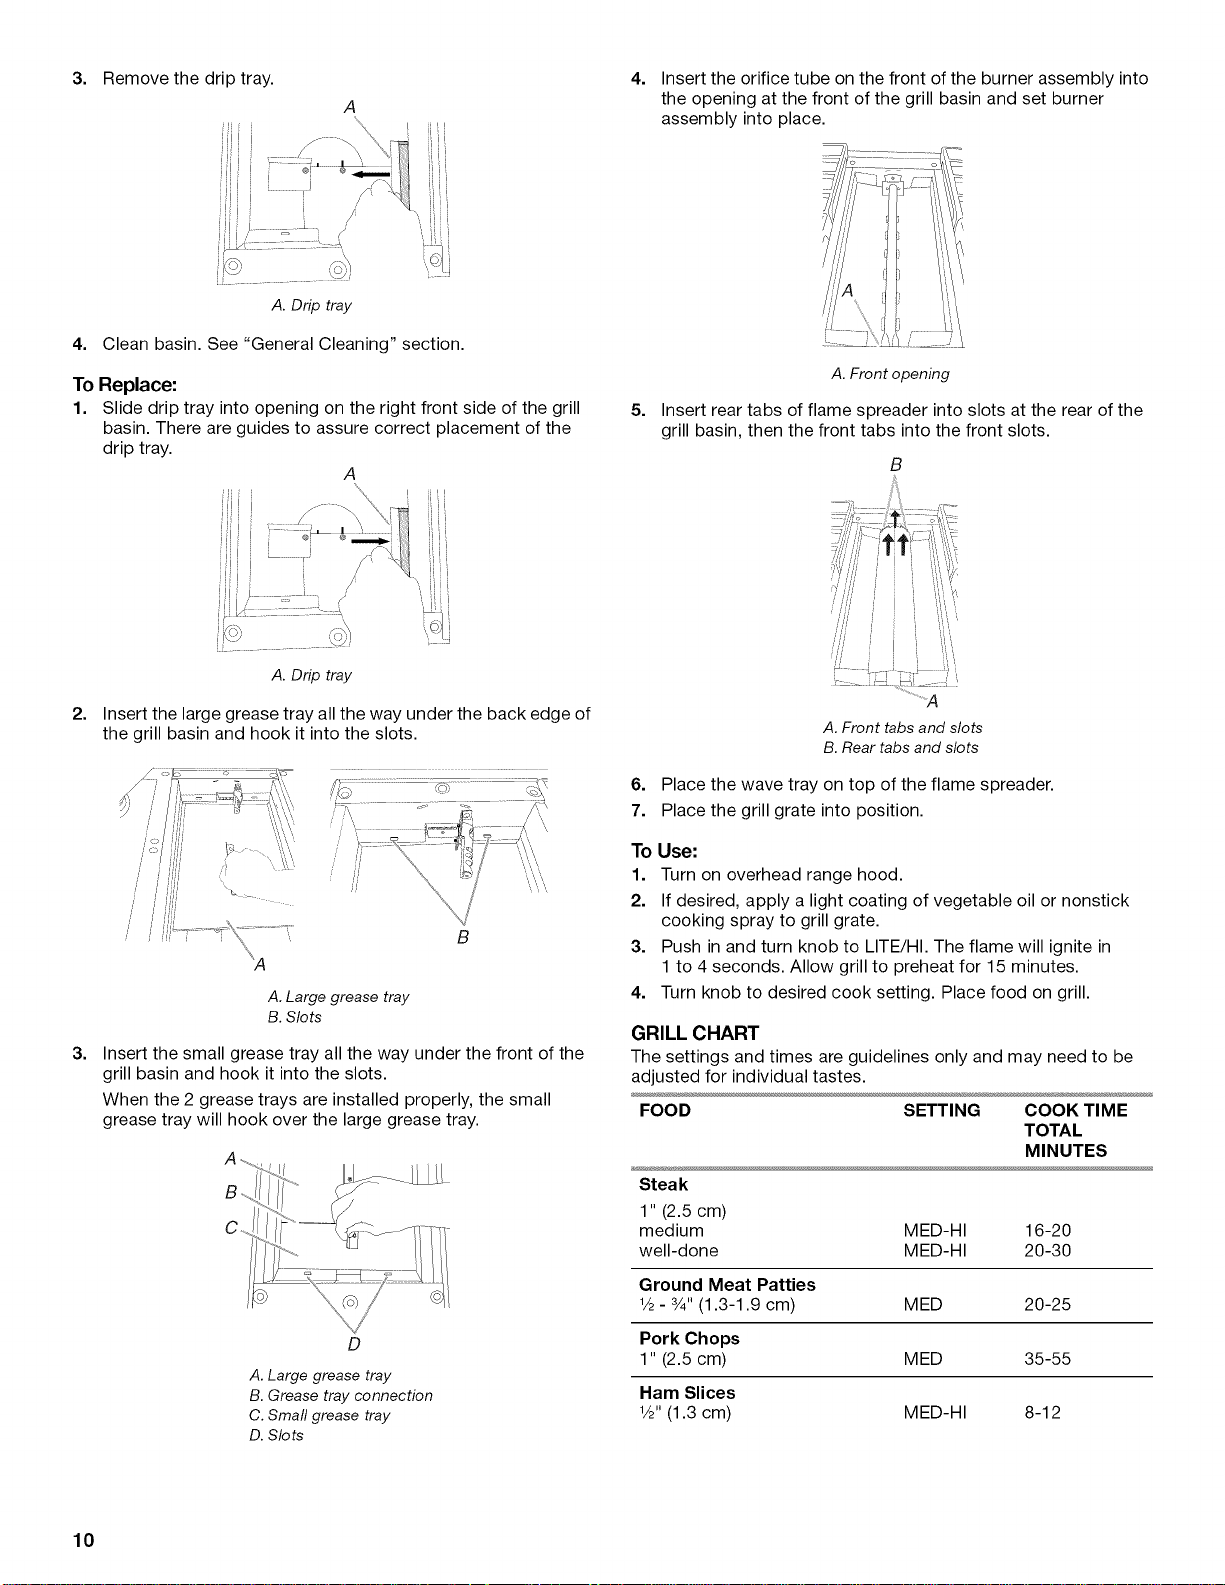
3. Remove the drip tray.
i
A
4. Insert the orifice tube on the front of the burner assembly into
the opening at the front of the grill basin and set burner
assembly into place.
A. Drip tray
4. Clean basin. See "General Cleaning" section.
To Replace:
1. Slide drip tray into opening on the right front side of the grill
basin. There are guides to assure correct alacement of the
drip tray.
A
5,
A. Front opening
Insert rear tabs of flame spreader into slots at the rear of the
grill basin, then the front tabs into the front slots.
B
2.
3.
A. Drip tray
Insert the large grease tray all the way under the back edge of
the grill basin and hook it into the slots.
\
/ _iii
/
A. Large grease tray
B. Slots
Insert the small grease tray all the way under the front of the
grill basin and hook it into the slots.
When the 2 grease trays are installed properly, the small
grease tray will hook over the large grease tray.
D
A. Large grease tray
B. Grease tray connection
C. Small grease tray
D. Slots
A. Front tabs and slots
B. Rear tabs and slots
6. Place the wave tray on top of the flame spreader.
7. Place the grill grate into position.
To Use:
1. Turn on overhead range hood,
2. If desired, apply a light coating of vegetable oil or nonstick
cooking spray to grill grate.
3. Push in and turn knob to LITE/HI. The flame will ignite in
1 to 4 seconds. Allow grill to preheat for 15 minutes.
4. Turn knob to desired cook setting. Place food on grill.
GRILL CHART
The settings and times are guidelines only and may need to be
adjusted for individual tastes.
FOOD SETTING COOK TIME
TOTAL
MINUTES
Steak
1" (2.5 cm)
medium MED-HI 16-20
well-done MED-HI 20-30
Ground Meat Patties
V2- 3/4"(1.3-1.9 cm) MED 20-25
Pork Chops
1" (2.5 cm) MED 35-55
Ham Slices
V2"(1.3 cm) MED-HI 8-12
10
Loading ...
Loading ...
Loading ...