Loading ...
Loading ...
Loading ...
- 15 -
3. INSTALLATION OF THE HOOD ON THE LOWER PART OF THE WALL UNIT ONLY FOR
30".
This model includes side installation to the wall unit by using 2 brackets B (figure 6 besides
steps 3-4, indicated in figure 4).
1- Position template B on the wall unit, bearing in mind the measurements indicated in
fig. 1-2 and the minimum distance from the hob.
- Mark the references to fix brackets A to the wall unit, as indicated in figure 6.
2 - Position the second template E on the side of the wall unit and make sure that the line
matches up with that traced in figure 6 - step 1.
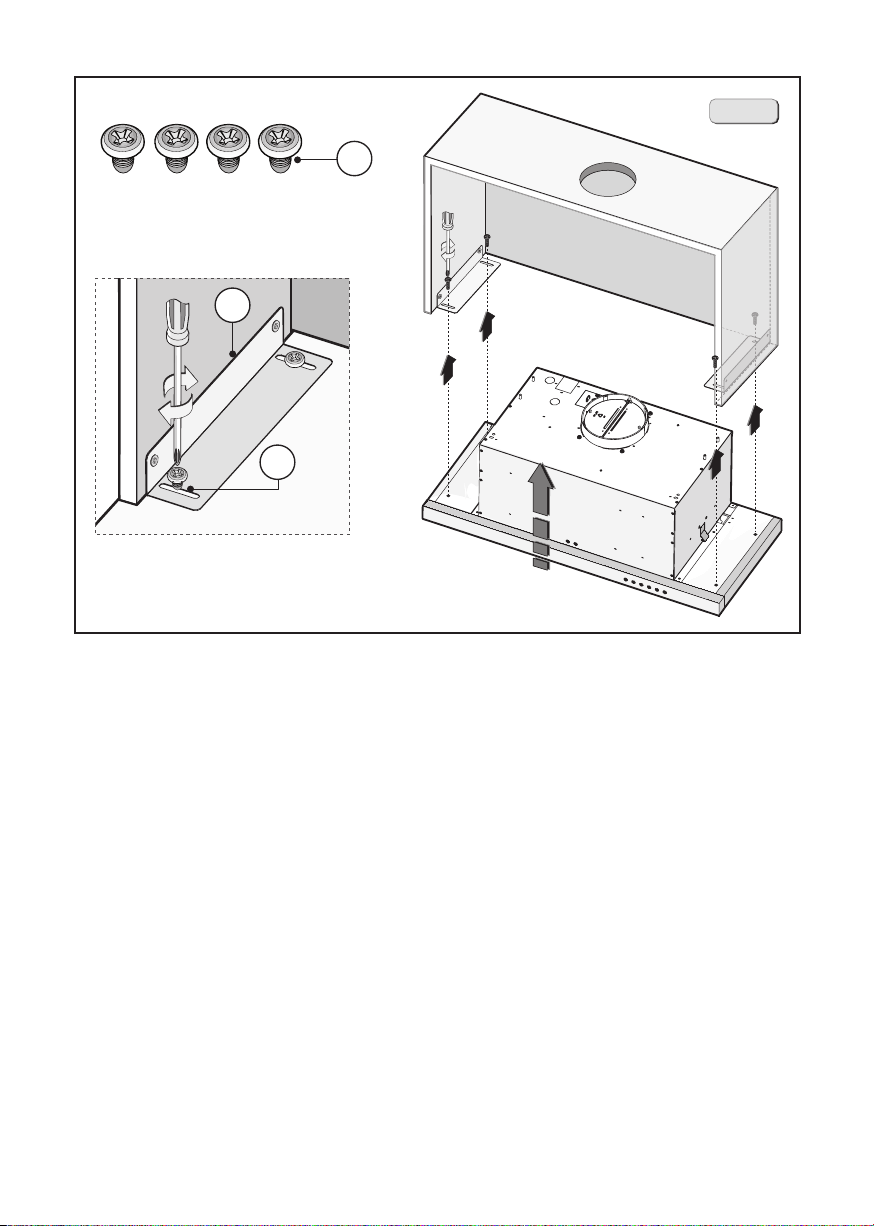
3 - Mark and drill the 4 fixing holes (figure 6 - step 2).
- Fasten the 2 brackets G to the wall unit using the 4 screws D (figure 6 - step 3).
- Fasten the hood to bracket G using the 4 screws E (figure 6 - step 4-5).
4- Remove pin Y from bracket A. Then place the insert X on the slot of the bracket A, as
indicated in figure 4 - step 3.
- Match the C screws with the L wascher and x the A bracket to the cabinet as indicated
in gure 4 - step 3.1. Pay attention not to completely tighten screws C before the bracket
firmly reaches the wall unit (figure 4 - step 3.2). After any adjusting, tighten the bracket
to the body (figure 4 - step 3.3).
- Fasten screw D to the wall unit as indicated in figure 4 - step 4.
Loading ...
Loading ...
Loading ...