Loading ...
Loading ...
Loading ...
Selecting Surface Cooking Utensils
For best result and energy conservation, choose cooking utensils that have these characteristics:
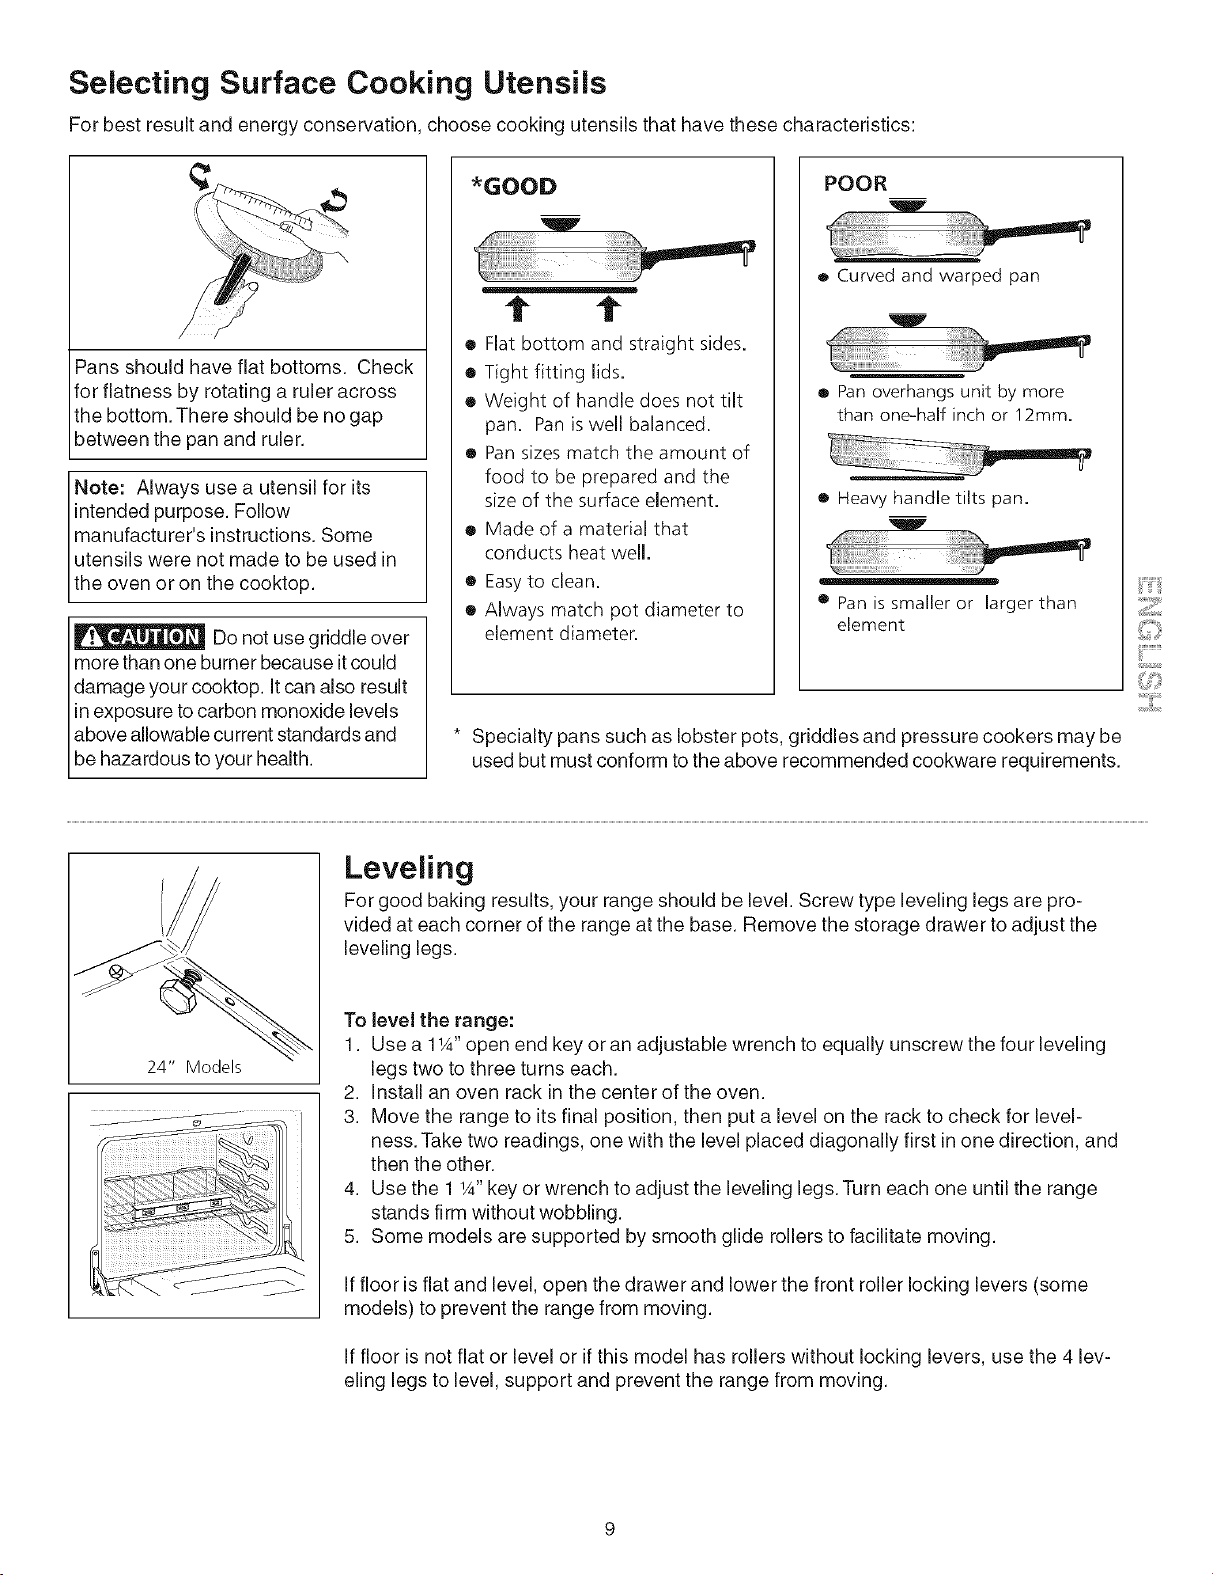
Pans should have flat bottoms. Check
for flatness by rotating a ruler across
the bottom. There should be no gap
between the pan and ruler.
Note: Always use a utensil for its
intended purpose. Follow
manufacturer's instructions. Some
utensils were not made to be used in
the oven or on the cooktop.
Do not use griddle over
more than one burner because itcould
damage your cooktop, it can also result
in exposure to carbon monoxide levels
above allowable current standards and
be hazardous to your health.
*GOOD
w
t t
• Flat bottom and straight sides.
• Tight fitting lids.
• Weight of handle does not tilt
pan. Pan is well balanced.
• Pansizes match the amount of
food to be prepared and the
size of the surface element.
• Made of a material that
conducts heat well.
e Easyto clean.
o Always match pot diameter to
element diameter.
POOR
e Curved and warped pan
_t_ iiiiiiiiiiiii_iiiiiiiiii_ _
o Pan overhangs unit by more
than one-half inch or 12mm.
• Heavyhandle tilts pan.
e Panis smalleror larger than
element
* Specialty pans such as lobster pots, griddles and pressure cookers may be
used but must conform to the above recommended cookware requirements.
iii.........
.....iH.....
24" Models
Leveling
For good baking results, your range should be level. Screw type leveling legs are pro-
vided at each corner of the range at the base. Remove the storage drawer to adjust the
leveling legs.
To level the range:
1. Use a 11A"open end key or an adjustable wrench to equally unscrew the four leveling
legs two to three turns each.
2. Install an oven rack in the center of the oven.
3. Move the range to itsfinal position, then put a level on the rack to check for level-
ness. Take two readings, one with the level placed diagonally first in one direction, and
then the other.
4. Use the 1 W' key or wrench to adjust the leveling legs. Turn each one until the range
stands firm without wobbling.
5. Some models are supported by smooth glide rollers to facilitate moving.
If floor is flat and level, open the drawer and lower the front roller locking levers (some
models) to prevent the range from moving.
If floor is not flat or level or ifthis model has rollers without locking levers, use the 4 lev-
eling legs to level, support and prevent the range from moving.
Loading ...
Loading ...
Loading ...