Loading ...
Loading ...
Loading ...
11
Add Rinse Aid
SLIDE
IMPORTANT: Your dishwasher is designed to use rinse aid. The
use of a rinse aid greatly improves drying by allowing water to
GUDLQIURPWKHGLVKHVDIWHUWKHoQDOULQVH5LQVHDLGDOVRNHHSV
water from forming droplets that can dry as spots or streaks.
Filling the dispenser
7KHGLVSHQVHUKROGVR]P/RIULQVHDLG8QGHUPRVW
conditions, this will last 1 to 3 months.
Full
Ad
d
NOTE: ,QGLFDWRUUHDGVFRUUHFWoOOOHYHOZKHQGRRULV
completely opened.
1. To add rinse aid, open the rinse dispenser lid by gently
pushing in the center of the lid with your thumb and
pulling up on the edge.
Pre
Wash
OPEN
SLIDE
2. Pour rinse aid into the opening until the dispenser is full.
'RQRWRYHUoOO
3. Clean up any spilled rinse aid. Spilled rinse aid can create
excessive suds.
4. Then, close the dispenser by pushing down gently on the lid.
Rinse Aid Setting
Your rinse aid dispenser is adjustable.
For most water conditions, the factory
setting will give good results. If you have
hard water and notice calcium buildup
on your dishware, you may want to try a
higher setting. If you notice foam in your
dishwasher, use a lower setting.
To adjust the setting:
Turn the arrow adjuster to a higher number
to increase the amount of rinse aid.
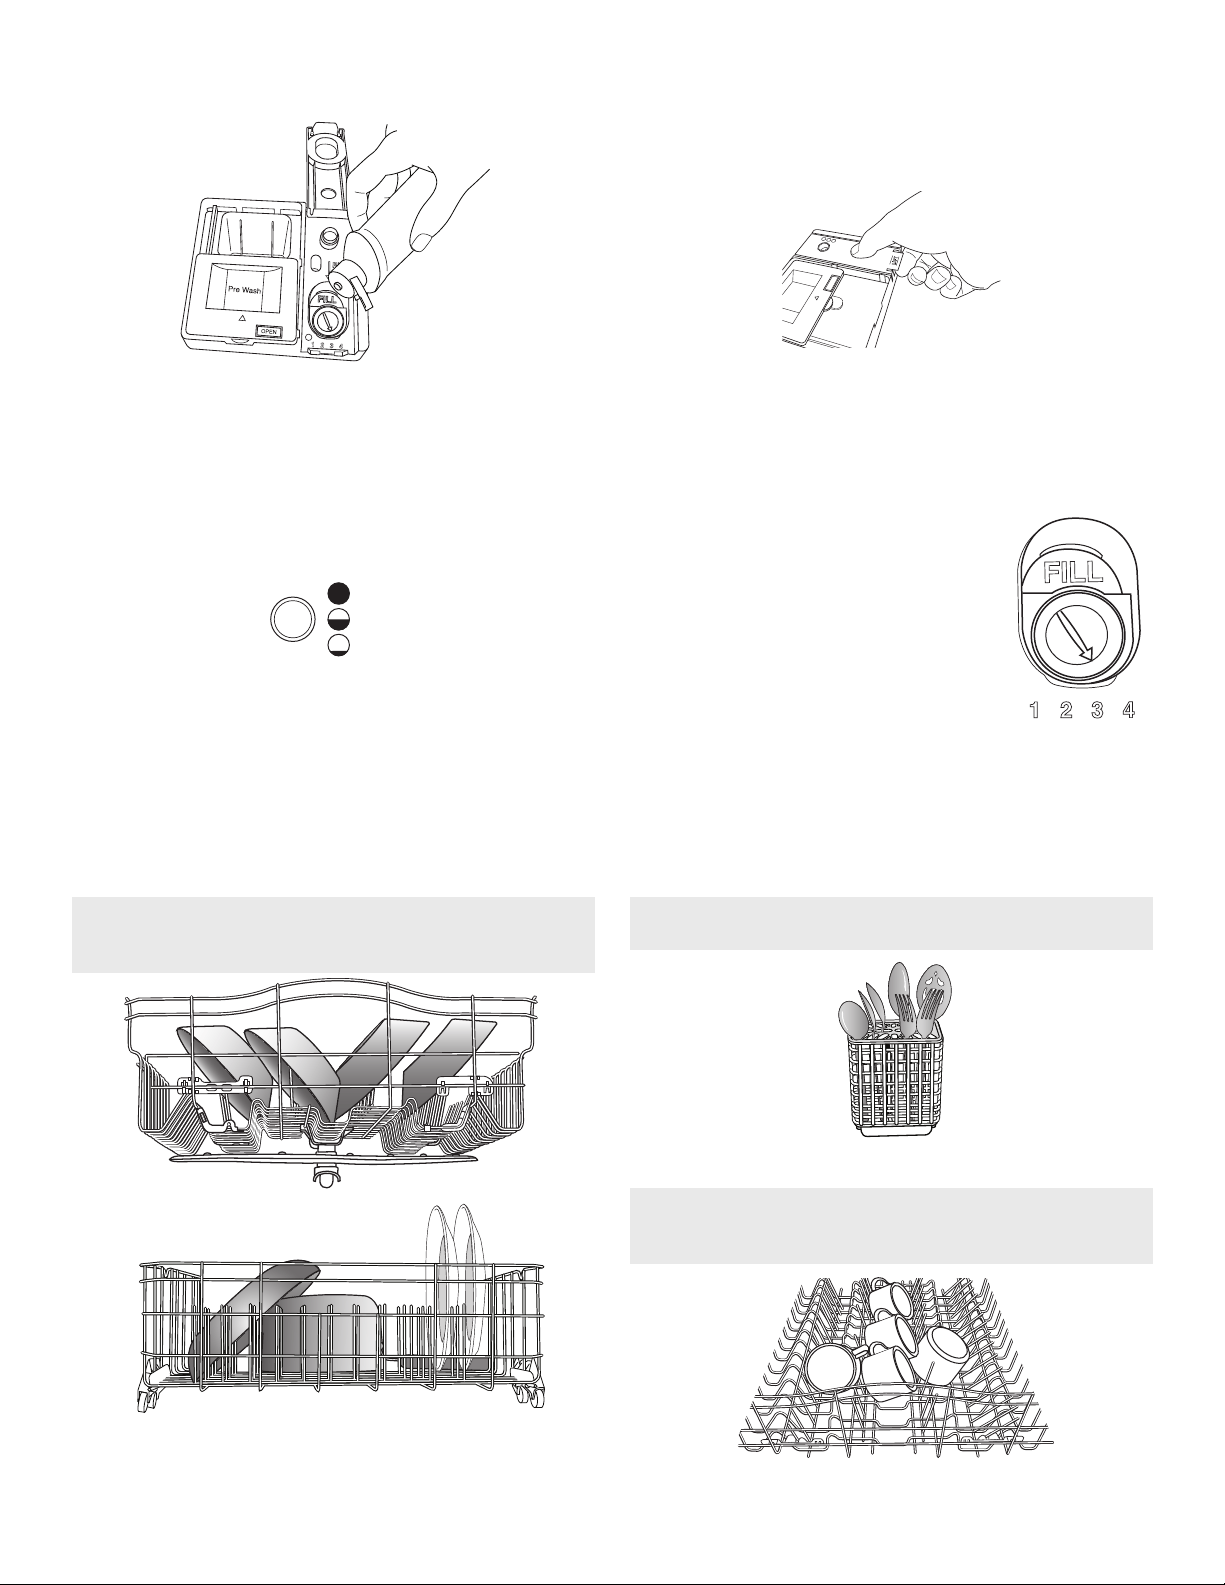
LOADING
Loading for Best Cleaning and Drying Performance
1. Angle dirtiest dish surfaces downward and allow
VSDFHIRUZDWHUWRpRZXSWKURXJKHDFKUDFNDQG
between dishware.
Separating allows water flow.
2. For best silverware cleaning, use the slots in the
covers to keep items separated.
Separated
3. Angle concave surfaces, such as the bottom of
FRçHHFXSVWRDOORZZDWHUWRGUDLQDQGLPSURYH
drying performance.
Angled surfaces
Loading ...
Loading ...
Loading ...