Instructions for use Washing Machine
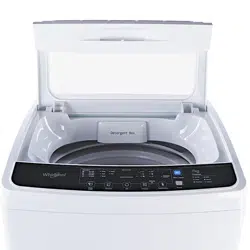
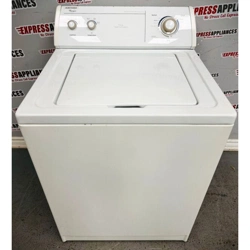
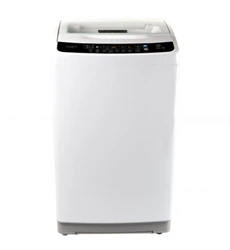
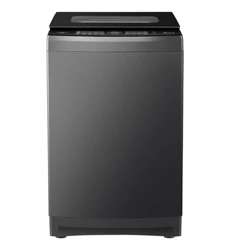
Product Overview

Accessories included:
Hot inlet hose, cold inlet hose, drain hose with elbow, bottom cover and screw.
Specifications and technical parameters
| Dimensions |
540 (W) x 562 (D) x 940 (H) mm |
| Max. capacity |
7 kg |
| Weight |
36 kg |
| Rated voltage |
230-240V ~ 50Hz |
| Rated power |
400W |
| Required water pressure |
0.03 - 0.08 MPa |
| Waterproof grade |
IPX4 |
Getting Started: Installation
Unpacking
This product has been packaged to protect it against transportation damage. Keep the original packaging in a safe place. It will help prevent any damage if the product needs to be transported in the future. In the event that the packaging is to be disposed of, please recycle all packaging materials where possible.
Plastic wrapping can be a suffocation hazard for babies and young children, so ensure all packaging materials are out of their reach and disposed of safely.
Unwind the power cord to its full length and inspect it for damage. Do not use the appliance if the appliance or its cord have been damaged or are not working properly. In case of damage, contact our after sales support line for advice on examination, repair or return of the damaged product.
Read this manual to familiarise yourself with all the parts and operating principles of the washing machine. Pay particular attention to the safety instructions on the previous pages.
Installing the bottom cover
Make sure the power cord is unplugged from the mains supply. -
Place some padding (such as a soft mat, blanket or Screw thick towel) on the floor and gently lay the washing machine on the padding, back side down. Take care not to dent the housing.
Insert the bottom cover into the hooks of the leg, pushing it straight until it reaches into the back hooks.
Fasten the bottom cover with the supplied screw.
Carefully set the washer upright.

Levelling the washer
Install the washer on a stable and level surface, in a dry location, out of sunlight. If levelling is necessary, adjust the adjustable leg (at the front right side of the machine), as illustrated, right.
The maximum permissible inclination of the supporting surface is 2 degrees.

CAUTION! Installing the washer on a carpeted floor may cause vibration issues. If you must install it on carpet, make sure not to block the ventilation openings on the bottom of the washer.
Connecting the water inlet hoses
Install the water inlet hoses to your hot and cold water taps, as described below. Check and ensure that the sealing washers are firmly in place.
Attach the straight end of the hose to your water taps. Make sure to attach the hot water supply hose (with red markings) to the hot water tap and the cold water supply hose (with blue markings) to the cold water tap.
Tighten the coupling huts securely by hand, as illustrated below (the sealing washer is a part of and located inside the tap end).

Attach the curved end of the hose to the corresponding inlet valve of the washer. Tighten the coupling nuts securely by hand, as illustrated below.
Tighten the nut by turning it clockwise while holding the hose. (To detach the water supply hose, turn the nut anticlockwise after turning the tap off.)

Turn on the taps and check for leaks. Tighten the coupling nuts firmly if there is any leakage. If your water pressure is strong, close the water tap completely, then open it slightly.
IMPORTANT: Both the hot water and cold water hoses must be connected to your taps. Make sure your hot water from the tap is no hotter than 60°C.
CAUTION! When tightening the clamping nut, take care not to damage the water inlet valve joint. Apply force evenly and do not twist the water inlet valve.

CAUTION! Use only the new (supplied) hoses with your new appliance. Do not use a hose from an existing machine, or one that has been used previously.
CAUTION! In the event that the hoses are too short for your set-up, please seek advice from your local washing machine store to purchase a longer hose.
Installing the drain hose
The drain hose and drain pump filter are located at the back of the machine, as illustrated below, left.
Pinching the two bands of the clamp on the drain hose, connect it to the drain hose connection at the back of the washer, as illustrated below, centre.
Insert the hose clips for the water drainage hose (marked with red arrows in the illustration on the right) into the mounting holes at the back of the washer. Turn the clips so you can lead the hose through the clips up the back of the machine.


When the washer is in use, put the drain hose into a drain spout (or into a sink/tub), as illustrated below.

CAUTION! While the washer is in use, ensure the height of the drain hose is at least 70cm, otherwise the washer will not work properly, or water may flow out in the course of washing. Also ensure the drain hose is not higher than 1 m above ground, otherwise the washer will not drain water well.
Never lay down the drain hose, as water will be discharged. Be sure the drain hose is properly routed so it will not kink or lift off the sink.
WARNING - this appliance must be earthed.
In the event of a malfunction or breakdown, earthing will reduce the risk of an electric shock by providing a path of least resistance for the electric current. This appliance is equipped with a cord having an equipment-earthing conductor and an earthing plug. The plug must be plugged into an appropriate outlet that is installed and earthed in accordance with all local standards and requirements. Do not modify the plug under any circumstances. If the plug does not fit your outlet, consult a licensed electrician and have the outlet changed.
Features
The Control Panel

1. Detergent indicators
These scoop indicators show how much powder detergent to use.
See Detergent and load recommendations for details.
2. Digital display
The digital display shows the currently selected option. For example:
During washing, it shows the time remaining, e.g.:
Remaining time is 20 minutes 
When setting soak and wash processes, this indicator shows the time you set, e.g.:
Washing time is 10 minutes 
When setting the preset timer, it shows when the washing will be finished, e.g.:
Finish washing 2 hours later 
When an abnormal condition occurs, it shows the warning code, e.g.:
Water does not flow 
3. Start / Pause button
Press this button to start operation.
During operation, press this button to stop the washer temporarily; press it again to restart it. You can also use this button to cancel the end buzzer: press and hold it for 4 seconds until a beep has acknowledged the command.
NOTE: This is not a cancel button.
4. Water Level button
Use this button to select the water level appropriate for your load size. Different water levels for washing and rinsing are optional.
5. Process and Set button
First, use the Process button to select the desired wash process: preset (delay timer), soak, wash time, rinse time, or spin time. The appropriate indicator light above will flash.
Second, use the Set button to select the desired option.
For example, to select a rinse time, press Process until the Rinse indicator flashes, then press Set to select the rinse time.
NOTE: For the NORMAL and HEAVY DUTY programs, the machine will automatically select the appropriate water power and level, wash and spin times and rinse type.
6. Program button
Press this button to select the desired wash program. The appropriate indicator light above will flash.
To set the child lock, press and hold this button for 4 seconds.
7. Temp, button
Press this button if you want to choose the water temperature.
8. Power On/Off button
Press this button to switch the power on; press it again to switch it off.
To change the program, press this button once and then once more.
Power will be switched off automatically:
(a) 5 seconds after the end of a program;
(b) After 10 minutes of inactivity, after the Power On/Off button has been pressed.
Instructions
Before you start washing

- Make sure the washer is stable and level. If necessary, adjust the adjustable leg (front right) to stabilise the washer
- Make sure the water inlet hoses are properly installed
- Plug the machine into a nearby power outlet.
- Open the water taps.
- Make sure the drain hose is properly installed. Hang the upper end of the hose over the laundry sink or into a drain spout
- Before using the washing machine for the first time. run a complete cycle without laundry items and detergent.
Select the NORMAL program and run the machine until the end of the program.
 Install the drain hose at a height of 70-100cm to prevent water drain-age and overflowing problems.
Normal usage

- Before washing. remove any coins. keys and other hard items from pockets. Close any zippers to prevent damaging your clothes and the wash tub. Brush dirt and sand off clothes and turn pockets inside out.
- Sort your washing into appropriate loads: whites. coloureds. cottons. delicates. heavily soiled. etc.
Place delicate items into a wash bag for protection. a
- Put your washing in the machine. loading items uniformly in the tub.
- Add washing detergent.
- Press the Power On/Off button.
- Refer to the program selection guide and select a suitable wash program.
- Close the lid and press the Start/Pause button. (If the washer lid is not closed properly. the washer will sound an alarm and stop working before spinning.)
- At the end of the wash. remove your washing. unplug the power plug from the wall outlet and close the water taps. Leave the lid open until the interior has dried.
* Sensor: The machine will automatically choose the appropriate water power and level. and wash. spin and rinse times for the NORMAL and HEAVY DUTY programs. Other parameters can be set individually.
Program selection guide
|
Program
|
Suitable items
|
Max.
Load
(kg)
|
Default settings
|
|
Wash time (minutes)
|
Rinse
(times)
|
Spin time (minutes)
|
Water
Level
|
Temp.
(Wash/Rinse)
|
|
Cotton
|
Normally to heavily soiled robust cottons. This program has a fixed soak, wash, rinse, spin time & water level, with a default warm wash.
|
7
|
Soak: 20 Wash: 15
|
4
|
9
|
8
|
Warm/Cold
|
|
Normal*
|
For normally soiled everyday clothing and other items
|
7
|
Auto
|
2
|
Auto
|
Auto
(1-8)
|
Cold/Cold
|
|
Heavy
Duty
|
Heavily soiled cotton dothing/items
|
7
|
Auto
|
2
|
Auto
|
Auto
(1-8)
|
Cold/Cold
|
|
Blanket
|
Blanket or bulky items
|
7
|
12
|
2
|
8
|
8
(5-8)
|
Cold/Cold
|
|
Delicate
|
Delicate fabrics, lingerie
|
3
|
6
|
2
|
2
|
6
(3-8)
|
Cold/Cold
|
|
Quick
|
Less dirty dothes (daily wash)
|
1.5
|
5
|
1
|
3
|
Auto
(1-8)
|
Cold/Cold
|
* Test wash cycle in compliance with regulation AS/NZS 2040.1 and AS/NZS 2040.2: Normal, Water Level 8, warm Temp.
Detergent and load recommendations
We suggest you use detergent in the amounts recommended below. Too little will give poor washing results, but too much will affect rinse performance and may cause overflow of suds, which could interfere with machine operation.
CAUTION: Do not overfill detergent!
Add detergent into the detergent box or put it directly into the tub.
NOTE: it is recommended that powder detergent should be thoroughly dissolved in a small amount of warm water before adding to the machine.
If you are using liquid detergent or bleach, dilute it appropriately and pour it carefully into the hole on the top plate. Do not pour bleach directly onto the washing load in the tub.
|
Water level indicator
|
1
|
2
|
3
|
4
|
5
|
6
|
7
|
8
|
|
Water volume (approx.)
|
20L
|
25L
|
30 L
|
36 L
|
42 L
|
48L
|
54L
|
60L
|
|
Detergent indicator
|

|

|

|

|
|
Other detergent amount
|
When using a liquid or concentrated detergent, follow the recommendations on the packaging for a top load washing machine.
|
Customising a program
This washing machine is equipped with a fuzzy logic function that will automatically choose the correct water power and level, wash and spin times and rinse type for the NORMAL and HEAVY DUTY programs; you do not have to adjust anything. However, if you want to adjust these values yourself, please proceed as follows:
1. Prepare your washing according to points 1 to 4 on "Normal usage" section.
2. Press the Power On/Off button.
3. Press the Program button to select the washing program appropriate for your washing load.
4. Press the Process button to select the process; the relevant indicator light will start flashing when the option is selected. Then press the Set button and set the option.

5. Press the Water Level button and choose an appropriate water level.
6. Close the lid and press the Start/Pause button for the washing program to start.
7. At the end of the washing program, a buzzer will sound to alert you that the program has finished before the power is shut off automatically.
8. Close the water taps and unplug the power plug from the wall outlet.
NOTE: If you want to change the program or process during operation, switch off the power first, then restart it and choose the program you need.
The blanket program
Use this program for washing blankets or other bulky items. It will automatically select the highest water level (60L), but you can adjust this manually down to 42L according to the size of your bulky item(s).
1. Press the Power On/Off button and open the washer lid.
2. Press the Program button repeatedly until the indicator for the BLANKET program flashes.
3. Dissolve an appropriate amount of washing detergent with a little lukewarm water, then pour the detergent solution directly into the tub of the washing machine.
4. Fold up the blanket and put it into the washing tub, as illustrated below.

5. Close the washer lid.
6. Press the Start/Pause button for the washing program to start.
7. At the end of the washing program, a buzzer will sound to alert you that the program has finished before the power is shut off automatically.
8. Close the water taps and unplug the power plug from the wall outlet.
9. We recommend cleaning the lint filter after washing a blanket.
NOTE: If you notice that the blanket floats up during the wash, press the Start/Pause button, the washer will stop working temporarily. Push the blanket down and then press the Start/Pause button again to continue washing.
Selecting a wash cycle process
On occasion you may want to select a single wash cycle process (or two processes) instead of a complete program. For example, you may want to spin clothes that got wet from rain while hanging on the line, or rinse and spin clothes washed by hand.
- To set a spin cycle only, set the SOAK, WASH and RINSE options to 0 and then select a SPIN time (from 0-9 minutes). Then proceed as described on "Preset timer" section below.
- To set a rinse and spin cycle; set the SOAK and WASH options to 0, then select a RINSE option (from 1 to 4) and a SPIN time (from 0-9 minutes). Then proceed as described on "Preset timer" section below.
Preset timer (delayed washing)
This washing machine has a 0~24 hour preset function, which you can set to determine the time when the washing program will finish. (It is, in effect, similar to a delayed start function, but you set the time period after which you want the wash to finish rather than to start.)
NOTES: This function is not available for the COTTON, DELICATE and QUICK programs. To avoid water leakage when using this function, make sure the water taps are open, the drain hose is properly installed and the washing load and detergent are properly prepared.
- Put your washing in the machine, loading items uniformly in the tub.
- Press the Power On/Off button.
- Select the required program.
- Press the Process button until the PRESET indicator light flashes, then press the Set button to select the desired time period (in hours) for the wash to finish.
- Select the water level, if necessary.
- Add any detergents
- Close the washer lid and press the Start/Pause button.
- 8After setting the preset, the corresponding light will illuminate and al! other lights will be switched off about one minute later. From this time on until the preset time only the Power On/Off and Set buttons will respond when pressed.
- To check the preset program, press the Set button: the program will be indicated for 5 seconds. During these 5 seconds you can press the Water Level button and set the water level.
- To cancel the preset, shut off the power.
- To change the preset time, first cancel the preset, then set it again.
Adding detergent to a preset wash
When using the delayed wash, do not add detergent directly to the wash tub.

- Powder detergent: either put powder detergent into the detergent box or, if you prefer to put it directly into the wash tub, wrap the powder in a small cloth.
- Liquid detergent and bleach: pour liquid detergent or bleach into the hole on the top plate. Do not pour it directly into the tub as it may cause discolouration of your washing.
Adding fabric softener
You can program the machine to stop before the last rinse so that you can add fabric softener.
Press and hold the Water Level button for 3 seconds to set the Add Softener program. Before the final rinse, the machine will stop and SF will show on the display. It will also emit a beep sound to alert you to add fabric softener.
You can add the diluted softener directly to the tub, then close the lid and press the Start/Pause button to continue the program.
NOTE: If you disregard the alarm, the machine will repeat the alarm twice after 5 minutes of inactivity, and then resume the program.
Load sensor (fuzzy control)
For the NORMAL and HEAVY DUTY programs, the machine automatically detects the weight of your wash load and selects the appropriate water level, wash and spin time and rinse type. For the QUICK program, the machine will automatically choose the water level. You do not have to set these values; however, if you want adjust them yourself, see "Customising a program" secction for how to customise processes.
Hot / cold / warm water wash
This top load washing machine must be connected to both a cold and a hot water tap. With both hoses connected to a cold and hot water tap, you can set the washer to use either just cold water for a cold water wash, or just hot water for a hot water wash, or both hot and cold water for a warm water wash.
To select the wash temperature, press the Temperature button.
- Cold wash: the indicator light is off.
- Warm wash: the indicator light is on.
- Hot wash: the indicator light is flashing.
Setting the water level and other processes
You can set the water level for wash and rinse processes. For example, if you are sensitive to detergent residues in your washing, you may want to select a higher water level for rinsing.
To set different water levels:
Press the Process button until the WASH light flashes; press the Water Level button to choose the appropriate water level (it will be shown on the display screen); press the Set button to set the wash time.
Then press the Process button until the RINSE light flashes; press the Water Level button to choose the appropriate water level; press the Set button to set the number of rinses.
To set other processes:
Then press the Process button until the SPIN light flashes; press the Set button to set the SPIN time.
Finally press the Start/Pause button: the washer will start operating according to the set values for wash and rinse water levels, number of rinses and spin time.
Other functions
Water power
The water power affects the pause time of the pulsator and hence the intensity of the wash. It is automatically selected for the wash and rinse process, however, you can also adjust it yourself (except for the COTTON, DELICATE and BLANKET programs). To adjust the water power level:
- Press the Set button after pressing the Start/Pause button.
- Press the Set button again for standard water power: the display will show HO. Press the Set button again, repeatedly, to increase the water power level from H1, H2, H3 to the strongest: H4,
- Press the Set button again, repeatedly, to decrease the water power level from L1, L2, L3 to the weakest: L4.
Memory function
When you run the NORMAL, COTTON or HEAVY DUTY program, the machine memorises your choice of program for the next time you switch on the machine. NOTE: This function is not available for the DELICATE, BLANKET and QUICK programs.
Child lock
With the child lock activated, the machine will stop working automatically and sound an alarm if the washer lid is opened for 5 seconds. To set the child lock:
Press the Power On/Off button to switch on the power, then press and hold the Program button for 4 seconds until a buzzer sounds. The child lock will be activated when the Start/Pause button is pressed.
To cancel the child lock, repeat the above steps.
Start of washing
The machine will start washing when the water Inside the tub has reached two levels below the set level while the water will continue to flow in. This early start of washing will increase the wash time and allow the detergent to dissolve fully before the start of the set wash time.
This function will be ineffective:
- When the first two water levels (20L or 25L) are selected.
- When the DELICATE or BLANKET program is selected.
- When SOAK is selected, after the soaking process.
NOTE: This is a default function and cannot be set.
FAQs and Troubleshooting
Not all unusual incidents you may encounter with your washing machine are faults, or cause for concern. Check in the list below what issues may arise and why. Also check in the table on the following page for solutions to other common problems.
The washer does not work at all. What could I have done wrong?
Check and ensure that the washer is connected properly to the power supply and power is switched on at the outlet. If both are OK, first press the Power On/ Off button, then press the Start/Pause button. If the machine still does not start the set program, check elsewhere in your home whether there has been a power failure, or whether the fuse or circuit breaker has been activated.
The drain hose is leaking water during the first use. Does this indicate there is a problem?
No, this is normal; it is residual water from the performance test in the factory and no cause for concern.
Why is there still some water intake during the wash or rinse cycle?
When the water level is low, the washing machine will automatically refill during the washing or rinsing process. This is no cause for concern.
At the beginning of the spin cycle, why is the tub turning first and then stopping?
This is intermittent spinning and it results in better spinning performance.
During the spin cycle, why is the machine spinning and then stopping suddenly and taking in water again?
If the washing is piled up at one side of the tub during the spin cycle, the washing machine automatically takes in more water to redistribute the load. Once the load is balanced again, the spin cycle will continue.
Why is there a sound like water flowing after spinning?
This is the sound of the balancing liquid in the balance ring. This helps reduce vibration during spinning.
Why is the control panel still warm after the power is switched off?
This is caused by the memory circuitry still working.
If none of the solutions offered above and on the following page help you solve the problem, contact our after sales support line for advice.
Error messages
When the following problems occur, the microcomputer inside the washer will detect the abnormal condition. An electronic buzzer will sound for approximately 10 seconds, an error message will flash as shown below and the washer will stop operating.
|
Type of problem
|
Error message
|
Where to check
|
|
Water does not flow into the wash/spin tub.
|
E1
|
Turn on the water supply tap.
Check whether the water supply has been cut off.
Check whether the metal filter of the water inlet is clogged.
Make sure your water pressure is appropriate and no water has frozen in the hoses.
|
|
Water does not drain out.
|
E2
|
Check and ensure the drain hose is properly connected and installed at a 1m maximum height.
Check the drain hose for kinks or obstructions.
Check whether the drain hose is clogged. Check and ensure that the filter (at the drain pump) is clean and nothing is obstructing the flow of water.
|
|
The washer does not spin.
|
E3
|
Check whether your washing is piled at one side of the tub. If so, redistribute the load evenly inside the tub.
Check and make sure the washer is installed on an even, level surface.
|
|
E4
|
Close the washer lid.
|
|
The washer does not wash.
|
E5
|
Check whether the child lock is set. Close the washer lid.
|
|
Other problems.
|
ER
|
Press the Power On/Off button to turn off the power, then contact our after sales support centre to arrange a service.
|
|
EC
|
NOTE: Press the Start/Pause button once to release the emergency stop and cancel the error message; press it again to restart the operation.
Service
Before calling for Assistance:
- Check whether you can solve the problem alone (see "FAQs and Troubleshooting").
- Restart the programme to check whether the problem has been solved.
- If this is not the case, contact an authorised Technical Assistance Centre using the telephone number provided on the warranty card.
! Always request the assistance of authorised technicians.
Have the following information to hand:
- the type of problem;
- the appliance model (Mod.);
- the serial number (S/N).
This information can be found on the data plate applied to the rear of the washing machine
Care and Maintenance
Cleaning and care
To prolong the service life of the washing machine, keep it in good condition and perform regular maintenance. For any type of cleaning and maintenance, make sure the washing machine is disconnected from the mains power supply.
Cleaning the washing machine (when required)
Use a soft cloth to wipe any water or dirt off the washer lid and housing. If using a damp cloth, squeeze it almost dry to avoid leaving water residues.
The detergent box may be pulled out for cleaning, if required. Other inside parts should be wiped with a damp cloth, if necessary.
Do not use any chemical, alkaline or abrasive cleaning agents to avoid damaging the surface. Do not spray water directly onto the washer housing.
IMPORTANT!
If you frequently use a COLD wash cycle, you will need to clean the inside of your washing machine regularly (every three months), especially if you use a fabric softener. Liquid detergents can cause detergent scum to build up around the outside of the inner tub, which cold water will not remove and which can cause bacteria, unpleasant odours, and eventually soiling of your wash load.
To remove scum build-up from the inside of a washing machine, run a cleaning cycle without clothes using the COTTON program and HOT water.
As a cleaning agent, use a commercially available washing machine cleaning product (such as Trimat Washing Machine Cleaner) according to the instructions on the product), or use a mix of bicarbonate of soda (Vz cup) and white household vinegar (2 cups).
Cleaning the lint filter (suggested interval: every week)
Take out the lint filter as illustrated below. Open the filter and rinse it clean under running water, taking care not to damage any parts. Reinstall the filter, making sure it fits securely behind the cover clasp and latches and locks securely into place.

Cleaning the water inlet valve (suggested interval: every 6 months)
To avoid blockage of the mesh filter at the water inlet after long time use, detach the water inlet hose, making sure you have turned off the water supply at the taps beforehand. Take the mesh filter out of the water inlet valve and clean the filter with a soft brush. Then assemble the mesh filter back into the valve and reconnect the water inlet hose.

Cleaning the hose filter (suggested interval: every 6 months)
To avoid blockage of the hose filter after long time use, detach the water inlet hose making sure you have turned off the water supply at the taps beforehand. Turn the nut anticlockwise to take off the hose, clean the filter under running water or with a soft brush, then reconnect the hose.

Drain pump maintenance
We recommend that you clean the drain pump filter regularly (at least once a month} to avoid blockages created by bobby pins, coins and excess lint.
Proceed as follows:
1. Disconnect the washer from the power source.
2. If necessary, wait until the water has cooled down.
3. Place a container underneath the pump opening to collect any spillage (see below, left).
4. Turn the filter cap anticlockwise to take it out gently (see below, right). Always keep a rag nearby to dry up water spillage when removing the pump filter.

5. To remove any objects from the filter, wash it thoroughly in a basin or under running water (see below, left).
6. Put the cap back and place the filter back in its seat (see below, right).