Loading ...
Loading ...
Loading ...
SECTION3: TRACTORSET-UP
AttachingtheBatteryCables
NOTE: The positive battery terminal is marked Pos.
(+). The negative battery terminal is marked Neg. (-).
• The positive cable (heavy red wire) is secured to
the positive battery terminal (+) with a hex bolt and
hex nut at the factory. Make certain that the rubber
boot covers the terminal to help protect itfrom
corrosion.
• Remove the hex bolt and wing nut from the
negative cable.
• Remove the black plastic cover, if present, from the
negative battery terminal and attach the negative
cable (heavy black wire) to the negative battery
terminal (-) with the bolt and wing nut.
• Make certain the hold-down strap is in position over
the battery, securing it in place. See Figure 1.
,bberL _ _ IL /
",,oot 2
Figure I
NOTE: If the battery is put into service after the date
shown on top of battery, charge the battery as
instructed on page 22 of this manual prior to operating
the tractor.
AttachingTheSteeringWheel
• If the steering wheel for your tractor did not come
attached, the hardware for attaching it has been
packed within the steering wheel, beneath the
steering wheel cap. Carefully pry off the steering
wheel cap and remove the hardware.
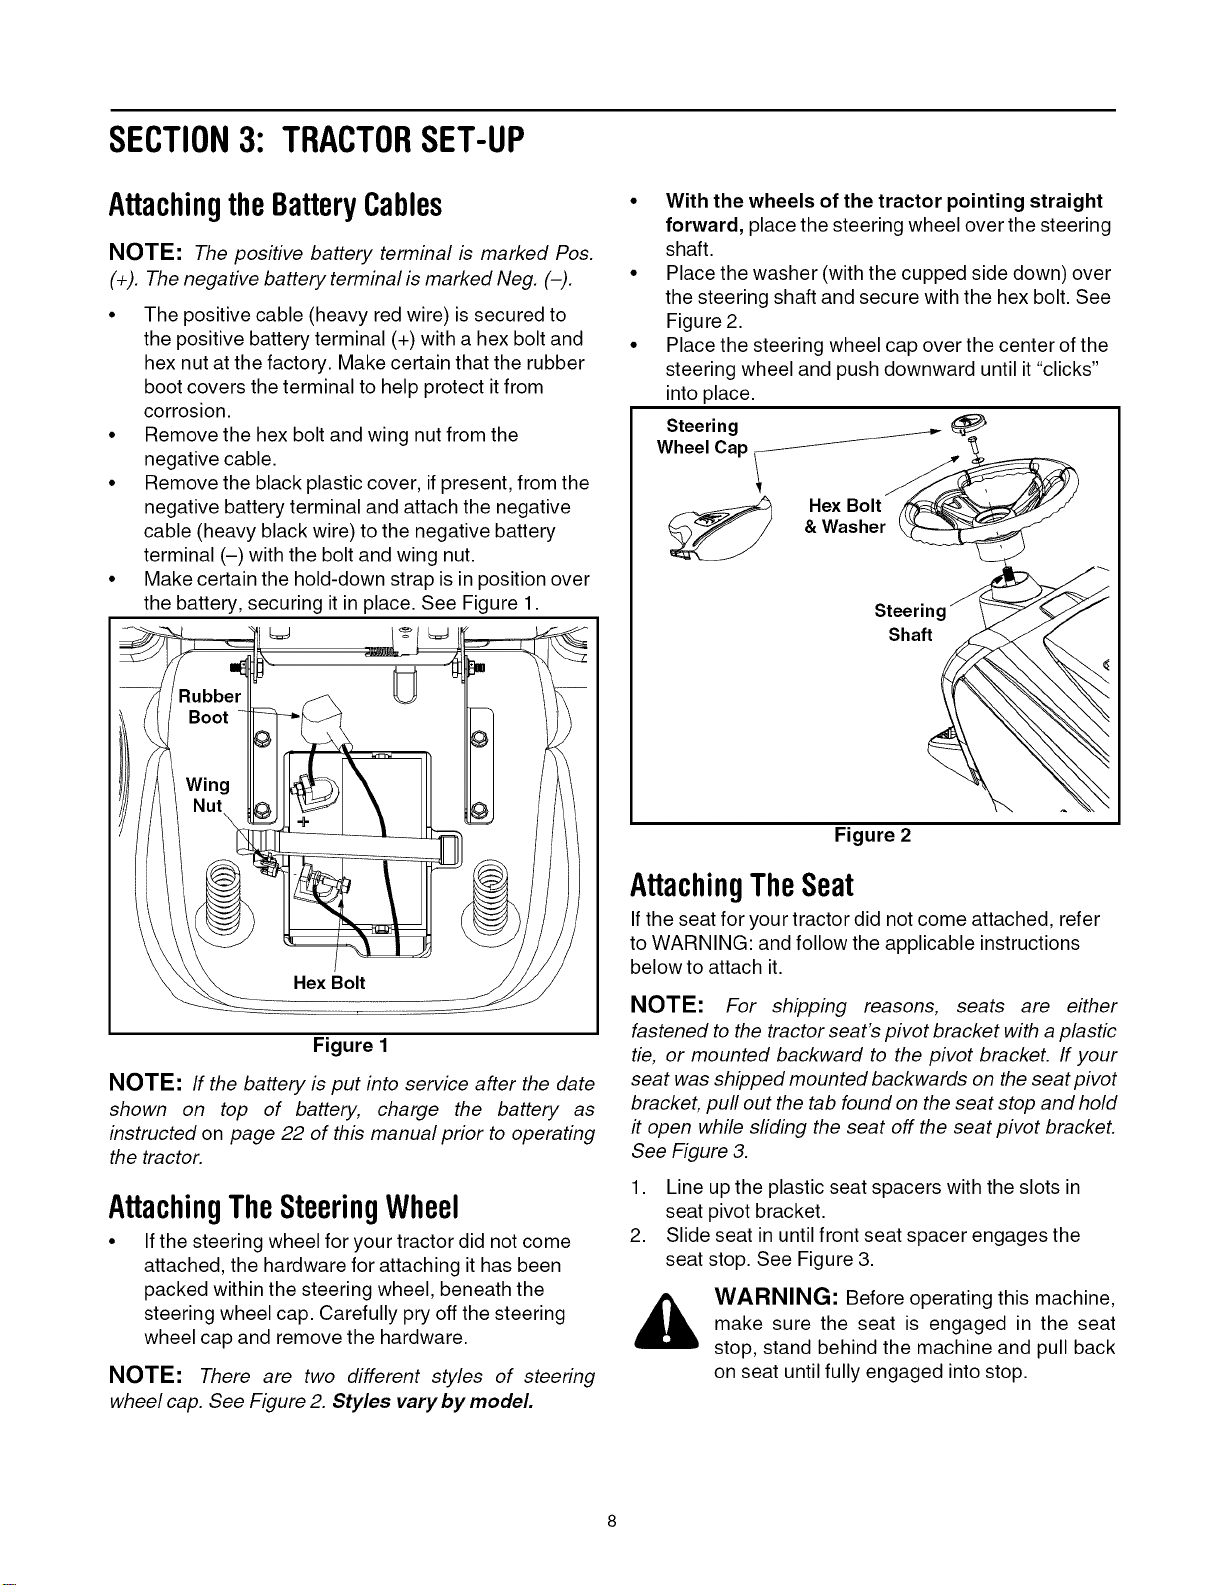
NOTE: There are two different styles of steering
wheel cap. See Figure 2. Styles vary by model
• With the wheels of the tractor pointing straight
forward, place the steering wheel over the steering
shaft.
• Place the washer (with the cupped side down) over
the steering shaft and secure with the hex bolt. See
Figure 2.
• Place the steering wheel cap over the center of the
steering wheel and push downward until it "clicks"
into place.
Steering
Wheel Cap
Hex Bolt
&Washer
Steering
Shaft
Figure 2
AttachingTheSeat
If the seat for your tractor did not come attached, refer
to WARNING: and follow the applicable instructions
below to attach it.
NOTE: For shipping reasons, seats are either
fastened to the tractor seat's pivot bracket with a plastic
tie, or mounted backward to the pivot bracket. If your
seat was shipped mounted backwards on the seat pivot
bracket, pull out the tab found on the seat stop and hold
it open while sliding the seat off the seat pivot bracket.
See Figure 3.
1. Line up the plastic seat spacers with the slots in
seat pivot bracket.
2. Slide seat in until front seat spacer engages the
seat stop. See Figure 3.
WARNING: Before operating this machine,
make sure the seat is engaged in the seat
stop, stand behind the machine and pull back
on seat until fully engaged into stop.
Loading ...
Loading ...
Loading ...