Loading ...
Loading ...
Loading ...
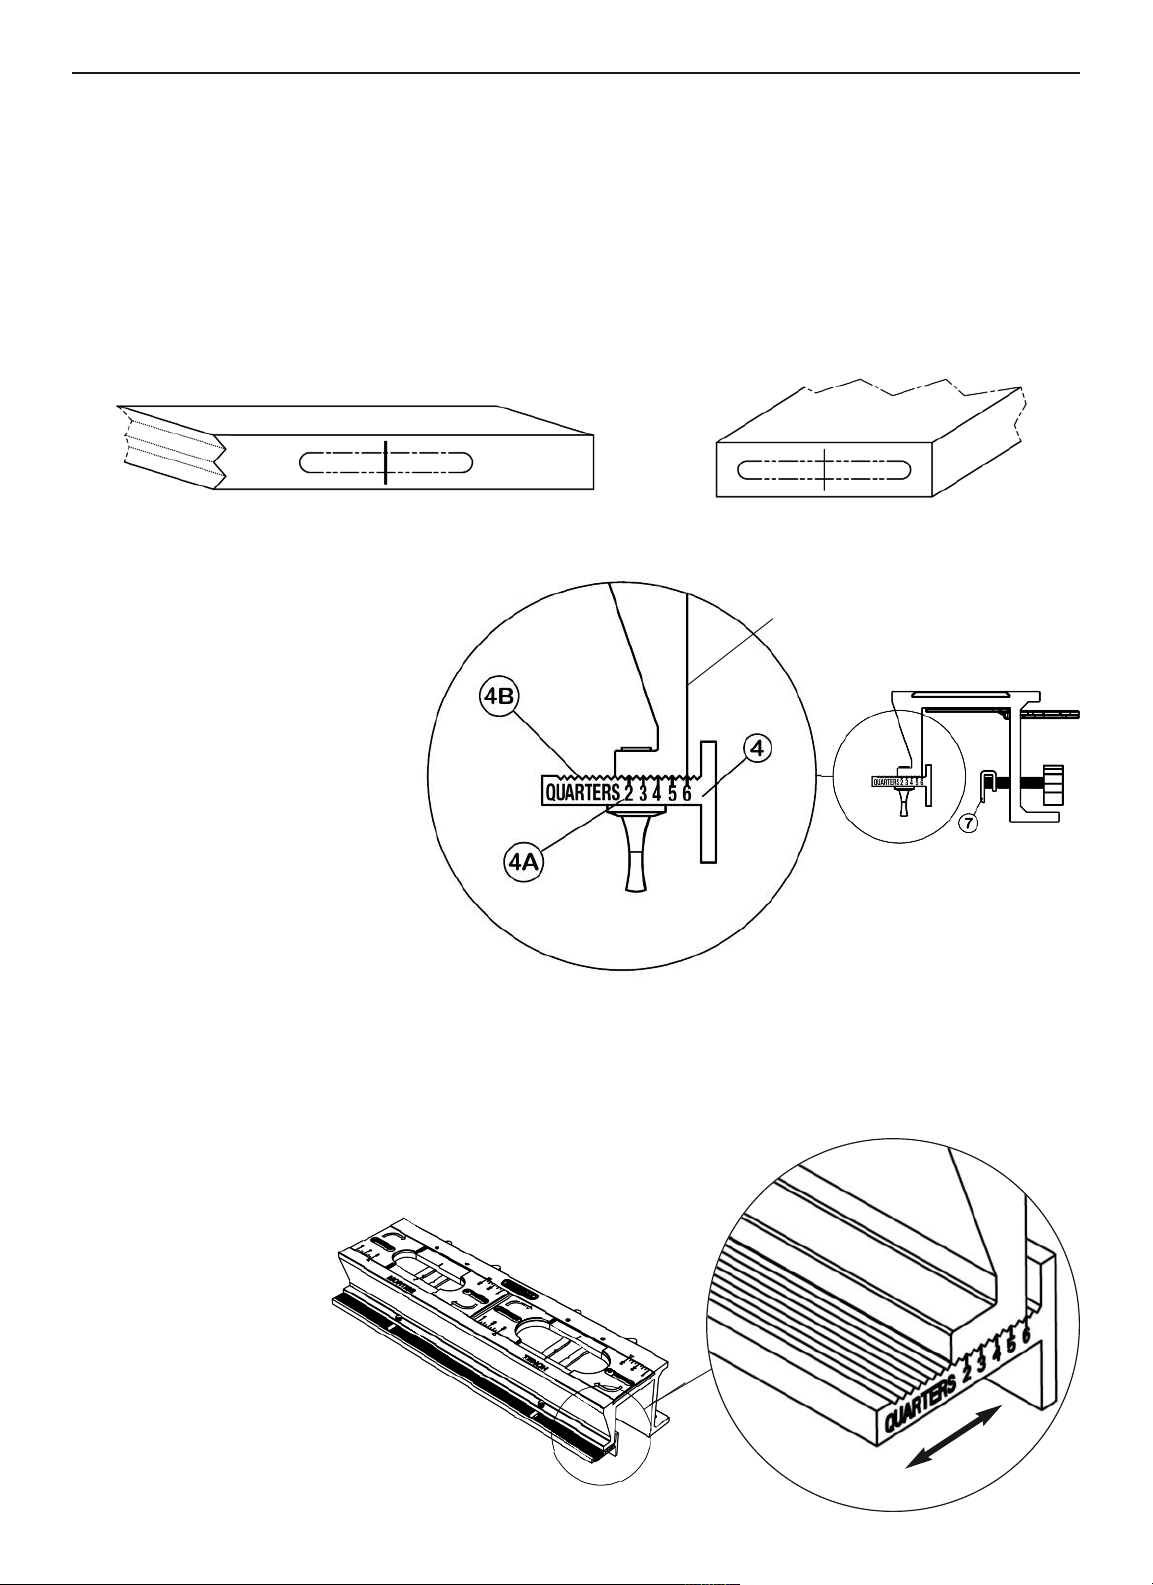
Fig. 11
OPERATING INSTRUCTIONS:
1. Marking Joint Centers and Location
Mark the stock with center marks at the positions for the length of the tenon and the mortise.
These marks will be needed to center the tenon and the longitudinal position of the mortise on the
stock. If you have correctly set the Centering Wall for the thickness of the stock, the stock will
automatically be centered** for stock thickness when clamped in the jig.
**Tip: if there is a variation in the thickness of the stock used, you may adjust for this by use of
appropriate shims or by readjusting the Centering Bar.
2. Centering the Stock
• Centering the stock in the jig is
accomplished by adjusting the
Centering Wall [4] (Fig.10) for
the thickness of the stock.
• The jig will handle stock with
a thickness between 1/2" and
1-1/2".
• Using the lumber industry’s
nomenclature, these two
thicknesses, designated as,
“2 quarter” (1/2") and
“6 quarter” (1-1/2"), indicating
the number of 1/4" increments of thickness.
• The markings are on the tenon end of the Centering Wall [4A]. Use these “quarter” units to adjust
for the thickness of your stock in “quarters”. For example: if you are using 3/4" (three quarter)
stock, align the number “3” with the inner wall of the jig (Fig. 11), and the stock will be at its
nominal center in the templates.
• When adjusting the Centering Wall, and to maintain parallel
alignment, always make sure the bar is correctly seated
on the jig body with its serrated matching surface
[4B] (Fig.11) in the jig.
Tips: to assure an accurate joint
alignment, particularly if you are making
a Face Frame or similar matching
surface type joint, always keep the
matching faces to the same side of the jig.
7
CENTER POSITION OF THE MORTISE
MORTISE SECTION
TENON SECTION
CENTER POSITION OF THE TENON
Fig. 9
Fig. 10
INNER WALL
Loading ...
Loading ...
Loading ...