Loading ...
Loading ...
Loading ...
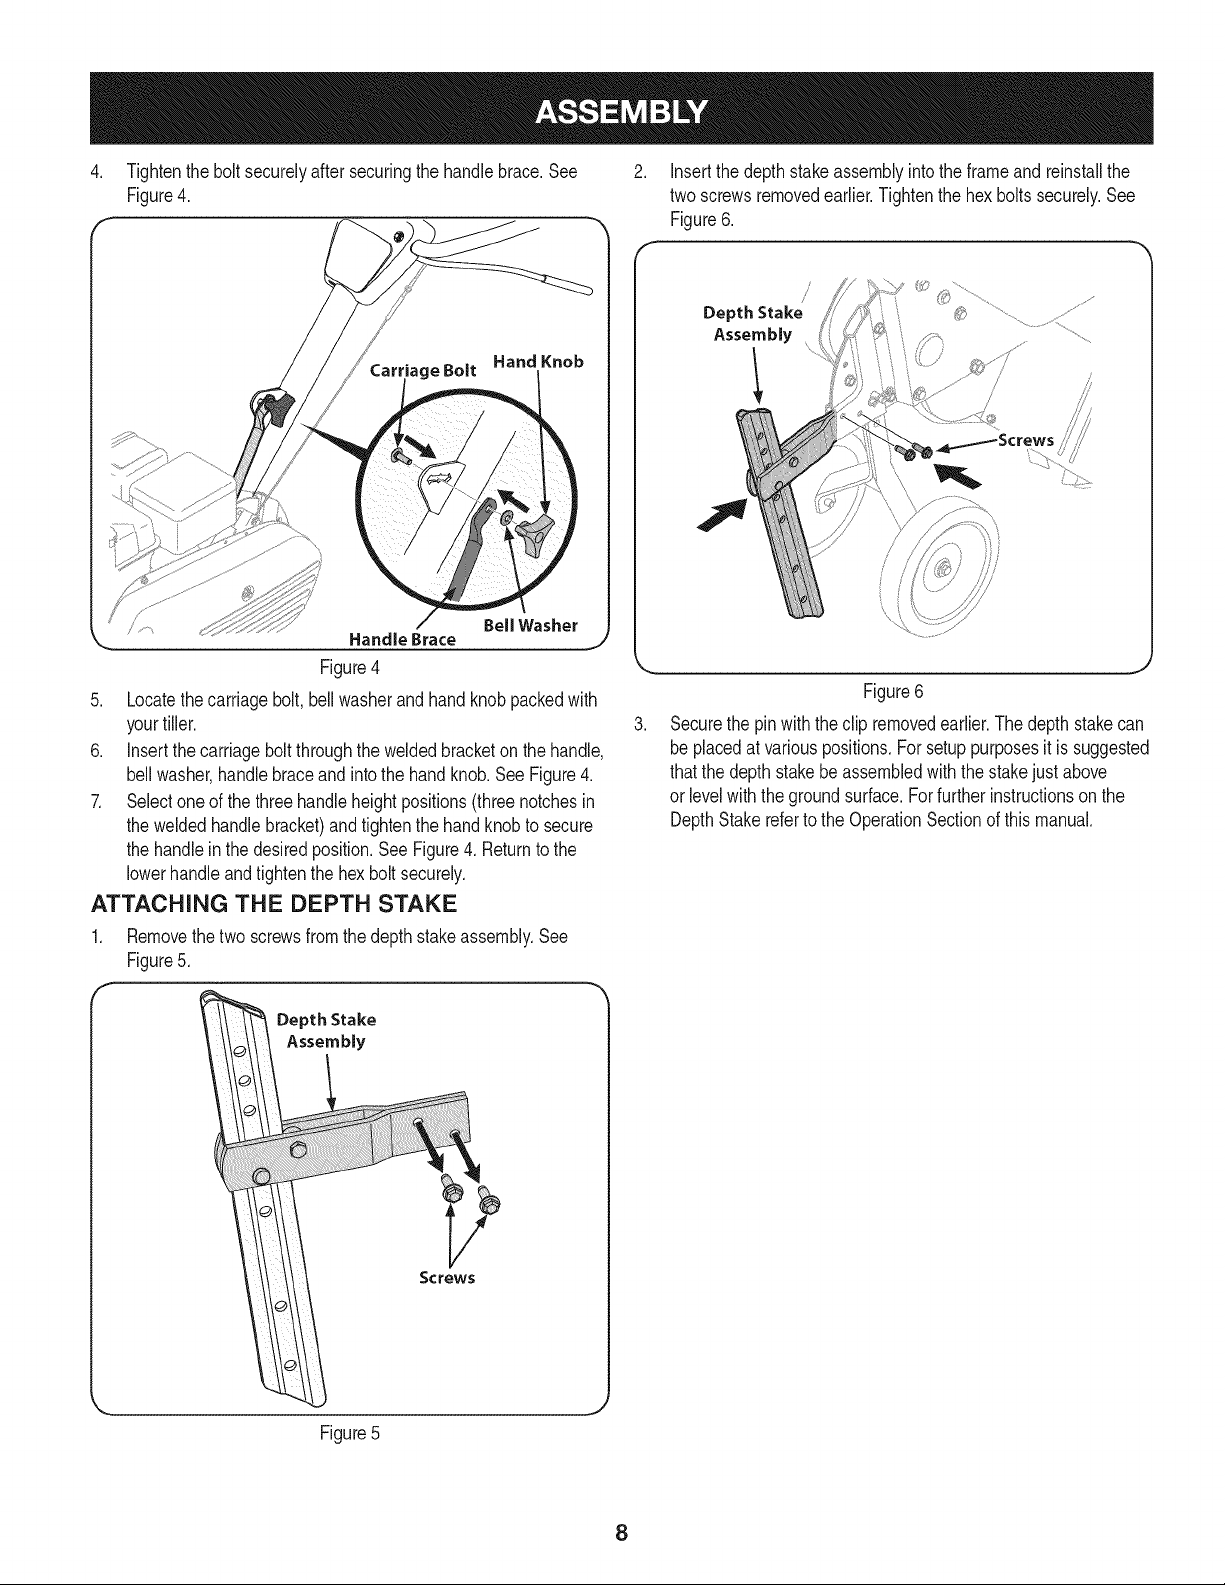
4. Tightenthe boltsecurelyafter securingthe handlebrace.See
Figure4.
Bell Washer
Handle Brace
Figure4
5. Locatethecarriagebolt, bellwasherandhand knobpackedwith
yourtiller.
6. Insertthe carriagebolt throughthe weldedbracketon the handle,
bellwasher,handlebraceand intothe handknob.SeeFigure4.
7. Selectone of the threehandleheightpositions(threenotchesin
the weldedhandlebracket)andtightenthe handknobto secure
the handleinthe desiredposition.See Figure4. Returnto the
lowerhandleand tightenthe hexbolt securely.
ATTACHING THE DEPTH STAKE
1. Removethetwo screwsfrom the depthstakeassembly.See
Figure5.
Insertthe depthstakeassemblyintothe frameandreinstallthe
two screwsremovedearlier.Tightenthe hex boltssecurely.See
Figure6.
Depth Stake
Assembly
/ /
Figure6
Securethe pin withtheclip removedearlier.Thedepthstakecan
beplacedat variouspositions.Forsetup purposesit is suggested
thatthe depthstakebe assembledwith the stakejust above
or levelwiththe groundsurface.Forfurtherinstructionson the
DepthStakereferto the OperationSectionof thismanual.
Depth Stake
Assembly
Screws
Figure5
8
Loading ...
Loading ...
Loading ...