Loading ...
Loading ...
Loading ...
11
FINAL INSTALLATION
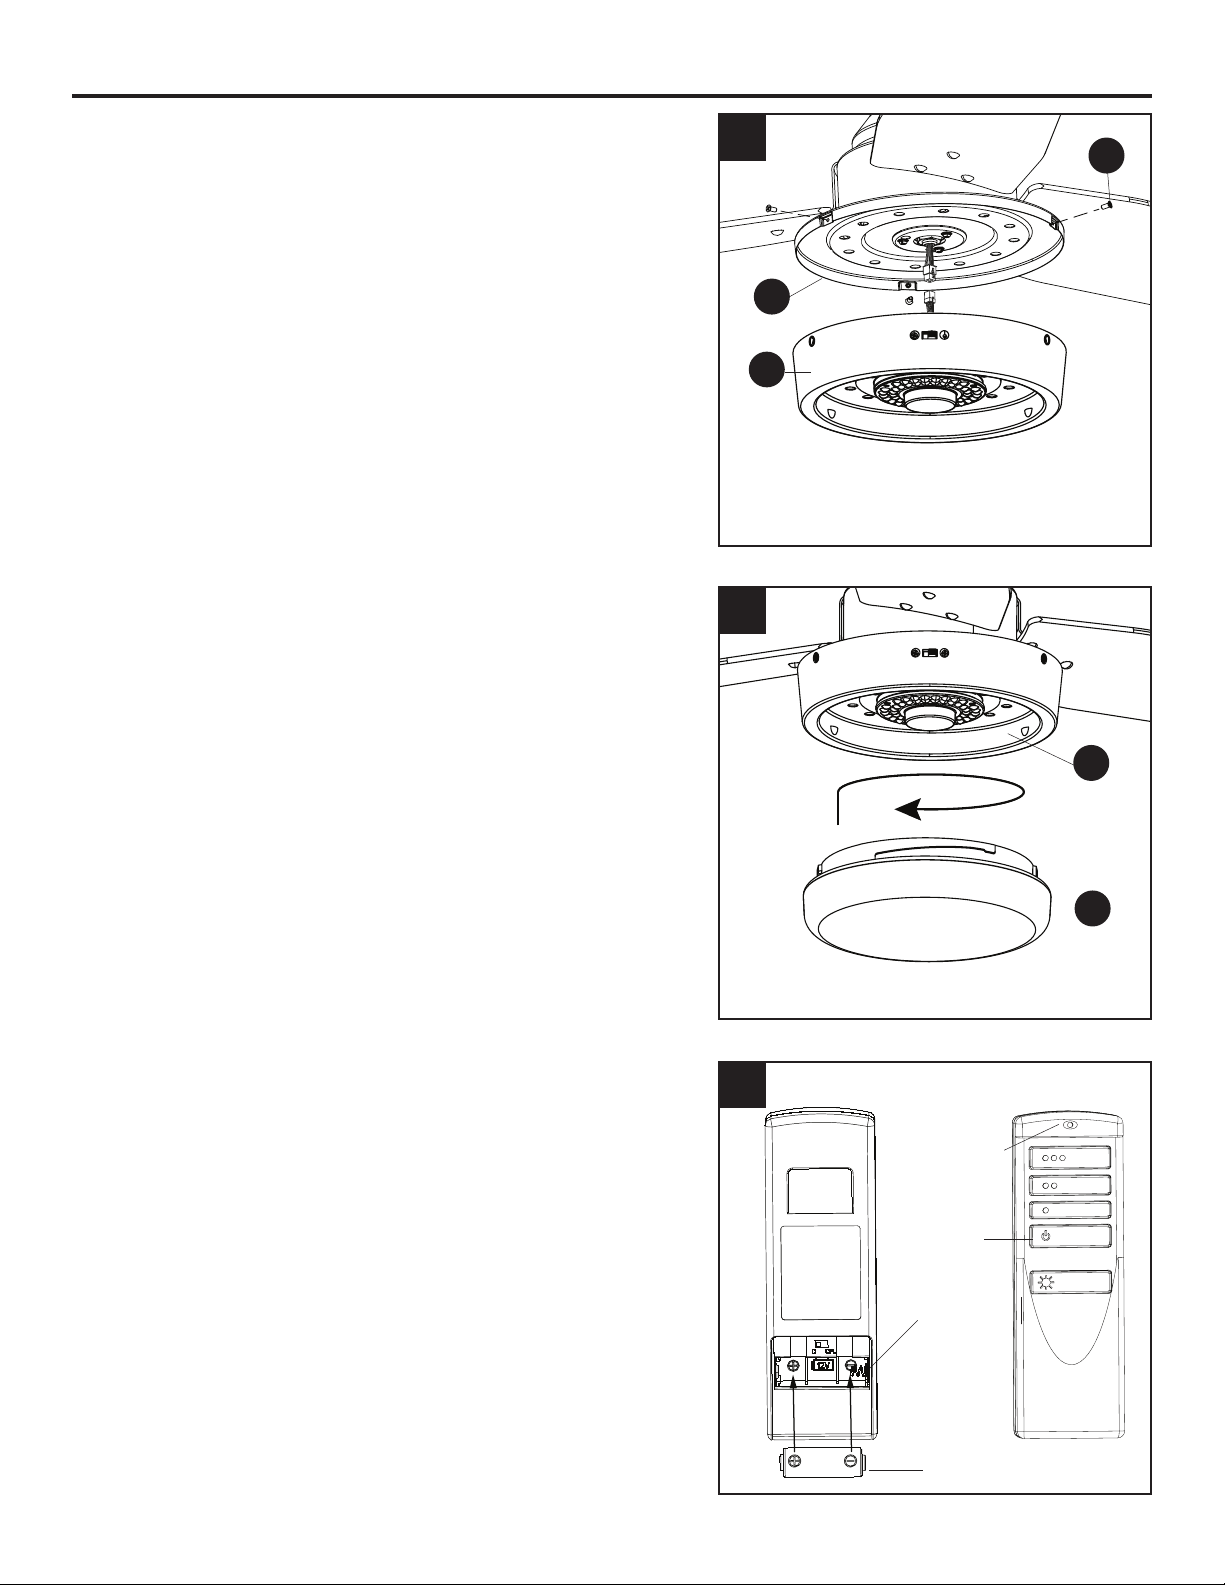
4. Remove the three light pan screws (G) preassembled
to the side of the light pan (F).Connect the 9-pin
connector from the fan to the 9-pin connector from the
light kit (H). Secure the light kit (H) with the previously
removed light pan screws (G). Tighten all three screws.
5. Lift the glass bowl (I) into the light kit (H) and turn in a
clockwise direction until it is secure. CAUTION: Avoid
cross-threading the glass during installation. Improper
installation could cause the glass bowl (I) to be dicult
to remove or fall, which could cause serious injury.
6. Remove the battery cover from the back of the remote
found in remote pack (L). Insert the battery from
remote pack (L) into the remote; ensure polarity of
battery matches the polarity indicated in the battery
compartment -- positive (+) to positive (+) and negative
(-) to negative (-). Replace the battery cover and press
the high fan speed button on the remote to ensure the
remote turns on the fan.
Note: If remote does not turn on fan, see
TROUBLESHOOTING (page 15).
5
6
4
H
I
F
G
H
Battery
Battery
Compartment
LED Indicator
Fan Power
Loading ...
Loading ...
Loading ...