Loading ...
Loading ...
Loading ...
10
BB
CC
LL
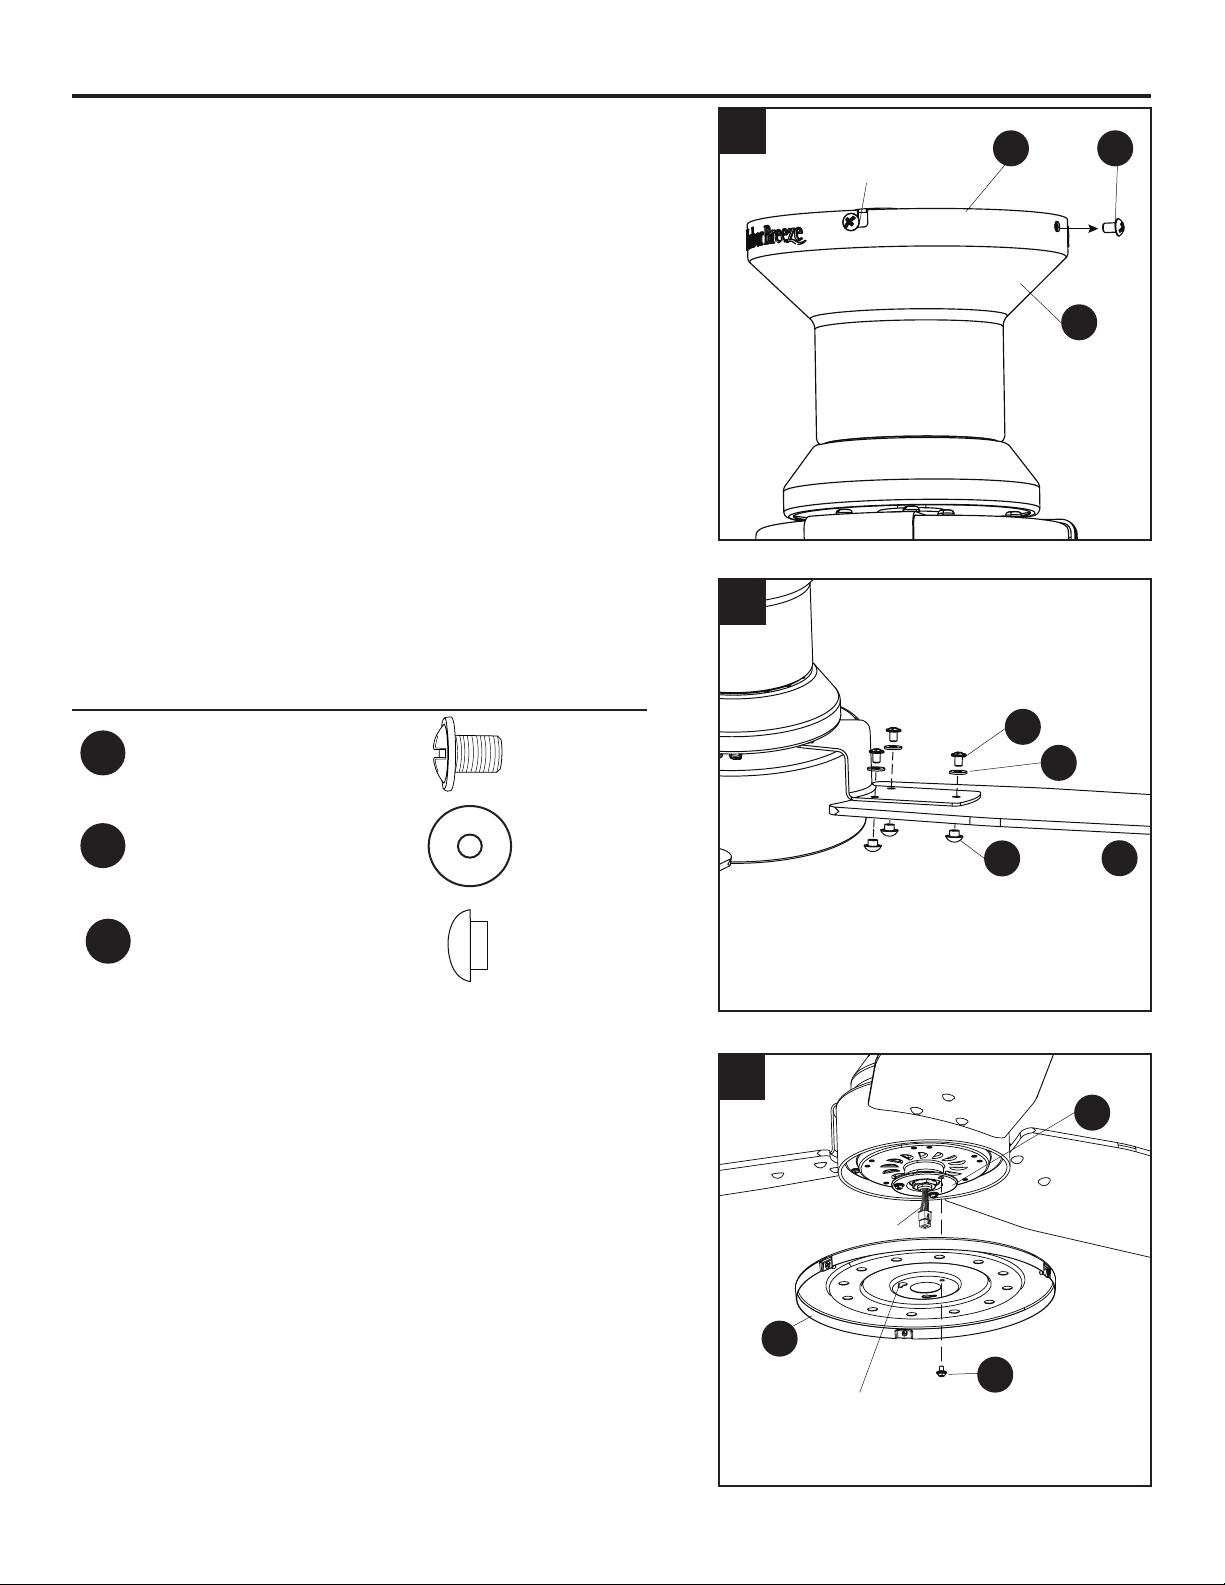
FINAL INSTALLATION
1. Slide the canopy (B) over the mounting bracket (A),
aligning the slotted holes in the canopy (B) with the
previously loosened mounting bracket screws (M) in the
mounting bracket (A). Twist the canopy (B) clockwise
to lock. Then re-insert the mounting bracket screws (M)
(Step 4, page 8) and securely tighten all screws.
2. Attach the blades (J) to the blade arms (K) using the
blade screws (BB), blade washers (CC) and screw caps
(LL).
Hardware Used
BB
Blade Screw x 9
CC
Blade Washer x 9
Screw Cap x 9
3. Remove one and loosen the other two tter plate
screws (E) but do not remove from tter plate (D).
Feed the 9-pin connector through center hole in light
pan (F). Align the two key slots in the light pan (F) with
the loosened tter plate screws (E). Place the light
pan (F) over the two screws and turn the light pan (F)
clockwise. Then tighten the two tter plate screws (E).
Re-install the previously removed tter plate screw (E)
and tighten rmly.
2
3
D
LL
1
F
E
9-pin connector
Key Slot
Slotted Hole
J
A
B
M
Loading ...
Loading ...
Loading ...